January 2010 Archives

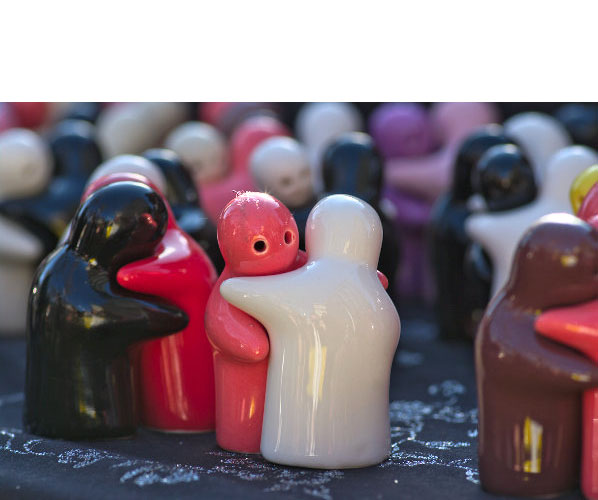
"Embrace" can be an expression of affection, or as you'll see in this excellent gallery, a number of other things too. Check out the Dec. 09 Photo Assignment and see just how creative embracing can be.
The Feb. 2010 assignment is "Red." Start working on your contribution now. Details can be found on the Member Participation page. You can submit photo assignment pictures up to 600 pixels in the widest direction.

Please follow the instructions carefully for labeling the subject line of the email for your submission. It's easy to lose these in the pile of mail if not labeled correctly. For example, the subject line for next month's assignment should be: "Photo Assignment: February 2010." Also, if you can, please don't strip out the metadata. And feel free to add any IPTC data you wish (These fields in particular: Caption, Credit, Copyright, Byline), I use that for the caption info.


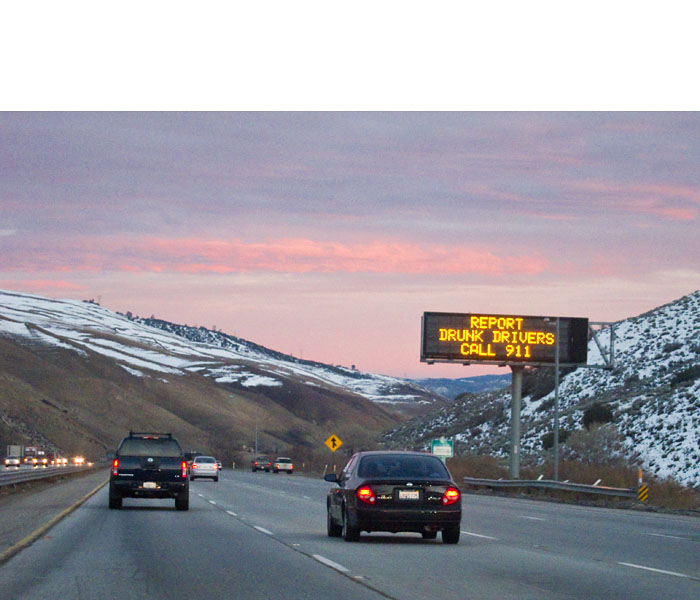
Photo by Brian Reynolds. You can read more about how Brian captured this shot, plus see all of the other great images on the Dec. 09 Gallery page.


Good luck with your February assignment, and congratulations to all of the fine contributors for December. It's a great collection of images.


twitter.jpg Follow me on Twitter

-


Now Available! The Digital Photography Companion. The official guide for The Digital Story Virtual Camera Club.

  • 25 handy and informative tables for quick reference.
  • Metadata listings for every photo in the book
  • Dedicated chapter on making printing easy.
  • Photo management software guide.
  • Many, many inside tips gleaned from years of experience.
  • Comprehensive (214 pages), yet fits easily in camera bag.

Technorati Tags: , ,

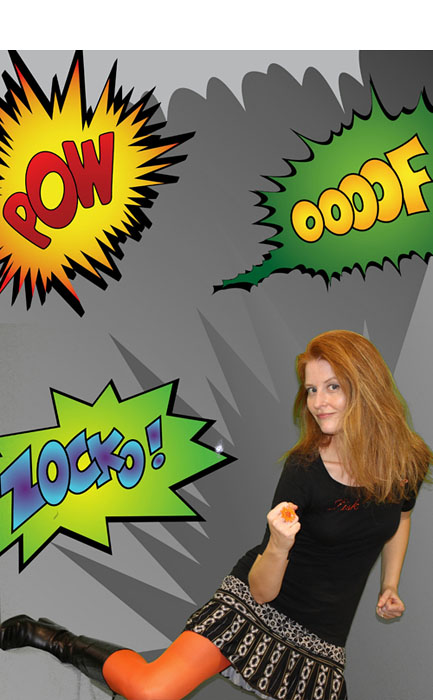
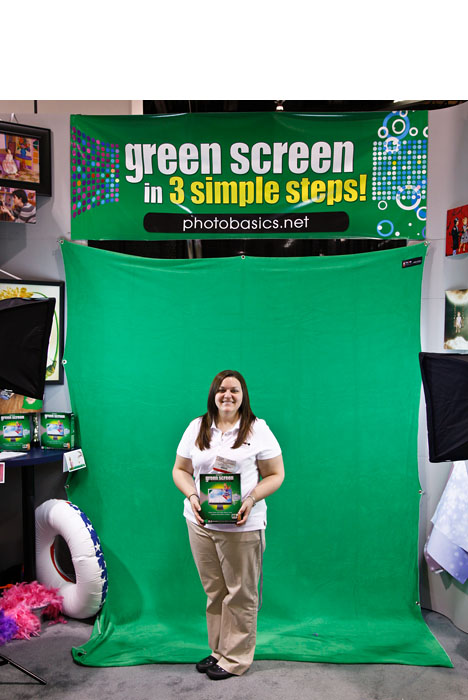
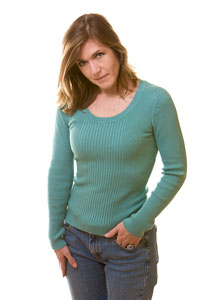
The folks over at PhotoBasics.net have created a green screen kit for only $69.50 US that simplifies the process to three steps: shoot, upload, and create. With any digital camera, you shoot a subject against the included 5'x7' green screen background, then upload the image to your Mac or Windows computer, and finally, apply any of the 100 included digital backgrounds (such as the one shown here), or one of your own. The software takes over from there, merging your subject and background.

I discovered PhotoBasics.net while exploring the exhibit hall at the CHA Show in Anaheim, CA. They had a sample green screen set up, as shown here, with a variety of props. You could have your picture taken, choose the backdrop, and they would show you how the process worked. Here you can see Marketing Specialist Amber McCoy holding the green screen kit in front of the backdrop (click image to enlarge). She used a MacPro to meld the images, and it literally only took seconds.

The $69.50 kit includes the 5'x7' green background, 2 background hooks, PhotoKey 2 Lite Software (Mac or Windows), and 100 digital backgrounds. But the real power is that it lets you use your images for backgrounds too.

The Mac version requires Mac OS X 10.4 or later, but works on Intel or PowerPC computers. The PC version only requires Windows XP with Service Pack 2 (or later). The software supports JPG, PNG and TIF file formats for importing and saving. You do have some adjustments to fine tune the image, and you can output to digital or print.

I chose this image of the woman with red hair to illustrate how well the software works without any additional touch up. I see just a little green peeking through around the hair, which I could fix in about 2 minutes. Most shots that I looked at required no touch up at all.

If you want to dig into the details, you can download an instructional PDF. If you're ready to buy, just hop over to B&H Photo where it's available for $69.50.


twitter.jpg Follow me on Twitter

-


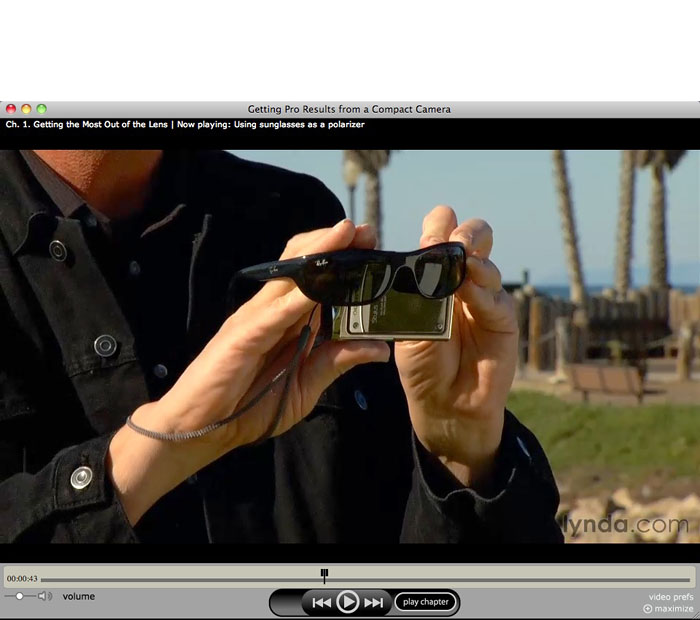
Have you ever used your sunglasses as a polarizer for a compact camera? This is just one of the many photography techniques that I cover in my new Lynda.com title, Getting Pro Results from a Compact Camera. I mention the sunglasses technique here because it's a free video that you can watch right now.

But there's plenty more. For example, I explain how to:

  • Shoot amazing close-up shots easily
  • Create super-wide-angle panoramas by stitching images together
  • Understand ISO, exposure, exposure compensation, and all that stuff
  • Master the flash in a variety of lighting conditions
  • Get the most out of scene modes
    • Not only do you join me in the field for the actual shooting techniques, we then go to the computer and review how those very shots turned out. And the best part is, you can absorb all of these great techniques in only an hour, then revisit them as often as you want. I hope you give Getting Pro Results from a Compact Camera a look, and share it with your friends.


      twitter.jpg Follow me on Twitter

      -


Adobe Photoshop: The First 10 Years

photoshop_toolbar_v1.png

As we near the 20 year anniversary of Photoshop on Feb. 18, 2010, I have a special treat to add to the festivities. Ten years ago, with the help of Erin McCabe and Glenn Knoll, I published an article titled, From Darkroom to Desktop -- How Photoshop Came to Light.

To celebrate two decades of greatness, you can download the PDF of that original article that includes some terrific old Photoshop toolbars, application icons, history of Photoshop timeline, and photos of the Knoll brothers shot by Jeff Schewe.

One of my favorite passages in the article tells how the foundation was poured for what would become photography's killer application:

The story of one of the original "killer apps" begins in Ann Arbor, Michigan with a college professor named Glenn Knoll. Glenn was a photo enthusiast who maintained a darkroom in the family basement. He was also a technology aficionado intrigued by the emergence of the personal computer. His two sons, Thomas and John, inherited their father's inquisitive nature. And the vision for future greatness began with their exposure to Glenn's basement darkroom and with the Apple II Plus that he brought home for research projects.

The rest, as they say, is history.

The journey is as important as the destination. Are you missing opportunities for good photographs during your travels? Do you have a camera with you when riding in a cab? Have you ever been in a glass elevator? And please tell me you've taken cloud shots through an airplane window!

This week we're talking about taking photographs through car windows and other crazy places that normally we don't think to pull out the camera. Once you get in this frame of mind, you'd be surprised at how many good images you get.

Listen to the Podcast

You can also download the podcast here (20 minutes). Or better yet, subscribe to the podcast in iTunes.

Monthly Photo Assignment
Slippery is the Jan. 2010 Photo Assignment. You can read more about how to submit on our Member Participation page. Deadline for entry is Jan. 31, 2010.

TDS Workshops Update

The TDS Hot Air Balloon Photography Workshop in June 2010 is sold out. If you'd like to get on the waiting list for upcoming workshops, please send me email with the subject line: "TDS Workshops." Those virtual camera club members who are on the waiting list get first opportunity to register for newly announced workshops. Attendance is limited to 6 for each TDS Workshop to ensure a personalized experience.

More Ways to Participate

Want to share photos and talk with other members in our virtual camera club? Check out our Flickr Public Group. It's a blast!


twitter.jpg Follow me on Twitter

-


Podcast Sponsors

SiteGrinder lets you take ownership of your websites. Effortlessly output pages right from Photoshop.

Red River Paper -- Try the $7.99 Sample Kit.

Add Magic to Your Slideshows -- FotoMagico presentations are so amazing that your audience will be asking how you did it.


Technorati Tags: , , , , ,

kodak_camera.gif

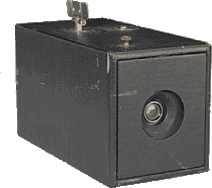
I just read a good, short piece on George Eastman and the first Kodak camera. It's a slice of history that has an impact for all of today's photographers. The article, Eastman, Kodak, and Roll Film: A history of revolution and evolution in photography is also a good reminder of how good we have it today as shooters.


twitter.jpg Follow me on Twitter

-


photo_box_tricks.png

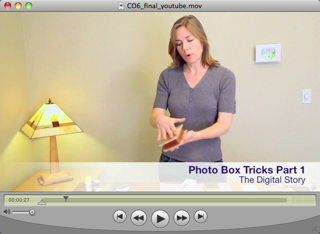
Dig around in your dresser drawer, and chances are that you'll find old gift boxes that are too nice to throw away, but you're not exactly sure what to do with them either. Well, Stephanie can help. In her latest Creative Output video tutorial, she shows you, step by step, how to use your photographs to transform old gift boxes into functional works of art.

This is the first in a two-part series. In part 2 she'll show you how easy it is to make your own box.


twitter.jpg Follow me on Twitter

-


Photo artist Stephanie Scheetz shows you how to take everyday, boring gift boxes and transform them into personalized works of art using your photographs. These boxes make great gifts, or they can be used for decorative organization around the house. Stephanie walks you through this process, step by step.

This tutorial is part 1 of a two-part series. In the next show, you'll learn how to create a box from scratch by simply folding paper, including stock that has your imagery printed on it. Stay tuned!

Other Creative Output Projects with Stephanie

Stephanie has many more creative output projects waiting for you. Just visit our Creative Output section, right here on The Digital Story. Some examples are:

Shrink Plastic Jewelry (Video Tutorial)

Stencil Art from Photos (Video Tutorial)

Make a Custom Notebook Using Your Images (Video Tutorial)

Make a Custom Photo Gift Bag (Video Tutorial)

Buckle-Up Frame Present for Dad on Father's Day

A Time to Remember - Make Your Own Photo Clock

dvmug_logo.png

What are you doing on Saturday, Feb. 27? If you're going to be in Northern California, please join me for an all day workshop titled, Digital Photography from Start to Finish. This event is hosted by the Diablo Valley Mac Users Group, and will take place at Meadow Homes School, 1372 Detroit Ave., Concord, CA. The workshop begins at 9am and concludes at 4pm.

The day begins with a series of easy-to-master pro tips for both compact and DSLR photographers. Then we'll cover how to make great portraits, how to tame those unwieldy group shots, and fire up iPhoto to explore the powerful tools available to improve our images even more. You will learn how to:

  • Capture professional looking portraits
  • Master your flash
  • Shoot in low light
  • Take great shots of kids, pets, and sports
  • Create digicam movies
  • Edit images in iPhoto
  • And much more!

There will be plenty of Question & Answer time throughout the day, too.

The workshop is only $75, so this is a real bargain for an all day event. You can attend by downloading the PDF registration form and mailing it in. You can also call (925) 689-1155 for more information. Register today!

Free eBook on Wildflower Photography

wildflower_book.png

For those of us in North America, it's not too early to start thinking about the Spring wildflower season. I've just downloaded and perused a free eBook titled, 13 tips for better wildflower photography, and it contains lots of helpful information and some terrific shots. If you want to improve your flower pictures this Spring, you might want to download a copy for yourself.


twitter.jpg Follow me on Twitter

-


Cool Gadget: Flipbac Angle Viewfinder

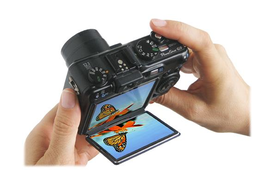
flipbac_finder.png The Flipbac Angle Viewfinder protects your 3" camera LCD and makes it easier to compose shots at high and low angles. It opens to more than 180 degrees in both landscape and portrait positions, and reflects the LCD image on its mirror-like surface. When you're done shooting, the flipbac folds up and protects the surface of the LCD. It fits most cameras with 3" screens, and is available for $18.95 US.


twitter.jpg Follow me on Twitter

-


stephanie_limited_space.jpg

I shoot in all sorts of locations, most of which are more cramped than I want. So I bring along my 6-foot wide rolls of white, black, and colored photographer's backdrop paper and do the best I can. Fortunately, if I shoot on black or white backgrounds, I can increase the space later in Photoshop CS (any of the versions) using the Canvas Size dialog box (Image > Canvas Size). This technique works best if you keep your background whites bright, or your blacks saturated.

In the top image you'll see that I ran out of space and don't have much background area around the subject. This can be a particular problem if you need to add another element to the shot, such as type. But the fix is easy. Just open the Canvas Size dialog box and adjust the settings as I have here.

canvas_size.png

Notice how I select the bottom/center box for the anchor. That adds white space to the top and sides of the image. You can control this by selecting the anchor that best suits your needs for that picture.

stephanie_space.jpg

I usually work with white or black as the Canvas Extension Color, but you have nearly unlimited options via that popup menu at the bottom of the dialog box. Once you have your settings in place, click OK, and your backdrop suddenly becomes much more spacious.

I dug around a bit and found a good tutorial that also shows a similar technique for Photoshop Elements. Check out the article titled, Add Space to Your Studio in Photoshop. About half way into the article the author shows the technique for Elements.

twitter.jpg Follow me on Twitter

-


Some lessons come easier than others. For example, you would think by now I have the USB cord situation straight for all of my cameras. But nooooo! And there's other things that I've insisted on learning the hard way.

Plus, I have an update on the TDS Workshops I discussed last week. The TDS Hot Air Balloon Photography Workshop in June 2010 is a go. I'm already working on ideas for the Fall event. Thanks to everyone for the great feedback, and a special thanks to those who registered.

Listen to the Podcast

You can also download the podcast here (23 minutes). Or better yet, subscribe to the podcast in iTunes.

Monthly Photo Assignment
Slippery is the Jan. 2010 Photo Assignment. You can read more about how to submit on our Member Participation page. Deadline for entry is Jan. 31, 2010.

More Ways to Participate

Want to share photos and talk with other members in our virtual camera club? Check out our Flickr Public Group. It's a blast!


twitter.jpg Follow me on Twitter

-


Podcast Sponsors

SiteGrinder lets you take ownership of your websites. Effortlessly output pages right from Photoshop.

Red River Paper -- Try the $7.99 Sample Kit.

Add Magic to Your Slideshows -- FotoMagico presentations are so amazing that your audience will be asking how you did it.


Technorati Tags: , , , , ,

balloon_classic_workshop.jpg

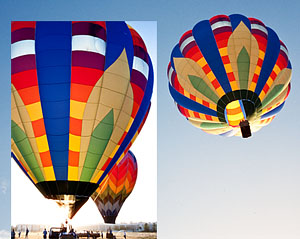
The TDS Hot Air Balloon Classic Workshop is scheduled for June 25-28, 2010 in Sonoma County, CA. The focus of this 3-day event is food, photography, and fun.

This photo gathering will include three classroom sessions at The Digital Story Headquarters in Santa Rosa, CA, two morning shoots at the Sonoma County Hot Air Balloon Classic, delicious lunches and snacks, personalized instruction, cool swag, and three days of relaxation in beautiful Sonoma County located in the heart of Northern California Wine Country. Class size is limited to 6 participants to ensure personalized instruction.

The workshop fee is $495. Reserve your spot today, or ask follow up questions, by sending me email with the subject line "TDS Workshop." Contact information is on our Member Participation page. More details are available on the TDS Workshop page.

I hope you can join me in June. It's going to be a blast!

twitter.jpg Follow me on Twitter

-


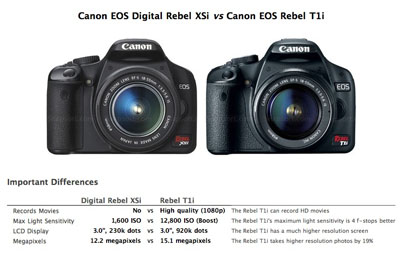
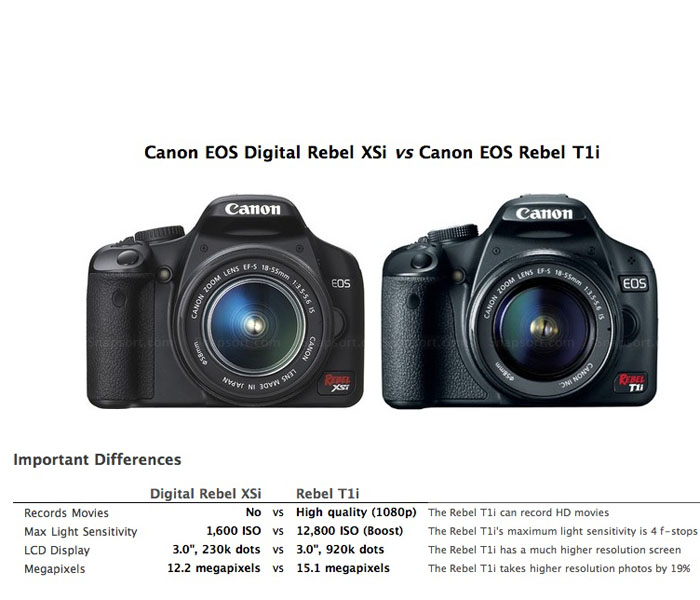
Inevitably, when you're thinking about buying a new camera, it comes down to a horse race between two models. That's where a new site, Snapsort becomes invaluable. Just type in the names of your two finalists and let Snapsort provide you with an easy-to-read, highly useful, feature comparison.

It's also fun. I learned all sorts of interesting details about cameras I was curious about. The interface is clean. Performance is fast. Very nice.

You can keep up with Snapsort by reading their blog and following them on Twitter.


twitter.jpg Follow me on Twitter

-


"The Wall" - Grab Shot 191

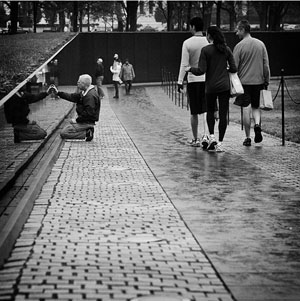
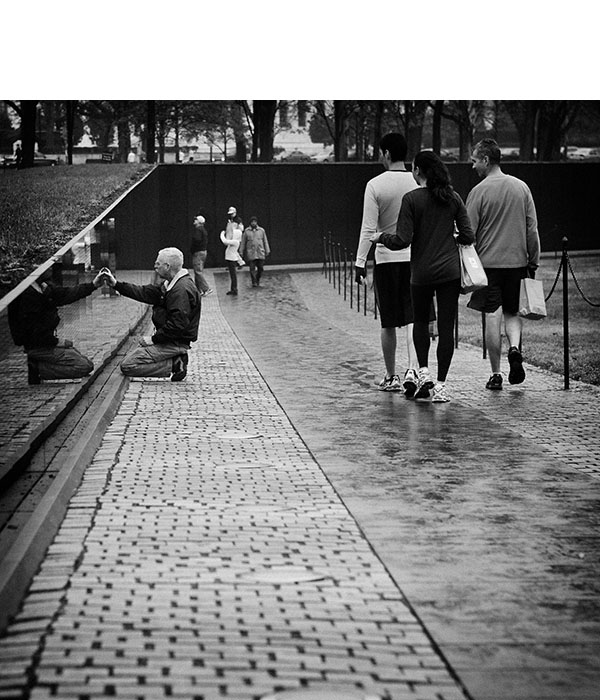
"I spent four hours Thanksgiving morning walking the National Mall in Washington, DC," writes Rick Brandt. "Among my stops was the Vietnam Veterans Memorial. I worked my way from the eastern end of the wall to the western end. At the very end of the western wall, where there is only one name, laid a wilting carnation -- an interesting photo opportunity -- I took it. Then I looked up and saw this gentlemen kneeling at the wall -- he was about 50 yards away and I considered swapping lenses -- I had the 24mm-70mm on my 5D, and the 70mm-200mm was in the backpack."

" I really wanted to get closer, but I thought if I took the time to swap lenses, the moment may be gone -- and I didn't think it was appropriate to physically get closer -- so I took several shots from where I was with the lens that I had on the camera. A few seconds later, a threesome of runners (the Thanksgiving Day Trot for Hunger just finished at the Lincoln Memorial, just up the hill from the wall) passed me, entered the frame and provided what I feel was some sorely needed balance to the composition."

As Rick mentioned, he captured the image with a Canon 5D at 70mm (24mm-70mm). He then post-processed the image with Aperture and Silver Efx Pro.

Photo by Rick Brandt. Click on image to zoom to larger size.

If you have a candid you'd like to share, take a look at our Submissions page, then send us your Grab Shot. We'll try to get it published for you on The Digital Story.

And you can view more images from our virtual camera club in the Member Photo Gallery.


twitter.jpg Follow me on Twitter

-


Technorati Tags: , , ,

The "infrared look" in photography is a terrific alternative to traditional color imagery. There are many paths you can follow to experiment with the IR alternative. The pure approach is to actually shoot infrared with a digital camera.

You can purchase a very dense Hoya 52mm RM72 Infrared Glass Filter and put it over your lens. Some cameras work better than others in terms of displaying the IR effect. You can test your candidates by pointing a TV remote control toward the lens and seeing how bright the dot of light appears on the camera's LCD screen. The brighter the dot, the better the camera will record IR.

You can also have an existing DSLR modified for IR photography through 3rd party services such as Life Pixel. If you want to get serious about IR, this is the best way to go. They remove the IR blocking filter inside the DSLR so you can shoot normally without having to put that dense RM72 filter over the lens.

You can read more about ways to capture IR in my Macworld article titled, Photograph the invisible with infrared photos.

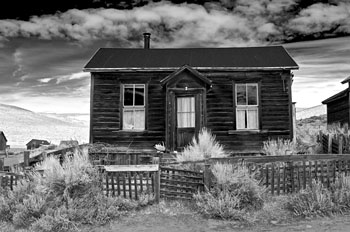
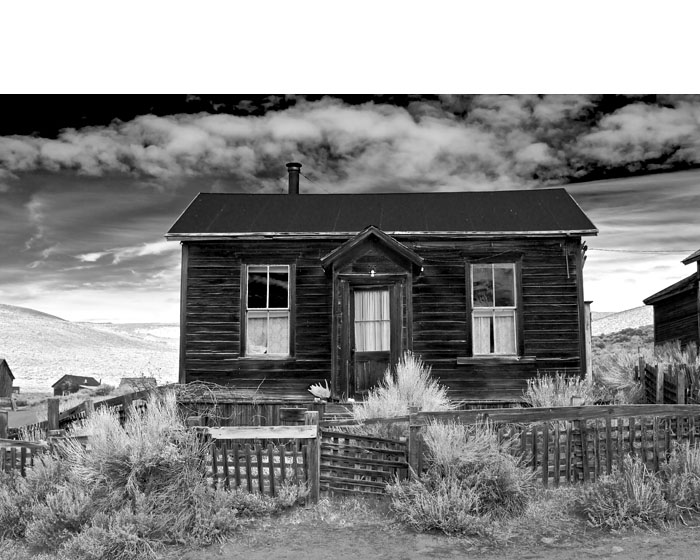
If you're not interested in dense filters or modifying cameras, you can fake the IR effect using your image editor, as I did with the shot of the Bodie House shown above. I created that effect in Aperture using these simple steps in the Adjustments panel:

  • Enable the Monochrome Mixer in Aperture. Move the Blue slider to -20 and Green to +80
  • Switch to the Color adjustment brick and click on the Green square. Move Luminance and Saturation sliders all the way to the right.
  • While still in the Color brick, click on the Yellow square and move the Luminance and Saturation sliders all the way to the right.
  • And finally, in the Color brick, click on the Blue square and move the Luminance slider all the way to the left and Saturation slider all the way to the right.
  • Now play with your normal image adjustment controls, such as Exposure and Enhance to perfect your photo.

You can even create fake IR on your iPhone using applications such as Photo fx 2.0. I go over all of these techniques in my Macworld article titled, Four ways to fake infrared photography.

Regardless of your approach, this contrasty, unusual, B&W look is very refreshing and a nice way to shake things up.


twitter.jpg Follow me on Twitter

-


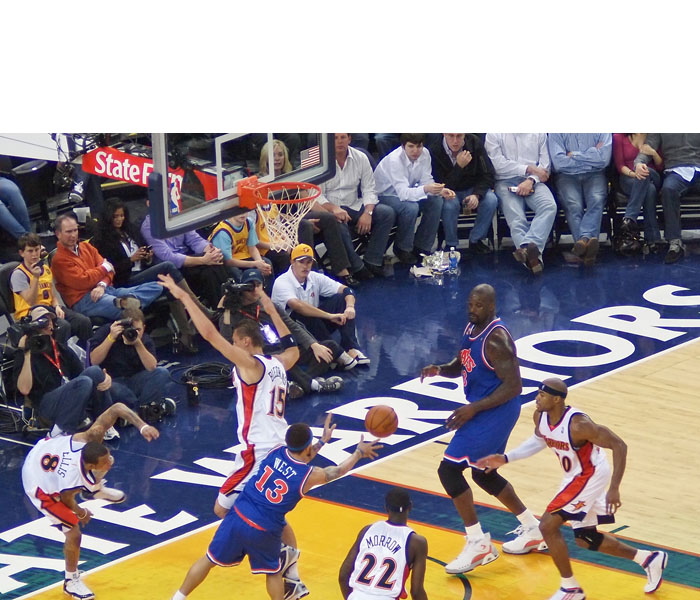
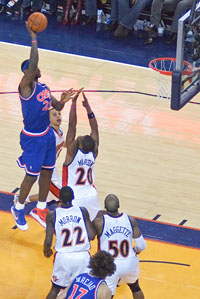
Most sports arenas don't allow professional camera gear unless you're part of the media pool. So it's very difficult to get compelling shots from the stands as a spectator. I can't tell you how many times I've had to walk back to the car with my camera gear because I couldn't get it past security.


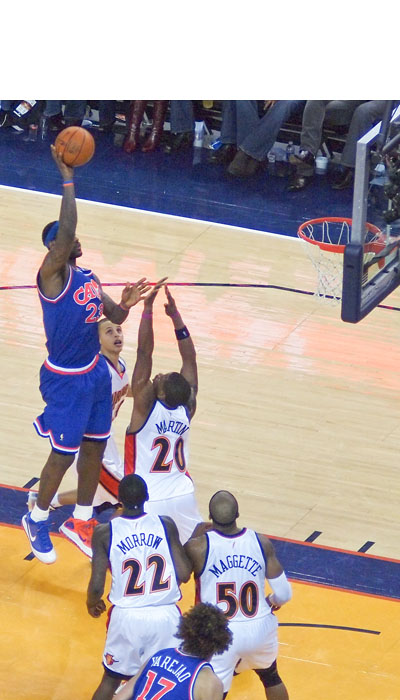
Image of Lebron James shooting captured from the upper deck of Oracle Arena using a Zeiss 135mm lens mounted on an Olympus E-P1 camera. You can see the entire set of images on the TDS Flickr page. Click on image to zoom.


Here in Northern California, however, you are allowed to pack a "non-professional" camera with your personal belongings. To most security guards that means a compact. Just try getting a decent shot with it from the upper deck -- or for that matter, anywhere in the arena. There are three main problems with compacts in these venues:

  • Their zoom lenses generally don't have the reach you need. And if they do, it's at too small of an aperture, such as f/5.6
  • They don't perform as well at high ISO settings.
  • Their shutter lag and slow burst modes aren't a good fit for action photography.

But what about the in-between cameras such as the Olympus E-P1 that have compact-like looks, but perform more like a bigger DSLR? The E-P1 has a good burst rate, minimal shutter lag, and excellent high ISO performance. The only problem is, Olympus doesn't have a long, fast lens for that body.

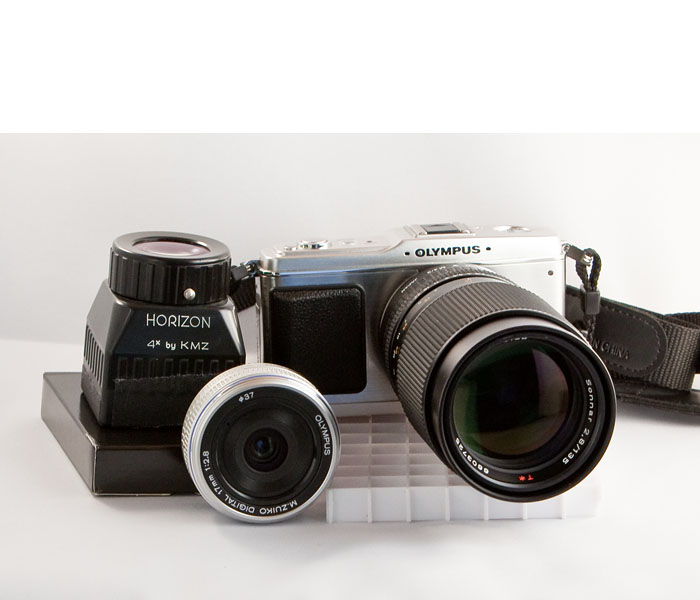
So I pulled out my manual focus Zeiss 135mm f/2.8 lens that was part of my Contax SLR kit and used a Rayqual micro 4/3rds adapter to attach it to the E-P1. Nice thing about micro four thirds cameras is that they double the focal length of SLR lenses. So my humble Zeiss zoom became a 270mm f/2.8 sports lens when mounted on the E-P1.

To get this rig into the arena, I stashed the 135mm lens in the bottom of my small shoulder bag, then mounted the stock 17mm Olympus lens on the E-P1. The security office took one look at the E-P1 with the pancake lens on it, and let me though the door. Once inside, I switched lenses. To help me focus accurately at f/2.8 with the telephoto, I attached a Horizon 4X loupe (that I still had for medium format film) to the back of the E-P1 with gaffers tape. (If I still had the E-P2, I would have used the electronic viewfinder instead. But alas, I had to send back the review unit.) Using the loupe attached to the E-P1's LCD, I found I could focus quite accurately.

I then took my seat in the upper deck, set the ISO to 800, put the camera in burst mode, and had a great time shooting pictures. You can see a gallery of shots on the TDS Flickr page. These shots are cropped, but even so, the edited shots still have plenty of resolution for 8" x 12" prints.

Now I have to resist getting greedy because I also have a German made Zeiss 200mm prime lens. But I think it's too big to pass as part of an "amateur" kit. So for the moment, I'm going to stick with the 135mm kit when I'm at events as a spectator.


twitter.jpg Follow me on Twitter

-


Personalized photography instruction, interesting events, beautiful location, and very affordable pricing: these are the cornerstones for the brand new 2010 Digital Story Workshop Series held in Northern California. TDS Workshops will feature a combination of classroom instruction with hands-on field events. Plus there will be opportunities for wine tasting packages and other local tours. And I've lined up some very nice swag for each attendee.

But we need to know what you think of this idea. Please send email (contact information is located on the Member Participation page) with the subject line TDS Workshop, and let us know what you think of the idea, and if you want to reserve a spot in one of the following events.

Proposed Workshop Schedule 2010

May 15, 2010 -- AMGEN Tour of California. The workshop would begin on Sat. night, May 15, and conclude on Tuesday 18th at noon.

June 25, 2010 -- Sonoma County Hot Air Balloon Classic. The workshop would begin on Fri. night, June 25, and conclude on Monday June 28th at noon.

Sept. 25, 2010 -- Sebastopol Celtic Music Festival and the Hand Car Regatta. The workshop would begin on Sat. night, Sept. 25, and conclude on Tues. Sept. 28th at noon.

Listen to the Podcast

You can also download the podcast here (23 minutes). Or better yet, subscribe to the podcast in iTunes.

Monthly Photo Assignment
Slippery is the Jan. 2010 Photo Assignment. You can read more about how to submit on our Member Participation page. Deadline for entry is Jan. 31, 2010.

More Ways to Participate

Want to share photos and talk with other members in our virtual camera club? Check out our Flickr Public Group. It's a blast!


twitter.jpg Follow me on Twitter

-


Podcast Sponsors

SiteGrinder lets you take ownership of your websites. Effortlessly output pages right from Photoshop.

Red River Paper -- Try the $7.99 Sample Kit.

Add Magic to Your Slideshows -- FotoMagico presentations are so amazing that your audience will be asking how you did it.


Technorati Tags: , , , , ,

The eye-catching feature of the Solio Mono charger is the 3" solar cell that can charge the internal 1000Amh Lithium-Ion battery. And indeed, this is a selling point for the device.

But if you're going to be happy with this purchase, you'll have to take a broader view and see this as an all-purpose back-up charger for your iPhone, digital camera, handheld GPS, or other small electronic device. That's because the easiest and quickest way to recharge its Lithium battery is via the USB port on your laptop or with a separate USB charger. This only takes a few hours. If you have to depend on the sun for a full recharge, it will take a few days. And that's only if you have direct sun shining on the device.

So the way you might want to think about the Solio Mono is that it's a back up charger for you small electronics that his its own back up via its solar cell.

I purchased one at the Apple Store for $79 specifically to charge my iPhone 3GS while working in the field. This particualar kit comes with the connections required for iPhones and iPods. The same charger is also available on Amazon for $59, but I couldn't tell which specific connections that kit came with. Either charger has the ability to replenish thousands of devices, it just depends on having the right connection, such as an Apple Dock Connector, for your particular gizmo.

You can tell how full its battery is by the number of green blinks you get when you push the clear button on the back of the device. Each blink indicates 20 percent charge. So, five blinks is full, and one blink is 20 percent.

I was happy with how the Solio charged my iPhone. For example, when the iPhone was at 59 percent charge, I connected the Solio via its dock connector cable. I pressed the clear button to initiate the charge, and 90 minutes later the iPhone was back to 100 percent full. The Solio charger still had 40 percent capacity, leading me to believe that it can come close to fully charging the iPhone.

I generally replenish the Solio's battery using its USB cable and the iPhone USB wall charger. It usually takes a few hours to top off the Solio after I've used it. I've also tried recharging the Solio via its solar cell. I got about 20 percent charge for every 5 hours of direct sun. I will use this feature more when camping to gather as much energy as possible, especially for topping off the Solio's battery. I like this option as a back up feature. Just don't get it in your mind that you're purchasing a solar charger that will keep your electronic device running on a daily basis.

To carry the Solio kit, I'm using the Lowepro 4.3-Inch Navi Shield GPS Carrying Case that holds the charger itself perfectly in the internal pouch, plus all of the cords and connecters in the secure mesh area. It almost seems as though the Navi Shield was designed specifically for the Solio Mono.

Overall, I like the Solio-Mono. I'll charge it completely before I hit the road, then top it off using the solar cell. By keeping my iPhone charged, I know I'll always have a 3-megapixel camera, voice, SMS, email, and Internet available as long as there's a cellular connection.

twitter.jpg Follow me on Twitter

-


If children aren't the most popular subjects for photography, they are definitely near the top of the list. The challenge, as I see it, is that most snapshooters don't really take a moment to consider the best way to capture shots of young ones. Yes, they are usually cute regardless of how casually we approach them with the camera. But there's potential for so much more.

landon_listening.jpg

In the article, 7 Tips for Photographing Children, the editors at Virtual Photography Studio help you think more carefully about your approach, enabling you to capture more meaningful memories. Keep these thoughts in mind the next time an opportunity presents itself.

Photo by Landon Michaelson.


twitter.jpg Follow me on Twitter

-


So Lady Like... and Such a Guy

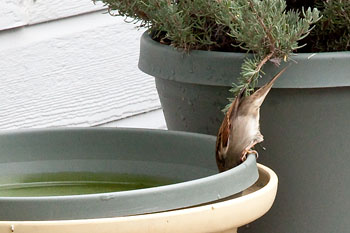
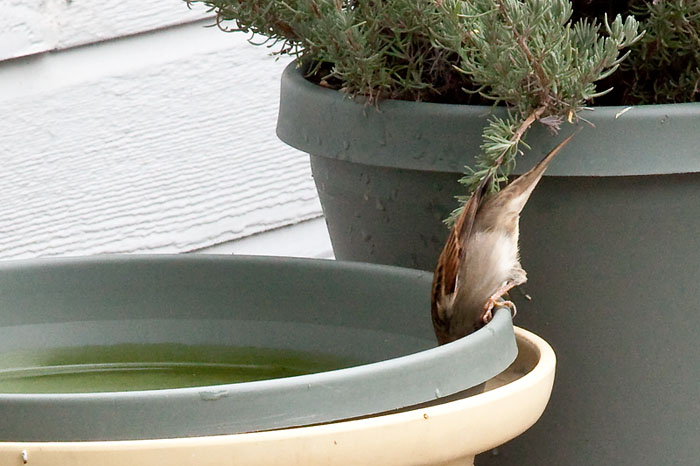
Nothing like a birdbath to highlight the difference between males and females. I have a little backyard garden at my studio that I enjoy all day through a sliding glass door next to my desk. I maintain this little ecosystem for my distraction, plus it's a constant source of fresh images. Why drive to the mountain when its habitants will come to you?

One of the features in my own private Eden is a makeshift birdbath. It's heavily used, so I change the water daily and keep it shallow because, well, the birds like it that way. Just like with any creature you observe daily, you get to know their habits and quirks. In this case, the difference between some males and females.

The female in the top photo was very lady like as she bathed her feet and freshened up. The male, on the other hand, just bent over and stuck his head in the drink. I'm sure he burped afterward too.

Both images captured with a 5D Mark II and a 70-200mm f/2.8 IS L zoom. The female shot was tethered to a MacBook Pro (located behind the curtain) running EOS Utility. The shot of the male... just handheld. He wasn't nearly as shy. You can click on either image to enlarge.


twitter.jpg Follow me on Twitter

-


"Mama, don't let your sons grow up to be photographers," at least according to Wall Street Journal's Best and Worst Jobs 2010. Says the WSJ, "The 200 best and worst jobs in the U.S. in 2009 were based on five criteria -- environment, income, employment outlook, physical demands and stress -- according to a newly released study from job site CareerCast.com.".

Of course things could be worse: you want to be a photojournalist. That ranks #189. Ten slots below "Roofer." This is why I became a blogger too. Oh wait, "Blogger" didn't even make the list. Oh my...

sony_tx7.png

I've been following the news from CES in Las Vegas, and I'm amazed at how many compact cameras are being announced. It's not just the variety of manufacturers that dazzles me, but the sheer number of models each camera maker is releasing.

For example, Sony announced 12 Cyber-shot compacts, Olympus chimed in with at least 9 new models, Panasonic adds 5 more, Samsung lists 4 new models, Canon released 4 new compacts, and I'm sure there are others I have forgotten. Are we buying that many point and shoots?

I thought the walls were closing in on the standard point and shoot. I mean, these days we have smart phones that are capturing 3 and 5 megapixel images, and micro four thirds systems that are half the size of traditional DSLRs. Don't get me wrong, I love compact cameras, but there's a lot of competition out there. Even a photo geek like me only buys a new compact every 18 months or so. And I know a lot of people with cameras that are 3 years or older.

So, I'm curious. How often do you buy a compact camera? Please post a comment and let us know. Maybe I'm totally off-base about this whole quantity thing.


twitter.jpg Follow me on Twitter

-


Aperture Workshop at Macworld 2010

macworld_2010_logo.png

I'll be leading a 2-day workshop at Macworld 2010 titled, Professional Photography Adventure with Aperture. The dates are Feb. 9 & 10 at Moscone Center in San Francisco. I think the title of the seminar is particularly appropriate for this year's class. There's always the chance that Aperture 3 will be released before Macworld, giving us the opportunity to have the first full workshop on the updated photo management application. Plus, I've been working on ways to integrate Aperture into a broader photo workflow, and I'll be covering that too.

Either way, this is going to be a wild ride. So I hope you join me. You can sign up now at the Macworld site.


twitter.jpg Follow me on Twitter

-


Do You Have a Spare USB Port?

lexar_usb_drive_lg.png

There were lots of great announcements today from Canon, Eye-Fi, and Lexar. But one of my favorite new goodies may have been overshadowed by all of the hoopla: the 32GB Echo ZE Backup Drive (also from Lexar) that provides anytime backup of files because it resides barely noticeable in a spare USB port.

The Echo also comes with automatic backup software: " Built-in Lexar Echo backup software securely and automatically encrypts files and performs ongoing backup to any files in use, targeting essential files to help protect your working data. It also easily restores previously saved versions of a file, preventing you from accidentally overwriting or deleting files. And the software works across platforms with one seamless interface, allowing you to easily back up or restore files on either a PC or a Mac system."

Lexar says the Echo ZE Backup Drive is coming soon. I'll keep an eye peeled and let you know when I see it.


twitter.jpg Follow me on Twitter

-


In this follow-up to last week's show, I finally nail down my photography workflow for 2010. I've decided to go the "referenced file" approach. So I purchased a new LaCie 320GB Rugged Triple Interface Portable Hard Drive (7200 rpm), cleaned off the hard drive on my MacBook Pro, and designed a totally flexible photo management system. You can hear all of the details in this week's show.

Listen to the Podcast

You can also download the podcast here (19 minutes). Or better yet, subscribe to the podcast in iTunes.

Monthly Photo Assignment
Slippery is the Jan. 2010 Photo Assignment. You can read more about how to submit on our Member Participation page. Deadline for entry is Jan. 31, 2010.

More Ways to Participate

Want to share photos and talk with other members in our virtual camera club? Check out our Flickr Public Group. It's a blast!


twitter.jpg Follow me on Twitter

-


Podcast Sponsors

SiteGrinder lets you take ownership of your websites. Effortlessly output pages right from Photoshop.

Red River Paper -- Try the $7.99 Sample Kit.

Add Magic to Your Slideshows -- FotoMagico presentations are so amazing that your audience will be asking how you did it.


Technorati Tags: , , , , ,

Camera Club Specials for Jan. 2010

Here's a new Digital Story feature for 2010: Camera Club Specials. Once a month I receive a list of deals on photography gear from the folks over at B&H Photo. I sift through the list and pick a few items to feature as club specials for the month. If you see something you like, just click on the link to read more about it on its product page. Enjoy!

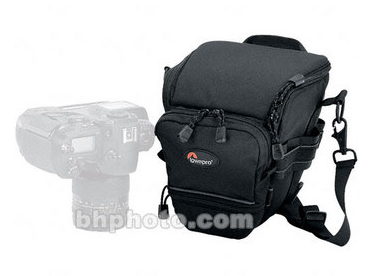
lowepro_65_toploader.png

Special #1: Lowepro Toploader 65 AW Camera Holster Bag - Color: Black; Condition: Brand new/Never used -- In original manufacturer's packaging -- $29.95

Special #2: Canon Selphy ES40 Compact Photo Printer - $89.95, plus you can save another $50 via Canon rebate (offer ends 1/31/2010)

Special #3: Xuma SEP-10 In-Ear Stereo Earphones - pouch and extra sleeves included -- $19.95

canon_60mm.png

Special #4: Canon EF-S 60mm f/2.8 Macro USM Lens - USA warranty, for APS sensor Canons such as the 50D, Rebel T1i, and Rebel XSi -- special price ends on 1/16/10 -- free shipping -- $392


twitter.jpg Follow me on Twitter

-


Tripods Getting Smarter Too

traverse_tripod.png
The march of innovation affects everything, not just the latest digital camera or computer. Tripods are an excellent case in point. Take a look at the new Davis & Sanford Traverse Tripod ($169) that folds up ingeniously to a mere 16", but extends to a comfortable 57".

Other companies, such as Benro, offer the Travel Angel Aluminum Tripod, ($231) that's a full-featured, sturdy camera support with legs that also fold up over the tripod head resulting in a compact unit you can take just about anywhere.

Even traditional brands, such as Manfrotto, offer a 4-Section Tripod with Ballhead ($115) that's relatively compact (19" folded) and supports most DSLRs and all compacts.

My point is, if you haven't looked at tripods lately, like everything else, they have continued to improve. And chances are, you can get something just right for your needs that fits within your budget.


twitter.jpg Follow me on Twitter

-


Many photographers are revisiting wedding photography because it remains a good source of income during tough economic times. I just read a good article titled, How to Become a Top Wedding Photographer that contains some excellent tips for pushing your business up to the next level. It's a good read if wedding and portrait photography is part of your revenue stream for 2010.


twitter.jpg Follow me on Twitter

-


2010: Year of Software Decisions

As I look into my crystal ball for 2010, I predict we'll have new versions of many of the heavy-hitter software applications that we depend on for photo management and processing. How those new releases match up with the way we shoot will impact people on both sides of the equation.

Sometime during 2010, my guess is that we'll see Photoshop CS5 with updated versions of Adobe Camera Raw and Bridge. Lightroom 3 will probably come out of beta and on to the shelves. And Aperture 3 will most likely debut too. The big question is, how will those new applications match up to our evolving photography?

For example, I want one application that has Raw support for all of my cameras. I want to be able to catalog my video as well as my still pictures in the same environment. And I want integration with the other applications and services I use.
What's on your application wish list for 2010? If you have specifics that are important to you, please share them in the comments below.

Happy New Year! (It's going to be an interesting one...)


twitter.jpg Follow me on Twitter

-