November 2014 Archives

luma-reflected-meter.jpg

I've been using the Lumu light meter for iPhone since it was first released. Using the dongle along with the Lumu Photo app, I could employ my smartphone for incident light measurements.

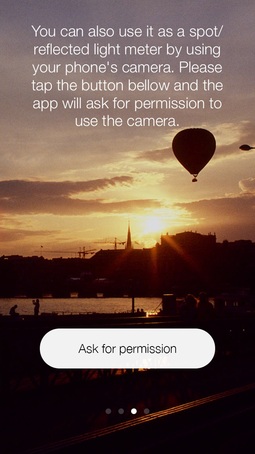
Now, with version 2.0, photographers can take reflective readings too - no dongle required. Lumu Photo uses the iPhone's camera for reading the light. So all you have to do is download the app, fire it up, and start taking meter readings. And if you need spot readings, just tap on the screen in the area that you want to measure.

Lumu Photo can be a lifesaver for analog film shooters with non-metering cameras. But this app is also handy for evaluating scenes, double-checking your camera's light meter, and of course, taking incident measurements if you have the Lumu dongle (which happens to be on sale at the moment).

I tested the performance of the reflective meter with an iPhone 5S, and the readouts were very accurate, producing excellent exposures. The app also includes the ability to save meter readings, along with location data, and your notes via iCloud, then synced across devices. Again, great for scouting missions for both photo and video projects.

Speaking of which, Luma also makes a Video and Pinhole app.

Want to Comment on this Post?

You can share your thoughts at the TDS Facebook page, where I'll post this story for discussion.

Note: Now that Black Friday is over, so is the special price for this kit. It does, however, remain in the store at $34.95.

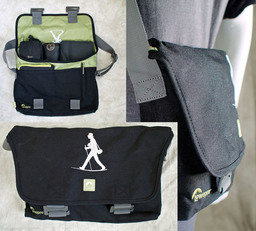
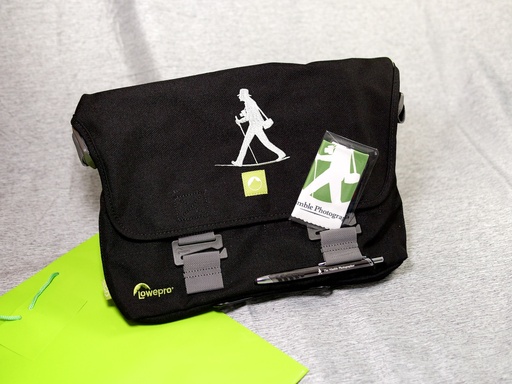
A great deal in the Nimble Photographer Store for 24 hours only - the Walking Man Shoulder Bag + Dual-Function Stylus Pen + microfiber cloth - entire kit for $19.95 (regular $34.95). Here's more about it.

black-friday-special-web.jpg

Take the stairs instead of the elevator - You're light on your feet with the Walking Man Shoulder Bag slung across your back.

The Urban Explorer Kit includes our classic Shoulder Bag designed by Lowepro and made of recycled material (it's planet friendly!), the Dual-Function Nimble Stylus Pen (perfect for iPad browsing in a restaurant or coffee shop), and the "I have a high nimbleosity rating" Microfiber cloth (for keeping your electronics and optics nice and shiny).

The kit comes packed with the Stylus Pen and Microfiber Cloth nestled in their dedicated pockets inside the Shoulder Bag. Plus, we include a holiday gift bag. So all you have to do is sign the card and present the gift.

The Black Friday Sale Price is effective until 11:59 PM on Friday Nov. 28th. Offer good while supplies last.

Ghost with Beach Background.jpg

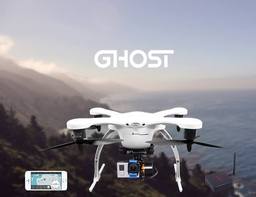
I was just contacted by the folks at Ghost Drone, letting me know that they have an IndieGoGo project going that can get backers flying for as little as $375. The other thing that caught my eye, as a potential pilot with no experience, is that they claim that the Ghost "is the world's easiest drone to fly. It is perfect for first-timers and experienced pilots alike."

OK, you've got my attention.

The basic kit doesn't include a gimbal (stabilizing camera mount), so it's more for learning to fly, then you can add your own gimbal later if you wish. But if you're willing to back the project for $599, you get everything your need to mount a GoPro camera to the Ghost and start recording images and video from above. If you don't have a camera already, there's a $979 package that includes the Ghost Drone, gimbal, and GoPro4 Silver Edition. This is considerably less than the DJI Inspire-1 for $2,800 (without controller) that I wrote about last week.

Drone App on Phone.jpg

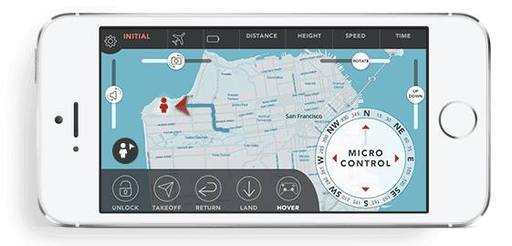
Speaking of controllers, you don't have to buy one for the Ghost Drone because it uses an iPhone or Android device to control it. The software is free. "Travel light with just your phone, and let Auto Mode do the flying, so you can focus on generating the perfect shot. Point your finger on the map, and the drone flies to that spot. No bulky RC controller to carry around. Just your phone and a small G-Box."

Ghost is going to send me the $375 basic kit in January so I can test it. My backing is this blog post. Their focus at the moment is trying to raise as much capital as possible via the IndieGoGo project, which is open only until Dec. 10, 2014.

If you want to try your hand at ariel photography, but have been nervous before about your skill level or making a big investment, there are still good deals available for backers. Then we'll all get together in February and compare notes.

Want to Comment on this Post?

You can share your thoughts at the TDS Facebook page, where I'll post this story for discussion.

This week on The Digital Story Photography Podcast: All (Backup) Systems Go, Mirrorless Camera Recommendations, Nimble Black Friday, Workshops Update - All of this and more on today's show with Derrick Story.

Snapshot - "After the Rain" - I keep my Canon S110 on the kitchen counter so I can grab it on my way out the door. On this afternoon, I captured not one, but two beautiful shots as a result. Here's the story about why I'm glad I had a compact and not just my iPhone.

after-the-rain.jpg

Weekly Update - MacBook Pro 13" with Retina Display. I needed a new travel computer. And since Apple hasn't put a Retina Display on the 13" Air, I went with the MacBook Pro that was released in Aug. 2014.

The specs are pretty good: 2.8 GHz Intel Core i5, 8 GBs of RAM, and 512 GB SSD hard drive. How's it performing? I'll provide an update in this segment.

In other news, There will be a Nimble Black Friday. What might the special be?

Story #1 - All (Backup) Systems Go, 5 Tips for Year End Archive Maintenance: Spin up old hard drives, update photo management libraries to current versions, review your cloud storage strategy, evaluate and adjust your backup hardware for the new year, and finally, make 6 archival prints of your best shots. I go into detail in this segment of the show.

Story #2 - My Recommendations for Mirrorless and Premium Compacts - here's a list of new, high performance cameras that you won't want to miss.

Story #3 - TDS Workshops Update - Reservation forms have been sent for the SF Street Shooting Workshop, and we're going to most likely adjust the dates for the Aperture to Photos event currently scheduled in February. More on this during the podcast.

Virtual Camera Club News

Photo Assignment for November 2014 is "Layers".

Red River Paper - Save 10 percent off your next order of inkjet paper and greeting cards. Good one per customer. Use discount code STORY10X - Ends 1/15/15.

A Note from SizzlPix

Special for TDS listeners, a 20 percent discount on all SizzlPix ordered, now through end of November. Using the comment space on the newly streamlined SizzlPix order page, write "TDS 20 percent discount."

And Finally...

If you haven't done so already, please post a review for The Digital Story Podcast in iTunes.

BTW: If you're ordering through B&H or Amazon, please click on the respective ad tile under the Products header in the box half way down the 2nd column on thedigitalstory.com. That helps support the site.

Download the Show

In addition to subscribing in iTunes, you can also download the podcast file here (34 minutes). You can support this podcast by purchasing the TDS iPhone App for only $2.99 from the Apple App Store.

More Ways to Participate

Want to share photos and talk with other members in our virtual camera club? Check out our Flickr Public Group. And from those images, I choose the TDS Member Photo of the Day.

Podcast Sponsors

lynda.com - Learn lighting, portraiture, Photoshop skills, and more from expert-taught videos at lynda.com/thedigitalstory.

Red River Paper -- Keep up with the world of inkjet printing, and win free paper, by liking Red River Paper on Facebook.

SizzlPix! - High resolution output for your photography. You've never seen your imagery look so good. SizzlPix.com. SizzlPix! now is qualified for PayPal "Bill Me Later," No payments, No interest for up to 6 months, which means, have your SizzlPix! now, and pay nothing until May!

Want to Comment on this Post?

You can share your thoughts at the TDS Facebook page, where I'll post this story for discussion.

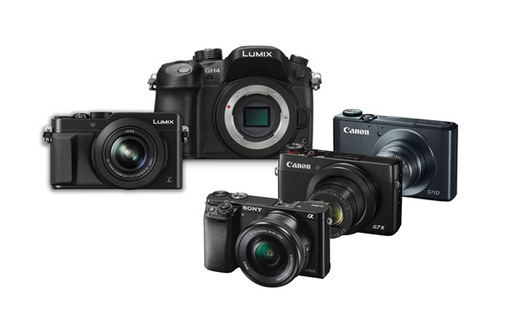
As we wind down 2014, many photographers are thinking about year-end purchases and gifts. For those who appreciate quality and nimbleosity, I've published my recommendations for mirrorless and premium compact cameras in the post, The Gift-Giver's Guide to Premium Compact and Mirrorless Cameras on the lynda.com Article Center.

mirrorless_compact-cameras.jpg

The guide is organized by four categories. Here are those categories and an overview of the cameras that I think have the right stuff.

The Well-Heeled Traveler

The Serious Enthusiast

The Emerging Artist

The Flat Out Bargain

Canon PowerShot S110 Digital Camera (Black) $249 with free SanDisk 16GB SD card (offer ends Nov. 26).

You can read all about these recommendations over at lynda.com Article Center.


Join me on my Instagram site as I explore the world of mobile photography. And now Instagram features 15-second movies too.

Want to Comment on this Post?

You can share your thoughts at the TDS Facebook page, where I'll post this story for discussion.

toshiba-flashair-package-web.jpg

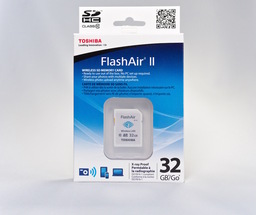
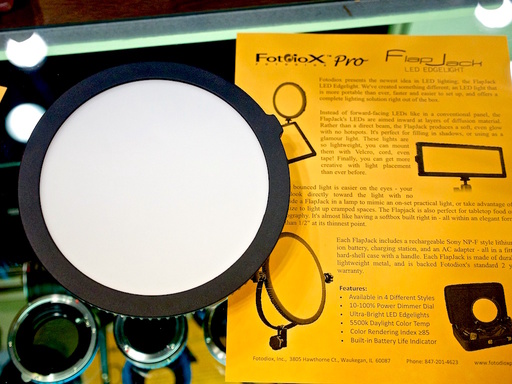
When I needed to photograph the Toshiba FlashAir card for my review on c't DigiPhoto, I used the Fotodiox FlapJack LED Edge Light ($299) for the shoot. And I have to say, this nimble, diffused light is making my job a lot easier.

What separates the Fotodiox from other LED units I've used is the built-in diffusion, eliminating the need for a softbox. The LED bulbs aren't pointed directly at the subject. Instead, they are angled inward with the light reflected through diffusion material. The result is a soft, beautiful illumination.

fotodiox-edge-light.jpg

For the FlashCard shoot, I put the product in a collapsable mini-studio and used the Fotodiox light for the front illumination. I added a smaller traditional LED panel pointed at the backdrop to keep it nice and bright.

The Fotodiox is battery-powered (although the kit includes an AC adapter if you want to use it). I leave the Flapjack mounted on a light stand so I can position it anywhere I need without concern about cords. The Fotodiox also includes a built-in dimmer, so I can easily balance the foreground illumination with the background to get exactly the look I want. And since the output is color-balanced for daylight, I can leave my camera in Auto White Balance mode without worrying about unsightly color casts.

All of this adds up to fast, easy, and attractive product photography. As much as I like the Fotodiox Flapjack for portrait lighting, it's even better for knocking out product shots.

Adding the Finishing Touches

Once you've captured the photo, finish it off in style. My post-production tutorial Enhancing Product Photography with Aperture is chockfull of tips and techniques that will help you make your products shine.

Want to Comment on this Post?

You can share your thoughts at the TDS Facebook page, where I'll post this story for discussion.

canon7d-Markii-front.jpg

RAW support for the Canon EOS 7D Mark II, Fujifilm X30, Nikon D750, and the Panasonic LUMIX DMC-LX100 were added to the Apple ecosystem that currently includes iPhoto, Aperture, and Preview.

Digital Camera RAW Compatibility Update 6.01 is currently available in the Mac App Store. This update requires Mac OS X Yosemite.

Aperture Tips and Techniques

To learn more about Aperture, check out my Aperture 3.3 Essential Training (2012) on lynda.com. Also, take a look at our Aperture 3 Learning Center. Tons of free content about how to get the most out of Aperture.

Want to Comment on this Post?

You can share your thoughts at the TDS Facebook page, where I'll post this story for discussion.

Adobe incorporated its Aperture/iPhoto Import Utility into Lightroom 5.7. And it works well. But a little preparation in Aperture will provide you with the best results possible.

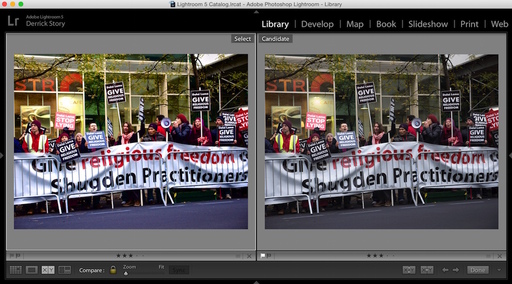
Edited-Jpeg-and-Raw.jpg Imported Aperture files in Lightroom 5.7 - The edited RAW file is now a Jpeg displayed on the left. The unedited RAW file is on the right. Both images were imported into Lightroom using the Adobe utility. The size and quality of the image on the left was determined by the Preview Settings in Aperture prior to import into Lightroom.

Since Lightroom can't imported the adjustments to RAW files (only the RAWs themselves), it provides you with the option to import Jpeg versions of your edited RAW files, along with the master RAWs themselves. I cover how to set this up in the article, How to Import Aperture Libraries into Lightroom 5.7 published on ct-digiphoto.com.

The real key for Aperture users is to regenerate their Jpegs that are being prepared for import into Lightroom. Most of us are using Aperture previews set to a constrained size, such as 1920x1920 or 1440x1440. This makes sense in terms of managing disk space on our computers.

The problem is, if we don't regenerate these Jpegs to "Don't Limit Size" and to a higher quality setting, such as "10," then the edited files that are imported into Lightroom won't be maximum quality or resolution.

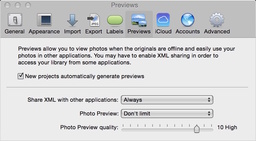
preview-settings-in-aperture.jpg

You can correct this by regenerating your previews using these settings in Aperture's Preferences (Aperture > Preferences), Photo Preview: Don't Limit, and Photo Preview Quality: 10 (High). Click on the image on the right to see how this looks.

To generate new previews using these parameters, hold down the Option key and go to Photos > Generate Previews. Depending on how many previews you're regenerating, this can take a while. Monitor your progress via the Activity window in Aperture (Window > Show Activity).

An easy test to make sure this worked is to drag a thumbnail out of Aperture to the Desktop. Open it in Preview, and use CMD-i to bring up the General Info box. There you can see the dimensions of the current preview in Aperture.

By regenerating full size previews, the pictures you so carefully edited in Aperture will be imported into Lightroom as Jpegs at their maximum dimensions with high quality. The edited preview receives an augmented file name, such as "PB020248_Aperture_preview.jpg" to help you identify it. Plus you'll get the original RAW, if there was one.

I highly recommend that you do a test run with a small Aperture library to ensure that you've prepared properly. Once everything passes muster, you're ready for the big import.

Keep in mind, that you only have to go through this laborious task if you were planning on moving to Lightroom anyway. A much easier transition to Apple's Photos app is on the horizon. And that move will keep all of our adjusted RAW files intact, plus library structure and metadata. Stay tuned for news about that right here on The Digital Story.

Aperture Tips and Techniques

To learn more about Aperture, check out my Aperture 3.3 Essential Training (2012) on lynda.com. Also, take a look at our Aperture 3 Learning Center. Tons of free content about how to get the most out of Aperture.

Want to Comment on this Post?

You can share your thoughts at the TDS Facebook page, where I'll post this story for discussion.

DPR-goldaward.png

I was just reading the excellent review of the Panasonic Lumix DMC-LX100. This is a camera for which I have serious lust. And that desire was intensified by the Gold Award bestowed upon it by DP Review.

Since the LX100 is a new form factor, however, I'm also reminding myself that I need to experience it physically before dinging my credit card for $800. Why? Because good on paper doesn't always mean good in the hands.

I recently received this note from Ed, a longtime TDS virtual camera club member, and owner of a previous LX camera. He shared his experience with the LX100, a camera he knew he wanted from the moment it was announced. Ed wrote:

"I was like a kid waiting for Christmas on the day it was to be delivered. But as soon as I opened the box and picked it up I experienced immediate disappointment. It just didn't feel right in my hand; it felt awkward. I couldn't believe how 2-3mm here and 2-3mm there and only ~2-3oz more had so drastically changed my wonderful and most used LX camera. It no longer just slipped into my hip pouch, I had to consciously angle it in and it felt surprisingly heavy in my vest pocket."

Ed ultimately sent back the camera. His experience is something to keep in mind in this online world. When I upgraded from the Canon 60D to the 70D, I was pretty confident that I would like the new camera. That's a purchase I could make online right away.

But I also know that's not always the case. Trade shows, friends with gear, and physical camera stores can help me evaluate new form factors. (If you try at a camera store, BTW, they deserve the sale.) Yes, we can usually return the item if necessary.

But as with photography itself, it's best to get it right the first time.

Want to Comment on this Post?

You can share your thoughts at the TDS Facebook page, where I'll post this story for discussion.

Tripod Too Short? Use Your Car

One of my favorite pictures of Ansel Adams is with him on the roof of his panel truck using a tripod to make a picture. When I first saw that image, I thought, "That guy is cool."

Often the tripod I have with me is of the compact variety, such as the MeFOTO DayTrip that extends only 24". In city settings, this lack of height hasn't been a problem.

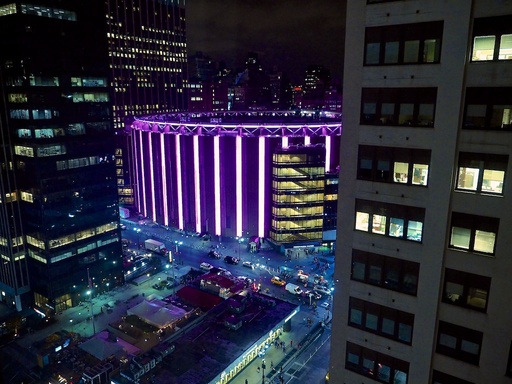
bay-bridge-sf-night-web.jpg "San Francisco Skyline with Bay Bridge" captured with the OM-D E-M1 and a MeFOTO DayTrip tripod sitting on the hood of my car. Photo by Derrick Story.

In many situations, like Adams, I use my car to extend the height of my sticks. This image of the San Francisco skyline with Bay Bridge was recorded by mounting an OM-D E-M1 on the MeFOTO, and using the hood of my car as the platform. Rubber feet don't scratch the paint. (I've also used newspaper machines, street barriers, steps, walls, ledges and anything else I can find.)

I'm not sure if others around me thought I was cool. But I did get the shot.


Join me on my Instagram site as I explore the world of mobile photography. And now Instagram features 15-second movies too.

Want to Comment on this Post?

You can share your thoughts at the TDS Facebook page, where I'll post this story for discussion.

This week on The Digital Story Photography Podcast: Dealing with Drones, a chat with Storytag founder Nikki McKenna, huge savings on the Olympus OM-D E-M5 - All of this and more on today's show with Derrick Story.

Snapshot - Pelican on Treasure Island. I try to arrive early for assignments in interesting places. Usually I'm rewarded with a few extra images. This was the case last week as I hung out with a Pelican in the marina on Treasure Island.

Weekly Update - $400 Savings on the Olympus OM-D E-M5 - Now available for $599 until inventory is depleted. The word on the street is that a replacement is coming in early 2015 - (Source: B&H Photo)

In other news, Canon EF 100-400mm f/4.5-5.6L IS II USM becomes a reality - The lens itself is slightly taller, wider and heavier than the original (circa 1998, but the move to a rotating zoom design should resolve problems associated with dust being sucked in during operation. It also offers three image stabilization modes and offers 4 stops of stabilization compared to 1.5 in the previous model. Thew new lens will automatically lock the IS elements when it detects a tripod in use. (Source: DP Review)

And finally, Rumor: Sigma's Much Anticipated 24mm f/1.4 Art Lens May Finally Arrive Q1 of 2015 (Source: PetaPixel).

dealing-with-drones

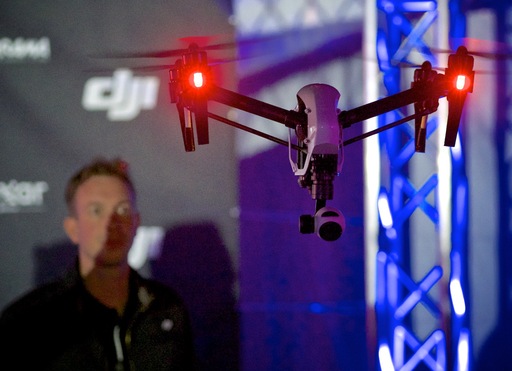
Story #1 - Dealing with Drones: One of the most controversial tools in photography right now are those flying quad-copters and their brethren. After attending the DJI Launch Party for the Inspire-1 last week, I came away more conflicted than ever about drones. I discuss this in today's first feature story.

nikki-storytag.jpg

Story #2 - A Chat with Storytag Founder Nikki McKenna - Storytag is about helping you to tell your story, one chapter at a time. You know the richness of  conversation that happens when you flip through old pictures with your grandparents, and you spend the time to ask questions? Nikki has figured out how to provide that service to all of us, and she explains how in the second segment of today's show. 

Story #3 - First Annual Nimble Store Sale - To celebrate one year of online nimbleosity, we're in the middle of a doozie of a sale. For example, our popular Walking Man Shoulder Bag and Stainless Steel Water Bottle Kit is on sale for $29.95. That's over 30 percent off for a quality Wenger hiking bottle and the classic shoulder bag. Sale ends on Monday, Nov. 24th.

Virtual Camera Club News

Photo Assignment for November 2014 is "Layers".

Red River Paper News! - Save 10 percent off your next order of inkjet paper and greeting cards. Good one per customer. Use discount code STORY10X - Ends 1/15/15.

A Note from SizzlPix

Special for TDS listeners, a 20% discount on all SizzlPix ordered, now through end of November. Using the comment space on the newly streamlined SizzlPix order page, write "TDS 20 percent discount."

And Finally...

If you haven't done so already, please post a review for The Digital Story Podcast in iTunes.

BTW: If you're ordering through B&H or Amazon, please click on the respective ad tile under the Products header in the box half way down the 2nd column on thedigitalstory.com. That helps support the site.

Download the Show

In addition to subscribing in iTunes, you can also download the podcast file here (39 minutes). You can support this podcast by purchasing the TDS iPhone App for only $2.99 from the Apple App Store.

More Ways to Participate

Want to share photos and talk with other members in our virtual camera club? Check out our Flickr Public Group. And from those images, I choose the TDS Member Photo of the Day.

Podcast Sponsors

lynda.com - Learn lighting, portraiture, Photoshop skills, and more from expert-taught videos at lynda.com/thedigitalstory.

Red River Paper -- Keep up with the world of inkjet printing, and win free paper, by liking Red River Paper on Facebook.

SizzlPix! - High resolution output for your photography. You've never seen your imagery look so good. SizzlPix.com. SizzlPix! now is qualified for PayPal "Bill Me Later," No payments, No interest for up to 6 months, which means, have your SizzlPix! now, and pay nothing until May!

Want to Comment on this Post?

You can share your thoughts at the TDS Facebook page, where I'll post this story for discussion.

stance-with-iphone.jpg

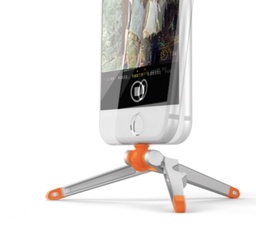
What initially attracted me to Kenu Stance was that it did not require an adapter or special case to mount to an iPhone. Its MicroMount inserts directly into the iPhone's Lightning port. Combined with the Stance's lightweight (1.2 ounces) and compact (3.1") design, you can carry it with you anywhere.

The Stance can also be configured as a stand for watching videos on the iPhone. And its ball head allows for versatile positioning for photography.

included-bottle-opener.jpg

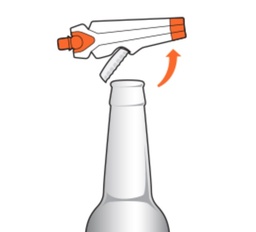
And if all of that wasn't good enough, the Stance includes a bottle opener. So when it's time to celebrate your great shot with a sip of your favorite microbrew, you're opener will already be in hand.

The Stance is available directly from the Kenu site for $29.95.


Nimble Photographer Logo

The Kenu Stance has a high Nimbleosity Rating. What does that mean? You can learn about Nimbleosity and more by visiting TheNimblePhotographer.com.

Want to Comment on this Post?

You can share your thoughts at the TDS Facebook page, where I'll post this story for discussion.

Considering Affiliates for Your Website

rocky-nook-affiliate.jpg

Many of us in photography and technology maintain web sites in addition to our work on social networks. Running our own blog, for example, provides us with complete control over the presentation of the content, including any ads or promotions that we might choose to share.

We probably won't attract the likes of Ford Motor Company for our personal sites. But that doesn't mean that we can't form strategic partnerships with like-minded companies. Often the easiest way to accomplish this is through an affiliate program.

How do these work? First, find a company that you like. My most recent partnership was formed with Rocky Nook Publishing that has an excellent Affiliate Program. I'll use them as an example for this article.

You sign up, providing basic information about yourself and your site. In most cases, you're setting up an affiliate account with the company. An agreement is finalized, and you're ready for business. Now you have access to the assets they provide to their partners, usually through an affiliate area that you can log in to.

Since not every website qualifies, getting this far is a stamp of approval. You can leverage this acknowledgement by placing a promotional tile on your site. Site visitors recognize that you're serious about your publishing and those with whom you choose to associate.

All affiliate content, whether it's a tile or a link, contains your account ID. This gives you credit for any resulting transactions with your business partner. In the case of Rocky Nook, you earn 10 percent commission on purchases made through affiliate links.

This creates a passive revenue stream, which means that you didn't have to do a specific task to earn money. Instead, you've created an environment that generates revenue through everyday use. Passive revenue streams are the holy grail of independent publishers.

We are often judged by the company we keep. Be choosy about who you partner with online. In my opinion, the co-branding is at least as important as the revenue. When you look at The Digital Story home page, you'll see tiles for c't Digital Photography, Rocky Nook, Red River Paper, SizzlPix, lynda.com, B&H Photo, and Amazon. These are all companies that I like and respect. And I'm thrilled to be associated with them.

If you want to learn more about Rocky Nook's affiliate program, which I think is a good starting point, then take a look at their Affiliate FAQ page.

Carefully choosing affiliates for your online publishing can be a positive experience for both parties involved.

Want to Comment on this Post?

You can share your thoughts at the TDS Facebook page, where I'll post this story for discussion.

Facing the Sun - Again

One of the techniques we worked on at a recent TDS Photography Workshop was shooting in to the sun. I had an other opportunity yesterday while on assignment at Treasure Island in San Francisco.

Looking-in-to-the-Sun-SF-web.jpg Looking In to the Sun - SF. Photo by Derrick Story.

Using the LCD on my Olympus OM-D E-M1 with a Panasonic Lumix G X Vario 12-35mm f/2.8 zoom set to 12mm, I used the sun and its reflection on the water as a key part of the composition.

The ISO was 200, at f/11, and 1/640th of a second. This image was sampled down from a in-camera Jpeg in Superfine mode.


Nimble Photographer Logo

The Olympus OM-D has a high Nimbleosity Rating. What does that mean? You can learn about Nimbleosity and more by visiting TheNimblePhotographer.com.

Want to Comment on this Post?

You can share your thoughts at the TDS Facebook page, where I'll post this story for discussion.

Walking Mag Black bag web.jpg

Have you been waiting to get your Walking Man Shoulder Bag? Or maybe step up to the stylish Nimble Messenger Bag that holds a 15" laptop? Or how about one of my favorites: the Walking Man Cap?

If that's the case, you may want to take advantage of The First Annual Nimble Store Sale. Terrific price reductions on many of your favorite items. Sale prices are good from now until November 24th. These will be the best prices of the season.

Check it out for yourself at The Nimble Photographer Store.

Want to Comment on this Post?

You can share your thoughts at the TDS Facebook page, where I'll post this story for discussion.

This week on The Digital Story Photography Podcast: Special Edition: Amazing Holiday Gift Guide for Photographers - All of this and more on today's show with Derrick Story.

Snapshot - Elissa writes, "I'd say I'm a very intermediate photographer at best, so I was disappointed when Apple announced they were going to stop developing Aperture a while ago.  Since then, I've learned a lot about Lightroom (thanks to Lynda.com!) because iPhoto didn't have enough editing tools, and it didn't make sense to invest any time learning Aperture.   But I also hate the cumbersome workflow that comes with Lightroom, and miss the simplicity of the Aperture/iPhoto combo. Can you shed some light on this?"

Story #1 - Amazing Holiday Gift Guide for Photographers. Here's a hand-selected list for photographers ranging from $5.95 to $249. And I even wrangled a few special deals for our listeners.

stylus-pen-gift-set.jpg

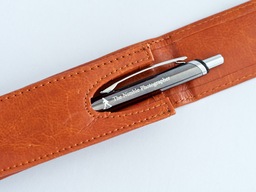
  • Nimble Stylus Pen Gift Set ($5.95) - The popular dual-function Nimble Stylus Pen in a handsome leather case - It's the perfect holiday gift for that special tablet-toting someone in your life. One device, two functions. Soft stylus tip works great on iPads, iPhones, and Phablets of all sizes. Keep the glass surface clean, yet tap and drag just like with your finger. Handy for restaurant reading. When it's time to sign the check, just click the top button and a black-ink pen tip emerges from the stylus.
  •  
  • Focus Digital Grey Card Set & Lanyard ($6.50 )- Here's a terrific stocking stuffer. This set of white, gray, and black laminated cards with lanyard are perfect for white balance settings and exposure readings. They hardly take up any space in the camera bag.
  • nimble-fingerless-gloves.jpg

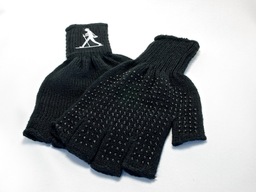
  • Nimble Fingerless Gloves ($12.99) Soft, 100 percent acrylic gloves with exposed fingertips enabling you to adjust devices and keep your hands warm. Rubberized dots on the palm side assist with gripping tripods and light stands. High-wrist design ensures that gloves stay within jacket sleeves, even during activity.The Walking Man logo is embroidered on top of each wrist with silver thread providing a classic look. Designed for men's hands, all sizes.
  • 2-for-1 Subscription of c't Digital Photography Magazine with eBook Chapter One from "The Essence of Photography" by Bruce Barnbaum - Engineered in Germany, this quarterly photographic publication provides deep dives into gear reviews, techniques, and artists. There's no publication like it in North America, and for a limited time, you can give a subscription and garner one for yourself. The best deal of the year!
  • Nanuk-903-case.jpg

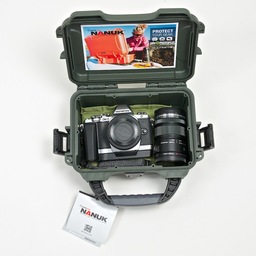
  • Nanuk 903 Case ($30) - It's like a mini-Pelican case that you can carry inside backpacks and duffels. The Nanuk is waterproof and impact resistant with 100 percent stainless steel hardware and automatic pressure release valve. The cases come in a variety of sizes and colors. I'm using the 903 to protect my Olympus OM-D E-M10 with pancake zoom lens on camera and the 12-50mm zoom by its side.
  • Olympus 9mm f/8.0 Fisheye Body Cap Lens ($99) - Mounts on both Olympus and Panasonic Micro Four Thirds cameras, this petite lens takes very big pictures. It features a constant f/8 aperture and a 35mm equivalent focal length of 18mm. I carry one with me everywhere.
  • lexar-256gb-ssd.jpg

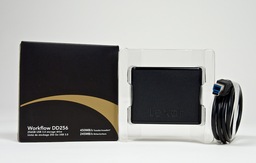
  • Lexar Professional Workflow 256GB SSD USB 3.0 Storage Drive ($129) - Leveraging USB 3.0 speeds, the drive provides read transfer speeds up to 450MB/s and write speeds up to 245MB/s. I copied a 37GB Aperture library to the Lexar and the process only took 2 minutes, 46 seconds. Once the library was copied to the drive, I ran Aperture from it, and the performance was terrific. Small size (2.9" x 2.4" x 0.9") and very light. Kit includes USB 3.0 cord. Integrates with Workflow HR1 and HR2 USB and Thunderbolt 2 hubs. PC and Mac compatible.
  • 35 Percent Off Rocky Nook eBooks - Choose from an extensive library of great photography books and download and give instantly. The perfect "last minute" gift idea. Use discount code: Thanks2014 at checkout.
  • canon-24mm-pancake.jpg

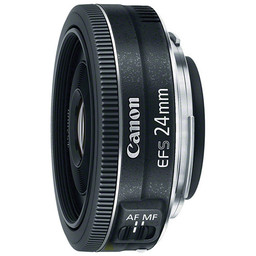
  • Canon EF-S 24mm f/2.8 STM lens ($149) - Providing a 38mm-equivalent focal length, this lens takes on a slightly wider-than-normal perspective to benefit its use in a broad variety of shooting situations. A stepping motor AF system pairs well with cameras featuring the Movie Servo AF mode, where it will deliver fast, smooth, and nearly silent focusing performance that can instantly be manually overridden at any time. It's not often we can photographers a lens as a gift, this is a terrific one at an amazing price.
  • wd-wireless-hd-angle.jpg

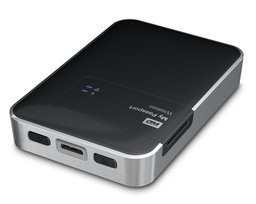
  • WD 1TB My Passport Wireless hard drive ($179) - Incredible device that includes an SD card reader, 1 TB of storage, and a built-in WiFi access point. Works with iPad, iPhone, and Android mobile devices, as well as Mac and Windows computers. Allows for photo backup on the road, even without a computer. Plus it wirelessly serves and can receive content using its built-in WiFi - one cool hard drive.
  • pro-tactic-front-and-back-web.jpg

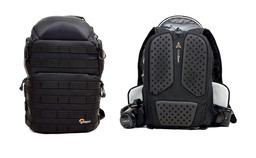
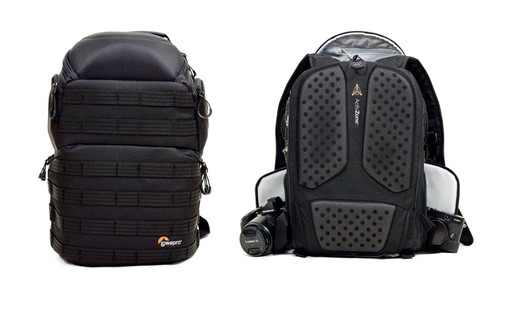
  • The Lowepro ProTactic 350 AW ($199) camera/laptop backpack. The real standout feature of this backpack is its versatility. Lowepro has designed access to your gear from the top, back, and both sides. Everything stays organized and easy to get to. Great for mirrorless and DSLRs. Accommodates a 13" laptop. One of the best backpacks I've ever tested. (You can read my full review of the ProTactic 350AW here.)
  • Canon-S110-front.jpg

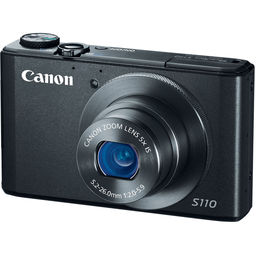
  • Canon PowerShot S110 compact camera ($249) - The PowerShot S110 is an advanced compact digital camera with a 12MP resolution 1/1.7" CMOS sensor, redesigned high speed autofocus, built-in WiFi, and 3" touchscreen display. It also shoots Full HD video and RAW files in several aspect ratios. Its 5x optical zoom lens has the 35mm equivalent of a 24-120mm focal length, while the built-in Control Ring allows for easy access to functions and settings. It's a wonderful camera.

Story #2 - Book of the Month: Photography as Meditation - Tap the source of your creativity. Use discount code: PMED at RockyNook.com

Virtual Camera Club News

Photo Assignment for November 2014 is "Layers".

Pano Cards from Red River

Inkjet Pano Cards are guaranteed to turn heads and get friends, family, and clients to take notice of your work. Pano Cards are perfect for your your landscapes and wide angle shots. Try something new and make a tall crop for your work printing on the card vertically. Unfolded, the pre-scored sheets are 8" x 9". When folded, the Pano Card is 9" x 4". The Pano Card uses a standard #10 business envelope. Learn more at Pano Card FAQ page.

A Note from SizzlPix

They've ramped up their capacity, so we can go for volume for the holidays.

Special for TDS listeners, a 20% discount on all SizzlPix ordered, now through end of November! Using the comment space on the newly streamlined SizzlPix order page, write "TDS 20 percent discount."

SizzlPix! is qualified for PayPal "Bill Me Later," No payments, No interest for up to 6 months, which means, have your SizzlPix! now, and pay nothing until May 2015! "Hang your SizzlPix before Christmas, and pay nothing until Mothers Day!"

And Finally...

If you haven't done so already, please post a review for The Digital Story Podcast in iTunes.

BTW: If you're ordering through B&H or Amazon, please click on the respective ad tile under the Products header in the box half way down the 2nd column on thedigitalstory.com. That helps support the site.

Download the Show

In addition to subscribing in iTunes, you can also download the podcast file here (36 minutes). You can support this podcast by purchasing the TDS iPhone App for only $2.99 from the Apple App Store.

More Ways to Participate

Want to share photos and talk with other members in our virtual camera club? Check out our Flickr Public Group. And from those images, I choose the TDS Member Photo of the Day.

Podcast Sponsors

lynda.com - Learn lighting, portraiture, Photoshop skills, and more from expert-taught videos at lynda.com/thedigitalstory.

Red River Paper -- Keep up with the world of inkjet printing, and win free paper, by liking Red River Paper on Facebook.

SizzlPix! - High resolution output for your photography. You've never seen your imagery look so good. SizzlPix.com. SizzlPix! now is qualified for PayPal "Bill Me Later," No payments, No interest for up to 6 months, which means, have your SizzlPix! now, and pay nothing until May!

Want to Comment on this Post?

You can share your thoughts at the TDS Facebook page, where I'll post this story for discussion.

I have a new favorite travel bag. The Lowepro ProTactic 350 AW ($199) holds my 13" MacBook Air, iPad mini, Olympus OM-D, FujiFilm X20, lenses, hard drives, and accessories, yet fits neatly under the seat in front of me while flying, or easily in the overhead compartment.

Lowero ProTactic 350 AW

The real standout feature of this backpack is its versatility. Lowepro has designed access to your gear from the top, back, and both sides. Everything stays organized and easy to get to.

I've been testing the ProTactic 350 AW, and have published a detailed review with lots of photos on c't Digital Photography Magazine. If you're interested in an all-in-one carrying solution, then this backpack is worth a look.


Nimble Photographer Logo

The ProTactic 350 AW has a solid Nimbleosity Rating. What does that mean? You can learn about Nimbleosity and more by visiting TheNimblePhotographer.com.

Want to Comment on this Post?

You can share your thoughts at the TDS Facebook page, where I'll post this story for discussion.

If you haven't updated your Google Nik Collection of plugins for a while, you might be greeted with an unhappy surprise after migration to Mac OS X Yosemite.

In my case, I was asked to reregister. And when I did, the software wouldn't accept my code. What caused this is incompatibility between the new operating system and an older version of the Nik suite.

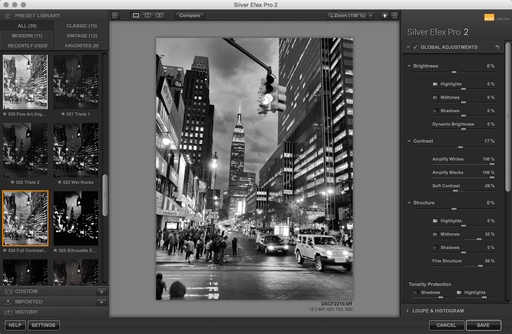
silver-efex-2pt2.jpg Everything is working fine again now that I have the latest version of Silver Efex Pro 2.

I contacted tech support and asked them to call me. Within a few minutes I learned that the most current version (2.2.x) of the Nik Collection seems to work well with Lightroom, Aperture, and Photoshop running on Yosemite. Google is working on an updated version of the suite that will ensure full compatibility. We should see that before too long.

If you haven't checked your Nik apps since upgrading to Yosemite, you might want to do so now. That way, you can get everything straightened out before you're in a time crunch.

Want to Comment on this Post?

You can share your thoughts at the TDS Facebook page, where I'll post this story for discussion.

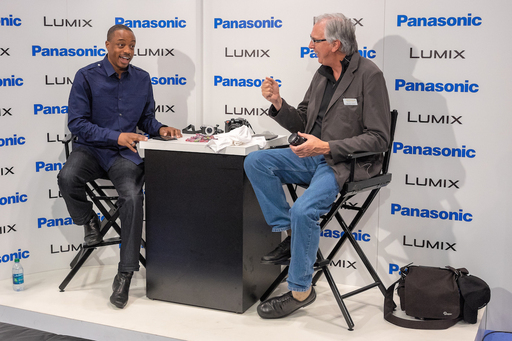
Frederick Van Johnson and I got together in the Panasonic booth during PhotoPlus Expo and drilled deep into the world of Nimble Photography. This is a terrific conversation that covers the foundation of "traveling light with plenty of might."

Thanks to Frederick, Tom Curley, and the entire Panasonic team for producing this informative, entertaining, video.

Frederick-and-Derrick.jpg


Nimble Photographer Logo

This interview has a high Nimbleosity Rating. What does that mean? You can learn about Nimbleosity and more by visiting TheNimblePhotographer.com.

Want to Comment on this Post?

You can share your thoughts at the TDS Facebook page, where I'll post this story for discussion.

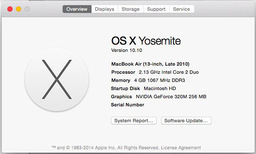
MB-Air-2010-Yosemite.jpg

My main computer is a 15" mid-2012 MacBook Pro with Retina Display. It's a heck of a machine that's serving me well.

But I also have a late-2010 MacBook Air that I prefer for traveling. It's more nimble when working on the road. My debate with this machine was whether or not to bring it inline with my main computer and iOS 8 devices.

At first, I decided against this move. My feeling was that Mac OS X Yosemite and Adobe Creative Cloud apps would tax the machine beyond its capabilities. Given a choice, I was opting for perceived performance over compatibility with my computing ecosystem.

After a week in New York with the MB Air running Mavericks and my older software, I changed my mind. Yosemite had spoiled me on the 15" machine. Using Mavericks now seemed like a huge step backwards. I didn't like using the Air anymore. And that is not where I wanted to be. So, I decided to roll the dice.

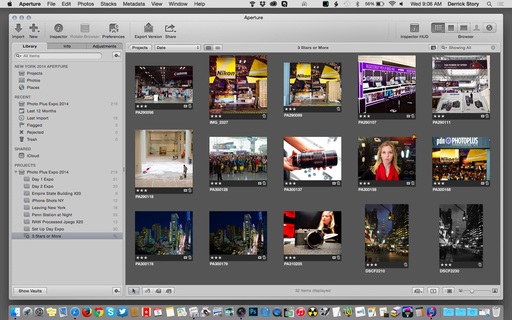
yosemite-aperture-3pt6.jpg Aperture 3.6 running on Yosemite on a late-2010 MacBook Air.

I installed Mac OS X Yosemite, Adobe Creative Cloud, and updated Aperture, iPhoto, and the suite of iWork apps... then held my breath.

After initial testing, everything is running great. In fact, I like the new environment better. The first thing I noticed is that the screen rendering on the Air is more inline with my other computers. In other words, the pictures look better. This is particularly helpful for image editing.

Next, performance seems on par with what I was used to with this computer. My "go to" photo apps: Aperture, Lightroom, and Photoshop, all seemed fine. Certainly they were not running as fast as they do on the MacBook Pro, but I didn't expect that. What I wanted was compatibility without paying a huge performance price.

At the end of the day, that's what I got. By upgrading the 2010 MacBook Air, I extended the life of this computer. In other words, revitalize. And maybe it will hold me until Apple releases the Retina Display model (which is what I really want!).

Want to Comment on this Post?

You can share your thoughts at the TDS Facebook page, where I'll post this story for discussion.

This week on The Digital Story Photography Podcast: In-Camera RAW Processing, Notes from New York, Photography as Meditation - All of this and more on today's show with Derrick Story.

Snapshot - Left my hotel for dinner in NY with the X20 in my jacket pocket and just enough light in the sky. A few minutes later I experienced one of those moments I just love.
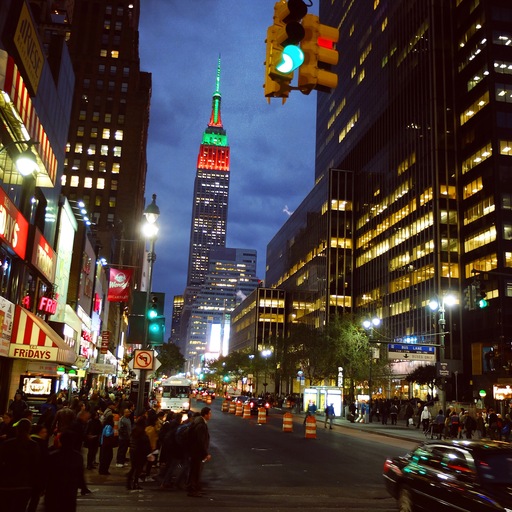
Empire State Building New York City

Weekly Update - Olympus gives us a peek at the 300mm f/4 that's coming in 2015 (PhotoPlus Expo 2014).

In other news, Epson SureColor P600 looks like a great enthusiast/pro printer. This 13" printer yields incredible blacks and vibrant colors. Shipping starts in early 2015. Estimated price is $799. (PhotoPlus Expo 2014)

And finally, How to Use Keystone Compensation with the Olympus OM-D E-M1. (Source: The Digital Story).

Story #1 - In-Camera RAW Processing: A Powerful, Yet Often Overlooked Feature. Here's a look why I think you should consider a second look at this capability.

Story #2 - PhotoPlus Expo Recap - Great week in New York. My highlight was visiting with so many members of our virtual camera club community. Here's more about it.

Story #3 - Book of the Month: Photography as Meditation - Tap the source of your creativity. Use discount code: PMED at RockyNook.com

Virtual Camera Club News

Photo Assignment for November 2014 is "Layers".

Pano Cards from Red River

Inkjet Pano Cards are guaranteed to turn heads and get friends, family, and clients to take notice of your work. Pano Cards are perfect for your your landscapes and wide angle shots. Try something new and make a tall crop for your work printing on the card vertically. Unfolded, the pre-scored sheets are 8" x 9". When folded, the Pano Card is 9" x 4". The Pano Card uses a standard #10 business envelope. Learn more at Pano Card FAQ page.

A Note from SizzlPix

They've ramped up their capacity, so we can go for volume for the holidays.

Special for TDS listeners, a 20% discount on all SizzlPix ordered, now through end of November! For orders placed by October 31, there should still be time for free mini-samples prior to production.

Using the comment space on the newly streamlined SizzlPix order page, write "TDS 20 percent discount," and if a free mini-proof is wanted prior to production, "free proof first," and your mailing address.

And Finally...

If you haven't done so already, please post a review for The Digital Story Podcast in iTunes.

BTW: If you're ordering through B&H or Amazon, please click on the respective ad tile under the Products header in the box half way down the 2nd column on thedigitalstory.com. That helps support the site.

Download the Show

In addition to subscribing in iTunes, you can also download the podcast file here (30 minutes). You can support this podcast by purchasing the TDS iPhone App for only $2.99 from the Apple App Store.

More Ways to Participate

Want to share photos and talk with other members in our virtual camera club? Check out our Flickr Public Group. And from those images, I choose the TDS Member Photo of the Day.

Podcast Sponsors

lynda.com - Learn lighting, portraiture, Photoshop skills, and more from expert-taught videos at lynda.com/thedigitalstory.

Red River Paper -- Keep up with the world of inkjet printing, and win free paper, by liking Red River Paper on Facebook.

SizzlPix! - High resolution output for your photography. You've never seen your imagery look so good. SizzlPix.com. SizzlPix! now is qualified for PayPal "Bill Me Later," No payments, No interest for up to 6 months, which means, have your SizzlPix! now, and pay nothing until January!

Want to Comment on this Post?

You can share your thoughts at the TDS Facebook page, where I'll post this story for discussion.
I felt like it was an escape scene from a James Bond movie.

My assignment was to reach JFK Airport in time to catch my flight to California. But I had to navigate the New York Marathon that was underway and a Dalai Lama protest. My position was the New Yorker Hotel at 34th St. and 8th Ave. In the lobby, I waited on the ready with my two bags: one contained my camera and iPad, the other my clothes.

"Derrick, Derrick!" my name was called. I was whisked to a black 2014 Toyota Camry by a man in chauffeur clothing. He reached for my bags to put them in the trunk. "Not that one," I said pointing to the Lowepro Urban Reporter 150. "It goes in the car with me."

Dalai Lama Protesters Protesters chanting "Dalai Lama Stop Lying," in Manhattan on Nov. 2, 2014, claiming intolerance toward the Shugden Buddhists. Photo by Derrick Story.

The driver took a shortcut through a parking garage, and when we emerged, we were in the middle of the protest. "So, that's where the noise is coming from," I thought. Agitated participants were on both sides of the street. To my right, supporters of the Dalai Lama. Across the street were those claiming intolerance toward the Shugden Buddhists.

I pulled my Olympus OM-D E-M1 from the camera bag with one hand while powering down the window with the other. I managed to catch three frames before the driver saw an opening and punched the gas. They were in our rearview mirror in seconds.

The moral of the story for me is this: Always have your camera ready. Never let them lock it in the trunk. And, you seldom know what's around the next corner. (And yes, I had returned my settings from the previous "night shoot" back to my default set. So the camera was ready to fire.)


Nimble Photographer Logo

I wrote about the incessant chanting on the Nimble Photographer, titled, The Pounding of the Drum. This was composed in the morning before I knew what was going on, or where, precisely, it was located.

You can learn about Nimbleosity and more by visiting TheNimblePhotographer.com.

Want to Comment on this Post?

You can share your thoughts at the TDS Facebook page, where I'll post this story for discussion.
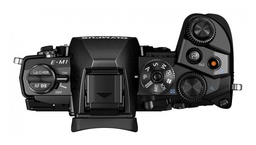
olympus-om-d-em1-top.jpg

The Olympus OM-D E-M1 mirrorless camera includes Keystone Compensation that allows photographers to correct for converging lines in-camera.

There are two ways to apply this correction: 1) while shooting using the control dials on the top deck of the camera, or 2) using the RAW/Jpeg Edit function while viewing images. Here are the steps for both methods.

Keystone Compensation While Shooting

  1. Make sure you have Firmware 2.0. You can check this by going to the Menu and navigating to the wrench icon on the left side. The Firmware option will appear on the right. Once you navigate to it, it should read "Body:2.0" or later.
  2. Enable Keystone Comp. In the Menu, go to Camera Icon 1 on the left side and navigate to Keystone Comp. at the bottom of the screen. Turn it "on."
  3. Activate the LCD for live view by pressing the "monitor" button directly to the left of the viewfinder on the back of the camera.
  4. On the LCD screen, you should see the Keystone icon at the top and two scales with a green bar, one on the bottom and the other on the right. If you don't see these, press the INFO button repeatedly until they appear.
  5. Rotate one of the top control dials, and you'll see the image adjust. On my E-M1, the control dial around the shutter button adjusts the image horizontally, and the back control dial adjusts the image vertically.
  6. Once you begin an adjustment, a green arrow appears to show you which direction you're moving. Also, the scale for the adjustment you're not using will disappear. You can bring it back by "centering" the adjustment you're currently working on.
  7. Once the image looks good, take the picture.
  8. Move the green indicator bar back to center, then turn off Keystone Compensation.
  9. To save time, you can assign one of the Function buttons, such as Fn2, to quickly enable Keystone Compensation. If you do that, it will be grayed out in the Menu screen.

Penn Station, NY, No Keystone Compensation - Photos by Derrick Story. Penn Station No Compensation

Penn Station with Keystone Compensation Applied In-Camera with the E-M1 Penn Station With Compensation

Apply KeyStone Compensation in RAW/Jpeg Edit Mode

  1. Make sure you have Firmware 2.0. You can check this by going to the Menu and navigating to the wrench icon on the left side. The Firmware option will appear on the right. Once you navigate to it, it should read "Body:2.0" or later.
  2. Press the Play button and navigate to the image you want to correct on the camera's LCD screen.
  3. Press the OK button and choose either "RAW Data Edit" or JPEG Edit." Press OK.
  4. Navigate to "Custom2." Find the Keystone Compensation on the right side of the screen and enable it.
  5. Press the INFO button to make the adjustment to the image. As you move the Control Dials, a white box will indicate the adjustment you're making. Once the image looks the way you want, press the OK button.
  6. Press the OK button again, and choose "Yes." The correction will be applied.
  7. Press the Menu button to exit the screen and view your corrected photo.

The Keystone Compensation produces a Jpeg based on your size and compression settings. The final image looks amazingly good, and all done within the camera and ready to use.

More Features with Firmware 2.0

Tethering is also available with this firmware update. To learn more about that, see my article, Tethered Shooting for Product Photography.

Want to Comment on this Post?

You can share your thoughts at the TDS Facebook page, where I'll post this story for discussion.
Fast Memory Cards Need Fast Readers

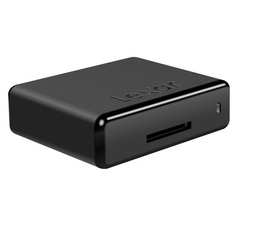
lexar-sr1-card-reader.jpg

I had an interesting talk with the folks at Lexar today and learned about their new UHS-I and UHS-II SD memory cards.
Currently, I'm more interested in the UHS-I cards because none of my cameras are UHS-2 compatible anyway. But the Lexar UHS-II cards also have UHS-I controllers, so they match up well with my existing cameras and will perform great in the future.

I like the 32 GB Lexar Pro 1000X UHS 2 U3 SDHC ($46) and the 64 GB Lexar Pro 1000X UHS 2 U3 SDHC ($80).

Now for many of us, the most noticeable benefit of these SD cards comes when we're downloading images to our computers. A full 32 or 64 GB card can take a while to offload all those RAW files and videos. To maximize this speed (and the return on your investment), get a compatible card reader.

With these speedy memory cards, a USB cable or your computer's built-in card reader won't be as fast as a tuned unit.

A good choice is the Lexar Professional USB 3.0 Dual-Slot Reader ($28) or the Lexar Professional Workflow SR1 Card Reader for SDHC/SDXC cards ($21). A matched card reader has a tuned controller that maximizes throughput from memory card to computer. A tandem like that can increase speed up to 8X compared to a USB 2 cable transfer.

One other thing. The drive in your computer is part of this recipe. If you have a fast SSD drive, then the flow of data can be quite speedy with this setup. A slower spinning hard drive does impact potential performance.

Want to Comment on this Post?

You can share your thoughts at the TDS Facebook page, where I'll post this story for discussion.