January 2008 Archives

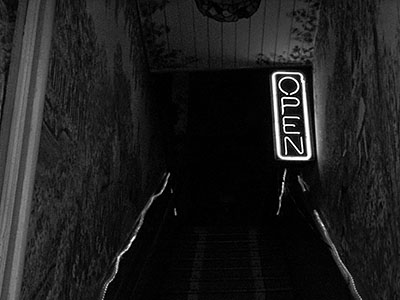
"Neon Open Sign" - Grab Shot 137

jay_hunt_gs.jpg

"When I saw the entrance with a neon open sign," said Jay Hunt, "I couldn't resist taking a couple of shots. It seemed so foreboding and beckoning at the same time. There was nothing but this black void after a couple of steps and the eerie light of the sign -- it was like someone from the 'dark side' saying, 'Come in if you dare.' I converted the image to black and white to work with the mysterious mood and to make it seem even more timeless."

If you have a candid you'd like to share, take a look at our Submissions page, then send us your Grab Shot.

And you can view more images from our virtual camera club in the Member Photo Gallery.

Event Calendar

Events! See the TDS Event Calendar for photography workshops, speaking engagements, and trade show appearances.


Technorati Tags: , ,

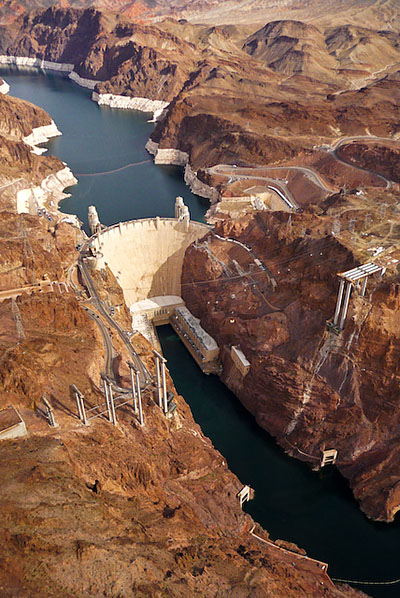
Shooting from a helicopter is tricky business. You have to photograph through glass that is often curved and full of reflections. Unlike with other through-glass shooting, you can't put your camera lens up against the surface because of the rotor vibration while flying. I was dealing with all of these factors while capturing this image of Hoover Dam with Lake Mead in the background at the Arizona/Nevada border in Southwestern USA.

hoover_dam_web.jpg

So here's how I did it. I used a Panasonic LUMIX TZ5 (just announced at PMA) in aerial scene mode. What that does (and what you can do on your own) is activate image stabilization and "warm up" the white balance to offset the coolness of shooting from above. I then looked for a patch of clean glass and held the camera as close to it as possible without touching it. I watched the reflections as the pilot maneuvered, and shot when the reflections weren't apparent.

You can increase your odds of success by wearing dark clothing (that doesn't reflect in the glass as much) and bringing a polarizer filter. Both help minimize reflections in the glass. If you're using a compact, bring one that has as wide a focal length as possible. The TZ5 goes to 28 mm, which helped considerably for capturing big scenes.

Photo of Lake Mead and Hoover Dam by Derrick Story using Panasonic TZ5, 1/320th at f-3.3, ISO 100, using aerial scene mode.


"How I Did It" is a new feature of The Digital Story featured on The Digital Photography Companion mini site. These are techniques from virtual camera club members who have built upon information in The Digital Photography Companion, or have come up with new tips altogether.

We're building a living library of knowledge for everyone to use (and contribute to). If you have a "How I Did It" tip to share, just send it to me with the sample photo, and put "How I Did It" in the email subject.

Technorati Tags: , , , , ,

julieanne_kost_web.jpg

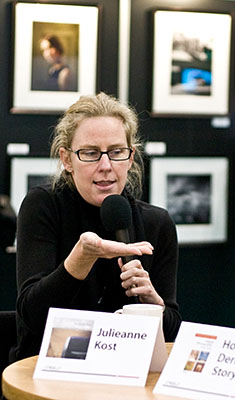
Julieanne Kost is one of my favorite Lightroom evangelists. I sat down with Julieanne at PhotoPlus Expo in New York to talk about Lightroom, DNG, and organizing lots and lots of photos. Julieanne shares plenty of great tips in this interview. I think you'll enjoy it.

You can check out Julieanne's book, Window Seat on Amazon.com

Photo of Julieanne Kost at PhotoPlus Expo by Colleen Wheeler.

Monthly Photo Assignment

Edges is this month's photo assignment. Where does one thing begin and another end? How about the edges of the day, the mind? Lots of possibilities for this one. You can read more about how to submit on our Submissions page. Deadline for entry is Jan 31.

Listen to the Podcast

Now that I've piqued your curiosity, it's time to listen to today's audio show titled, "Julieanne Kost on Lightroom and DNG." You can download the podcast here (32 minutes). You can also subscribe to the podcast in iTunes

The Digital Story Podcasts are available for direct download from Apple iPhones. I've created a special mobile download page here. Just load the page in Safari, browse the podcast line-up, and click on the one you want to listen to.

Want to share photos and talk with other members in our virtual camera club? Check out our new Flickr Public Group. It's a blast!

Check out what you can do with an $150 underwater housing and a compact point and shoot by taking a look at my underwater gallery from the Caribbean.

Have you looked at the Park by the Numbers Camera Phone Project? If you have a camera phone, you've got to check this out.

Event Calendar

Events! See the TDS Event Calendar for photography workshops, speaking engagements, and trade show appearances.


Technorati Tags: , , , , ,


Sponsor Notes...

Lowepro Bags for Photographers On the Go -- Lowepro gear for every type of camera rig, every type of photographer.

Add Magic to Your Slideshows -- FotoMagico presentations are so amazing that your audience will be asking how you did it.
alan_amundsen_water2.jpg

The December 2007 Photo Assignment was "Water," and we have an excellent selection of images to show you -- 27 photos submitted by Digital Story members who demonstrate their ability to see and capture the various states of water.

To produce the gallery, the pictures were first loaded into Aperture. I then added the accompanying stories to the IPTC caption field and combined it with the EXIF data from the photograph. The final step was to create a web gallery in Aperture and upload it to the Digial Story server. You can view this month's photo assignment here.

The January 2008 assignment is "Edge." Start working on your contribution now. Details can be found on the Submissions page. Because of our new gallery format, you can now submit photo assignment pictures up to 600 pixels in the widest direction. Please follow the instructions carefully for labeling the subject line of the email for your submission. It's easy to lose these in the pile of mail if not labeled correctly. For example, the subject line for next month's assignment should be: "Photo Assignment: Jan 2008." Also, if you can, please don't strip out the metadata. And feel free to add any IPTC data you wish (These fields in particular: Caption, Credit, Copyright, Byline), I use that for the caption info.

Good luck with your January assignment, and congratulations to all of the fine contributors for December. It's an excellent collection of images.

Photo by Alan Amundsen

Technorati Tags: , ,

Here's a new feature for The Digital Story: "How I Did It." These are techniques from virtual camera club members who have built upon information in The Digital Photography Companion, or came up with a new tip altogether.

The "How I Did It" tips will appear on The Digital Photography Companion mini-site, so we can build a living library of knowledge for everyone to use (and contribute to). If you have a "How I Did It" tip to share, just send it to me with the sample photo, and put "How I Did It" in the email subject.

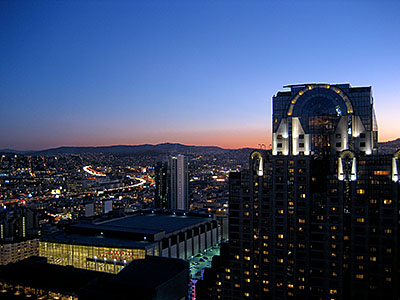
This week's "How I Did It" is from Hans Stolz. Hans attended my Five Shooting Techniques to Make Your Pictures Look Better than Everyone Else's at Macworld SF (which was based on content from Digital Photography Companion). He liked the "Shoot at Night and Twilight" tip, and gave it a try from his hotel room in San Francisco. Here's what Hans had to say.

Hans_twilight_sf_hidi.jpg

"I own a Canon 10D and a Canon IXUS 65 camera," says Hans. "The photo, however, was shot with the IXUS 65 in my hotelroom in the Westin (former Argent) after your talk at the MacWorld conference. I followed your instructions on night shots."

"Here is how I actually did it:"

  1. I used my office chair which I rolled to the window.
  2. The camera was positioned on the armrest of the chair. I adjusted the camera so that it didn´t look in a right angle to the window (I think that is better for focusing).
  3. I set the camera in manual mode, the ISO to 80, flash off and the self timer to 10 seconds. 2 seconds didn´t work because the chair was still vibrating after 2 seconds.
  4. All the lights in the room were turned off.

"Fortunately, the Argent has floor to ceiling windows."

Hans camera was set to: ISO 80, f-2.8 with a 1 second exposure. Thanks Hans for sharing your work and your ingenuity!

Event Calendar

Events! See the TDS Event Calendar for photography workshops, speaking engagements, and trade show appearances.


Technorati Tags: , , , , ,

canon_xsi_front.jpg

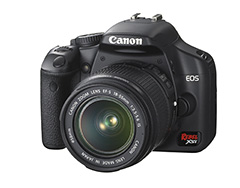
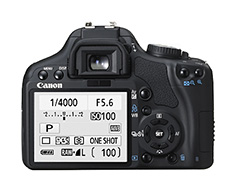
There are a lot of things to like about the just-announced Canon Digital Rebel XSi (450D). Inclusion of the DIGIC III processor is important. I'm using that processor in the G9, and it elevates the game noticeably. Also, 3.5 fps in a Rebel? My gosh, I don't have that speed in my EOS 5D. Having such a fast frame rate in a camera that sells for $799 US is a boon to folks who want to leverage burst mode. And you can shoot up to 53 JPEGs in burst, or 6 RAWs. Not bad at all.

The 3" Live View LCD is also a nice touch. Canon has designed this LCD so you can use it at odd viewing angles. You know how hard it is to shoot through a DSLR at ground level. Now with Live View on this well-designed LCD, low-angle shooting won't be a back-breaking task.

canon_xs1_back.jpg

Believe it or not, I'm not as thrilled about the 12.2-megapixel sensor, especially if the DIGIC III can't control its noise at high ISOs. Since I haven't shot with the camera yet, it's too early to tell for sure. But I do know that my 10 megapixel XTi is nosier than the 8 megapixel XT. I'd like to see what the DIGIC III can do with a 10 megapixel sensor instead. But more to discover on this front.

I should also mention that, if you do go for the kit with the 18-55, that lens is now optically image stabilized, and it only costs you $100. Something to consider.

Overall, the Canon Rebel XSi looks like a great upgrade at a compelling price. I think its going to put great image quality and versatility in the hands of promising photographers... and the result will be more beautiful pictures. I'll follow up after I have a chance to play with the camera in Las Vegas at PMA.

The Canon XSi is available on Amazon for $799 US.

Technorati Tags: , , , , ,

A Cornucopia of Keywording Advice

keywords.jpg

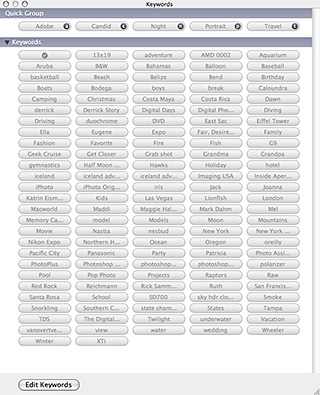
I was reading Jon Canfield's post this morning, Using Standard Keywords, and I began to wonder about how many articles we've published on O'Reilly Digital Media on the art and science of using keywords.

So I did a quick search on the subject, and came up with list of 20 posts that help you organize your photo library. This is a true cornucopia of keywording advice.

So, for those of us in the middle of winter, now might be the opportune time to finally figure out what our approach is to organizing our libraries. And even if you don't want to actually do anything about it, you can read these cool articles and tell yourself it's research.

Event Calendar

Events! See the TDS Event Calendar for photography workshops, speaking engagements, and trade show appearances. I'm teaching an Aperture Lab at PMA next week.


Technorati Tags: , , ,

nikon_d300.jpg

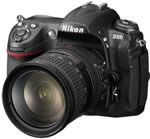
Nikon's D300 DSLR ($1,799 US) is the successor to the popular D200 that has been seen in the hands of many pros. Initial reports about this camera have been very positive, with improvements in high ISO shooting.

PhotobraphyBLOG has just reviewed the Nikon D300 and writes:

"The mid-range digital SLR camera market has never been so competitive, with new models recently announced by virtually all the major manufacturers. The Nikon D300 is the latest prosumer model to pass through our review lab. With the highest price-tag of any of the main contenders, it has a lot to live up to, but a quick glance at the spec sheet reveals some impressive features. A new 12.3 APS-C sized sensor, 51 point AF system, 3 inch LCD screen, 6fps continuous shooting, Live View mode and ISO range of 100-6400 are all squeezed into the D300’s dust and water resistant magnesium alloy body. We published some impressive photos and an in-depth report when nature photographer Jan Vermeer took the D300 all the way to Antartica. Now Gavin Stoker hits the not-quite-so-cold streets of London to find out what the Nikon D300 is capable of in a more everyday setting."

Nikon shooters take note. This looks like a sweet body for sure.

Technorati Tags: , , , , ,

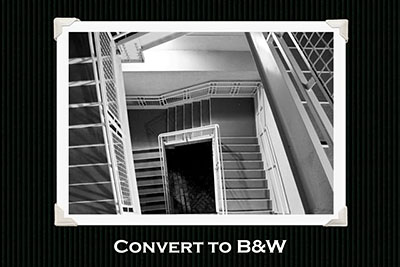
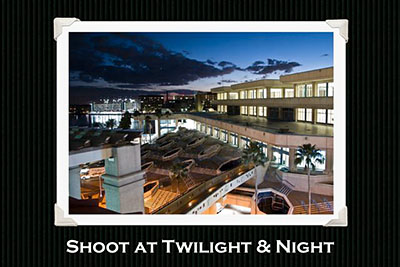
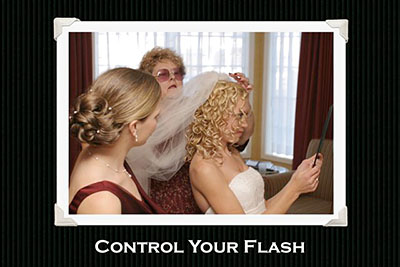
try_bw.jpg

You can distinguish your work from others. If ten people are given an assignment to shoot a cityscape, you want your photo to be the one that stands out from the crowd.

In this podcast, I cover five reminders that will help your photos look different than those of your peers. No magic here. Just good photography technique. I provide sample images at the end of this post.

Monthly Photo Assignment

Edges is this month's photo assignment. Where does one thing begin and another end? How about the edges of the day, the mind? Lots of possibilities for this one. You can read more about how to submit on our Submissions page. Deadline for entry is Jan 31.

Listen to the Podcast

Now that I've piqued your curiosity, it's time to listen to today's audio show titled, "5 Ways to Distinguish Your Photos." You can download the podcast here (29 minutes). You can also subscribe to the podcast in iTunes

The Digital Story Podcasts are available for direct download from Apple iPhones. I've created a special mobile download page here. Just load the page in Safari, browse the podcast line-up, and click on the one you want to listen to.

Want to share photos and talk with other members in our virtual camera club? Check out our new Flickr Public Group. It's a blast!

Check out what you can do with an $150 underwater housing and a compact point and shoot by taking a look at my underwater gallery from the Caribbean.

Have you looked at the Park by the Numbers Camera Phone Project? If you have a camera phone, you've got to check this out.

Event Calendar

Events! See the TDS Event Calendar for photography workshops, speaking engagements, and trade show appearances.


Technorati Tags: , , , , ,


Sponsor Notes...

Lowepro Bags for Photographers On the Go -- Lowepro gear for every type of camera rig, every type of photographer.

Add Magic to Your Slideshows -- FotoMagico presentations are so amazing that your audience will be asking how you did it.


shoot_at_night.jpg

control_flash.jpg

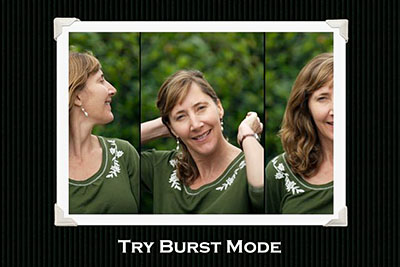
burst_mode.jpg

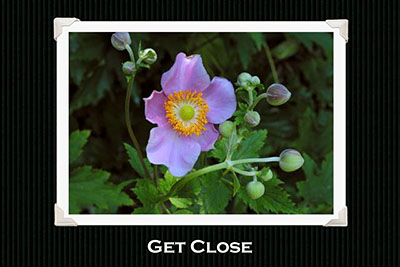
get_close.jpg

photo_finder.jpg

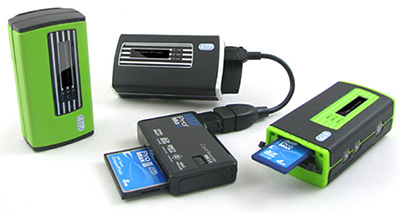
Since we don't have Geotagging in most of our cameras yet, here's a slick device for SD Card shooters that enables us to add GPS position data directly to JPEGs. ATP's Photo Finder is a pocketable GPS tracking device that lets you insert the SD memory card from your time-synced camera, then it writes the positions directly to the file header of each shot. You can then plot the data with Google Earth to see the location of each photo.

The $100 device seems easy enough to use. Just make sure that your camera's internal clock is in sync with the Photo Finder, and that the device is on while you're out taking pictures. When you take a break, just remove the SD card from your camera, insert it in Photo Finder, and the data is added to each shot. Later, when you upload the images to your computer, you'll see the GPD info in the EXIF data.

If you shoot RAW, my guess is that you'll have to shoot RAW+JPEG and use Photo Finder for the companion files. Also, it doesn't accommodate CF Cards directly, but as shown in the illustration, can tag them via a USB memory card reader. This is an interesting device that I want to explore more.

If you have any experience with it, please post a comment.

Technorati Tags: , , , , ,

Previewing Matte Colors in iPhoto '08

iphoto_matte.jpg

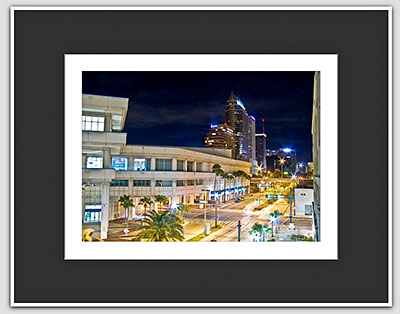
I've been sharing a lot of iPhoto '08 tips lately at Macworld SF in the O'Reilly Booth. But I discovered a new one this weekend that I thought you might enjoy. When you have a print, and want to figure out the perfect color for the front matte, you can do so right on your computer.

One of the new goodies in iPhoto '08 is the Customize function in the Print dialog box. It allows you to design (and print if you want) single and double mattes in a variety of color combinations. I wanted to figure out a good color standard matte to use for a few prints I had just output, so I loaded the images into iPhoto and used Customize to preview different colors.

It worked great! After a few minutes, I had figured out just the right combinations for all of my prints. Now I can order the mattes online, or just head down to the local art store with my notes.

You may be thinking at this point, "how does it look when you actually make a print with these "virtual mattes"? Actually, they look pretty cool. And for fun I wouldn't hesitate at all. But you will use a lot of ink for those big solid areas, plus, I still like the way a real rag paper matte looks. But in a pinch? Never say never.

Technorati Tags: , , , ,

casio_ex-f1.jpg

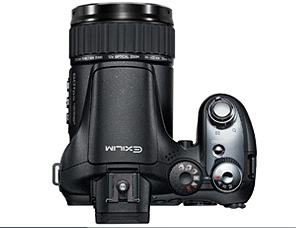
I stopped by the Casio booth here at Macworld and played with the Casio EXILIM Pro EX-F1. It's still in the final stages of development, but they should have a full production model ready for testing by PMA. I have an appointment with Casio there to test the latest version.

I'm excited by these specs: 60 fps still photography, CMOS sensor, DNG format, 7 fps burst mode with flash, HD and SD video, external mic jack, and tons of other goodies. This camera is a true speed demon.

I'll report more after testing the finished model in Las Vegas, but I wanted to get it on your radar now.

Technorati Tags: , ,

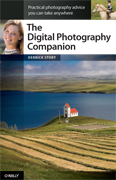
dpc_116x180.jpg

The Digital Photography Companion is the culmination of two years work. To prepare this book, I spent hours working with photographers and aspiring photographers to find out exactly what they wanted. As a result, I settled on an 8.5" x 5.5" trim size that allows enough room for healthy-sized photographs, yet fits in the backpack, purse, camera bag, or jacket pocket.

The book is designed to help you make pictures that distinguish your work from others. By mastering the controls on your camera and learning a few basic techniques, you can create virtually any type of image you want. The book will be your companion for such an endeavor. And you can order it now, and receive it by early March.

I also wanted to create a companion site for the book, so we've launched the The Digital Photography Companion online. Here I will publish tips to augment the information in the book, and feature photos from TDS members who have used these techniques to create their own look. More on this once the Companion is published.

In the meantime, I will be adding content to the DPC page regularly. I hope you enjoy this new addition to The Digital Story and share it with your friends.

Event Calendar

Events! See the TDS Event Calendar for photography workshops, speaking engagements, and trade show appearances.


Technorati Tags: , ,

Remember the Pocket Tripod Too!

loris_diner.jpg

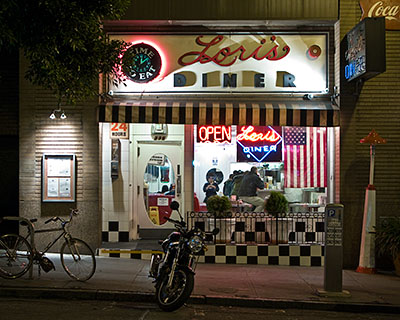
I constantly remind people to keep their compact cameras with them while on the go. That way if a great shot presets itself, they can grab it. But when going out for an evening stroll, take the portable tripod too!

Compact tripods, such as my favorite, Gorillapod by Joby ($22), enables me to use sign posts, newspaper machines, and just about anything else I can find standing still on the street, and use it for making long exposures. In the case of this image of Lori's Diner on Mason Street in San Francisco, I use the Gorillapod and a parking meter to make a 1/4 of a second exposure.

This technique will improve your street shooting at night, enabling you to capture sharp shots at low ISO settings (I used ISO 80 for this image on a Canon G9, and there is virtually no noise at all.) Then all you have to do is set your Drive mode to "self-timer," and the magical world of lights at night become your personal photo studio.

Photo by Derrick Story using a Canon G9 and Gorillapod.

Event Calendar

Events! See the TDS Event Calendar for photography workshops, speaking engagements, and trade show appearances.


Technorati Tags: , , , , ,

Raw is Still the Favorite Topic

book_passage_jan08_web.jpg

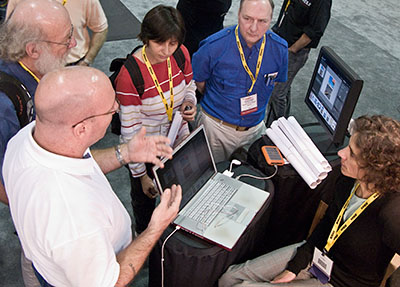
During Sunday night's panel discussion at Book Passage in Corte Madera, and then during the first day of the Aperture workshop at Macworld SF, Raw was still the most popular topic among attendees.

I imagine we're in for more Raw discussion at Wednesday's Apple Store event (in San Francisco) that features Mikkel Aaland, Harold Davis, Rick Smolan, and myself. (directions and details here.) The talk starts at 4:30 pm.

The crux of what many want to know is why they should shoot Raw, what are its advantages, and how best to process the files? I'm happy about the interest because I think Raw provides some nice options for photographers, including:

  • Ability to recover highlights and shadows better than with Jpegs.
  • Option to change white balance with no quality penalty.
  • More data to work with overall for high quality conversions.

I hope to keep the conversation going on Wednesday night at the Apple store.

Photo by Colleen Wheeler take with Canon 5D with a 50mm f-1.8 lens.

Event Calendar

Events! See the TDS Event Calendar for photography workshops, speaking engagements, and trade show appearances.


Technorati Tags: , , ,

sharpen_mask.jpg

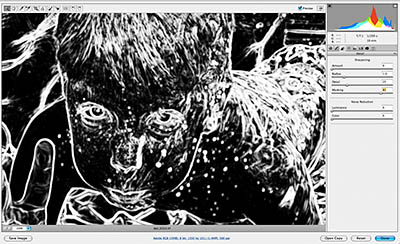
One of the problems with sharpening in Adobe Camera Raw and Lightroom could be that you're not controlling what gets sharpened and what doesn't. For example, you may want to sharpen the buildings in a scene, but not the sky above them. Sharpening sky is a waste of time that only increases image noise. Same for portraits, you want to sharpen the eyelashes but not the skin pores.

You may have more control than you realize if you use this simple technique in either Adobe Camera Raw or Lightroom. Display your photo at 100 percent (this technique won't work unless you're working at full view). Go to the Sharpen menu. Hold down the Option or Alt key (Mac or Windows) and click on the Masking slider. You be treated with an instant edges mask that shows you exactly what will be sharpened. The white areas will be affected and the black areas will be left untouched. Move the slider to the right until you have a mask that works for your photo.

Now all you have to do is set the Radius (usually 1.0 or less), then slide the Amount until you have the sharpening you want.

This provides you excellent control and will improve your sharpening greatly.

Technorati Tags: , , , , ,

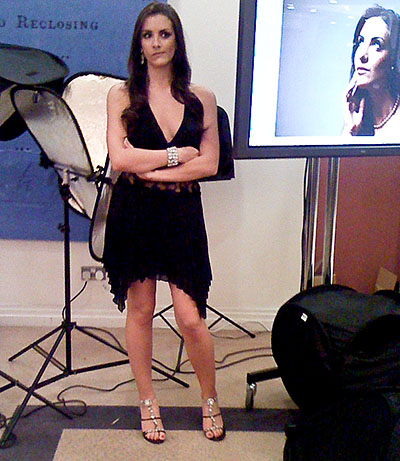
"Bored Model" - Grab Shot 136

matt_newsome_gs.jpg

"While at the recent Nikon Expo in London, the model got bored waiting round for her session to start," said Matt Newsome. "Inset is the great look she could pull for the camera on demand, whereas I think her expression in this shot is probably the more honest one!"

Matt captured his grab shot with an Apple iPhone in existing light at f-2.8.

If you have a candid you'd like to share, take a look at our Submissions page, then send us your Grab Shot. If we publish it, you'll receive an ultra cool custom carabineer keychain.

And you can view more images from our virtual camera club in the Member Photo Gallery.

Event Calendar

Events! See the TDS Event Calendar for photography workshops, speaking engagements, and trade show appearances. Next week is a busy one for me in the Bay Area of Northern California. Check out speaking events for Book Passage in Corte Madera and at Macworld in San Francisco.


Technorati Tags: , ,

PS_elements6.jpg

We think that Photoshop Elements 6 is one of the best values in Mac software (along with iLife 08). Adobe just announced Elements 6 for the Mac at a preorder price of $89.99 US and upgrade from $69.99 US. For those dollars you get a Universal Binary version of Photoshop that features many of Adobe's latest technologies such as Photomerge GroupShot, Faces, Web Galleries and improved tools for B&W and scrapbooking. Plus, you can even correct lens distortion.

Here's what Adobe has to say:

"New features based on proprietary Photomerge technology let users easily combine the best facial expressions and body language from a series of shots to create a single, perfect group shot. The new Quick Selection Tool reduces a once time-consuming select-and-adjust task to a single click. Photographers – beginner to expert – can choose from one of three edit modes, each geared toward a different experience level. A new Guided Edit mode helps walk users through the steps of improving a photo. Photoshop Elements 6 software streamlines editing with clean, uncluttered screens that draw focus to the photos, with new tabs providing simple access to the many capabilities of the program. Additional enhancements include an improved conversion tool that dramatically converts color images into elegant, nuanced black-and-whites."

Technorati Tags: , , , ,

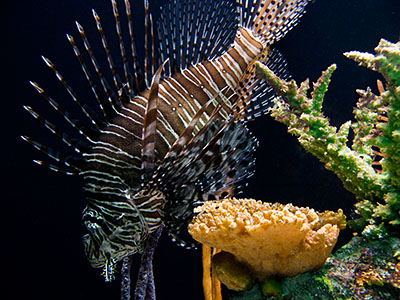
How to Shoot at Aquariums

aquarium_lionfish.jpg

I was wandering around the The Florida Aquarium in Tampa last night for the Kodak-sponsored Closing Night Party at Imaging USA. Since it was a photography show, it's safe to assume that most of the attendees were shooters.

I was amazed at how many people did not know how to shoot exhibits at an aquarium. So I thought it might be time for a refresher. This technique applies to shooting through hotel windows and portholes on airplanes too.

  1. Turn off the flash. (all it's going to do is cause reflection in the glass).
  2. Increase your ISO (for aquarium and museum shooting) to 400 or above.
  3. Look for a subject that isn't moving too fast. You're not going to engage in action photography here unless you switch to movie mode (which is also fun!).
  4. Find a clean place in the glass, and put the nose of your camera right against it. This eliminates reflections from your surroundings.
  5. Shoot in Raw if you have it. You'll most likely have to do a little image cleanup when you get back to the computer.
  6. Don't worry about bad shots. You'll have some loss for this type of assignment. But the keepers will be outstanding!

All types of water shots are fun. I was lucky enough to see Howard Schatz this week and learn how he did those amazing dancer images underwater. Aquariums also provide great opportunity. Apply this technique, and you'll come home with a prized shot.

Photo of Lionfish by Derrick Story, captured with a Canon G9, ISO 400, f-2.8 at 1/6 of a second. Processed in Adobe Lightroom.

Technorati Tags: , , , , , ,

katrin_eismann_tampa.jpg

What's the difference between "input" sharpening and "output" sharpening? Do you know when to use Adobe Camera Raw or when you should launch Photoshop? How would you like to learn a new way to convert to B&W in ACR that introduces less noise? Katrin Eismann, coauthor of the just released The Creative Digital Darkroom, shared many of her Raw processing secrets over the course of two days in Tampa.

In this podcast I highlight some of my favorite techniques that Katrin demonstrated, including my two favorites: how to better use the masking slider for input sharpening, and a new way to convert to B&W in ACR. These techniques also work in Adobe Lightroom.

You can get more goodies directly from Katrin and Sean by visiting their Creative Digital Darkroom web site.

Katrin Eismann (seated) holding court in the Adobe booth at Imaging USA in Tampa. Photo captured with a Canon G9 at ISO 400 by Derrick Story.

Monthly Photo Assignment

Edges is this month's photo assignment. Where does one thing begin and another end? How about the edges of the day, the mind? Lots of possibilities for this one. You can read more about how to submit on our Submissions page. Deadline for entry is Jan 31.

Listen to the Podcast

Now that I've piqued your curiosity, it's time to listen to today's audio show titled, "Katrin Eismann on ACR Sharpening, B&W and More." You can download the podcast here (25 minutes). You can also subscribe to the podcast in iTunes

The Digital Story Podcasts are available for direct download from Apple iPhones. I've created a special mobile download page here. Just load the page in Safari, browse the podcast line-up, and click on the one you want to listen to.

Want to share photos and talk with other members in our virtual camera club? Check out our new Flickr Public Group. It's a blast!

Check out what you can do with an $150 underwater housing and a compact point and shoot by taking a look at my underwater gallery from the Caribbean.

Have you looked at the Park by the Numbers Camera Phone Project? If you have a camera phone, you've got to check this out.

Event Calendar

Events! See the TDS Event Calendar for photography workshops, speaking engagements, and trade show appearances.


Technorati Tags: , , , ,


Sponsor Notes...

Lowepro Bags for Photographers On the Go -- Lowepro gear for every type of camera rig, every type of photographer.

Add Magic to Your Slideshows -- FotoMagico presentations are so amazing that your audience will be asking how you did it.
printerville_logo.jpg

Rick LePage had managed Macworld Magazine, covered the photography beat for other publications, had more printers than I have cameras, and is now putting his talent into a new web site called Printerville. Rick says this about the site:

"We love everything about printers, paper, ink and printing. We have been playing with them, writing about them, and using them for more than two decades, so we like to think we know more than a little bit about them. Of course, the world of printers is a big one, and we’ve chosen to focus largely on photo printers for amateur and professional photographers."

Rick launches the site with a news piece about the new Epson R1900. "The R1900 uses a reformulated inkset, called UltraChrome Hi-Gloss 2, consisting of eight individual inks: the gloss optimizer, matte and photo black, and cyan, magenta, yellow, red and orange. Epson claims that the orange ink, which replaces blue in the original Hi-Gloss inks, increases the printer’s overall gamut and provides improved flesh tones, while the new formulations of magenta and yellow inks improve the blues and greens, respectively, in most prints."

If you love printing too, or just want to keep up on everything in the world of output, be sure to spend some time over at Printerville. I think it's going to be a terrific resource for all of us.

Technorati Tags: , ,

20080106-0827-Tampa_web.jpg

Regardless if you're using Lightroom or just managing files on your own, a good file naming convention that you can apply to your pictures on import will help you stay organized. In his Imaging USA session, "Organizing: Asset Management in Lightroom," Seth Resnick provided this tip.

He created a preset in Lightroom to name his pictures logically when he brings them into the application:

DATE_custom-name_sequential-number.file-extension

So a file would look something like this for a shot he'd take today: 20080107_tampa_0001.cr2

I like his method, but use a variation on it. Instead of adding a sequential number after the custom name, I retain the original file suffix. I like keeping that original number the camera assigns in all of my file names. So my picture would look something like this on import:

20080106_0827_tampa.cr2

The 0827 is the original file suffix the camera assigned. Then, when I output the image for various purposes, such as for web publishing, I add this:

20080106_0827_tampa_web.jpg

Regardless of which method you embrace, now, at the start of 2008, is a good time to establish a useful file naming convention that you can use going forward.

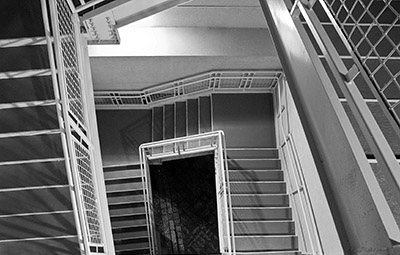
About the photo... I captured this with a Canon G9 while walking down a stairwell in the hotel. I used a GorillaPod to steady the camera during the .8 exposure. I keep the ISO to 80 and converted the image to B&W in Lightroom.

Technorati Tags: , , , , ,

In Tampa for Imaging USA

tampa_night_reflection.jpg

Lots of interesting stuff going on today at Imaging USA. I'm going to sit in on a Seth Resnick talk, "Organizing: Asset Management in Lightroom." I haven't had a chance to listen to Seth since he's moved from his management system to Lightroom, so this should be fun to hear how one of the DAM masters leverages Adobe's latest photo software.

I'm also looking forward to Katrin Eismann's talk on "The Power of Camera Raw." Katrin has a new book out, The Creative Digital Darkroom that looks just great. I have a copy at home that I can't wait to dig in to.

And of course, the Expo opens today with lots of high profile exhibitors. I want to get my hands on the new Nikon D3. It looks terrific on paper.

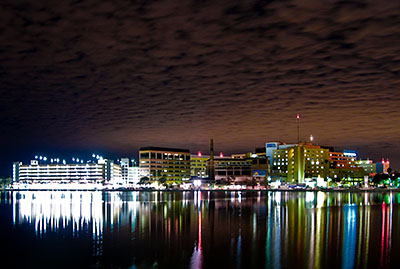
I took this photo last night while walking home from dinner. There's plenty of water in Tampa, and it makes for good night shooting, especially when you get some interesting skies to boot. I used the Canon G9 resting on the railing of a bridge (yes, I held on to the strap). With the self-timer on, I manually set the exposure to 15 seconds at f-2.8 keeping the ISO to 80 to control the image noise. I then processed the picture in Adobe Lightroom.

Photo of Tampa Night Reflections by Derrick Story.

Technorati Tags: , , , , ,

"Crazy Light" - Grab Shot 135

crazy_light.jpg

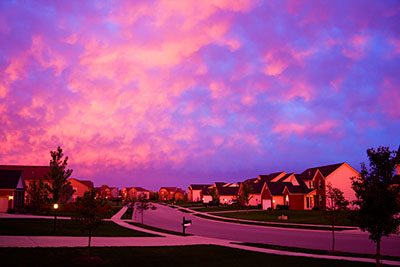
"The evening the light was amazing," said Alexey Stiop. "I was outside when I noticed the sky turning purple. I rushed in the house to grab my camera. I knew I wouldn’t have enough time to set up my tripod -–every second counts at sunsets. I leaned against the wall trying to stabilize the camera (I also used image stabilized lens) and took a series of shots within 5 minutes. I had my camera (Canon XTi) set in Aperture Priority mode at f/4 and exposed for the sky. I ended up with a number of decently sharp images at 1/5 sec exposure. This one had the peak color."

The Canon XTi was set to ISO 200 and handheld at 1/5th of a second with the zoom at 17mm. Minutes later, the shot was gone...

If you have a candid you'd like to share, take a look at our Submissions page, then send us your Grab Shot. If we publish it, you'll receive an ultra cool custom carabineer keychain.

And you can view more images from our virtual camera club in the Member Photo Gallery.

Event Calendar

Events! See the TDS Event Calendar for photography workshops, speaking engagements, and trade show appearances.


Technorati Tags: , ,

wide_angle_lens.jpg

Here's a fun project if it's miserable outside and you want to play with your photography. Find an old pair of corrective glasses for farsighted eyes, and make a do-it-yourself fisheye lens.

You can read all about, complete with instructions, at Photojojo, (which is a great site anyway for a rainy day).

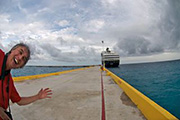
Oh, by the way, this shot was taken with a Nikon 10mm lens, not a DIY fisheye lens... don't expect these results with your hack ;)

Technorati Tags: , , ,

Prepare Your Hard Drives for 2008

lacie_drive_orange.jpg

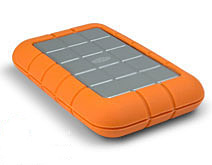
I've spent a lot of time lately backing up my portable drives, making sure my big drives are in order, and getting my photography act together for 2008. I've decided to close out my Aperture and Lightrooom libraries for 2007, and begin fresh libraries for 2008. I still carry my 2007 libraries with me on portable drives, and of course have them backed up in multiple locations.

This is a great time of year to get your digital house in order. I cover more of this stuff in this week's podcast, Getting Organized. 2008 will be our best workflow year yet!

Technorati Tags: , , , ,

The start of a new year is a great time to get organized. In this podcast, I discuss pulling together the serial numbers for your camera equipment, registration numbers for you software, and just getting things together in general.

reg_cert.jpg

I also remind folks about the new New Baggage Restrictions for Li-Ion Batteries.

Monthly Photo Assignment

Edges is this month's photo assignment. Where does one thing begin and another end? How about the edges of the day, the mind? Lots of possibilities for this one. You can read more about how to submit on our Submissions page. Deadline for entry is Jan 31.

Listen to the Podcast

Now that I've piqued your curiosity, it's time to listen to today's audio show titled, "Getting Organized." You can download the podcast here (27 minutes). You can also subscribe to the podcast in iTunes

The Digital Story Podcasts are available for direct download from Apple iPhones. I've created a special mobile download page here. Just load the page in Safari, browse the podcast line-up, and click on the one you want to listen to.

Want to share photos and talk with other members in our virtual camera club? Check out our new Flickr Public Group. It's a blast!

Check out what you can do with an $150 underwater housing and a compact point and shoot by taking a look at my underwater gallery from the Caribbean.

Have you looked at the Park by the Numbers Camera Phone Project? If you have a camera phone, you've got to check this out.

Event Calendar

Events! See the TDS Event Calendar for photography workshops, speaking engagements, and trade show appearances.


Technorati Tags: , , , ,


Sponsor Notes...

Lowepro Bags for Photographers On the Go -- Lowepro gear for every type of camera rig, every type of photographer.

Add Magic to Your Slideshows -- FotoMagico presentations are so amazing that your audience will be asking how you did it.
Technorati Tags: , , , ,