With the new Shared Photo Stream in Aperture 3.4.1 and iOS 6, you can set up mobile portfolios that can be viewed on your iPad, iPhone, Mac, or even Windows computer. You can limit accessibility to just your devices, or share individual streams (mobile portfolios) with friends. Here's how to set it up.
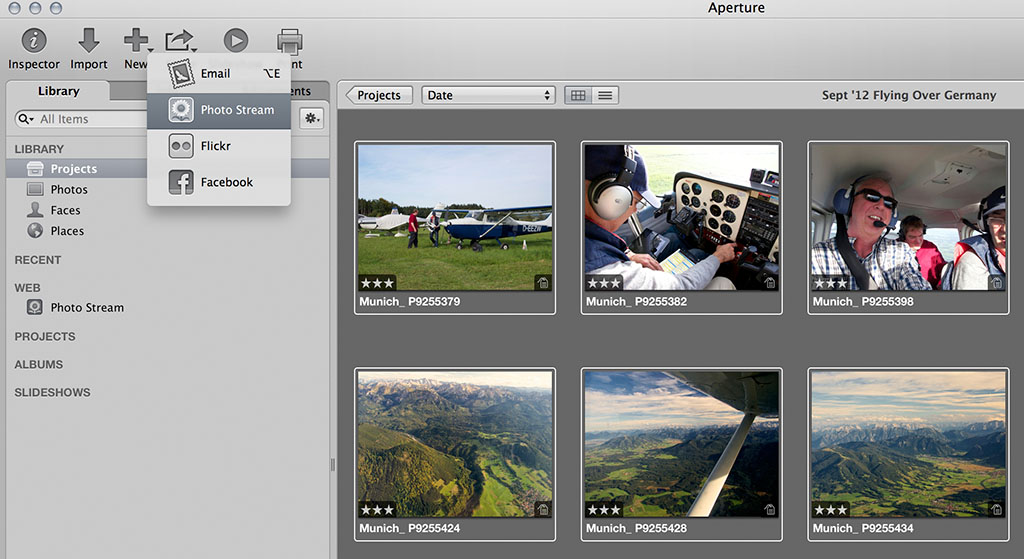 To get started, select your photos and then click on the Share button in Aperture.
First, you have to designate one library as your Photo Stream environment. This library can be opened in either iPhoto 9.4 or Aperture 3.4.1. You can't maintain Photo Streams from multiple libraries with one iCloud sign-in. So I've established one library that is my "Photo Stream Mission Control" and maintain it with iPhoto or Aperture, depending on my needs at the moment. Remember, it's very easy to switch among libraries now with the Shared Library Container.
Set Up a Shared Photo Stream
Select a group of photos, then click on the Share button and choose Photo Stream. If this is your first, you'll be asked to give it a name. After that, you can add the selected images to an existing Photo Stream, or create a new one.
I like creating unique Photo Streams for portfolio sharing. That way I can show a curated collection of photos instead of sifting through everything I've got. This helps with viewer attention span too.
 If you leave the "Share With" box blank, the Photo Stream will only be viewable on your devices.
Now you can set some parameters. If you want to share this with someone else, enter their iCloud email into the dialog box. They will be able to view your images on any iCloud-enabled device.
If the person doesn't have an iCloud account, you can still share with them, but then you have to check the box next to Public Website. The recipient will receive an email notification with a link they can view in any web browser. However this method puts your images on the Web, which is something you may not want. For tight control, it's best to stay within the iCloud ecosystem.
For Photo Streams only to be viewed on your ecosystem of devices, leave the "Shared With" box blank.
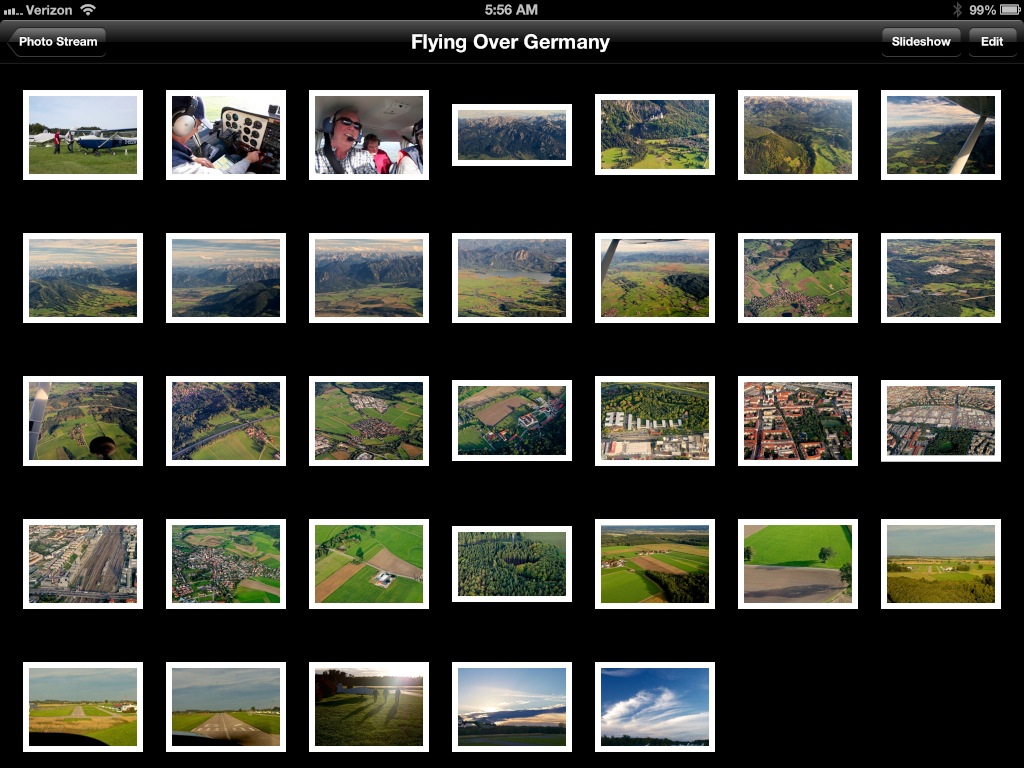 Now I can show off my pictures on the iPad or iPhone, yet the portfolio is controlled via Aperture.
Once you've published the Shared Photo Stream, you can add or subtract images from it, share with additional people, or unshare if needed.
It's an easy way to create and maintain portfolios that you can show at anytime, anywhere, on your iPad or iPhone. And they look great!
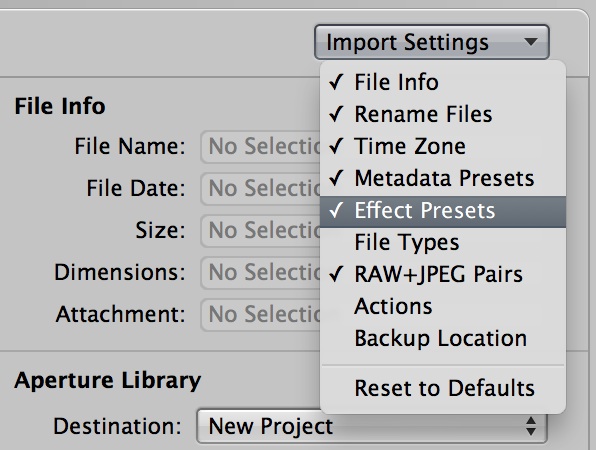
Aperture Tips and Techniques
To learn more about Aperture 3, check out my Aperture 3.3 Essential Training (2012) on lynda.com. Also, take a look at our Aperture 3 Learning Center. Tons of free content about how to get the most out of Aperture.
My next open Aperture Workshop is scheduled for Nov. 16 & 17 2012, in Santa Rosa, CA. You can get on the pre-registration list, plus learn about all the other photography workshops offered this season by visiting the TDS Workshops page.
The Digital Story on Facebook -- discussion, outstanding images from the TDS community, and inside information. Join our celebration of great photography!