August 2012 Archives

adobe_apps_dock.jpg

Good news out of San Jose. PetaPixel published an article pointing to an Adobe statement on the Photoshop.com blog, that Adobe "will provide support for HiDPI displays in the coming months, including the Retina Display available on the new MacBook Pro." According to the post, the updates will be free.

Photoshop CS6 and Lightroom 4 users who have the new MacBook Pro Retina Display should see quite a positive difference once the updates are available.


The Digital Story on Facebook -- discussion, outstanding images from the TDS community, and inside information. Join our celebration of great photography!


Want a compact camera that you can take anywhere, even 40' underwater? I put the Olympus TG-1 iHSthrough a grueling test during an 8-day trip to Maui, and have published my findings on TechHive in the article titled, Field Test: Olympus Tough TG-1 iHS.

Black Rock, Maui Skin diving at Black Rock in Maui with the Olympus TG-1

I loved the image quality, built-in GPS, fast f/2.0 lens (at the wide end), 4X optical zoom, 12 MPs of resolution, fast handling, light weight, all weather construction, clean menus, and pretty LCD screen. I think the TG-1 is a good value at $369 USand will serve adventurers well for years.

On the downside, the TG-1 doesn't shoot RAW and the LCD is still hard to see in certain lighting conditions underwater (the latter may be just the way it is with any LCD camera).

Check out my full report of the TG-1 iHS on TechHive. This is a terrific camera.


twitter.jpg Follow me on Twitter


battery_charger_om-d.jpg

About the only way you can get a spare Olympus-branded battery for the OM-D E-M5 is to buy a second body. So those of us who need a second cell, or who like to shoot with the Power Grip that holds another battery, are forced to look elsewhere for the time being.

I've tried the Power Tech 2-Pack Battery And Charger Kitthat sells for $24.95.

The kit includes two BLN-1 batteries, a portable charger, and a handful of other goodies. The charger has swing-out electrical prongs so you don't need a separate power cable to plug it into the wall. It also comes with a two-prong European adapter, and a car outlet adapter.

The batteries seem to last about 2/3 as long as the OEM Olympus batteries. I put the Power Tech cell in the OM-D body, then use the original Olympus BLN-1 in the power grip. In the menu, I instruct the camera to use the Power Grip battery first. I do this because it's much easier to change batteries from the grip than having to remove the grip to get to the one in the camera body. Basically, the Power Tech unit become my backup battery if I drain the Olympus unit.

The catch to all of this is that you can only charge the Power Tech batteries in the supplied charger. They are not compatible with your OEM Olympus charger. The bad news is that the Nimble Photographer doesn't like carrying two battery chargers. The good news is that they don't take up much room, plus I can charge two batteries at once.

I don't consider this a long term solution. But for the moment, I'm happy to have 3 batteries for my OM-D, and with a cash outlay of only $25.


Take a look at the Olympus Micro Four Thirds Gear Guide for an overview of cameras, lenses, and accessories.

Not all terrific cameras get the spotlight they deserve. The Pentax K-30 is a good example. It's the most affordable weather-sealed DSLR (body only at $846), captures Raw in the DNG format, includes sensor-based image stabilization so any lens you put on is stabilized, plus has a raft of cool features, including HDR and multiple exposure. I share my initial impressions as I prepare to write a formal review of this camera.

I then talk a bit about the recent rash of spam that has attacked our site. And I conclude with a brief wrap up of the Sonoma Coast Photography Workshop. Join me for this week's episode!

Listen to the Podcast

You can also download the podcast here (34 minutes). Or better yet, subscribe to the podcast in iTunes. You can support this podcast by purchasing the TDS iPhone App for only $2.99 from the Apple App Store.

Monthly Photo Assignment

Street Scene is the August 2012 Photo Assignment. You can read more about how to submit on our Member Participation page. Deadline for entry is August 30, 2012.

More Ways to Participate

Want to share photos and talk with other members in our virtual camera club? Check out our Flickr Public Group. And from those images, I choose the TDS Member Photo of the Day.

Podcast Sponsors

Red River Paper -- The $7.99 Sample Kit is back! And with free shipping.

Make Your Photos Sizzle with Color! -- SizzlPix is like High Definition TV for your photography.

Need a New Photo Bag? Check out the Lowepro Specialty Store on The Digital Story and use discount code LP20 to saven 20% at check out.


Technorati Tags:
, , , , ,


lightroom_4_dock_sm.jpg

Looking for Raw support for a new Sony DSC-RX100or Canon EOS Rebel T4idigital camera? Through Adobe Labs, Lightroom 4.2 Release Candidate (as well as ACR 7.2) is available with Raw support for the following models.

  • Canon EOS 650D / Rebel T4i
  • Canon EOS M
  • Fuji FinePix F800EXR
  • Leaf Credo 40
  • Leaf Credo 60
  • Nikon 1 J2
  • Panasonic DMC-FZ200
  • Panasonic DMC-G5
  • Panasonic DMC-LX7
  • Pentax K-30
  • Sony DSC-RX100

The Lightroom 4.2 release candidate is available as a free download for Lightroom 4 customers, and the Photoshop Camera Raw 7.2 release candidate is available for Photoshop CS6 customers. Both are available for Mac and Windows.

Apple also supports the Canon T4i with Digital Camera RAW Compatibility Update 3.14.


You can find more photo tips and "photography how tos" on my Pinterest page.


One argument to shoot Raw+Jpeg for your landscape work is the built-in distortion correction feature that we're seeing on many current DSLRs. When turned on, the camera corrects for barrel or pincushion distortion. That's the good news. Unfortunately that doesn't work for Raw files, only your Jpegs.

Fort Ross Road Corrected Distortion correction turned on in a Pentax K-30 with 18-135mm zoom.

I was part of a group that visited Ft. Ross in N. California during the recent TDS Sonoma Coast Photography Workshop. I used the opportunity to field test the new Pentax K-30 with 18-135mm Lensfor landscape shooting. I turned on Distortion Correction and shot Raw+Jpeg so I could compare the results.

Fort Ross Road Not Corrected Raw image from a Pentax K-30 with 18-135mm zoom.

Indeed, with Distortion Correction turned on, the Jpegs showed a clean horizon line (top image). The Raw file displayed distortion (bottom image) that would need to be corrected in post production.

For online posting and quick turnaround jobs, you may want to shoot Raw+Jpeg in this situation, so you can post the corrected files right away. Later, for your printing and other more detailed work, clean up the Raw files for maximum quality and control.


You can find more photo tips and "photography how tos" on my Pinterest page.


Alyssa Jayne

A combination of beautiful North Coast scenery and the fantastic Alyssa Jayne teamed up for a fun day of shooting at the the TDS Sonoma Coast Photography Workshop.

"It's hard to make my final selections," commented Scott Loftesness during the afternoon lab session. "There are so many good ones."

Day two will focus on landscape. We'll see what the North Coast provides for us...

Alyssa Up in the Air One of the day's assignments was to create a photo for a "pretend" Sprite soda commercial.


twitter.jpg Follow me on Twitter


It's Super Zoom Week!

pentax_x-5_superzoom.jpg

Been thinking about getting an all-in-one super zoom digital camera? Well, this is your lucky week. Pentax, Olympus, Nikon, and Canon all announced new models.

What type of photographer is the super zoom designed for? Someone who wants extended focal length topping out with long telephoto, but in a reasonably sized body. There's no messing around with interchangeable lenses. The kit you buy is the kit you use.

The Pentax X-5 ($279) features a 22.3-580mm zoom on a 16 MP body. It's powered by 2 rechargable AA batteries.

The Olympus SP-820UZ iHS ($329) sports a crazy 22.4 - 896mm zoom lens on a 14MP body. It also uses AA batteries.

The Canon PowerShot SX500 IS ($329) uses a 24-720mm zoom on a 16MP body.

And finally, the Nikon COOLPIX P7700 ($499) is designed for those who want reach, but like to shoot in low light. Its 28-200mm lens has a maximum aperture of f/2.0. The P7700 sports a 12MP body that can capture images at a fast 8 fps.

If you're looking for a lot of reach in a small package, one of these super zooms might do it for you.


The Digital Story on Facebook -- discussion, outstanding images from the TDS community, and inside information. Join our celebration of great photography!


Andriod Meets Nikon

nikon_s800c.jpg

The Nikon COOLPIX S800c digital camera ($349 US) doesn't have cellular (although how cool would that be), but it is Android powered with WiFi connectivity. (Hey, watch out for that zoom lens while using the touchscreen...)

The generous 3.5" rear OLED touch screen is big enough to take advantage of a boatload of apps available in Google Play. You're still going to have to duck in to a Starbucks (or maybe this is the time to get MyFi) to connect to the Internet. But once you do, you can process and share your images directly from the camera.

One of the many photo apps available in Google Play is Instagram. Can you imagine the leg up you'd have shooting with a 16 MP, 10X optical zoom, ISO 25-3200 Nikon camera?

Not fair!


twitter.jpg Follow me on Twitter


What's the biggest drawback to being the Nimble Photographer on photo assignment? Perception. If I show up with anything less than a big gun, will clients and participants take me seriously? I explore this phenomenon in the first segment of the show.

I then start laying the ground work for my trip to Germany in September to cover Photokina and Oktoberfest. If you're not all that familiar with Photokina, I provide some good context to help bring you up to speed.

And finally, I have a personal story that involves my iPhone. I know the best camera is the one you have with you, but I never expected this. And there's more... in this week's TDS podcast.

Listen to the Podcast

You can also download the podcast here (29 minutes). Or better yet, subscribe to the podcast in iTunes. You can support this podcast by purchasing the TDS iPhone App for only $2.99 from the Apple App Store.

Monthly Photo Assignment

Street Scene is the August 2012 Photo Assignment. You can read more about how to submit on our Member Participation page. Deadline for entry is August 30, 2012.

More Ways to Participate

Want to share photos and talk with other members in our virtual camera club? Check out our Flickr Public Group. And from those images, I choose the TDS Member Photo of the Day.

Podcast Sponsors

Red River Paper -- The $7.99 Sample Kit is back! And with free shipping.

Make Your Photos Sizzle with Color! -- SizzlPix is like High Definition TV for your photography.

Need a New Photo Bag? Check out the Lowepro Specialty Store on The Digital Story and use discount code LP20 to saven 20% at check out.


Technorati Tags:
, , , , ,


Making the Case for Live View

OM-D LCD

One of my favorite features on the Canon EOS 60D and the Olympus OM-D E-M5is live view. I'm discovering how effective composing on non-fixed-back LCDs can be for certain types of shots. It's ironic that we're used to this method for our camera phones and point and shoots, but seem to forget about it when picking up the DSLR.

I was so used to looking through the viewfinder that I would forget entirely about composing on the LCD. I'm over that now, and I'm using live view for about a third of my shooting. Some of the most common situations include:

  • Crowd shots where I hold the camera overhead.
  • Close up photography at weird angles.
  • Product shots in the studio.
  • Candids when I don't want to make people self conscious (holding the camera at my waist).

Big Crowd from Overhead By finding a good position and holding the camera over my head, I was able to compose this shot. Photo by Derrick Story.

Live view has really helped me with product photography. I move the camera around the subject at different angles until I find just the look I want. If I have enough light on the subject, I can capture the photo right on the spot. If you haven't done so already, try it.

Thanks to the addition of video recording with DSLRs, we're seeing more articulated LCDs than ever before. If you have one, try experimenting with live view for your still photography too. You might see the world in a slightly different way.


The Digital Story on Facebook -- discussion, outstanding images from the TDS community, and inside information. Join our celebration of great photography!


As I mentioned in yesterday's post, I'm not taking a DSLR on my assignment to Europe. Instead, I'm packing my micro four thirds kit and traveling light with two bodies and six lenses in a Lowepro backpack.

In preparation, I've been testing this kit in real world situations. (I might be crazy, but I'm not stupid.) Yesterday, however, was the first time I left my DSLR at home for a paid assignment.

Fun Ladies Fun Ladies. They were dying to get in a shot, so I let them. I held the OM-D high over my head and tilted the LCD screen to compose the shot. ISO 400 with no supplemental lighting. It's one of my favorites of the day. Photo by Derrick Story.

The job was to cover the Grapes to Glass event in the heart of Sonoma County's wine country. I took only one bag that held my micro four thirds kit including two flashes. Over the course of the afternoon and evening, I used two bodies, four lenses, and my lighting. I shot Raw and processed the work in Aperture 3.3.

Wine Pourers Wine Pourers. Captured with OM-D and 45mm f/1.8 lens at f/2.2. Off camera flash held over my head with my left hand. ISO 800. Photo by Derrick Story.

Bottom line: the shoot turned out beautifully. The images were sharp and colorful. I had no problem working with the Raw files in Aperture. And my back and shoulders feel great today.

Next test will be the TDS Sonoma Coast Workshop that begins on Friday. I'll keep you posted.


You can find more photo tips and "photography how tos" on my Pinterest page.


Getting Ready for Photokina

One of the biggest photography events in the western world is Photokina in Cologne, Germany, beginning Sept. 18, 2012. This amazing event happens every two years, and usually overlaps with Oktoberfest in Munich, just 5 hours away via train.

photokina_banner.jpg

I'll be on site covering the show in Cologne, then visiting Oktoberfest afterward. One of the major themes we'll see this year is mobile photography. A large amount of floor space has been dedicated to this topic, and it's on the hot list for many manufacturers.

I also anticipate major announcements from Canon, Nikon, Olympus, Panasonic, Sony, Samsung, and others. My sponsor, Lowepro, will be launching some terrific new products that I'm eager to discuss. I'll be posting on all of their social networks during the event, including Lowepro Facebook, Twitter and on Instagram (loweprobags). In fact, we'll be relying heavily on Instagram to share images on the other sites too.

As for my preparations, I'm traveling as light as possible. I'll be toting the MacBook Pro Retina Display for my heavy duty work (Aperture, Photoshop CS6, Final Cut X, etc.) and the new iPad for work in the field (iPhoto for iOS).

For my cameras, I'm placing my trust in the Olympus OM-D E-M5 system that will cut my gear weight by over half. I'll take five lenses and a backup PEN body. I'll also pack the new Olympus TG-1 for its tough, all weather capability and for its built-in GPS. Everything will fit easily in my Lowepro DSLR Video Fastpack 250 AWthat holds my camera gear, laptop, and iPad, yet fits easily on the plane both under the seat and in the overhead compartment.

At this point, you might be wondering why I'm getting prepared for this event a month in advance. I've learned over the years that if I start packing early, I forget much less. I'll keep you posted.


You can find more photo tips and "photography how tos" on my Pinterest page.


I get a kick out of creating landscape panoramas. When trying to photograph a beautiful vista, panoramas come closer to what I'm actually feeling while standing there.

Many cameras these days will handle the alignment and stitching for you. Some do better than others. I recently tested the Olympus TG-1 compact "tough" camera in Maui. While doing so, I tried its auto panorama scene mode. Here are the results.

Good Panorama Good Panorama

The camera performed well when I did this three-frame pano of the Maui rainforest. There are most likely flaws in the shot. But the forest hides them pretty well. This one I could show to friends.

The Bad Bad Panorama

Things got worse, however, when I tried to shoot ocean scenes with big skies. In this shot, the alignment is off, and you can see the seams in the sky where the 3 frames are adjoined.

The Ugly The Ugly.

But wait! Things can get worse. In this attempt just about everything that could go wrong, did.

Moral of the story. Handheld panoramas captured in auto stitching mode are a total crap shoot. Technology can make up for some of my laziness. But sometimes I just have to break out the tripod and shoot things the old fashioned way.

I have to admit though, these were fun to make.


You can find more photo tips and "photography how tos" on my Pinterest page.


Half the fun of image editing in a non-destructive environment is playing with different techniques. If you stumble across a look that you want to repeat in the future, you can save those settings as an Effect in Aperture. Here's how.

Mother and Child

Click on the Effects popup menu (near the top of the Adjustments panel) and choose "Save as Effect." This brings up the Effects Presets dialog where you can name your new look. At the same time, decide which image edits you want saved as part of the Effect. Some of the adjustments you might have done, such as tweaking Curves, might be specific to the photograph, but not necessarily part of the preset you're creating.

To eliminate an adjustment from the preset, just click on the "-" symbol next to its name. When you're done, click the OK button.

edit_preset_aperture.jpg

To apply the Effect to another image, go back to the Effects popup menu, and you should see your new preset in the list. Mouse over it to get a preview of how it will look. If you like it, just click and it will be applied to your image.

apply_preset_aperture.jpg

You can fine-tune the picture by using the other tools in the Adjustments panel.

Aperture Tips and Techniques

To learn more about Aperture 3, check out my Aperture 3 Essential Training on Lynda.com. Also, take a look at our Aperture 3 Learning Center. Tons of free content about how to get the most out of Aperture.

My next open Aperture Workshop is scheduled for Nov. 2012, in Santa Rosa, CA. You can get on the pre-registration list, plus learn about all the other photography workshops offered this season by visiting the TDS Workshops page.


The Digital Story on Facebook -- discussion, outstanding images from the TDS community, and inside information. Join our celebration of great photography!


For a week of hiking, snorkeling, and lounging around the pool in Maui, I depended on one camera - The Olympus Tough TG-1. Not only did it stand up to a week of island abuse, I got great pictures too. In this week's podcast, I talk about the Tough and how it was an integral part of my super nimble workflow.

Speaking of which, I detail the steps of getting the job done with just an iPad and the TG-1. Everything I needed to capture, organize, and publish fit in a light Lowepro Photo Hatchback bag. Don't believe it can be done???

And finally, I jumped in with both feet to Instagram while on the island. Near the end of the show, talk about the things I learned along the way. All of this and more in this week's TDS podcast.

Listen to the Podcast

You can also download the podcast here (32 minutes). Or better yet, subscribe to the podcast in iTunes. You can support this podcast by purchasing the TDS iPhone App for only $2.99 from the Apple App Store.

Monthly Photo Assignment

Street Scene is the August 2012 Photo Assignment. You can read more about how to submit on our Member Participation page. Deadline for entry is August 30, 2012.

More Ways to Participate

Want to share photos and talk with other members in our virtual camera club? Check out our Flickr Public Group. And from those images, I choose the TDS Member Photo of the Day.

Podcast Sponsors

Red River Paper -- The $7.99 Sample Kit is back! And with free shipping.

Make Your Photos Sizzle with Color! -- SizzlPix is like High Definition TV for your photography.

Need a New Photo Bag? Check out the Lowepro Specialty Store on The Digital Story and use discount code LP20 to saven 20% at check out.


Technorati Tags:
, , , , ,


My Week with Instagram

I have the opposite problem with my camera phone. I'm so used to carrying a regular camera that I forget to shoot with my iPhone 4S. So even though I have an Instagram account (derrickstory), I haven't really tapped its potential. That is, until last week.

golden_gate_bridge_ds.jpg Heading out of town for a trip to Maui. Instagrams by Derrick Story.

Since I was in Nimble Photographer mode already (iPad, Olympus TG-1, tropical drink), why not take advantage of the joy of iPhone photography and share those images immediately via Instagram? It was a good call.

vw_bus_on_maui.jpg VW Bus on Maui.

Shooting Instagrams is pure "slice of life" photography. Something catches your eye, you capture it immediately, add a little spice to it, then share. The whole process can be completed in a minute... enough time to catch up to the rest of the group that kept walking as you created your masterpiece.

breakfast_at_gazebo.jpg Breakfast at Gazebo on Maui.

So now that I'm back on the mainland, am I going to keep shooting Instagrams? Yes, indeed. I think they help me slow down a bit and pay more attention to the world around me.

If you want to explore with me, you can find Instagram in the App Store.

The Olympus TG-1iHS Camera"tough" is designed to withstand shock, cold, rain, and yes even immersion to 40'. I decided to put this camera to the "snorkeling test" on a recent trip to Maui to see how it would hold up to a week of water activity. The bottom line: this camera is not only tough, it takes great pictures. Here are a few samples. I will report more on its features in upcoming articles.

Black Rock, Maui Black Rock, Maui. Photos by Derrick Story.

Sea Turtle, Maui Sea Turtle, Maui

Ornate Butterflyfish, Maui Ornate Butterflyfish

Moorish Idol Moorish Idol


Take a look at the Olympus Micro Four Thirds Gear Guide for an overview of cameras, lenses, and accessories.

Canon issued a product advisory covering a potential focusing problem with the 40mm f/2.8 STM pancake lens.

In short, if you put pressure on the front of the lens, it may stop auto focusing. If this happens, you can fix the problem by detaching, then reattaching the lens. We should see a firmware update to correct this soon.

Canon 40mm Lens Canon 40mm prime mounted on a EOS 60D.

Where Did Everyone Go?

Sometimes the fun shots are available at dinner time.

After our meal, I got up from the table to work on this shot for a few minutes. And when I came back, everyone was gone.

Tiki torches at sunset

Sometimes the photographer's life is a lonely one...

Nimble Photographer in Maui

I want the sand beneath my toes and the sun low on the horizon... and not much more during my vacation in Maui. So when it comes to gear, I'm in Nimble Photographer mode.

Maui Sunset

Here's what I'm packing during my 8 days in paradise. Over my shoulder is the versatile Lowepro Photo Hatchback 16L AW. It protects my camera gear and iPad while leaving plenty of room for personal items while exploring the island. And when it's time hike to my favorite snorkeling spot, I remove the camera box allowing enough room in the bag to carry my mask, snorkel, fins (sticking out the top) and Olympus TG-1 underwater camera (more on this beauty in an upcoming post).

After I return from my swim, I put the camera box back in the Photo Hatchback and get into photographer mode. For these adventures I'm carrying the Olympus OM-D E-M5 with the 14-42mm zoom and Power Battery Holder HLD-6. I usually leave the bottom part of the HLD-6 back in my room and just use the grip.

OM-D with New Grip

I'm also carrying the M.Zuiko Digital ED 40-150mm f/4.0-5.6 R Lens, the 17mm f/2.8 Lens, and the 45mm f/1.8 Lens. All of this fits in the Photo Hatchback camera box along with the XZ-1 10MP Compact Camera that I also carry separately at times in my board shorts.

Olympus XZ-1 with VF-2 Electronic Viewfinder Olympus XZ-1 with VF-2 Electronic Viewfinder. I often choose the XZ-1 for my compact camera because I can use the electronic viewfinder with it, which is great in bright beach conditions. More about this in the article, Olympus XZ-1 with VF-2 Electronic Viewfinder - Best of Both Worlds?.

I round out this nimble kit with a Joby Gorillapod SLR-Zoom Flexible Mini Tripod with Ballhead and the new iPad with Camera Connection Kit.

So in my Photo Hatchback that only weighs 2 lbs to begin with, I have a 16 MP CSC body, 4 lenses, compact camera with f/1.8 zoom lens, underwater camera with f/2 zoom lens, tablet computer, card reader, and still tons of room for personal items. And with these tools that nary strain my shoulder, I can handle image editing, uploading, blog posting, and keep up with my social networking... all in-between the occasional refreshing drink.


Take a look at the Olympus Micro Four Thirds Gear Guide for an overview of cameras, lenses, and accessories.


Lowepro Photo Hatchback 16L AW

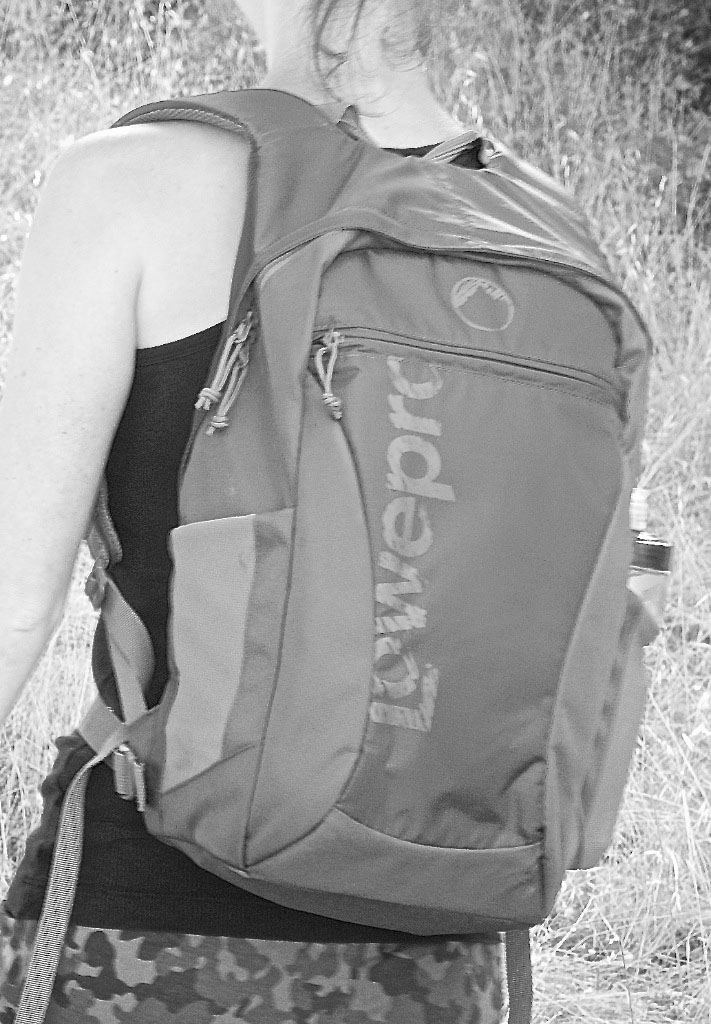
Leah Lavoneh works on both sides of the camera. As a junior college student, she studies Anthropology and enjoys taking photographs. To help cover expenses, she works part time as a model. Leah recently loaded up the Lowepro Photo Hatchback 16L AW and took it on a road trip to Oregon and Washington State. She was looking forward to exploring the beautiful scenery with a Canon DSLR and her outdoor gear.

"Hiking with the Photo Hatchback was an unexpected pleasure," Leah remarked. "Its compact size is deceiving; it has compartments for food, water bottles, sunscreen, extra clothing, flashlights, and other random stuff needed on the trail -- and all of this while still providing great protection for my camera."

Mount Ranier National Park
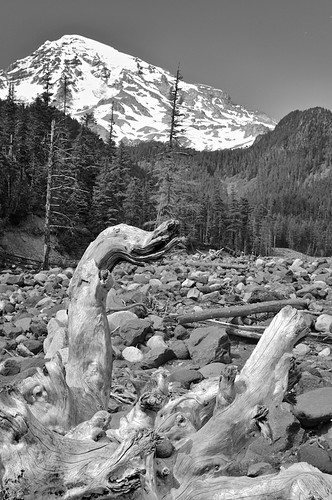
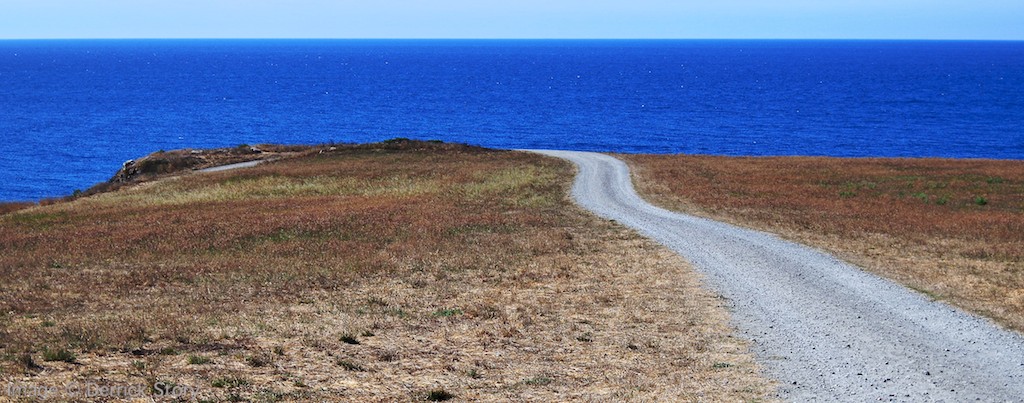
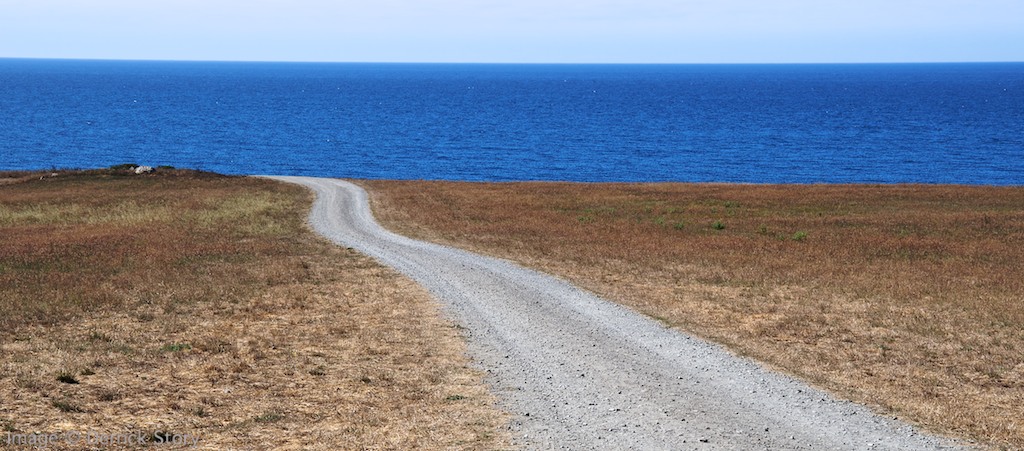
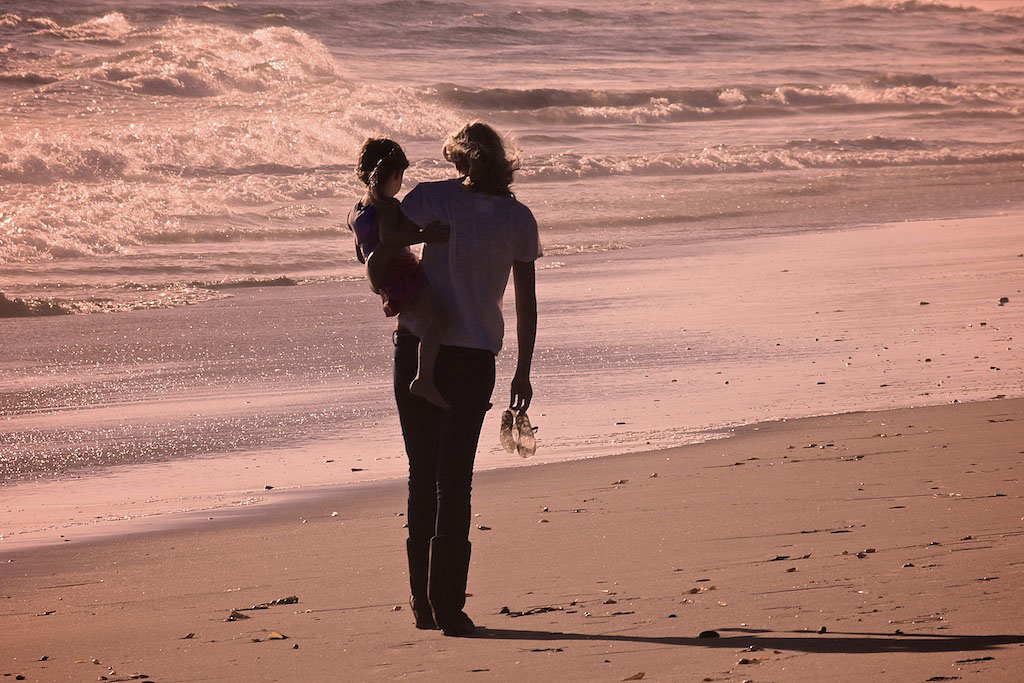
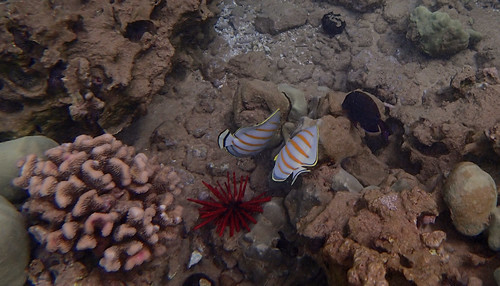
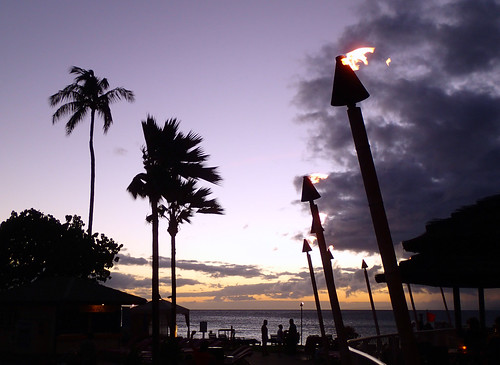
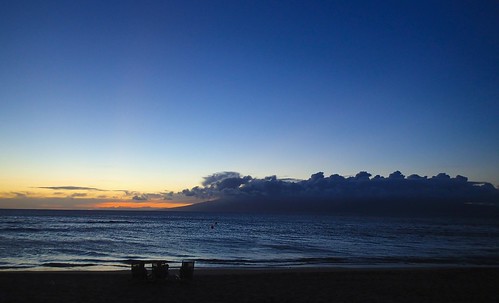
Mount Rainier National Park in Washington by Leah Lavoneh.

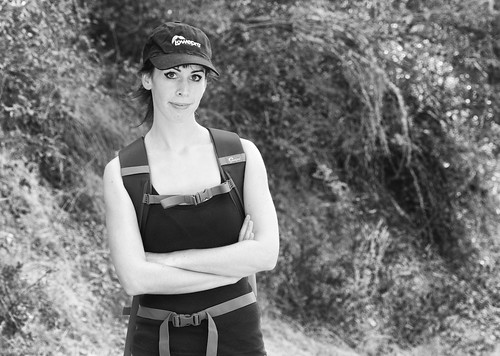
Part of the pleasant surprise with this bag unique "backside" compartment that keeps expensive gear protected, yet has fast access to make picture-taking easy. All Leah had to do was slide off the shoulder straps and swing the bag around via its waist belt. Then she could access her camera without having to set the bag on the ground.

Open Camera Compartment 
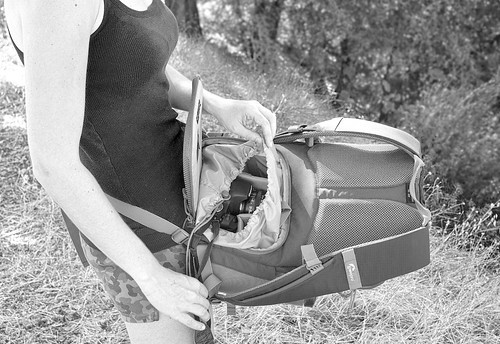
Backside camera access.

"The ability to use my camera while still wearing the backpack around my waist really made life on the trail easy," she said. "Not only did this feature help keep the backpack clean, it was much easier to put the camera away once I had taken the photo. In fact, it was so convenient, I found myself taking more pictures than normal."

Getting Camera Out "I loved not having to set my bag down in order to get to my camera," Leah said.

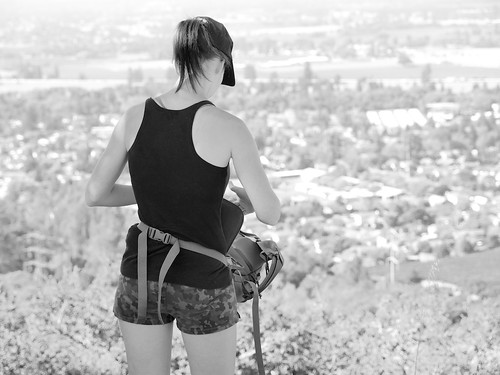
Having this kind of capacity without the heft kept Leah light on her feet while exploring the Northwest.

"The Photo Hatchback wasn't bulky at all. So, for example, when I was squeezing between boulders in Ape Cave (a pitch-black lava tube), I didn't have the annoyance that usually accompanies bigger backpacks."

Other helpful features of the Photo Hatchback include an All Weather cover in case the weather turns nasty, a dedicated pocket for an iPad, and a fully adjustable harness system for just the right fit.

Leah on the Trail

The only downside to convenient picture taking? "I have so many images to sort through now," Leah exclaimed.

Editor's note: The the Lowepro Photo Hatchback 16L AW is available for $89.95 from B&H Photo. Thanks to Leah Lavoneh for sharing her experience and a photo from her trip. Bag provided by Lowepro.


You can find more photo tips and "photography how tos" on my Pinterest page.


Inquiring minds want to know, right? On most Canon DSLRs, once you get over 100,000 shutter actuations, the risk of it failing increases (pro bodies more like 300,000). So how do you find out?

Canon 40mm Lens Canon 40mm prime mounted on a EOS 60D. Photo by Derrick Story.

I just read a good article full of information on this topic titled, Finding the number of shutter actuations for your Canon EOS DSLR. The author, Shane, provides good background information on the subject, then lists links to freeware utilities that can help you determine the shutter actuations for your camera.

It's not something that I lose sleep over at night. But it is cool that I can find out if I want to.


You can find more photo tips and "photography how tos" on my Pinterest page.


Sunflowers at Sunset

Earlier this evening, I was part of a conversation on TWiP about what a great time it is for photographers. On my way home, a visual case in point.

Sunflowers_2048_ P8013148.jpg "Sunflowers at Sunset" Click on image to inspect larger version. Photo by Derrick Story.

There's a field of sunflowers near my house that I've been keeping an eye on. Leaving work late put me there right at sunset as I drove by. I pulled out the Olympus OM-D E-M5 and mounted the 40-150mm f/4.0-5.6 R Lens. The light was low, and I wanted to extend the zoom to tightly frame the shot.

As a result, I captured this image at ISO 1600, 1/8 sec. at f/5.5... handheld. The effective focal length was 276mm. In my mind, to hand hold a shot at this focal length at 1/8 of a second defies photography as I understood it for years. But the image stabilization, great electronics, and sharp lens redefines what we can do with a camera.

Like we were saying earlier: it's a great time to be a photographer.


Take a look at the Olympus Micro Four Thirds Gear Guide for an overview of cameras, lenses, and accessories.