August 2010 Archives

Woz's 60th Birthday Party

Editor's note: A friend from my Lowepro life, Jeff Cable, offered to share the images he captured as the official photographer for Steve Wozniak's 60th birthday party. (Thanks Jeff.)

"Janet Wozniak (Steve's awesome wife) threw a surprise party to celebrate Steve's 60 birthday. The party was located at The Tech Museum in San Jose, CA. The big challenge was to keep it a secret and to surprise Woz. This is not an easy task for such a sharp guy..."

To get the rest of the story, with 19 photos from the party (including Drew Carey who is now 80 pounds lighter), hop over to Jeff's blog. The shots are terrific, with lots of interesting text too.

Photo by Jeff Cable.

Not all photo software has to cost you an arm and a shoulder strap. There are some excellent utilities that will set you back less than $5, or even free. And they are useful for the seasoned pro as well as the casual snapshooter.

This week I look at Preview for Mac OS X, and Photogene for iPad and Filterstorm, also for the iPad. Preview is free (included in Mac OS X), and the two iPad apps cost $3.99 each.

Preview App for Mac OS X Preview for Mac OS X is free, but includes some surprisingly robust editing tools. Click on image for larger size.

What's so amazing is how good all three are. Many Mac users know Preview for PDF reading, but don't realize there is a robust set of image editing tools there also. Meanwhile, on the iPad you have surprising pixel pushing power to create a very portable workflow.

I spend the most time this week on Preview, but do cover the other apps too. I think you'll be surprised by what you learn.

Listen to the Podcast

You can also download the podcast here (30 minutes). Or better yet, subscribe to the podcast in iTunes. You can support this podcast by purchasing the TDS iPhone App for only $2.99 from the Apple App Store.

Monthly Photo Assignment

Saturation is the September 2010 Photo Assignment. You can read more about how to submit on our Member Participation page. Deadline for entry is Sept. 30, 2010.

TDS Autumn 2010 Photography Workshop

The next TDS Photography Workshop will be Oct. 16-18, 2010. The event is sold out. But, you can place your name on the reserve list for the next workshop. Just drop me a line.

More Ways to Participate

Want to share photos and talk with other members in our virtual camera club? Check out our Flickr Public Group. It's a blast!


twitter.jpg Follow me on Twitter

-


Podcast Sponsors

Red River Paper -- Try the $7.99 Sample Kit.

Make Your Photos Sizzle with Color! -- SizzlPix is like High Definition TV for your photography.

Blurb believes passionately in the joy of books - reading them, making them, sharing them, and selling them. Learn more by visiting Blurb on The Digital Story.


Technorati Tags: , , , , ,

Robert Yanal "Torn"

Here's a collection of images to create shear delight. The assignment for July 2010 was "Torn." Check out this edgy set of images from members of the TDS virtual camera club. And which one will be the SizzlPix Pick of the Month?

The September 2010 assignment is "Saturated." Start working on your contribution now. Details can be found on the Member Participation page. You can now submit photo assignment pictures up to 800 pixels in the widest direction.

Please follow the instructions carefully for labeling the subject line of the email for your submission. It's easy to lose these in the pile of mail if not labeled correctly. For example, the subject line for next month's assignment should be: "Photo Assignment: Sept. 2010." Also, if you can, please don't strip out the metadata. And feel free to add any IPTC data you wish (These fields in particular: Caption, Credit, Copyright, Byline), I use that for the caption info.


Photo by Robert Yanal. (Click on it to see enlarged version.) You can read more about how Robert captured this shot, plus see all of the other great images on the July 2010 Gallery page.


Good luck with your September assignment, and congratulations to all of the fine contributors for July. Once again, it's a great collection of images.


twitter.jpg Follow me on Twitter

-


Now Available! The Digital Photography Companion. The official guide for The Digital Story Virtual Camera Club.

  • 25 handy and informative tables for quick reference.
  • Metadata listings for every photo in the book
  • Dedicated chapter on making printing easy.
  • Photo management software guide.
  • Many, many inside tips gleaned from years of experience.
  • Comprehensive (214 pages), yet fits easily in camera bag.

Technorati Tags: , ,

Lowepro Pro Trekker 300 AW Review

Lowepro Pro Trekker 300 AW

As the photography evangelist for Lowepro, I can try any bag that's available. As you've read in other reviews, I definitely have my favorites: the Fastpack 250 and Pro Runner 300 AW, to mention a couple. After months of testing, I have another favorite to add to the list: the Lowepro Pro Trekker 300 AW backpack. Here's a short list why:

  • Great interior depth allowing me to place my Canon 5D Mark II on its side in the bag.
  • Removable belly band. This is huge for me when flying. A fully padded belly band adds much to the thickness of a bag. I don't need it for urban gigs, so being able to remove it helps for travel.
  • Adjustable harness. So I can get the fit just right.
  • Ample side pockets. Two long side pockets run the height of the bag. Very useful for personal gear.
  • Rugged. Everything about this bag inspires confidence. The material, design, zippers, all weather cover, even the looks.
  • Big enough, but not too big. The Pro Trekker 300 AW is the smallest of the series, yet it accommodates the gear I need for serious assignments. You can see both the interior and exterior specs here. And yes, it is airline compatible for most flights.
  • Top converts to a removable waistpack. It serves in two ways: first as a traditional backpack lid, providing extra security and weather protection; and as a removable/wearable waistpack with a mesh-covered backpad, two roomy pockets and a key clip.
  • Loops, handles, and straps. Three handles for grabbing, straps everywhere to secure tripods, monopods, ski poles, etc. And even compression straps on the bottom for additional outdoor gear. Whatever you have, you can probably lash it to this pack.
  • Built in hydration. Yes, the Pro Trekker is hydration ready.

The next stop for me and the Pro Trekker 300 AW is Cologne, Germany for my assignment at Photokina. I'll be shooting stills, recording video, and interviewing photographers, including Greg Lowe. My bag is packed. I'm ready to go.

The Lowepro Pro Trekker 300 AWis available on Amazon for $240.


twitter.jpg Follow me on Twitter


Music and audio add presence to our slideshows and movies. The combination of ambient sound, such as waves lapping up on a beach, and a soundtrack, such as a guitar solo, transforms our pictures into experiences.

Aperture provides two methods for managing these audio tracks, and I want to review them quickly so you can take full advantage of what this application offers for movie making.

Aperture Soundtracks Two types of soundtracks: Top -- "Secondary Audio Track," which is editable, and Bottom -- Main Audio Track, which has other advantages.

There are two types of audio tracks for Aperture multimedia presentations: Main Audio Track, and the Secondary Audio Track. Each has their advantages, and I often use them together in my presentations.

The Main Audio Track is the simplest to use. Click on the "Display Audio Browser" icon in the Aperture interface (music note image) and select a song from your iTunes library. Drag it to the background of your slideshow timeline, and it converts to green (as shown in the bottom image). You can't edit this soundtrack, per se, but you can do two very important things: "Fit Slides to Main Audio Track," and "Align Slides to Beats." Both options are found in the gear popup menu on the toolbar.

I particularly like "Align Slides to Beats." You can see that I used it in the illustration above. The slides range from 3.9 to 4.1 seconds as Aperture keeps your images and music in sync. Try it, I think you'll like the results.

If your show goes longer than the song you chose for it, you can add a Secondary Audio Track. This time, when you drag the audio from the browser, drag it to the bottom of the particular slide where you want the track to begin, as show in the top illustration. Unfortunately you can't use "Align Slides to Beats" with secondary tracks, but you can control their length by clicking on the end of the track and dragging.

You have other options too. Click on the track to highlight it, then choose "Adjust Audio" from the gear menu. You have some useful volume and fade controls available. These are particulary helpful when both soundtracks overlap, and you want to control their respective volumes. (Yes, Adjust Audio is available for the Main track too.)

With just a little fiddling around with these controls, you can raise the level of your presentation to professional heights.

More Aperture Tips and Techniques

To learn more about Aperture 3, check out my Aperture 3 Essential Training on Lynda.com. Also, take a look at our Aperture 3 Learning Center. Tons of free content about how to get the most out of Aperture.


twitter.jpg Follow me on Twitter

The minute I saw the "swing out" Vari-Angle 3-inch Clear View LCD screen with 1,040,000 dot/VGA resolution (plus anti-reflective and smudge-resistant coatings), I knew the new Canon 60D was built for video recording as much as stills.

canon_60d.jpg

Speaking of movie making, the EOS 60D features Full HD video capture at 1920 x 1080 resolution with selectable frame rates of 24p, 25p or 30p. Plus, according to the Canon press release, "The Canon EOS 60D allows for three video recording modes - Full HD and HD in a 16:9 aspect ratio and Standard Definition (SD) in a 4:3 aspect ratio, all at selectable frame rates. The EOS 60D Digital SLR camera will record Full HD at 1920 x 1080 pixels in selectable frame rates of 24p (23.976), 25p, or 30p (29.97); 720p HD recording at 50p or 60p (59.94) and SD video at frame rates of 50p or 60p (59.94). The EOS 60D features a dedicated button to initiate live view for both video and still shooting. Once engaged, the same dedicated button will start and stop video recording."

The feature that I didn't see in the press release, but one that I'm sure is there, is an external mic jack. Without that, the rest really doesn't make a difference.

The 60D has some other cool stuff, such as a built in Speedlite transmitter. But I'll save that for when I can get more details.


twitter.jpg Follow me on Twitter


Is it Time to Dust Off my Apple TV?

There are so many things about my Apple TV that I like. Why is it that I don't use it more?

Apple TV

I have a Flickr account, and my images look great on HDTV thanks to the little white box. It's fun surfing YouTube and discovering something unexpected. I've listened to music, watched TV shows, and have even rented movies using the Apple TV.

All stuff that I can do with my MacBook Pro or the iPad.

And I think that's the problem for me with Apple TV. It doesn't do that one unique thing better than my other devices. The iPhone fits in my pocket and makes phone calls. The iPad fits in my messenger bag and does... well, just about everything. And my MacBook Pro has the horsepower I need to run Aperture and Photoshop. I need all of those functions.

So my Apple TV just sits there most of the time looking adorable beneath the HDTV. Maybe on Sept. 7, Steve will give me a compelling reason to dust it off and bring it into my daily life. I sure hope so. I like the little guy.


twitter.jpg Follow me on Twitter


Find iPhone

I always keep my iPhone in my right-front pants pocket. That is, unless I'm wearing swim trunks on a beach in Kauai. I know for a fact that salt water and electronics do not mix well.

So I decided to stash my iPhone in the front pocket of a travel bag I was toting around the island. As it turned out, I should have used one of the zippered pockets inside the bag instead. Without announcement, or even a soft thud, my iPhone slipped out of the bag and on to the sand. It was over an hour before I detected its escape.

I suspected the mishap happened while visiting Hanalei Bay on the North Shore. So I revisited the spot where we had set up shop, but no phone. We decided to head back to the hotel on the South Shore. My iPad was there. It was my last hope.

There's an app called Find My iPhone. If you have a MobileMe account, which I do, you can set up communication with your iPhone, even if you don't know where it is. You can also post messages on the phone, and if you have to, wipe it clean remotely. I was hoping it wouldn't come to that.

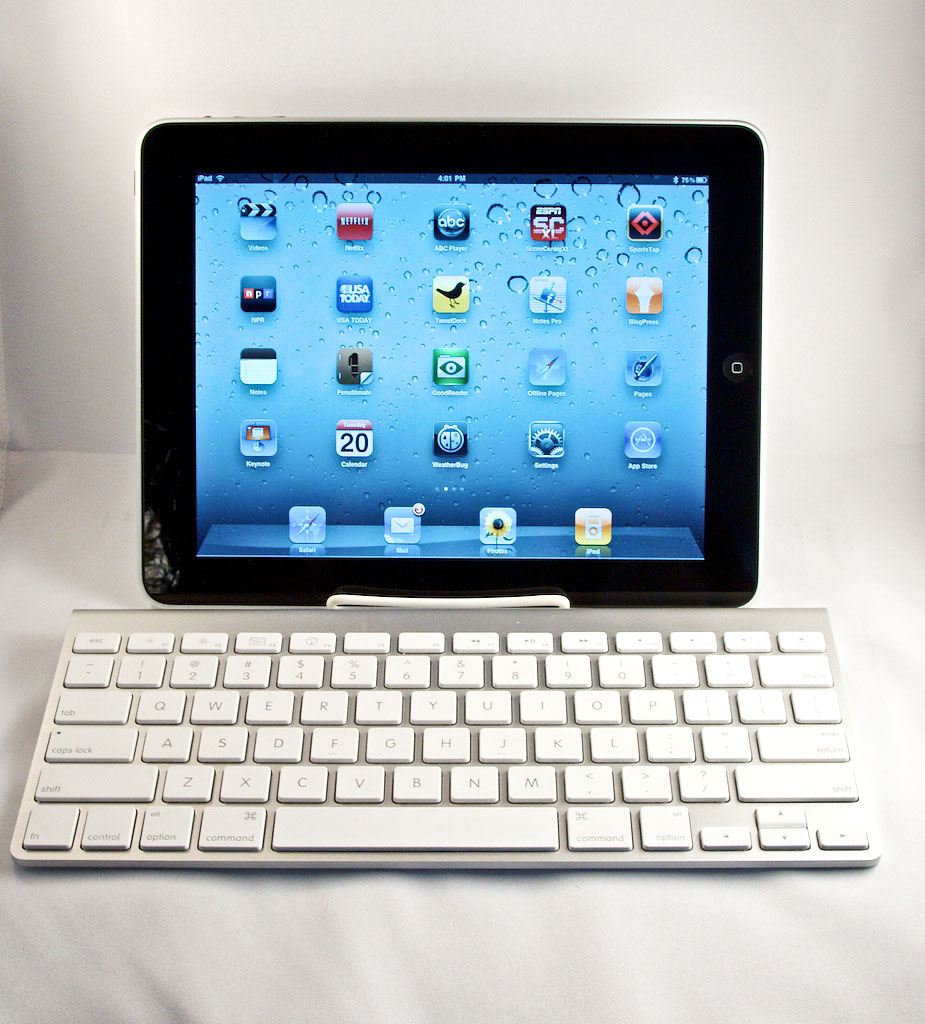
Back at the hotel room, I pulled out my iPad and launched Find My iPhone. The first thing I had to do was log in to my MobileMe account from within the app. Once I did, however, it went right to work looking for the lost device. And it found it! My phone was at a residence back on the North Shore. It was eerie to look at the satellite view on the map and see the house of the person who may be my new best friend. At least I was hoping so.

Via Find My iPhone, I sent the following message: "Please return my phone. Call 707-000-0000. Ask for Derrick. Thank you." about 3 minutes later, the other phone rang. It was the person who had my iPhone. When the phone buzzed and displayed my plea for help, she responded.

The conversation was a little awkward at first. The women on the other end of the line had spotted the phone in the sand and brought it home. She then contacted both AT&T and Apple trying to track me down, but they wouldn't give her any information. That frustrated her, and she shared some of that frustration with me. Then, somewhat abruptly, she then asked me, "Are you a serial killer?" I assured her that I was not. I was just a guy who wasn't very good at keeping track of his stuff.

She seemed OK with that. We then arranged for a time to meet and retrieve the phone. As it turned out, we all had a great visit that next day, and I was in possession of my iPhone once again. They even invited us in for a tour of the house they built in Kauai. I spotted two Macs glowing in the corner of the room. All in all, they were interesting, good-hearted people.

I've had many discussions over the years about the value of a MobileMe account. I use many of the services, including email, file sharing, and gallery publishing from Aperture. But on that summer day on the North Shore in Kauai, MobileMe seemed like one of my wisest purchases to date.


twitter.jpg Follow me on Twitter


Sunglasses ND Filter "Sunglasses ND Filter" I needed to slow down the shutter to shoot a waterfall in Kauai. I mounted a Canon S90 on a GorillaPod and used my Ray Bans as an ND filter.

When you're on vacation and taking pictures in a beautiful place, is it really a "workflow" when you move your pictures from camera to some sort of computer and look at them? What if you're having fun? When it's purely for your enjoyment, could it be called "playflow" instead?

This week I explore a new "playflow" while in Kauai. Instead of bringing a laptop, I took only an iPad. I didn't bring all of my lenses. And in fact, I snapped most of the week's shots with a compact camera. Yet, I was able to review the images, upload to Flickr, post to TDS, and even check my email now and then... but mostly then.

So this week's episode is dedicated to the art of taking a little time off to enjoy family and nature, but still enjoying photography.

Listen to the Podcast

You can also download the podcast here (33 minutes). Or better yet, subscribe to the podcast in iTunes. You can support this podcast by purchasing the TDS iPhone App for only $2.99 from the Apple App Store.

Monthly Photo Assignment

Tandem is the August 2010 Photo Assignment. You can read more about how to submit on our Member Participation page. Deadline for entry is Aug. 30, 2010.

TDS Autumn 2010 Photography Workshop

The next TDS Photography Workshop will be Oct. 16-18, 2010. The event is sold out. But, you can place your name on the reserve list for the next workshop. Just drop me a line.

More Ways to Participate

Want to share photos and talk with other members in our virtual camera club? Check out our Flickr Public Group. It's a blast!


twitter.jpg Follow me on Twitter

-


Podcast Sponsors

Red River Paper -- Try the $7.99 Sample Kit.

Make Your Photos Sizzle with Color! -- SizzlPix is like High Definition TV for your photography.

Blurb believes passionately in the joy of books - reading them, making them, sharing them, and selling them. Learn more by visiting Blurb on The Digital Story.


Technorati Tags: , , , , ,

I did it. I got on a plane and flew far away leaving my laptop at home. For eight days I was totally laptopless.

Instead, I had a 3G iPad with a Camera Connection Kit. A week later, I had shot more than 600 photos, posted to Flickr, and managed to refresh the blog. And truth be told, I never felt better.

iPad Editing with Photogene Editing a photo on the iPad using Photogene.

Here are my top 5 reasons why an iPad is more fun for vacation:

  1. Great for Flying. TSA does not consider an iPad a computer. So you don't have to take it out of your backpack when going through airport security. Sweet. Plus, once I'm on the plane, I can actually use the iPad, even in economy seating.
  2. Less Weight. My MacBook Pro weighs over 6 pounds. The iPad is tips the scale at 1.5.
  3. Easier Internet. The hotel wanted $15 a night for an Internet cable. Plus, I'd still have to bring my AirPort Express to create a WiFi network. I said no to both. I used my 3G connectivity with no drama. It costs me $15 a month for 250 MBs of data. I used 170 MBs during the week at the hotel. In other words, one week of Internet for the price of one day.
  4. No Unnecessary Accessories. I used the Camera Connection Kit, power adapter, and two cords. That was it. Their total weight is less than the power adapter for the MacBook Pro.
  5. Great Software. For photo editing, I tapped the power of Photogene and TiltShiftGen. Wonderful. For navigation, Maps works great. Plus, the iPad is so light you can take it anywhere, yet has GPS and Internet connectivity. I never had a problem finding where I wanted to go or how to get there.

So if the main goal of your trip is to have fun, and not work, then I highly recommend the iPad. Together, we had a great time.


twitter.jpg Follow me on Twitter


Aperture 3's slideshow authoring tool allows photographers to mix stills and video to create dynamic presentations. You can playback at full screen in Aperture to share with clients, friends, and family.

Typically, however, we need to move those presentations off our computer to other devices, such as an iPad, or to YouTube and other online sharing sites. Maintaining that high quality during the export process can be tricky. And if you're not mindful, you might be disappointed with the results.

Aperture Export Presets The Export dialog box in Aperture 3. You can go with one of these presets, but you may not like the final output.

In Slideshow mode, when you click the Export button in the upper right corner of the Aperture interface, Apple provides you with a handful of presets for various devices such at the iPod, iPhone, Apple TV, YouTube, 720p, 1080p, and Custom. The first thing iPad users will notice is there's no preset for them. You might be tempted to choose the 720p preset, but unfortunately that preset doesn't work on the iPad. iTunes won't let you copy the movie to the iPad. Plus you're stuck with 30 fps for your frame rate, witch is a bummer if you captured your video in beautiful 24 fps.

You could go to the next preset up, "MobileMe/YouTube" for standard definition output (640x360 at 30 fps). But I can tell you right now, you probably won't like the results on an iPad, or even YouTube for that matter. The audio will sound fine, but my images were consistently soft.

I decided to go back to the drawing board to see what kind of vido output I could squeeze out of Aperture. After a few adjustments, I was able to improve my results substantially, but it required a three additional steps. Here's what I did:

  • Create higher quality previews. Since I do use some Ken Burns effect in my shows, I decided that my default 1920x1920 previews might be compromising quality. Aperture uses your previews to create its slideshows. So I changed the Photo Preview (Preferences > Previews) to 2560x2560 at 9 quality. I then had to regenerate those previews at the new settings so Aperture could use them. I selected all of the thumbnails in my presentation, held down the Option key, and chose Photos > Generate Preview. This took a while for Aperture to regenerate the higher quality previews, so I took a break while the computer churned away.
  • Export Using the Custom Setting. My goal was to create a high quality master file at the frame rate I wanted. To do that, I needed to select Custom under the preset menu. I used H.264, 24 fps (to match the video in my presentation) at 1920x1080. Label this file "master" for both playback on your computer, but also for creating smaller versions for other devices.
  • Now Create Your iPad Version Using QuickTime 7. QuickTime 7 is in your Utilities folder. It gives you more flexibility for exporting than the QuickTime Player that is the default for Snow Leopard. After the movie is open, go to File > Export and choose Movie to QuickTime Movie from the popup menu. Click the Options button and make these selections -- Compression: H.264, Quality: High, Frame Rate: (your choice, I use 24 fps), Encoding Mode: Multi-Pass, Dimensions: 640x480 (or what ever you want), and Scale: Letterbox. For Sound, just make sure you go with AAC at whatever settings you want.

All of these steps take time to process, so make sure you have other tasks lined up to do elsewhere. Once your new movie is rendered, copy it to iTunes or upload to its online destination. On my iPad, I have both versions of the same movie: the Aperture preset for "MobileMe" and my multi-step version. The quality of my version is about twice as good.

More Aperture Tips and Techniques

To learn more about Aperture 3, check out my Aperture 3 Essential Training on Lynda.com. Also, take a look at our Aperture 3 Learning Center. Tons of free content about how to get the most out of Aperture.


twitter.jpg Follow me on Twitter

After just having spent a week in Kauai with a Canon S90 in my pocket, I can tell you that this compact is a godsend on the road. The ability to shoot with a fast f/2 lens in low light and save the images in Raw means that I rarely miss a photo opportunity.

Now, with the just-announced Canon S95,a great camera gets even better.

canon_s95.png

Canon has added HD 720p 24 fps video, click stops on the back control dial, improved stabilization, enhanced front control ring, and a high dynamic range mode. These improvements address just about every nit I had with the S90. It's an upgrade that I'm going to get as soon as I can.


twitter.jpg Follow me on Twitter


Heading Home from Kauai


Tropical Twilight, originally uploaded by The Digital Story.

I've packed up those full memory cards, and my memories, and am heading home from Kauai. I'll soon have a full report on working with an iPad instead of a laptop, underwater photography, travel tips, and more. Stay tuned.

Managing Geodata in iPhoto 09

iPhoto 09 is a handy geotagging tool. This means that if your camera doesn't capture latitude and longitude information when you take the picture (and most of our cameras don't), then you can use iPhoto afterward to add this information... and more.

Using "Places," not only can you add coordinates, but the actual place information in plain English: such as Country, State, City, etc. The best part is, iPhoto does most of this work for you. I demonstrate how this works in the following movie.

This movie is from my Lynda.com training series, iPhoto '09: 10 Things to Know About Places . If you want to tap the full power of iPhoto 09, you might want to take a look.


twitter.jpg Follow me on Twitter


Best Shaved Ice on Kauai


Best Shaved Ice on Kauai, originally uploaded by The Digital Story.

When in Kauai, you must have shaved ice... as often as possible. I like a little ice cream at the bottom. You can pay up to $5 for one of these treats, but if you go to JoJo's in Waimea, you can have the best on the entire island, and for only $2. The perfect refreshment after a hike in Waimea Canyon or a swim in the ocean.

While I'm in Kauai this week, I thought you might appreciate this rebroadcast of the Catherine Hall interview I recorded at the last WPPI. She's terrifc, and very knowledgable. I'll see you next week with a brand new podcast. Aloha!

Catherine Hall is one of those top-tier shooters, that when you meet her, you say to yourself: "Wow, she's the real deal." What I like about spending time with Catherine is that I always learn something new, see a fresh perspective, consider a different approach. After you listen to this interview, I'm sure you'll feel the same way.

Catherine Hall Photography

Our topic today is how Catherine prepares for a wedding shoot. From the time she has contact with the bride, to when she is packing her Lowepro Pro Roller x200, to the actual shoot itself. She's talented and delightful. I hope you enjoy the show.

You can learn more about Catherine Hall by visiting her website: www.catherinehall.net.

Listen to the Podcast

You can also download the podcast here (24 minutes). Or better yet, subscribe to the podcast in iTunes. You can support this podcast by purchasing the TDS iPhone App from the Apple App Store.

More Ways to Participate

Want to share photos and talk with other members in our virtual camera club? Check out our Flickr Public Group. It's a blast!


twitter.jpg Follow me on Twitter

-


Podcast Sponsors

Red River Paper -- Try the $7.99 Sample Kit.

Make Your Photos Sizzle with Color! -- SizzlPix is like High Definition TV for your photography.


Technorati Tags: , , , , ,

Jurassic Park Tree


Jurassic Park Tree, originally uploaded by The Digital Story.

This shot of a Moreton Fig Tree was captured in Kauai where scenes from the film Jurassic Park were filmed.

I recorded the shot with a Canon 5D Mark II, then processed the image on an iPad with Photogene. (I didn't bring a laptop in this trip, and doing just fine.)

Over on Blurb on the Digital Story, I just ran a short, informative piece about the Blurb Color Management Resource Center. If you want the color in your Blurb photography books to be on target, you might want to take a quick look.


twitter.jpg Follow me on Twitter


Quick Brushes in Aperture 3

Quick Brushes are a great addition to Aperture 3. They are located in the Adjustments popup menu, inside the Adjustments tab. Quick Brushes are exactly that, when you want to make a specific adjustment... quickly!

Some of my favorites include: Skin Smoothing, Polarize, Sharpen, and Definition. Being able to apply these types of adjustments to a specific area of the image without having to worry about creating masks is a wonderful enhancement to the post production workflow.

In this 7-minute video, I walk you through a typical Quick Brush scenario. You can see a larger version of the movie (better for this type of tutorial) by clicking through to YouTube or going to the Lynda.com Podcast page.

More Aperture Tips and Techniques

To learn more about Aperture 3, check out my Aperture 3 Essential Training on Lynda.com. Also, take a look at our Aperture 3 Learning Center. Tons of free content about how to get the most out of Aperture.


twitter.jpg Follow me on Twitter

Sea Turtle Detail, Kauai


Sea Turtle Detail, Kauai, originally uploaded by The Digital Story.

Even when the wind comes up, you can always find something interesting to photograph -- especially if you get a friendly sea turtle swimming by.

I used a Canon G9 in a Canon underwater housing to make this photo. The image was processed on an iPad using Photogene.

"Good Dog!" - Grab Shot 200

Mayra Martinez -- Good Dog

"I saw this sign posted at the Veterans Memorial in Pensacola, FL.," writes Mayra Martinez. "It is certainly one of the most original wordings for a city ordinance!"

Mayra captured this image with her Olympus E-3, and a Zuiko 12-60 mm f/2.8-4.0 mm lens (aperture priority, aperture f/4, ISO 100). Click on the image for a larger view.

I should also note that this is our 200th Grab Shot! Wow. If you want to review the collection that began back in 2006, go to our Grab Shots page.

If you have a candid you'd like to share, take a look at our Submissions page, then send us your Grab Shot. We'll try to get it published for you on The Digital Story.

And you can view more images from our virtual camera club in the Member Photo Gallery.


The Digital Story Podcast App is the best way to stream or download weekly TDS podcast episodes. No more syncing your iPhone or iPod Touch just to get a podcast. And there's more! Tap the Extras button for free passes and discounts and the current Grab Shot by our virtual camera club members. Each podcast episode has its own Extras button, too, that contains more goodies such as pro photo tips. And the best part is, The Digital Story Podcast App is your way to help support this show.Download it today!


twitter.jpg Follow me on Twitter


One of my favorite Off Camera Flash tricks is shooting framed artwork without getting those distracting reflections. The technique is simple. Set up two equal-powered off camera flashes at 45 degree angles from the art. They will cancel out each other's reflections, but still illuminate the artwork.

In this video, recorded as part of my Off Camera Flash training title on Lynda.com, we review my work after putting this technique to the test.

If you like this kind of stuff, be sure to check out the rest of the title.

More Off Camera Flash Tutorials

Off Camera Flash - Basic Techniques for Pro Results

Light Modifiers for Off Camera Flash

Off Camera Flash - The Single Light Portrait

"More Off Camera Flash" - Digital Photography Podcast 233


twitter.jpg Follow me on Twitter


The 2,400 Mile iPad Test

I'm going to do something I've never done before. I'm leaving for a week in Kauai, and I'm not taking a laptop. I have my Lowepro Fastpack 250 packed with my camera gear, lots of memory cards, iPad 3G, Bluetooth keyboard, and the Camera Connection Kit. The MacBook Pro stays home.

Why? Because I'm tired of lugging a 6.5 lb computer everywhere I go when I could save myself 5 pounds with the iPad, plus have Internet connectivity anywhere there's a cellular network.

iPad with Keyboard Going iPad and keyboard only - no laptop for this trip. Click on image for larger version.

While traveling, all of my images will stay on the memory cards. I'll upload my favorites to the iPad as backup and for enjoyment. And if everything goes right, I'll spend my free time taking pictures and enjoying Kauai, instead of working on the computer.

Stay tuned, and I'll let you know how this works...


twitter.jpg Follow me on Twitter


Mac Raw Updates Continue to Roll In

mac_updates.jpg

I was happy to see Digital Camera RAW Compatibility Update 3.3 posted last week, adding Aperture and iPhoto Raw support for these cameras:

  • Canon PowerShot SX1 IS
  • Olympus E-PL1
  • Panasonic Lumix DMC-G2
  • Panasonic Lumix DMC-G10
  • Samsung NX10
  • Sony Alpha DSLR-A390
  • Sony Alpha NEX-3
  • Sony Alpha NEX-5

Another good sign is the timely support of the mirrorless interchangeable lens cameras, such as the E-PL1, NX10, NEX-3, and NEX-5. This is a hot category right now, and Apple appears to be on top of it. I would have liked to seen the Panasonic DMC-LX5 on this list, but I'm hoping that it will be included in Update 3.4


twitter.jpg Follow me on Twitter


If you don't think you can edit your photos on a portable device, then you haven't worked yet with Photogene for iPad, a surprisingly powerful editor that you can buy in the iTunes store for $3.99.

San Francisco, Fort Point

This image for example, was captured with an Olympus PEN and a 17mm f/2.8 lens at Fort Point in San Francisco. I then went to a coffee shop and transferred the images to the iPad using the Camera Connection Kit. To create the cool look in the photo, I applied the "bleach" preset in Photogene, then uploaded to Flickr directly from the iPad.

In my spare moments, I've found myself playing with images in Photogene, just to get an idea of what's possible. It's a great creative process... in addition to getting your work done when you have to post a photo quickly.


twitter.jpg Follow me on Twitter


DIY LCD Magnifier for 5D Mark II

For me "do it yourself" is usually a short term solution that solves an immediate problem. Up the road, as time and finances allow, I can purchase "the real thing" if it turns out that I actually need it. In this week's show, I talk about some DIY projects that provided temporary fixes. In part, I'm able to do this because I hang on to much of my old photography gear, parts of which that can be repurposed for new projects.

We have lots of fun do it yourself ideas in the DIY Section of the Digital Story.

Listen to the Podcast

You can also download the podcast here (27 minutes). Or better yet, subscribe to the podcast in iTunes. You can support this podcast by purchasing the TDS iPhone App for only $2.99 from the Apple App Store.

Monthly Photo Assignment

Tandem is the August 2010 Photo Assignment. You can read more about how to submit on our Member Participation page. Deadline for entry is Aug. 30, 2010.

TDS Autumn 2010 Photography Workshop

The next TDS Photography Workshop will be Oct. 16-18, 2010. The event is sold out. But, you can place your name on the reserve list for the next workshop. Just drop me a line.

More Ways to Participate

Want to share photos and talk with other members in our virtual camera club? Check out our Flickr Public Group. It's a blast!


twitter.jpg Follow me on Twitter

-


Podcast Sponsors

Red River Paper -- Try the $7.99 Sample Kit.

Make Your Photos Sizzle with Color! -- SizzlPix is like High Definition TV for your photography.

Blurb believes passionately in the joy of books - reading them, making them, sharing them, and selling them. Learn more by visiting Blurb on The Digital Story.


Technorati Tags: , , , , ,

Over on Blurb on The Digital Story, I just posted "How to Make a Gorgeous Photo Book" for Pro Publishing Tips. I highlighted this guide because it is brimming with professional techniques for making stunning books. The kicker is, you can win this hardcover book by participating in our Blurb Book Page of the Month feature.

photo_book.jpg

Either way, if you're interested in creating, publishing, and selling your own books, you should definitely explore Blurb on The Digital Story. We'll get you headed in the right direction.


twitter.jpg Follow me on Twitter

-

Someday I will pay $400 for Z-Finder Pro because they are clear, secure, and adjustable. But today isn't that day. Budget is too tight at the moment. But I do need a bright, crisp LCD magnifier for some upcoming video projects. So for the time being, I'll do it myself.

LCD Magnifier for Canon 5D Mark II DIY LCD magnifier uses a 50mm f/1.7 Zeiss lens extended by using a Rayqual adapter. The mount is built around a Canon 70-200mm f/4 Tripod Collar.

Figuring Out the Optics

I went upstairs into my mad scientist lab and started playing with lenses and mounts. My magnifier is based on the old "reverse lens trick" to increase magnification. I chose a Zeiss 50mm f/1.7 lens because of its wide opening. To get the right viewing distance from the LCD screen, I needed to add a couple spacers. I used my Rayqual Micro 4/3 adapter because it also had a large diameter opening. It was close to the right distance, but just a tad short. So I took a real lens cap, cut a large diameter hold in it, and mounted it to the Rayqual adapter. Perfect!

I added a little gaffers tape to the open end as to not scratch the LCD on the Canon. On the other end, I screwed in a rubber lens hood to serve as my eyepiece. That way I can use the rig in bright light.

Designing the Mount

I wanted something solid that didn't look too cobbled together. It dawned on me that the tripod collar for my 70-200mm f/4 Canon lens might work. You can get these cheap, BTW -- $12.99 from Meritline. For the bottom plate, I repurposed a flash bracket that had two tripod screws. One for the camera and the other for the Canon ring mount. The only problem was, it sat a little high. So I found a brass spacer in my lighting bag that lined everything up nicely. It doesn't look too bad, does it?

Pros and Cons for this Set Up

Cons: The image is beautifully crisp, but it doesn't cover the entire LCD, only the central area. This isn't a problem when the camera is tripod mounted because I can set up the shot, then remove the magnifier. But for action shooting this would be a problem.

Pros: Aside from being very sharp, I can fine tune the focus via the lens focusing ring. Also, I used stuff I already had (no cash outlay!). And, when I want to use the 50mm on my Olympus PEN camera, I just remove the bottom lens cap (that has a hole in it) and mount the lens to my micro 4/3s camera. So I can get double use out of this set up. (Since the PEN doubles the focal length, that means I have a 100mm f/1.7 lens for my E-PL1. Tell me that isn't useful at times.)

Final Thoughts

At some point this DIY rig will drive me crazy. Hopefully by then I'll have the money to buy a real LCD magnifier. Until then, however, I'm in business.


If you like do it yourself gear, be sure to check out our DIY Section here on The Digital Story. Lots of great ideas there.


twitter.jpg Follow me on Twitter


Image Editing Tips for iPhoto 09

iPhoto 09 is deceptively adept at image editing. Yes, it looks simple, but the essential tools are there for both Raw and Jpeg adjustments. Some of the best goodies, however, are tucked away out of site.

In my recent Macworld article, Six essential iPhoto editing tricks, I show you some of my favorite iPhoto maneuvers. A few are simple, such as holding down the Shift key to view "before and after" versions of an adjusted picture. Others are less obvious, such as seeing the readouts for the Enhance tool, as shown below.

iPhoto Adjust Panel Before and after views of the Adjust panel when the Enhance Tool has been applied to an image.

And there's more. So if you want to improve your iPhoto 09 image editing chops, take a look at Six essential iPhoto editing tricks.


twitter.jpg Follow me on Twitter


Many photographers believe that they need an entire suitcase full of lights to create a professional looking portrait. In this video, I show you how to use one light, a stand, and an umbrella to capture a portrait that looks absolutely great.

This movie is from my Lynda.com training series, Off Camera Flash. By spending just an hour with this course, you can dramatically improve your indoor portrait photography, whether you're on location or in your own environment.


twitter.jpg Follow me on Twitter


Many of the specialty apps for the iPad transform once-difficult manipulations into simple fun. Such is the case for TiltShift Generator for iPad. You can create radial and linear blurs, plus add vignetting for any image on your iPad. And the final product can change your image into something quite special.

Maria Sharapova by Derrick Story Linear blur applied to top and bottom of this image of Maria Sharapova. Click for larger view.

When it's time to export, you have options that include: 480x640, 600x800, 768x1024, 900x1200, 1200x1600, and original size. You can send the edited version as an email attachment or upload to twitpic, twitgoo, or yfrog. If you just want to save the edited version to your iPad, you can do that too. It will be placed in your Saved Photos album, while the original remains intact in its original album.

Maria Sharapova Serve by Derrick Story Radial blur applied to this image of Maria Sharapova serving. Click for larger view.

TiltShift Generator for iPad is available for $2.99 in the iTunes App Store. It feels like Photoshop made easy... and a lot cheaper too.

If you enjoy women's tennis, you may want to visit my Maria Sharapova & Elena Dementieva gallery from the Bank of the West Classic, 2010.


twitter.jpg Follow me on Twitter


Blurb is the photographer's resource for making and selling their books. Like so many successful businesses, Blurb was conceived because its founder was frustrated with the options available for photographers to create and market their books. Today, Blurb stands above them all.

In this podcast, I introduce you to Blurb on The Digital Story, a sponsored section dedicated to making great books. I also invite Suzanne Knowlton in to the studio to take us inside Blurb and explain why it is such an exciting opportunity for photographers and storytellers who want to share their work with the world.

Listen to the Podcast

You can also download the podcast here (27 minutes). Or better yet, subscribe to the podcast in iTunes. You can support this podcast by purchasing the TDS iPhone App for only $2.99 from the Apple App Store.

Monthly Photo Assignment

Tandem is the August 2010 Photo Assignment. You can read more about how to submit on our Member Participation page. Deadline for entry is Aug. 30, 2010.

TDS Autumn 2010 Photography Workshop

The next TDS Photography Workshop will be Oct. 16-18, 2010. The event is sold out. But, you can place your name on the reserve list for the next workshop. Just drop me a line.

More Ways to Participate

Want to share photos and talk with other members in our virtual camera club? Check out our Flickr Public Group. It's a blast!


twitter.jpg Follow me on Twitter

-


Podcast Sponsors

Red River Paper -- Try the $7.99 Sample Kit.

Make Your Photos Sizzle with Color! -- SizzlPix is like High Definition TV for your photography.

Blurb believes passionately in the joy of books - reading them, making them, sharing them, and selling them. Learn more by visiting Blurb on The Digital Story.


Technorati Tags: , , , , ,

Raw files and video clips really pile up the gigabytes when I'm on the road. I've been testing hard drives that have both speed and capacity, and my latest favorite is the OWC 500GB Mercury Elite-AL Pro mini.

OWC 500GB Hard Drive

It spins at a speedy 7200 RPMs, holds 500GBs of data, allows for both FireWire 800 or USB2 connectivity (eSATA too if you need it), includes an on/off switch, and it *does not* require external power for FireWire and USB connections. It's a little bigger -- 5.5in(L) x 3.8in(W) x 1.1in(H) -- than the LaCie Rugged that it replaces. But it also feels more solid and looks beautiful. Cables and plenty of software are included with the drive.

The OWC Mercury Elite-AL Pro mini isn't the lightest drive I've carried recently, but it performs well and inspires confidence. And at $149, it's a good value too.


twitter.jpg Follow me on Twitter


Once you move the flash off the camera, you might want to soften the quality of its output. Here's a brief tour of light modifiers to consider for your off camera flash work.

This movie is from my Lynda.com training series, Off Camera Flash. By spending just an hour with this course, you can dramatically improve your indoor portrait photography, whether you're on location or in your own environment.


twitter.jpg Follow me on Twitter


The Smash, originally uploaded by The Digital Story.

I charged the batteries for the Olympus PEN E-PL1 and headed to Palo Alto, CA to photograph the evening match between Maria Sharapova and Elena Dementieva. At the time of the match, Elena was ranked #5 and Maria #17 in women's pro tennis.

To freeze the action, I knew that I would need shutter speeds of 1/250th or higher. I prefer 1/500th if I can get it under the lights of a night event. My E-PL1 is solid up to ISO 1600, so then it was a matter of lens choice. I opted for my Zeiss 135mm f/2.8 prime lens that I used for years on my Contax 35mm bodies. Since the micro 4/3 bodies double the focal length, I was shooting with an effective 270mm f/2.8 lens - plenty of reach for the intimate tennis center at Stanford University.

I always shoot wide open for these types of events. After a few minutes, I get a feel for where the players are most comfortable on the court, then prefocus in those areas. I always bring a magnifying loupe that I place on the back LCD to get as accurate a focus as possible. You can also use the electronic viewfinder for the E-PL1 if you have it.

It was a terrific match with Maria Sharapova defeating second-seeded Elena Dementieva 6-4, 2-6, 6-3. Maria also won her Saturday semi final event and is in the Bank of the West final today.

I've posted a Sharapova photo gallery captured with this rig. It's amazing what you can do with these compact micro 4/3 cameras.