Recently in Mobile

  Page 5 of 15 in Mobile  

Recently I wrote about ACDSee Pro for iOS and how easy it is to shoot in RAW with an iPhone.

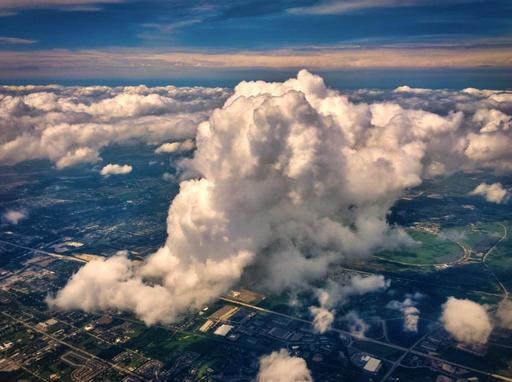
clouds-over-aurora-1024.jpg "Clouds Over Aurora" captured with an iPhone 6S and ACDSee Pro. Photo by Derrick Story.

One of the subjects I was looking forward to capturing in RAW was the landscape from above while flying. I wasn't disappointed.

Using ACDSee Pro, my images were stored as both Jpegs and DNGs. I saved the RAW files to my Camera Roll, which added them to iCloud as well. Once I reached my hotel room, I opened the images in Photos for macOS and quickly processed them using Luminar Neptune and the native tools in Photos.

And this is just quick and dirty stuff. Later on, if I want to apply noise reduction or other advanced adjustments, those RAWs will hold together nicely while doing so.

Having those DNGs, instead of Jpegs, for challenging subjects like this made my iPhone all the more valuable as a travel camera. I really like this workflow.

Photos for macOS as Your Digital Darkroom

You can learn more about using Luminar as an editing extension in my lynda.com training, Photos for macOS: Advanced Editing Extensions.

And if you'd prefer to cozy up with a book, check out The Apple Photos Book for Photographers that features chapters on basic editing, advanced post processing, and editing extensions.

You can share your thoughts at the TDS Facebook page, where I'll post this story for discussion.
Photography and the Apple Watch

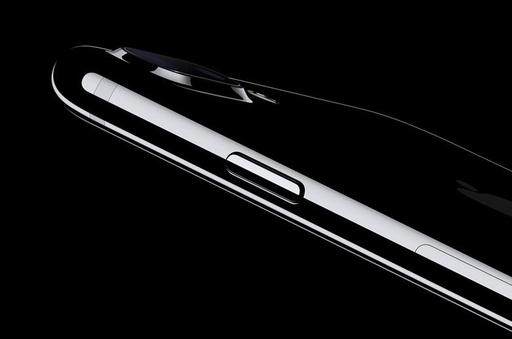
You're not going to show off your portfolio on an Apple Watch, but there are a few photographer tricks that come in handy. Here are my favorites.

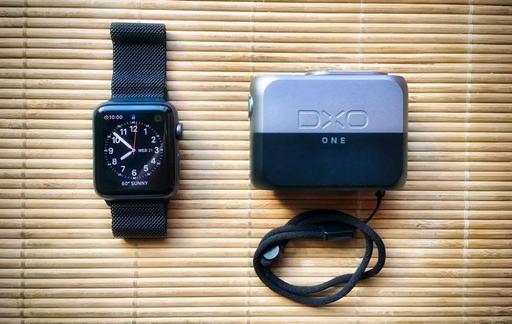
apple-watch-1024.jpg

The Camera App Companion

This app is included with the watch and adds functionality to your iPhone camera. You can find it by looking for the gray icon that shows a shutter release. And that's its primary function: allowing you to remote release the camera on your iPhone.

But if you explore it a bit more, the Camera App Companion has other tricks up its sleeve. For example, once it displays what the lens is viewing on the watch, you can change the focus point by tapping the area you want focused on the watch face image.

If you tap and hold, then a menu appears that allows you to change to the FaceTime camera, adjust the flash setting, control HDR, and even turn on and off Live View.

For single shot images, tap the shutter button on the watch face. For burst images, tap the 3s icon.

So, essentially, you have a full remote control for your iPhone camera. Combine this with a portable stand or tripod mount, and you can substantially expand its capabilities.

DxO One Camera Remote

If you shoot with the DxO ONE camera, then you can also use your Apple Watch to remotely trigger that camera when it's connected to the iPhone.

The Apple Watch app comes bundled with the iOS version of DxO ONE for the iPhone. With this configuration, you now have a full 1" sensor that can be remote released for long exposure shots or for compositions that require some separation between you and the phone. It's a handy bonus always having a remote release on your wrist.

And More...

Other apps that have watch compatibility include ProCamera, ProCam 4, Camera Plus, and Hydra. If you have any of these apps, and they are not showing on your watch, simply go to the My Watch app on the iPhone, scroll down the list of iOS apps, tap on the app you want to enable, then move the slider to green for: Show App on Apple Watch.

Soon after that, the watch app will appear in the software cluster on your device. You can add it to your dock if you plan on using it often.

Once I realized the additional capability that I have with the watch interacting with my camera phone, it expanded my use of the iPhone itself. If nothing else, always having a remote release is really handy.

You can share your thoughts at the TDS Facebook page, where I'll post this story for discussion.

Earlier today, I read a ACDSee Pro for iOS review by Quentin Decaillet on Fstoppers. I wasn't familiar with this app, but the fact that it could capture and process in RAW caught my eye.

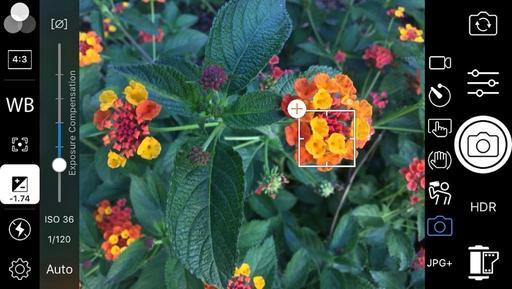
ACD-1024.jpg

So I ponied up the $6.99 and took it for a test drive this morning around my garden. Quentin was right, this is a terrific, robust, and easy to use app.

There are three different compression settings for Jpeg, plus DNG RAW. There's practically every basic setting that you could want, and they're easy to find and use.

The metadata readouts are outstanding (one of my complaints with normal iPhone photography). The Summary screen provides a histogram, basic EXIF, and location data. If you want more, just go to the Metadata tab for the comprehensive readout.

Tap the Edit button to enhance your image. In addition to all of the usual suspects for adjustments, you can create your own presets as well. I also appreciate the Undo and Redo buttons as I'm working through the corrections, plus I can tap to see the original shot.

Images captured in RAW, unprocessed, show up in my Photos library as RAW files. Very nice.

If you want to learn more about ACDSee Pro for iOS, I recommend reading Quentin's review. This is a terrific app.

You can share your thoughts at the TDS Facebook page, where I'll post this story for discussion.
App for Instagram - Viewer Only

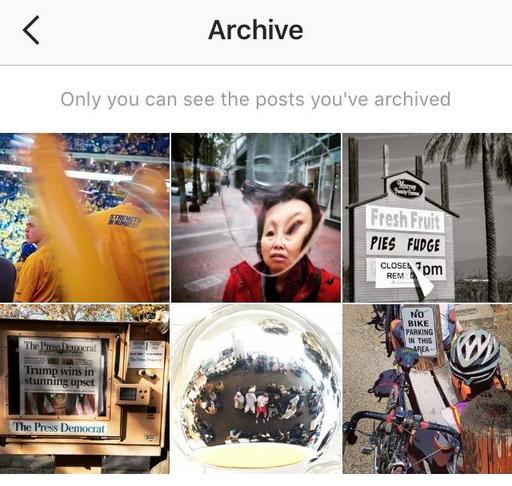
Ah, the dream. To be able to manage my Instagram account from my computer as well as my mobile devices. Well, it's still a dream.

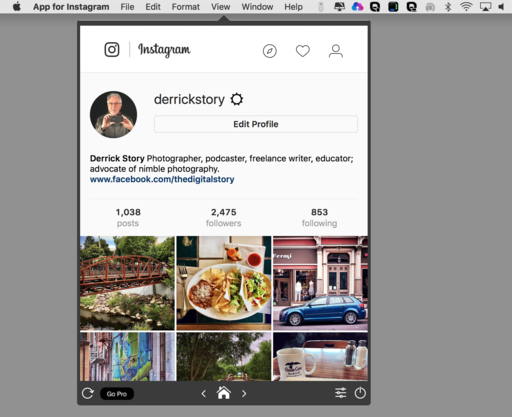
app-for-insta.png

I took App for Instagram for a spin. What did I have to lose? There's a free version available in the Mac App Store.

It's fine for viewing what's going on. You can like images and comment as well. Your profile page is also available. So you can see how people are responding to your shots. So for all of those niceties, the price is right.

However, if your hope is to post to Instagram via your computer, this app is not the ticket. Even if you upgrade to the Pro version for $4.99, that feature isn't listed.

Now before you send me email about this being prohibitive on Instagram's end, yes, I understand that. And there have been workarounds. And they have eventually been thwarted. So we can wonder and hope. And that's what I'll continue to do.

You can share your thoughts at the TDS Facebook page, where I'll post this story for discussion.
At first, I thought that infltr was just another filter app for my iPhone. But after a little testing, I've found it to be quite the creative workspace.

IMG_3612.jpg

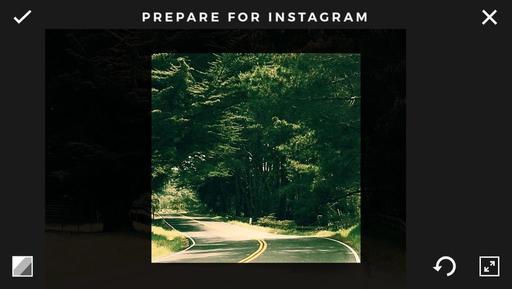
My initial interest was to find something new for my Instagram shots. And infltr is quite good for that purpose. You choose an image from your camera roll, select a filter, then tap on it and move your finger around the shot. As you do so, the filter changes. When you see something you like, stop and publish. You can also save your creation as a custom filter.

But the app goes well beyond that, including features such as:

  • Saturation, brightness, contrast & filter intensity.
  • Crop: 17 different presets.
  • Transform: rotate, straighten, flip horizontally & vertically, perspective horizontally and vertically.
  • Undo edits & view the history of your edits.
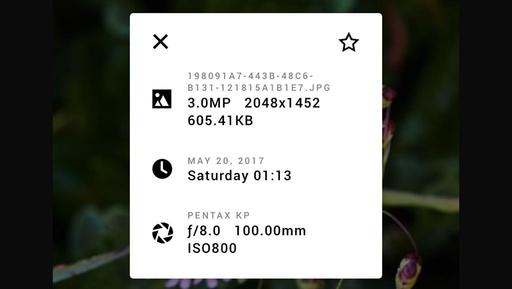
  • Metadata screen that includes camera type, lens, ISO and more.

IMG_3613.jpg

Plus, infltr allows you to edit photos, Live Photos, videos, and GIFs. In other words, just about any type of visual content on your iPhone.

Other handy features include a built-in camera function, iMessage App and Apple Watch compatibility, and the ability to connect to Adobe Creative Cloud and Dropbox.

For a mere $1.99 investment, you will breath new creative life, and functionality into your iPhone photography with infltr.

You can share your thoughts at the TDS Facebook page, where I'll post this story for discussion.
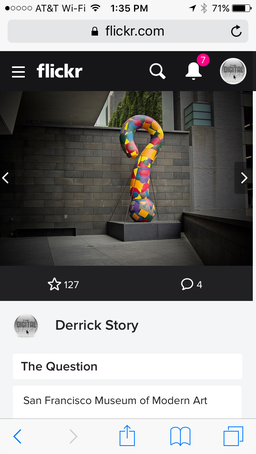
flickr-on-iphone.PNG

Someone's ToDo List item got checked off today. The Flickr.com website now renders beautifully on mobile devices as well as on the desktop.

Previously, lovers of photography had to use the Flickr app or a mobile version of flickr.com to browse, favor, and comment while scrolling though images. But now, you can merely enter flickr.com in your phone's web browser, and enjoy an optimized experience.

Everything is there: Camera Roll, Photostream, Explore, Galleries, Stats, Trending, and more. If you want to fav a photo from someone that you're following, you have to tap on the star beneath the image. Instagram users who are used to double-tapping on the photo to favor it will be greeting instead with the image appearing on a new web page.

Other than that adjustment, the new Flickr.com on mobile devices is an attractive and intuitive experience. Let the browsing begin...

More Flickr Tips and Techniques

If you want to master Flickr on your mobile device, check out Flickr Mobile: Photo Sharing Anywhere. Desktop users might be interested in Sharing Photos with Flickr. Of course the platforms work well together too, and I discuss how you can integrate all of your devices to create a seamless photography workflow.

Want to Comment on this Post?

You can share your thoughts at the TDS Facebook page, where I'll post this story for discussion.
Deadly Selfies

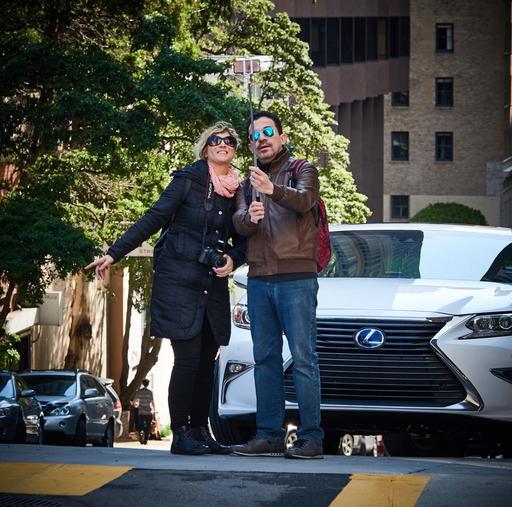
After just having spent three days on the streets of San Francisco, there were a number of things that I noticed while keeping an eye out for my workshop crew. And one that really jumped out at me was how tourists lose track of their surroundings while capturing selfies.

P4090959-SF-2017-Workshop.jpg Beware of your surroundings when capturing selfies. Photo by Derrick Story.

I watched people stop in the middle of the street, step off curbs, and hang over railings while photographing themselves. Yes, I absolutely believe in becoming part of the story, but doing so safely.

What I recommend when shooting in potentially dangerous situations is to assign a friend or family member to be a spotter during the capture. If no one in your group is available - group selfie - then most strangers would be happy to keep an eye out for 30 seconds while you take the picture. Just ask a friendly face on the street to serve as lookout.

And even if you don't have the camera pointed back at you, it's easy to lose track of your immediate surroundings when engaged in street photography. Stepping off the curb to get a better angle might not seem that hazardous, unless a bus comes rolling down the street and clips you with its side mirror. Once again, having a lookout while you shoot is a good practice.

If you're the "adult" in the group, be sure to spread the word about staying safe when taking pictures in urban environments.

Want to Comment on this Post?

You can share your thoughts at the TDS Facebook page, where I'll post this story for discussion.
I met Frederick Van Johnson last night at Oracle Arena to take-in a Warriors game. At one point he said to me, "What's missing here?" We both looked at each other, and neither had a camera other than our iPhones. "Times have changed, haven't they?"

Oracle-Noise-Reduction.jpg Oracle Arena at Twilight. Photo by Derrick Story captured with an iPhone 6S and processed in Photos for macOS with Luminar editing extension.

Obviously, I still shoot with dedicated cameras most of the time. But there are those moments, such as going through security at Oracle Arena, where just having an iPhone is so convenient.

But I do notice, that with shots like this one of the arena at twilight, that the iPhone produces a little more noise in the sky than I like. Since my smartphone images go directly into Photos for macOS, this isn't much of a problem because I have the excellent noise reduction of Luminar waiting as an editing extension. (Luminar noise reduction is far more powerful than the noise reduction slider built into Photos.)

noise-reduction-web.jpg The noise reduction tool built into Luminar.

All I have to do is open the shot in Photos, then choose the Luminar editing extension. Its noise reduction tool provides many options allowing me to apply just the right amount. Plus, it puts the adjustment on its own layer. Nice. I then save the image, and it appears back in Photos, and it's shared across all of my devices.

The process is totally non-destructive, so I can view or revert to the original at any time. And having a robust noise reduction tool to complement my iPhone photography makes it that much easier to travel super light, yet still capture important moments as they present themselves.

Photos for macOS as Your Digital Darkroom

You can learn more about using Luminar as an editing extension in my lynda.com training, Photos for macOS: Advanced Editing Extensions.

And if you'd prefer to cozy up with a book, check out The Apple Photos Book for Photographers that features chapters on basic editing, advanced post processing, and editing extensions.

You can share your thoughts at the TDS Facebook page, where I'll post this story for discussion.
I remember Macworld 2007 quite well. Thanks to my being on the conference faculty, I had a decent seat for the Steve Jobs keynote... the one where he introduced the iPhone.

iphone-introduction.jpg The Introduction of the iPhone, San Francisco 2007 - Canon Rebel XT, f/4, 1/20, ISO1600, -1.0ev, 28mm. Photos by Derrick Story.

By 2007, we really needed an all-in-one device that could handle phone calls, text, personal organization, and the Internet. We were tired of juggling Palm Pilots and candy bar cell phones. Blackberries seemed too pedestrian. And if we could get a decent camera out of the deal, all the better.

The problem was, that first 2-megapixel iPhone camera wasn't very good. And it certainly wasn't going to challenge the Canon XT I toted to San Francisco in 2007.

john-mayer.jpg John Mayer performing at the 2007 Macworld Keynote. Canon Rebel XT.

But the iPhone's sophistication evolved steadily, and by the iPhone 4, we had a good camera in addition to its other mobile features, and things began to change in the world of photography.

We know that the iPhone has all but killed the consumer compact digital camera. I never really liked carrying them around anyway, to be honest. I have two front pockets in my jeans: one for my wallet and the other for my iPhone. That's all I want with me.

Beyond that, however the iPhone was more than just my new compact camera, it was an integral link in my overall photography workflow. Regardless of what camera I was shooting with, I could upload those images, edit them, and publish from practically any location in the world.

iphone-with-adapter.jpg

During my reporting in Las Vegas last week, I would capture the image with an Olympus OM-D E-M5 Mark II, send the images to my iPhone 6S via WiFi, and share them on Instagram, Facebook, and Twitter from hotel lobbies, Starbucks, and yes, the occasional casino lounge.

ces-reporting.jpg Reporting during CES 2017.

As much as I like the iPhone camera, and I do like it, what I truly appreciate these days is the mobile connection to my entire photography ecosystem that includes iCloud, Photos for macOS, and all of my social sites. The iPhone is my Swiss Army Knife for reporting on the road. And as such, it has helped me become a more timely, creative photographer.

And to be honest... I'm having more fun than ever.

Photos for macOS - Part of my iPhone Ecosystem

Explore the world of modern photography with my The Apple Photos Book for Photographers that features insightful text and beautiful illustrations.

And if you'd like to cozy up to a video at the same time, watch my latest lynda title, Photos for macOS Essential Training

You can share your thoughts at the TDS Facebook page, where I'll post this story for discussion.
When I use my smartphone and Dropbox mobile to scan a document, the entire process only takes seconds, and the digital file is instantly available across all of my devices. The funny thing about this is, I don't think a lot of Dropbox users are aware of this functionality.

scan-in-dropbox.png

When you tap the + button in the Dropbox mobile app, a popup menu with three options appears: Scan Document, Upload Photos, Create or Upload File. Tap Scan Document, and you're directed to the scanning interface, which is designed specifically for documents and pictures. Here's a short video from Dropbox for Photographers that shows how it works.

Now I can access my new scan from any Dropbox-connected device: phone, tablet, or computer. And since Dropbox is platform agnostic, that means iOS, Android, Windows, and macOS.

See What Else Dropbox Can Do for You

Take a look at my lynda.com training, Dropbox for Photographers to see how this multi-platform service can easily integrate into your photography workflow.