May 2006 Archives

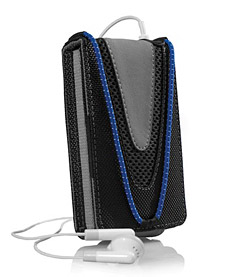
Marware Trailvue Case

The 30GB iPod video (5G) is my top pick iPod of all time. Great sound, slim design, amazing video capability, and excellent storage for my still photos. But after trying many different cases, I had yet to find one that I liked as well as the iPod itself. That is, until I discovered the Marware Trailvue iPod case ($27.95 from Amazon.com).

First of all, this case is rugged. It feels good in the hands. Marware uses a combination of nylon and other synthetic materials to create a case that inspires confidence while on the go. Plus it looks good, very stylish. The included bungee cord provides a handsome accent (5 different colors are included), and it comes in handy for securing your earphones when not in use.

The Trailvue case includes a nice large opening for the earphone jack that can be used when the case is open or closed, and a robust Velcro tab keeps the top flap securely in position when closed. When the case is open, a clear plastic faceplate protects the video screen but allows direct access to the scroll wheel. A nice touch is that you don't have to remove the case to access the Dock connector.

If you want to maintain the iPod's slim profile, don't attach the belt clip. Your iPod will slide in easily among your other gadgets in your camera bag or backpack. If you need the clip, it attaches quickly and secures your iPod to your belt or backpack strap.

This is a very nice case...

Technorati Tags: , ,

Scott Bourne

You can learn time-tested shooting techniques that will make you a better photographer. The challenge is, remembering them while you're actually taking pictures. This week, I sit down with ace photographer, Scott Bourne, to find out how he captures everything from stunning bird portraits to bridal bliss. Scott uses clever acronyms such as EDFAT to mentally organize his compositional techniques. In this interview he reveals all so you can start using these tips today.

Scott has also provided a link to an article on EDFAT, which stands for Entire, Details, Frame, Angles, and Time. EDFAT is a method that allows you to fine-tune your photographic vision. It really makes sense once you read the article and listen to Scott discuss it.

Listen to the Podcast

Now that I've piqued your curiosity, it's time to listen to today's audio show titled, "Killer Shooting Tips with Scott Bourne." You can download the podcast here (22 minutes).

Technorati Tags: , ,

FotoMagico

May 30, 2006 -- For immediate release

Contact: Derrick Story
The Digital Story--New Tools for the Creative Mind
(707) 546-8322
derrick@thedigitalstory.com

Aspiring documentarists invited to enter the FotoMagico Slideshow Showcase

Final two weeks for creating eye-catching slideshows before the top entries are shared with the world.

The deadline for submitting work in the FotoMagico Slideshow Showcase is Monday, June 15. The showcase, sponsored by Boinx Software and run by The Digital Story, first helps photographers master the art of producing the perfect slideshow. Then, the best of the entries will be showcased to the world on The Digital Story beginning June 27.

"Slideshow software has really evolved, so if you haven't looked at it lately, you should," explains Derrick Story, author of numerous photography books and creator of The Digital Story. "A good example is FotoMagico by Boinx Software. The software lets you produce shows as powerful as some of Ken Burn's earlier work, but with much greater ease."

FotoMagico is available for $79USD, or on The Digital Story site for $69USD (See bottom of page for discount code).

Forms and showcase rules are available at The Digital Story. Entries must be submitted by 11:59 p.m. PDT, Monday June 15 to be eligible for display.

The Digital Story makes photography, music, and filmmaking more enjoyable through its regularly updated, educational blog posts, podcasts, and videos. The site is dedicated to showing visitors simple tips and techniques that help the digital camera become an extension of a person's vision and a tool for expression. The Digital Story can be contacted at questions@thedigitalstory.com.

Boinx Software is a trademark of GeBE Computer and Peripherie GmbH. Based in Munich, Germany, Boinx Software develops and publishes fun and easy-to-use applications for the creative user.

# # #

Technorati Tags: ,

Grab Shot 38 - "The Windup"

The Wind Up

"Recently I grabbed my camera and my 3 1/2 old and went to the park," said Phillip Resuggan. "We stopped at a ball field where I 'grabbed' this shot. I was going to a 'timeless' kinda look. There was nothing wrong with the original image... just having fun."

Phillip captured the original image with a Nikon D200, ISO 800, 1/2000 @ f-5.3. He then processed the picture in Adobe Photoshop CS2 for the Mac.

If you have an interesting candid you'd like to share, take a look at our Submissions page, then send us your Grab Shot. If we publish it, you'll receive an ultra cool custom carabineer keychain.

Technorati Tags: ,

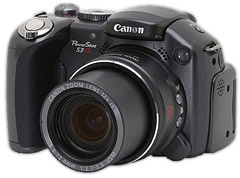
DP Review: Canon PowerShot S3 IS

Canon S3 IS

DP Review has just published an in-depth report on the tantalizing new Canon PowerShot S3 IS. The one feature that catches everyone's eye is the 12X optical zoom... and it's a good one too. Canon has bundled image stabilization with this high magnification creating a terrific "long range" shooter in a compact body.

The swing out "tilt n swivel" screen is great for capturing at a variety of angles, and is a plus for movie mode. Another great feature, in my opinion, is that the camera is powered by 4 AA NiMH cells instead of a proprietary Lithium battery. In an emergency on the road, you can always substitute regular AAs if your NiMHs run out of gas. Canon does not, however, provide batteries with the camera, so add this to your budget.

On the downside, there's no RAW shooting mode. I'm disappointed by this omission. This is a top quality camera that could be used for assignment. The sensor provides 6 megapixels of resolution, which is plenty for most situations. The lack of a RAW mode hamstrings the S3's potential.

That complaint aside, this is an amazing camera that is bound to draw lustful glances from any serious amateur. You can purchase the S3 IS for about $460. That's a lot of camera for the money... especially in such a handsome, compact, rugged body.

Technorati Tags: , , ,

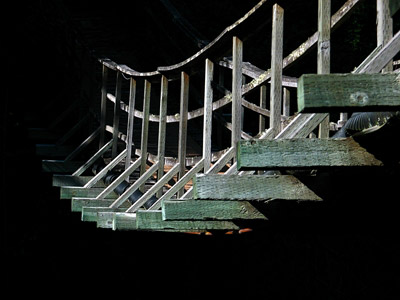
Suspension Bridge

"Since listening to your Metering Mode Podcast #21, I've been experimenting with using different modes, especially the spot metering option," said Alan Amundsen. "A couple of weeks ago I was visiting some friends who had a small suspension bridge on their property crossing over a creek. I climbed down and wanted to get a shot of the bridge from underneath, but was having problems with both the sky above and trees on the far side of the bridge being blown out by the late afternoon sun. I kept reducing the exposure compensation down until it was at -1 2/3 steps, set the shutter speed at 1/250, and used spot metering on the side of the bridge."

"Was I ever surprised at the results. Not only did I get a shot of a suspension bridge, but it also appears to be suspended in space since everything else was blacked out. The focal length was 28mm and the resulting aperture was f-3.5. This picture was taken with my Canon PowerShot S2 IS with which I've been having a lot of fun since last November."

If you have an interesting candid you'd like to share, take a look at our Submissions page, then send us your Grab Shot. If we publish it, you'll receive an ultra cool custom carabineer keychain.

Technorati Tags: ,

iMovie Voice Record

Voiceover adds a professional touch to slideshows. But you may not be ready to tackle new audio programs just to get a simple voiceover track. Even GarageBand seems daunting when you're in a hurry. Fear not, iMovie is a great tool for recording voiceover tracks that you can add to your slideshows created in FotoMagico or other applications. And the best part... it's really, really easy.

First, create a new project in iMovie. Then click on the "Media" button (as shown above) and choose the "Audio" tab. Press the record button (as shown above) and start talking into your Mac's microphone. You might want to play your slideshow in FotoMagico as your talk so you can time the audio to the pictures.

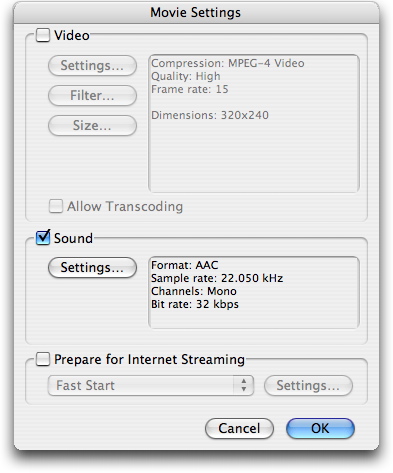
Once you finish recording, go to File > Export and click on the "QuickTime" icon. Choose Compress movie for "Expert Settings" from the popup menu, then click the "Share" button. You'll get another dialog box that lets you choose where you put the file (Desktop) and the export format. Choose "Movie to QuickTime Movie" from the Export popup at the bottom of the dialog box. Click the "Options" button to reveal a new settings box. Once there, uncheck "Video" as shown in the illustration. Make sure "Sound" is checked and click the Settings... button. Use these settings:

Export Settings

iMovie will place the audio file on your Desktop. Now, all you have to do is open FotoMagico and go to Slideshow > Add Audio... and choose your voiceover file. Like magic, your slideshow now has a voiceover track. This procedure might read a little complicated here, but it is truly simple and can be accomplished in minutes if you follow the steps.

This tip is to help you prepare your entry for the FotoMagico Slideshow Showcase. Submit your Entry Form today (to get on the books), then start working on your presentation. Deadline to submit Entry Forms is May 30, and your presentation itself is due by June 15. Don't delay!

And don't forget... if you wish to use FotoMagico to create your show, you can get a $10 discount off the software by entering "Digital Story" in the discount code box. Visit the order page and select FotoMagico. You'll be able to enter a coupon code at the first checkout page. The code is set to "Digital Story". Once the code is input, and the Checkout button is clicked, the $10 discount will be reflected on the final order total page.

Technorati Tags: ,

Preview for Raw

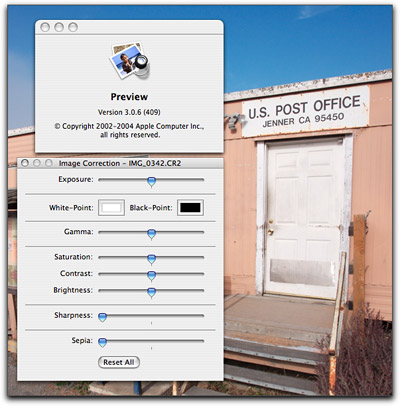
Many Mac OS X "Tiger" users don't realize that they have a powerful Raw converter bundled with their operating system. Every 10.4 Mac comes with a handy application called Preview that most folks think of only as a PDF viewer. Even Apple touts its PDF capabilities without going into much detail about its hidden powers. The most notable of these lesser known features is Preview's ability to decode Raw files and convert them to other formats.

It's true. You don't need Photoshop Camera Raw. You don't need Aperture. If you want to open a common Raw formatted image, just drop it on the Preview icon on your Dock. Preview will decode the Raw file and display it on screen. But wait, things get even better. Go to Tools > Image Correction and you're greeted with a handy set of adjustments that include Exposure, Gamma, Saturation, Contrast, Brightness, Sharpness, and even Sepia -- all of which you can use for manipulating your Raw file.

Would you like to read the metadata embedded in the file header? Go to Tools > Get Info and click on the Details tab. Tons of image data are revealed including dimensions, aperture, shutter speed, color space, and even the camera model used to capture the shot.

When you're ready to convert the file, go to File > Save As and choose among four different formats: Photoshop, Tiff, PNG, and PDF. With the first three options, you can choose between 8-bits or 16-bits per channel. And if you choose the PDF format, you have more options including file encryption -- that's right, you can assign a password to your image to protect it from prying eyes.

File Encryption

And yes, there's still more. You can rotate the Raw file, flip it, assign a Colorsync profile, then print the image. If you go to View > Customize Toolbar, you can add a cropping tool and even a Scale resizer. So not only can you zoom in and out with the Zoom tools, you can set the numeric amount to scale the image, such as 25 percent. Then crop it if you wish.

Preview is an amazing photo editing application that's right there under your nose. If you haven't done so already, I recommend that you add it to your Dock, and use Preview whenever you have to make quick edits to a stray Raw file, or to save it to another format. For many simple jobs, this tool is faster than Photoshop.

Technorati Tags: ,

Photo Icon

In digital imaging, your master files are the equivalent to film negatives in chemical photography. I recommend that you start by capturing the highest quality possible with your camera. If you shoot RAW, you're already getting the most your camera has to offer. Jpeg shooters need to set their preferences to the highest quality settings available.

Then, after you've uploaded the files, you can make copies of your master files for your various needs. I provide a nice overview of this workflow in this week's podcast. Included in the discussion is how to create a master movie then export versions for specific output. This can be particularly handy for your FotoMagico Slideshow Showcase entry.

Listen to the Podcast

Now that I've piqued your curiosity, it's time to listen to today's audio show titled, "The Concept of Master Files." You can download the podcast here (32 minutes).

Technorati Tags: ,

Grab Shot 36 - "End of an Era"

End of an Era

I was driving down Highway 101 in Northern California when I spotted this abandoned gas station off the side of the road. I needed a break, so I pulled off and went exploring. The light was diffused from the overhead clouds that were also producing rain. I surveyed the scene for a few minutes, then pulled out my Canon 5D with its 24-105 lens and started working the shot.

I had just paid $3.35 a gallon for my compact Saturn, and I was thinking about how we were nearing the end of an era -- the petroleum fuel era. Funny that minutes later I stumbled upon this shot that echoed my thoughts.

I captured the image in RAW mode, 1/60th @ f-4.5, ISO 400. I then converted it to B&W in Adobe Photoshop. Image by Derrick Story.

If you have an interesting candid you'd like to share, take a look at our Submissions page, then send us your Grab Shot. If we publish it, you'll receive an ultra cool custom carabineer keychain.

Technorati Tags: ,

FotoMagico

I used to resize all of my images to 640x480 before adding them to my slideshows, but that was before zooms and pans were easily included in these presentations. I still crop and resize many of my pictures, but now I take into consideration the resolution needed for zooming and panning. Those images have to be bigger than your finished slideshow dimensions.

For example, let's say your finished presentation is going to be 640x480. But you want to have an image where you zoom in on a portion of the frame, maybe to show some detail. That picture needs to have enough resolution to maintain top quality as you zoom in.

My rule of thumb is that I like to have at least 1280x960, but often I will go 2560x1920 if I think I'm going to zoom in tight. When choosing among candidates for zooming, examine the photo at 100 percent magnification. If the detail looks good, then the image will most likely hold up as you zoom in during the slideshow. Both iPhoto and FotoMagico enable you to create this effect in your presentation. It's not a technique that you want to overuse, but I think a few well-placed zooms or pans give your movies a real professional touch.

This tip is to help you prepare your entry for the FotoMagico Slideshow Showcase. Submit your Entry Form today (to get on the books), then start working on your presentation. Deadline to submit Entry Forms is May 30, and your presentation itself is due by June 15. Don't delay!

And don't forget... iIf you wish to use FotoMagico to create your show, you can get a $10 discount off the software by entering "Digital Story" in the discount code box. Visit the order page and select FotoMagico. You'll be able to enter a coupon code at the first checkout page. The code is set to "Digital Story". Once the code is input, and the Checkout button is clicked, the $10 discount will be reflected on the final order total page.

Technorati Tags:

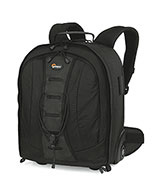
Lowepro Roller Backpack

When you want one camera bag that provides everything you need for travel, take a look at the Lowepro Rolling CompuTrekker AW. Use its top handle to carry it, padded backpack straps to wear it, or in-line skate wheels to roll it. If the weather turns foul, pull out its all-weather cover to keep both bag and equipment dry. Need to go for a hike with your tripod? Expose its hidden tripod holder and attach your "sticks" to the outside of the bag. Oh, and want to bring your 12" or 15" laptop? No problem, there's space for that too.

This $199USD bag (available from Adorama.com and other retailers) fits in the overhead compartment of an airplane or neatly in the trunk of your car. Zip open the main compartment to reveal enough room to fit a DSLR with an 80-200mm f-2.8 lens attached, plus room for lenses, flashes, and other accessories. There's a nifty digital goodie pouch (that's removable) that I use to store my batteries so they're always handy. You can arrange the padded dividers in the main area in various configurations to accommodate your particular needs. I like to bring a smaller Lowepro bag and tuck it inside the CompuTrekker. That way, when I head out for street shooting, I have a super-portable bag to complement the larger roller unit.

I have rolling luggage that I use all the time, but none of my suitcases are as balanced or easy to tote as the CompuTrekker. The extending arm arcs to the perfect angle making the unit very easy to roll for extended distances. Other nice touches include a dedicated memory card pouch that's very accessible and a removable 12" laptop sleeve. 15" computer users can ditch the sleeve and slide their laptops directly into the front compartment of the CompuTrekker.

In practical use, however, I prefer the bag without the laptop inserted. It makes for a slimmer profile that's easier to stash in tight compartments on the plane. If you need to fit the bag in even a smaller space, pull out the backpack straps and waistband from their hidden compartment. It's handy to stash them when using the bag as a roller, but the bad is slimmer when they're exposed.

The Lowepro Rolling CompuTrekker AW's outer dimensions are 12.2W x 4.5D x 13.4H (inches) -- 31 x 11.5 x 34 (centimeters). It weights 8.8 pounds -- 4.4 kilograms. This is as close to a perfect travel bag as I've used. I have mine filled with one Canon 5D, 5 lenses, 2 flashes, Canon Rebel XT, and a handful of accessories (including the lighter "street bag." This one is a winner.

Technorati Tags: , ,

Grab Shot 35 - "Coffee in Hand"

Coffee Cup

"I love Athletics Day. Rarely in the school year is there an event where can you can capture such a large spectrum of colors and people in a sunlit environment," said Michelle Kong. "Granted, considering the fact that it was a compulsory school event, and the fact it turned out cold and rainy, there were a few sour faces among the crowd. However, it's hard not to have a good time when you're with so many of your friends around you..."

Michelle captured this grab shot of her friend with coffee in hand using existing light and a Nikon D70. The ISO was set to 500 with an exposure of 1/160th @ f-5.6. She got nice a close and used a focal length of 24mm.

If you have an interesting candid you'd like to share, take a look at our Submissions page, then send us your Grab Shot. If we publish it, you'll receive an ultra cool custom carabineer keychain.

Technorati Tags: ,

"Camera Bag Chat" - Podcast 32

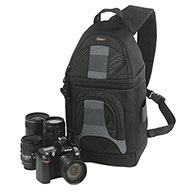
Lowepro Slingshot 200

We love our photo bags almost as much as the cameras tucked safely inside. This week I chat with Suzanne Caballero, who is a camera bag expert. She works for Lowepro; they've been designing great bags for over 30 years.

During our conversation, Suzanne shared a few stories about famous photographers she's met through her work as Marketing Communications Manager. First she talked about Greg Gorman, who is a well known portrait shooter with a wonderful studio in Northern California. Suzanne also talked about Seth Resnick, a legend too, who is doing much to promote digital photography across the world. She even chats about her first photo expedition to Death Valley with John Isaac. Great stuff!

I asked Suzanne for some staff recommendations for Lowepro bags. Here are a few she thought you'd be interested in:

And finally, here's the link to first story and the second story she told about Lowepro bags saving more than just camera gear.

Listen to the Podcast

Now that I've piqued your curiosity, it's time to listen to today's audio show titled, "Camera Bag Chat." You can download the podcast here (34 minutes).

Technorati Tags: , ,

Lightsphere II

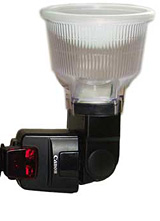
I took the Lightsphere II on assignment to cover a cocktail party in San Francisco. The location was the Scott Howard restaurant on Jackson St. that had a high center ceiling with 10' drop ceiling around the perimeter of the room -- perfect for testing a bounce flash device.

The Lightsphere slips over the head of the Canon 580EX flash I use with a 5D. It's made of flexible clear vinyl and doesn't require any adapters. (There are four different versions that work for most popular flashes.) The fit is snug and secure. The device diffuses light in all directions. The light from the flashhead bounces off the inverted dome atop the Lightsphere and travels through the ribbed sides of the device. Light also passes through the dome and bounces off the ceiling above. The goal is to produce a much softer light than with direct flash alone. Plus, you don't have to use a flash bracket.

I started out the shoot my normal way with direct flash mounted on a bracket. I then added the Lightsphere for another series of shots. I noticed that the Lightsphere worked best in the areas where the ceiling was lower and I could be closer to the subjects. Under these conditions, it does diffuse the light and produce softer results than with a direct flash. Here are two comparison shots.

Direct Flash on Bracket
Direct Flash on bracket with no Lightsphere

With Lightsphere
Lightsphere added to flash

One thing you'll notice is that the direct flash is also "cooler" in color temperature than the shot with the Lightsphere, which is warmer. The Lightsphere picks up the slight tint of the ceiling. I also noticed that the light was broader with the Lightsphere, providing illumination for more surrounding subjects than with direct flash.

The Lightsphere does use more light however, so my flash didn't recycle as fast as I'm used to. I had more underexposed frames with the Lightsphere, mainly because I shot before the flash was fully charged again. In the area with the high open ceiling, the Lightsphere didn't perform as well. My sense is that it really requires a low enough ceiling for bounce flash to provide best results.

With its $48 price tag, it's not cheap. But if you photograph a lot of people indoors, such as events and weddings, the Lightsphere could be a handy addition to your bag of lighting tricks.

Technorati Tags: ,

Sony W50

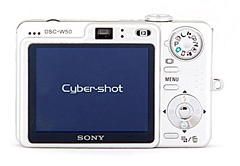
Hobbyists looking for a solid 6-megapixel pocketable digicam for less than $250 might want to take a look at the recent review of the Sony Cyber-shot DSC-W50 published on Imaging-Resource.com. In addition to its ample resolution, the DSC-W50 sports a 3X optical zoom, 2.5" LCD monitor, fast shutter response, fun multi-burst mode, great battery life, fast USB 2.0 interface, and cool accessories such as an underwater case.

The DSC-W50 also features high ISO settings up to 1000, but before you get you hopes up that you have a low-light gem here, read what Imaging Resource says about picture quality at settings above ISO 400. Their opinion is that print quality is unacceptable at these high settings, but very good at 400 or below.

Overall, seems like a great camera to toss in the pocket and hit the road.

Technorati Tags: , ,

New Adobe Lightroom Tips Site

Inside Lightroom

I've been spending a lot of time with Lightroom these days, Adobe's photo management software for serious photographers. I'll have lots of surprises for you around this application, but for now I want to let you know about a new site I'm running called Inside Lightroom.

Inside Lightroom is loaded with tips and techniques for mastering this photo workflow software. Right now, you can listen to an audio interview I did with published author Julianne Kost as she discusses Lightroom's impact for digital photographers.

Then go the the Adobe Labs page and download the latest version of the public beta. To help you get comfortable quickly, also download the free 22-page "getting started" PDF by O'Reilly author, Ken Milburn, titled From Darkroom to Lightroom.

I'm firing up the blog posts too. For example, do you know how to add music to a Lightroom slideshow? Check out this slideshow tip to get the scoop.

Technorati Tags:

iTunes

There's a saying in filmmaking that "sound is half the picture." This adage applies to your slideshows too. Adding music to your presentations strengthens their emotional appeal. But where do you find music for soundtracks, and how do you add it to your pictures?

One of the first places to look is in your iTunes music library. You're allowed to use the songs you buy through iTunes Music Store (iTMS) for personal use, including your slideshows. (Commercial use of your iTunes music requires specific permission from the license holder of the material.). If you're using iPhoto to create your presentation, you can pull music directly out of your iTunes library and add it to your images (by clicking on the iTunes icon in iPhoto). Find out more by reading this brief tutorial.

FotoMagico users also have direct access to their iTunes music. Click on the Audio tab to reveal all of the music in your library. Find the song you want, and click on it once to highlight it. You can preview it by clicking on the Play button to make sure it's the track you want to use.

There can be a snag however. Even though you're allowed to use music purchased through iTunes Music Store, FotoMagico won't let you export your slideshow with iTMS music in it because of the DRM embedded in the track. There is a workaround, however.

  • Go to iTunes and select the songs you want use for your presentation. I usually create a special playlist for these.
  • Click the Burn button in the upper right corner. You'll be asked to insert a blank CD.
  • Burn an "Audio" CD (not MP3 or Data). You can set this choice in iTunes Preferences under Advanced > Burning.
  • Eject the audio CD after burning, then reinsert it. Now import the songs back into your iTunes library. I usually adjust each song's title slightly so I know the it's not the original track. You can do this by choosing Get Info.
  • Keep the songs in a special "Slideshow" playlist so they're easy to get to.
  • Reopen FotoMagico and navigate to the music you want to use.

Now when you drag the song to the timeline, you'll no longer get the warning that you won't be able to export this slideshow. And unlike slideshows created with iPhoto, you can add more than one song to a presentation, creating a more interesting movie.

This tip is to help you prepare your entry for the FotoMagico Slideshow Showcase. Submit your Entry Form today (to get on the books), then start working on your presentation. Deadline to submit Entry Forms is May 30, and your presentation itself is due by June 15. Don't delay!

Technorati Tags: , , ,

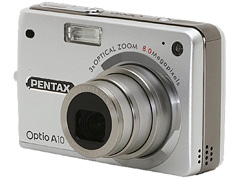
Pentax Optio A10 on DPReview

pentax_optio

Pentax's latest Optio features a 3x optical zoom, 8 megapixels, a "high sensitivity" scene mode (ISO 800), and a spacious 2.5-inch screen. Other features include a CCD-shift image stabilization system, in-camera effects and frames, and the ability to record movies in MPEG-4 DivX format.

If you want to find out more about this handsome, capable shooter, check out the full review on dereview.com.

Technorati Tags: ,

Grab Shot 34 - "Spring Rainbow"

Rainbow

"Spring is really beautiful here in Italy," says Jennifer Tofani. "We get these April showers rolling in. This afternoon after one such shower, a friend called to give me a tip that a full rainbow had formed. I grabbed the camera and shot away at whatever the camera was set at. A few moments later it faded away."

Jen used a Nikon D70, RAW, Auto Exposure Mode (1/320 ay f/9), ISO 200, Focal Length 18mm.

If you have an interesting candid you'd like to share, take a look at our Submissions page, then send us your Grab Shot. If we publish it, you'll receive an ultra cool custom carabineer keychain.

Technorati Tags: ,

Camera Raw 3.4

Adobe announced an update to the Camera Raw plug-in for Photoshop CS2, extending raw file support to eight additional digital camera models, including the popular Canon EOS 3OD. This brings the total number of supported camera models to over 120. The update is available immediately as a free download at the following location.

Technorati Tags:

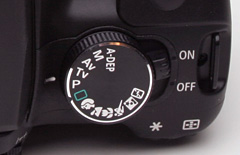
Camera Settings

Today's photo mailbag includes questions about exposure compensation, over-saturation of solid reds by some cameras, macro photography, photo archiving, iTunes podcast subscriptions, plus a bonus slideshow tip. I promised to post the links to the Macworld article on photo archiving. So here's the info:

First, take a look at New Life for Old Photos, then you might want to read Selecting a Scanner. You might also be interested in Tools for Turning Back Time. And finally, don't forget my podcast titled, Scanning Tips.

Plus, here's some more info about my slideshow tip, Use Existing Signs for Titles. This tip is to help you prepare your entry for the FotoMagico Slideshow Showcase. Submit your Entry Form today (to get on the books), then start working on your presentation. Deadline to submit Entry Forms is May 30, and your presentation itself is due by June 15.

Listen to the Podcast

Now that I've piqued your curiosity, it's time to listen to today's audio show titled, "Mailbag - Digital Photography Q&A." You can download the podcast here (28 minutes).

Technorati Tags: ,

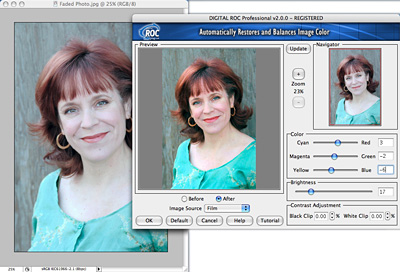
Color Restore

For decades, you faithfully recorded your most precious moments on film, picked a few snapshots from the bunch for photo albums, and then carefully stored the rest. But now those prints are fading. If they're stored in nonarchival albums or -- heaven forbid -- in the attic or garage, they may be aging even faster.

You can save them. By scanning old photos and film into your Mac now, you'll be able to stop the aging process and preserve irreplaceable photos. With the help of image-editing software, you may even be able to reverse some of the worst damage.

In a series of articles I have published in Macworld Magazine, you can learn how to set up a photo archiving workflow using a scanner and software you probably already own. First, take a look at New Life for Old Photos, then you might want to read Selecting a Scanner. You might also be interested in Tools for Turning Back Time. And finally, don't forget my podcast titled, Scanning Tips.

Technorati Tags: ,

Open Sign

Later this month I'll cover how to make graphical titles for your slideshows, but first I want to acknowledge the obvious -- taking pictures of signs and using those images to help you tell the story.

For example, the "open sign" I've shown here is both artistic and can be informative in a slideshow. And you don't have to present it just a static image. You can pan it through the frame, or you use it as a transition to activity inside. The real trick is to remember to take these shots while you're gathering source material for your project. Even if you don't use them as originally conceived, they become part of your stock image collection for future projects.

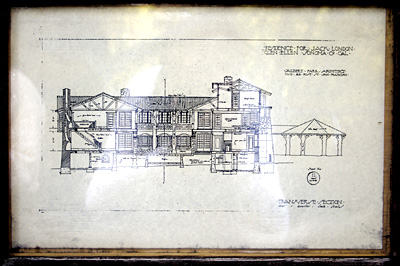
Also keep an eye out for informative placards. Often they contain a wealth of informative that can really spruce up your show. For example, this drawing was displayed at the ruins of "Wolf House" that Jack London was building for his retirement. If you captured a high resolution shot of this drawing, you could then zoom in on it during your slideshow as you described that part of the house. Ken Burns would be proud of you.

Placard

This tip is to help you prepare your entry for the FotoMagico Slideshow Showcase. Submit your Entry Form today (to get on the books), then start working on your presentation. Deadline to submit Entry Forms is May 30, and your presentation itself is due by June 15. Don't delay!

Technorati Tags: ,

Camera Phone Shooting Tips

Sony K510a Cameraphone

One of the reasons that people shy away from camera phones is that they often get lousy pictures. You can improve your odds by trying some of these tips. Here's a look at the most common camera phone settings and how they can help you capture better images.

Start with Picture size. This option gives you the choice between a couple resolution settings: large and small. (They would be more accurately labeled small and smaller, but that's so un-American) Choose large, which is usually about 640 x 480 or 1.3 megapixels. You can't make a very big print with these images, but they can look decent on a web page or part of an email attachment.

Here are a few other options you might want to try.

Technorati Tags: , ,

Grab Shot 33 - "Red and Black"

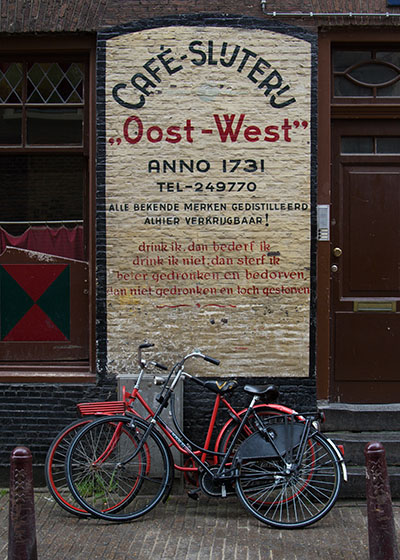
Amsterdam Bikes

"Had a 7-hour layover in Amsterdam, so I took a train downtown and started looking for pictures with no sense of direction or purpose," said Muyi Abifarin. "The first picture I saw was a black and red bike parked under a black and red sign by what seemed to be a closed bar. I took about three hand held shots at about 6:45 AM, right before the city was awake."

I then got nervous because I was by myself in an alley holding an expensive camera, passport, and boarding pass with a couple of men I had seen earlier approaching. Wish I could have taken a few more frames without the two pillars in front.

Muyi captured the picture with a Canon 20D and Tamron 28-75mm lens. The camera was set to f/4.5, 1/100sec, and ISO 200.

If you have an interesting candid you'd like to share, take a look at our Submissions page, then send us your Grab Shot. If we publish it, you'll receive an ultra cool custom carabineer keychain.

Technorati Tags: ,

Boinx Software

A well-crafted digital slideshow is a thing of beauty. Boinx Software and The Digital Story are teaming up to help you master the art of authoring the perfect slideshow, then providing you with the opportunity to share your work with the world. The month of May is digital slideshow month on The Digital Story, and we have lots planned for you.

These activities are gathered around the FotoMagico Slideshow Showcase. The Showcase, sponsored by Boinx Software, is designed to help you perfect your slideshow authoring skills. Here's how it all unfolds.

In this week's podcast, Sensational Slideshows, I discuss how to pick an appropriate subject and offer some ideas for getting your tools together. Then, as we work through the month of May, I'll be providing tips for building your show, adding audio, making titles, and fine-tuning your presentation. The goal is that after a few weeks, you'll have your slideshow project in production and will be able to submit an entry form to the FotoMagico Slideshow Showcase. In June, we'll select 10 entries to feature on The Digital Story and send out a press release with the names, bios, web site links, and pointers to all of the showcased presentations. This is an excellent opportunity to shine a light on your photography.

You should read the Official Rules for entry (at the bottom of the entry form), but the basic parameters are this:

  • Anyone over 18 can enter.
  • Slideshow entries must be between 1-4 minutes in length.
  • The dimensions of the slideshow can be no more than 400 pixels in any direction. 320x240 is the recommended size.
  • Music and/or voiceover is permitted, but not required.
  • You must own, or have permission, to use all of the content in your slideshow
  • You need to complete an Official Entry Form for each slideshow submitted, but you can submit as many shows as you wish.
  • If you wish to use FotoMagico to create your show, you can get a $10 discount off the software by entering "Digital Story" in the discount code box. Visit the order page and select FotoMagico. You'll be able to enter a coupon code at the first checkout page. The code is set to "Digital Story". Once the code is input, and the Checkout button is clicked, the $10 discount will be reflected on the final order total page.

You may also use other software to author your slideshow, such as iPhoto 6 (Mac), QuickTime 7 Pro (Mac/Windows), and Photo Story 3 (Windows XP), just to name a few. As the month goes on, I'll publish tips and tricks for adding polish to your creation.

The FotoMagico Slideshow Showcase also serves as our Photo Assignment for the month of May. You can send in your entry form before your slideshow is completed (to let us know that you're working on your presentation). In fact it's recommended. Entry forms and actual slideshows are due on June 15. You can complete and submit your entry form here.

I encourage Mac OS X users to take a look at the FotoMagico software. It is an amazing authoring tool for slideshows. You might want to watch an informative QuickTime slideshow that demos FotoMagico.

Regardless of which tools you use, I hope you will participate in the Showcase. The skills you can develop this month by working with us will benefit you for years to come.

Technorati Tags:

FotoMagico

Powerful multimedia presentations of your pictures will enhance their impact on viewers. And few tools in the photographer's bag of tricks are more compelling than slideshows. This episode begins a month long journey into the craft of building great slideshows. As part of this endeavor, I'm announcing the FotoMagico Slideshow Showcase, which is an opportunity for you to master the art of slideshow presentation and share samples of your work with the world.

Here's how it all unfolds. In this podcast I'm discussing how to pick an appropriate subject and am offering some ideas for getting your tools together. Then, as we work through the month of May, I'll be providing tips for building your show, adding audio, making titles, and fine-tuning your presentation. The goal is that after a few weeks, you'll have your slideshow project in production and will be able to submit an entry form to the FotoMagico Slideshow Showcase. Then in June, we'll select 10 entries to feature on The Digital Story and send out a press release with the names, bios, web site links, and pointers to all of the showcased presentations. This is an excellent opportunity to shine a light on your photography.

You should read the Official Rules for entry (at the bottom of that page), but the basic parameters are this:

  • Anyone over 18 can enter.
  • Slideshow entries must be between 1-4 minutes in length.
  • The dimensions of the slideshow can be no more than 400 pixels in any direction. 320x240 is the recommended size.
  • Music and/or voiceover is permitted, but not required.
  • You must own, or have permission, to use all of the content in your slideshow
  • You need to complete an Official Entry Form by May 30 for each slideshow submitted, but you can submit as many shows as you wish.
  • If you wish to use FotoMagico to create your show, you can get a $10 discount off the software by entering "Digital Story" in the discount code box. Visit the order page and select FotoMagico. You'll be able to enter a coupon code at the first checkout page. The code is set to "Digital Story". Once the code is input, and the Checkout button is clicked, the $10 discount will be reflected on the final order total page.

You may also use other software to author your slideshow, such as iPhoto 6 (Mac), QuickTime 7 Pro (Mac/Windows), and Photo Story 3 (Windows XP), just to name a few. As the month goes on, I'll publish tips and tricks for adding polish to your creation.

The FotoMagico Slideshow Showcase also serves as our Photo Assignment for the month of May. You can send in your entry form before your slideshow is completed (to let us know that you're working on your presentation). In fact it's recommended. Entry forms are due by May 30. The actual slideshows are due on June 15. You can complete and submit your entry form here.

Listen to the Podcast

Now that I've piqued your curiosity, it's time to listen to today's audio show titled, "Sensational Slideshows." You can download the podcast here (32 minutes).

Technorati Tags: ,

This month's Photo Assignment displays the work of 13 participants from The Digital Story community. The following shots are their interpretations of the theme, "vertical." This assignment was a tall order, but our crew was up to the task.


thumbnail
Maarten Sneep

"The Road to Nowhere." You can learn more about this shot, and the others that he took for the vertical assignment by visiting his website.


Technorati Tags: