August 2006 Archives

MacBook Pro 17

Over the last couple months, I've talked to quite a few photographers who are running Aperture on the new Intel-based MacBook Pros. This includes me. (Yes, I talk to myself too.) I use Aperture on a 17" MacBook Pro and have been satisfied with its performance.

But at times I would hear comments from some of the others that Aperture wasn't running well on their Intel-based laptops, and that they were seeing the spinning beach ball more often than they cared to. Finally, I sat down with one of these fellow shooters, and we both opened our laptops and launched Aperture. Sure enough, mine performed better -- not only on launch, but during sorting and editing too. My friend was using a similarly configured 15" MBP, and I the 17".

I then began to retrace my earlier conversations. Sure enough, those who were not as happy with Aperture performance on MBP were using the 15" models, and those happier had 17" laptops.

When I ran System Profiler on the test laptops, the specs were very similar, including RAM (2 GBs). One difference on my 17" is the 7200 RPM hard drive compared to the 5400 RPM drive in the 15". But the 17" still performed well when I accessed libraries on external 5400 RPM drives.

This is purely anecdotal, but it seems to me that if you're going to run Aperture on a laptop, give a good look at the 17" model. You may be a bit happier with the performance. We'll see if the next rev of MBPs closes this alleged gap any. My guess is that we'll see upgraded machines by the end of the year.

Technorati Tags: ,

Red Photo Assignment

If you haven't submitted your photo assignment for August yet, today is the deadline. The theme for this month is "red."

Our monthly Photo Assignment on The Digital Story is designed to make us all working photographers. It helps us apply the techniques we learn and produce a body of work to show to the public. We have a great line up in the works for the August gallery. I'll showcase the entries on Monday, Sept. 4. For more information about how to submit your photo assignment, go to the Submissions page and follow the instructions for Photo Assignment.
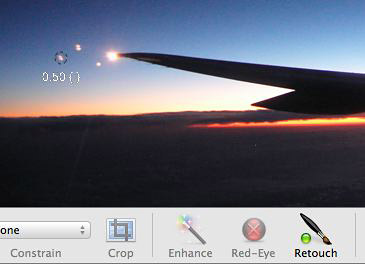
Featured photo: This "red" entry is from Jennifer Tofani. "I was bleary eyed with bloodshot eyes," she said about her return trip home. "As I leaned on the window watchng the sky go by, I saw red! Although the red was but a dot on the tip of a wing, it really stood out against the pale blue sky and white clouds."

Technorati Tags: , ,

Grab Shot 56 - Red Wall Revisited

Red Wall Revisited

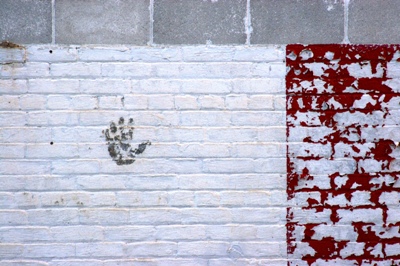
"Over a year ago I stumbled upon this wall in an old manufacturing section of town and took a shot of it," said Brett Stoddart. "Every time I looked at the picture, I would imagine it broken up into sections with more detail in each. I finally made it back to where the original was taken, and recomposed the shot with emphasis on the grease handprint against the whiteness of the wall and the peeling red paint. Needless to say, I have been so much happier with this and other 'revisited' images of 'the red wall.'

Brett used a Canon 20D in Aperture Priority mode at f-5.6. The ISO was set to 400. The focal length was 140mm.

If you have an interesting candid you'd like to share, take a look at our Submissions page, then send us your Grab Shot. If we publish it, you'll receive an ultra cool custom carabineer keychain.

Technorati Tags: , , ,

ExpoDisc

The Custom White Balance setting is one of the most powerful features on your camera. Yet it is seldom employed because we're not sure how to use it. In this podcast, I describe the value of using custom white balance and techniques for putting it to work.

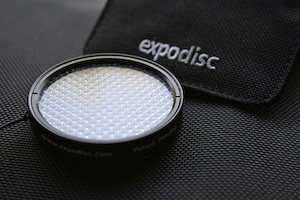
You can use something as simple as a plain sheet of paper, a coffee filter, or my personal favorite, the ExpoDisc. If you want to learn more about how to use the ExpoDisc, see my article on O'Reilly Digital Media.

Regardless of how you employ custom white balance, it will save you post processing time and improve the look of your images.

Listen to the Podcast

Now that I've piqued your curiosity, it's time to listen to today's audio show titled, "Custom White Balance" You can download the podcast here (28 minutes).

See It in Person

If you're in Northern California on the weekend of October 7, stop by the Macintosh Computer Expo and sit in on my iPhoto 6 Tips and Tricks session. It's free, and I'll show you this tip plus lots of other cool iPhoto goodies. For those who really want to dig into some shooting techniques, stick around another day and sign up for my Digital Photography Made Amazing half day workshop on Oct. 8. But sign up early because seating is limited.

Technorati Tags: , ,

How to Animate Your iPhoto Titles

Motion Title

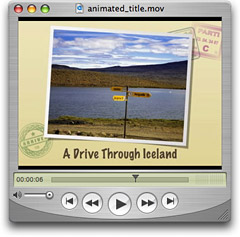
You can put your great looking slideshow titles in motion without ever leaving iPhoto. In a previous post, I explained how to use the Greeting Card function in iPhoto 6 to generate compelling title slides. You can take these images to the next level by animating them.

Start by making a copy of your title slide and placing the two identical images side by side at the beginning of your iPhoto slideshow. Then apply the Ken Burns effect to the first slide. For the "Start" point, zoom in a little (using the Zoom slider setting located at the lower right of the frame). The set the "End" point of the effect to show the slide at 100 percent (no magnification).

Open the "Adjust" panel and set the slide appearance length to 6 seconds or so with no transition. Now go to the second slide and set its length to 2 seconds with a Dissolve transition. You won't use the Ken Burns effect for this image. Now click once on your first slide and hit the Preview button to see the effect.

I've posted an example so you can see the effect in action. You can play with the settings to create exactly the look you want. It's a professional way to start your slideshow that's so easy to create in iPhoto.

See It in Person

If you're in Northern California on the weekend of October 7, stop by the Macintosh Computer Expo and sit in on my iPhoto 6 Tips and Tricks session. It's free, and I'll show you this tip plus lots of other cool iPhoto goodies. For those who really want to dig into some shooting techniques, stick around another day and sign up for my Digital Photography Made Amazing half day workshop on Oct. 8. But sign up early because seating is limited.

Technorati Tags: , , ,

iPhoto Ppostcard

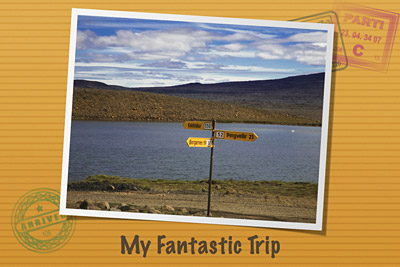
Here's a great graphics trick that many people don't know. You can easily build fantastic slideshow titles right within iPhoto 6. Start by clicking once on an image in your iPhoto library that would be a good opening title. Now click on the "Create a new card" icon at the bottom of the iPhoto window. (It's the greeting card picture with a plus sign.) iPhoto will open a new window and ask you to choose a theme.

Go to the popup menu in the upper left corner of the dialog box and select "Postcard." Then browse the different themes until you find one you like. Select it by clicking on it once, then click on the Choose Theme button. This prompts iPhoto to open a new window with the preliminary design of your card.

To add text to the front of your postcard, which will soon become your opening title, click on the Design icon to reveal a popup menu, and select option #2. You can add type to your card by clicking on "Insert Title" and typing.

You have lots of design control. You can change backgrounds by clicking on the Background button, switch themes by clicking on the Themes button, and even change fonts and size by clicking on the Settings button. Once you have the postcard designed to your liking, go to the File menu and choose Print. iPhoto will assemble your card for you then present you with another dialog box.

If you're greeted with the standard view of the dialog box (that doesn't give you any options), click on the Advanced button. Now set up "From 1 to 1" for your Pages selection. You don't need the back of the postcard for this assignment. Go to the PDF dropdown menu and select "Save PDF to iPhoto."

Your Mac will run a little workflow that soon asks you which iPhoto Library to save the image in. Select your slideshow album from the "Choose Album" popup menu and hit "Continue." iPhoto will place a 1200 x 800 Jpeg of your postcard in your album. Rename the image "Opening Title" and drag it to the first position in the album. You can create as many of these graphics as you need throughout the show. You now have a stupendous opening graphic for your slideshow.

See It in Person

If you're in Northern California on the weekend of October 7, stop by the Macintosh Computer Expo and sit in on my iPhoto 6 Tips and Tricks session. It's free, and I'll show you this tip plus lots of other cool iPhoto goodies. For those who really want to dig into some shooting techniques, stick around another day and sign up for my Digital Photography Made Amazing half day workshop on Oct. 8. But sign up early because seating is limited.

Technorati Tags: , ,

ExpoDisc

Capturing accurate color under different types of lighting isn't always easy. Fortunately, most of the time the auto white balance setting does a good job. And if you shoot Raw, you always have the option to fiddle with your white balance settings in post production.

But imagine setting all of those concerns aside and just get the color right when you take the picture. I've been using the ExpoDisc recently, and my colors have never looked better.

The ExpoDisc works hand in hand with your Custom White Balance setting. By following just a a few easy steps, you essentially create a new white balance preset tailored specifically for the light source that's illuminating your subject. I can set up a custom white balance setting in less than a minute on my Canon DSLRs.

In my next podcast I cover the custom white balance setting and explain how to use it with a variety of accessories including a sheet of white paper, a coffee filter, and the ExpoDisc. You can find my podcasts on iTunes Music Store. The custom white balance episode will be available this coming Tuesday.

The ExpoDisc is available for $80 - $115 depending on what diameter you buy.

Technorati Tags: , ,

Canon Rebel 400D Announced

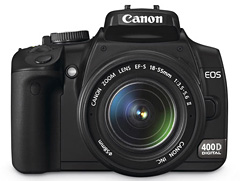
Canon Rebel 400D

Canon announced the Rebel 400D today along with two new lenses (50mm f-1.2 and 70-200mm IS). The new Rebel features a bigger 2.5" LCD, sensor dust management system, and a new CMOS 10.2 MP sensor.

Canon has also lowered the price $100 from the previous Rebel, which means you can get the 400D body for $799 USD. This is a tempting package for those with the original 6MP Rebel, and I bet even current Rebel 350D users will give this new model a close look. The larger LCD and image sensor puts this camera on par with many of Canon's more expensive offerings. Combined with the fact that existing 350D accessories and battery work with the new model, the upgrade path is quite smooth.

We'll keep an eye on availability...

Technorati Tags: , ,

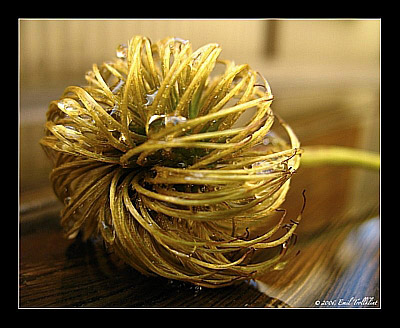
Grab Shot 55 - Fallen Flower

Emil Trollklint

"I grabbed this photo only the other day on my balcony after a awful rainy night," said Emil Trollklint. "This flower had landed on the wood floor, and its shape and colour attracted my eye. I captured the scene with my Canon A620 set to 1/60 of a second at f-2.8."

If you have an interesting candid you'd like to share, take a look at our Submissions page, then send us your Grab Shot. If we publish it, you'll receive an ultra cool custom carabineer keychain.

Technorati Tags: , , ,

Olympus SP-510 UZ Debuts at Photokina

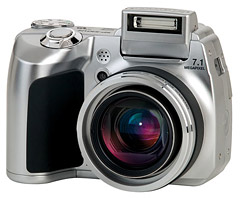
Olympus SP-510uz

This is a camera to keep an eye on. Olympus is unveiling the SP-510 UZ at Photokina. It's specs are impressive: 7.1 million pixels, 10x optical zoom, 2.5" LCD, ISO 50-1600 at 7.1 megapixels, ISO 2500/4000 at 3 megapixels resolution, and... RAW mode.

In a recent post, Are "Prosumer" Cameras on the Way Out?, I wonder if full-featured compact cameras with Raw capability are becoming a thing of the past. Apparently, Olympus doesn't think so. This camera has so much: spot metering, advanced white balance adjustment, 3 frames per second, and f-2.4 maximum aperture. The only missing feature is its lack of a hot shoe. Other than that, it appears to be a dream packed into 325 gram package.

I can't wait to see what the first wave of reviews have to say.

Technorati Tags: , ,

"The Impact of Prints" - Podcast 46

Touching the Prints

Among my many eye-opening experiences in Iceland, I had a revelation about printing while participating in the reception at the Reykjavik Apple Store that final Friday. Instead of mounting our stacks of 13" x 19" prints and properly hanging them on the wall, we used removable Scotch tape and placed them haphazardly on the giant glass windows that illuminated the room. We also left some in stacks on counters where visitors could shuffle through them at their own pace.

These choices helped transformed what could have been a somewhat staid event into one of artistic immersion. People would pull the prints off the glass, hold them, show them to others, take them to the photographers for signing, and ultimately cart one or two home. We weren't just looking at photography, we were touching it. You could hold the image at any angle you wanted, look as closely as you dared, and feel the texture of the paper while doing so.

Reykjavik Reception

We had worked hard to output these snapshots of Iceland on Epson R2400s supplied by Epson as part of their generous sponsorship. But I don't think any us imagined the reaction to the images as they disappeared off the windows, through the doors, and into the Reykjavik night.

I've brought this experience home to my own studio. Now, instead of putting barriers between my images and those who view them, I'm going to leave them laying around for anyone to touch. They only cost a few dollars each to make, and I can always output more if necessary.

I learned many things in Iceland. But this one was a surprise. It seems so logical now -- letting people touch your prints brings them closer to your artwork.

Listen to the Podcast

Now that I've piqued your curiosity, it's time to listen to today's audio show titled, "The Impact of Prints." You can download the podcast here (31 minutes).

Technorati Tags: , ,

Grab Shot 54 - Camera Phone Sauce

Photoshopped Image

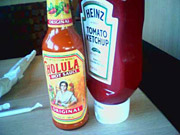
"After getting my first camera phone, my initial thought was, 'well it's a novel idea but not very useful,'" said Harold Thompson.

"One day while waiting for our dinner to come, I took the camera out and begin to pan around to see what might be within range. The colors of the catsup and hot sauce bottles on our table sort of popped. So I took a grab shot, and to my surprise, it wasn't too bad. My next step was to bring it into Photoshop and experiment."

Original Camera Phone Image

"The final adjustments were pretty simple. I duplicated the background layer, applied a posterize effect, around 6 or 7, and then applied the ink outlines filter on another layer. You can also adjust the exposure which is sometimes necessary with camera phones. Lighting is really a big deal with these little guys."

The camera phone used is a Samsung SCH-a670 with a resolution of: VGA (640 x 480)

If you have an interesting candid you'd like to share, take a look at our Submissions page, then send us your Grab Shot. If we publish it, you'll receive an ultra cool custom carabineer keychain.

Technorati Tags: , , ,

Model Gallery Now Online

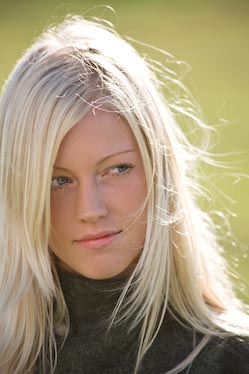
Iceland Model

I've just posted a gallery of model shots from the Iceland shoot that Maggie Hallahan and I discussed in podcast 45. This gallery covers three of the locations we visited, including the steam shots we recorded at 10pm as the final sequence of the day.

I used Adobe Lightroom to process the images and built the gallery using its Web module. I recorded most of the images with a 70-300mm Canon USM IS zoom lens mounted on a Canon 5D body. For the steam series, I attached the camera on a tripod and set the camera to 1/30th of a second at f-5.6, ISO 100.

As with the wedding couple series that I published earlier, I made sure I got model releases for all of the subjects featured in these galleries.

Technorati Tags: , ,

Grab Shot 53 - Cooling Off

Cooling Off

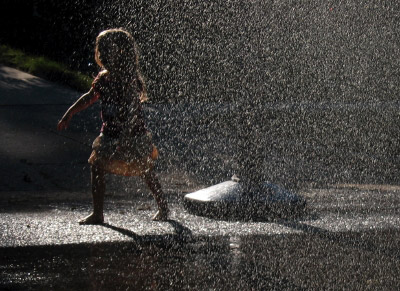
"I love your idea of grab shots," said Matthew Kuperus Heun. "I, too, like photographing what I see around me. One of my photography goals is to never disturb what I'm shooting, whether is people, landscape, animals, whatever. While I do few posed portraits, I'm constantly challenging myself to improve my photographer's eye."

"The attached photo is my submission for a Grab Shot. I had my little Canon A75 point and shoot with me during our block party last week. The fire department was doing a demonstration for the kids, letting them control the hoses. To cool off, the kids were playing in the spray. I walked around for a shot backlit by the evening sun streaming between two houses, just as my neighbor was walking out of the spray. I love the effect!"

One of the things that I want to point out here is that Matt walked around the subject to find this great angle. I discussed this and other techniques in my "10 Tips for Great Field Photography". By doing so, you'll often find an even better composition, as demonstrated here by Matt.

If you have an interesting candid you'd like to share, take a look at our Submissions page, then send us your Grab Shot. If we publish it, you'll receive an ultra cool custom carabineer keychain.

Technorati Tags: , , ,

Iceland Wedding

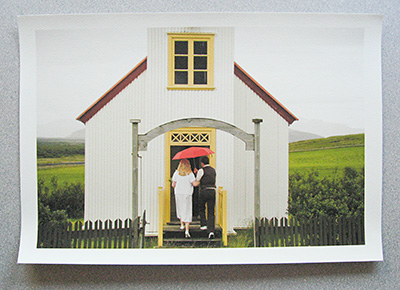
Imagine as you arrive to the chapel on your wedding day, you're greeted by a professional photographer whom you've never seen before and he says he'll shoot your ceremony for free. All you have to do is sign a model release. Oh, and he doesn't speak your native language.

This is just one of the amazing events that happened in Iceland. In the story, The Couple from Sweden, I describe the series of events that led to my photographing one of the sweetest weddings I've ever encountered. I've also posted the gallery on my Story Photography site.

Unlike the commercial weddings that I normally shoot, I captured this one existing light with no flash. I had complete artistic freedom. I then processed the images in Adobe Lightroom, and used its Web module to generate the gallery pages. From start to finish, this was a very satisfying self-assignment.

Technorati Tags: , ,

Nikon D80 for Serious Enthusiasts

Nikon D80

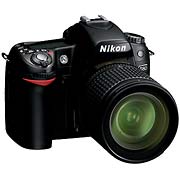
The new Nikon D80 is a 10.2 megapixel sophisticated DSLR designed for serious enthusiasts who want great images but don't have the budget for a high-end Nikon.

The specs are impressive: new 12-bit image processing engine, 2.5" LCD, 0.18 sec. start-up with fast 80ms shutter response, three metering modes including spot, 3 frames per second, built-in flash with wireless commander, and bright 0.94x optical glass viewfinder. The body should retail for $999, or get the kit for $1,299 that includes the new 18-135mm DX Zoom Nikkor lens. Personally, I think the kit sounds like a better deal.

This camera is clearly a cut about the D50 and D70. It has more resolution, better image processing, and lots of new features. It's not inexpensive by any means. $1,300 for body and lens is a sizable investment for most enthusiasts. But I think Nikon had done their homework here and put together a camera that will satisfy this demanding niche. I'll report more once the test results begin to surface. The camera should be available sometime in September.

Technorati Tags: , ,

model_shoot.jpg

Setting up a model shoot can be easier than you think. In this podcast, I interview Maggie Hallahan as she describes how she put together the model shoot in Iceland. We had our chat the morning before the event, so neither of us knew how it was going to turn out. By many accounts, it went quite well.

Listen to the Podcast

Now that I've piqued your curiosity, it's time to listen to today's audio show titled, "Setting Up a Model Shoot." You can download the podcast here (18 minutes).

Technorati Tags: , ,

Grab Shot 52 - Rain Forest

rainforest.jpg

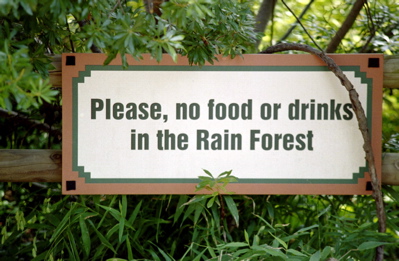
"I shot this as I was going into an exhibit at our local zoo," said Harold Thompson. "I was suddenly struck by the irony of the sign and had to grab the thought. I usually focus on the wildlife, but this time the sign caught my attention. I used a Nikon FM with a 50mm 1.8 Nikkor Lens at f 5.6 125/sec."

If you have an interesting candid you'd like to share, take a look at our Submissions page, then send us your Grab Shot. If we publish it, you'll receive an ultra cool custom carabineer keychain.

Technorati Tags: , ,

This month's Photo Assignment displays the work of 4 participants from The Digital Story community. The following shots are their interpretations of the theme, "heat." This assignment must have prompted many of our readers to break out into a sweat, because we had fewer participants than in previous months. But I think you'll enjoy the steamy shots presented here.

Iceland Steam
Derrick Story

"Iceland Steam." Many people imagine Iceland as this cold, barren place. But much of the country is powered by geothermal steam. While I was staying in Nesbud, I discovered this creek of flowing 90 degree C water... too hot to touch. We waited until evening so we could capture the steam rising in the cool air, then placed models in the middle of this turmoil clad in Icelandic wool. All of these elements helped me create this unusual portrait. (Derrick is the moderator for The Digital Story).
I used a tripod-mounted Canon 5D with a 75-300mm IS zoom set to 170mm. ISO was 200, shutter speed 1/30th, aperture f-5.6.


WWDC Wrap Up on Latest iLifeZone

iLifeZone

I just got together with the rest of the iLifeZone crew in San Francisco to record a special WWDC Wrap Up episode. If you haven't listed to the iLifeZone previously, it's a regular podcast that I do with host Scott Bourne and Chris Breen. We cover all things Macintosh, with me usually focusing on QuickTime and iPhoto. In this current show, however, we analyze the announcements from Apple's World Wide Developers Confernce that include the new Intel-based Mac Pro desktop computer, Leopard (Mac OS X 10.5) and the Apple Design Awards.

You can subscribe to the iLifeZone via iTunes Music Store. Our next show, which airs on August 20, is the "Tips Monster" episode. For that episode, we sat 6 Mac experts around a table and fired off tip after tip. You won't want to miss that one either.

Technorati Tags:

NY Botanical Garden Conservatory

"This is a shot I took of the New York Botanical Garden Conservatory last month here in the Bronx" said Eric Marin. "The framing of the photo reminded me of some sort of alien landscape from a Star Wars movie, and I just loved the way the blue gradient of the sky contrasted with the white dome."

Eric used a Casio QV-R40 in program mode to compose this artistic shot.

If you have an interesting candid you'd like to share, take a look at our Submissions page, then send us your Grab Shot. If we publish it, you'll receive an ultra cool custom carabineer keychain.

Technorati Tags: , ,

retouch_tool.jpg

The Retouch tool in iPhoto 6 has more capability than most people realize. The default mode is a frustratingly blunt cross hairs that provides very little control. You can, however, enable an advanced mode that lets you set the diameter of the brush for more precise retouching.

First launch iPhoto 6, choose a picture and enter Edit mode by clicking on the Edit button in the row of buttons beneath the thumbnails. Click on the Retouch tool and your mouse pointer will become the normal cross hairs that we're accustomed to with Retouch.

To enable the advanced options, press the "Caps Lock - CTRL - 9" keys all at the same time. You won't notice any difference at first, but you have activated the advanced mode. Now press the Tab key, and your cursor will change from a cross hairs to the brush diameter indicator as show in the illustration above. You can make the diameter of the brush bigger by pressing the right bracket key ] and smaller by using the left bracket key [.

You can also control the density of the retouching by holding down the SHIFT key and using the right and left curly braces { }. SHIFT - Right Brace } increases the density of the retouch and SHIFT - Left Brace { decreases the density.

If you press the Tab key again, you go to Lighten mode. This tool is good for lightening areas of the image that have a little too much density. Again, you can control the diameter of the brush via the left and right bracket keys. Press the Tab button again and you return to the normal cross hairs mouse pointer.

The advanced options stay on as long as iPhoto is open. If you relaunch the application, then you'll need to enable them again via the "Caps Lock - CTRL - 9" keys. You can read more about these tools in Rob Griffiths excellent Macworld article, Use advanced iPhoto 6 edit tools.

Technorati Tags: , , ,

sony_gps.jpg

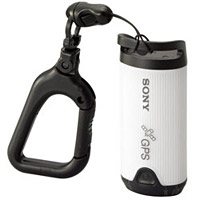
Sony's new GPS-CS1 is compact device (about 55 g) that records your GPS coordinates every 15 seconds while in the field. Then, when you return home, you can synchronize this information with your picture metadata and know the approximate location of every image you captured.

The $150 USD device works with Sony Cyber-shot DSC-S500, S600, S45, W30, W40, W50, W70, W100, H2, H5, T30 and Sony α (alpha) DSLR-A100 cameras using Windows software. It's not clear yet if it can be used for other cameras via a workaround. We'll have to wait until it actually ships to find out.

In the meantime, this is probably the first of many such devices we'll see that enable us to record satellite data and synch it with our image metadata.

Technorati Tags: , ,

waterfall.jpg

Here are 10 tips that you'll want to keep in your back pocket the next time you wander into the great outdoors. I've been using these tips for years, but had a chance to refine them a bit on my recent adventure to Iceland. The goal of field photography is to capture great images, enjoy nature, and do no harm to yourself and others. This list will help you accomplish the first goal.

  1. Chase the light.
  2. Photograph where you are.
  3. Get out of the car.
  4. Know where your equipment is.
  5. Walk around the subject.
  6. Take food and water.
  7. Shoot high quality.
  8. Isolate your subjects.
  9. Take a polarizer.
  10. Learn from what you've shot, then shoot it again.

Listen to the Podcast

Now that I've piqued your curiosity about these tips, it's time to listen to today's audio show titled, "10 Tips for Great Field Photography." You can download the podcast here (26 minutes).

Nikon 12-24mm Lens

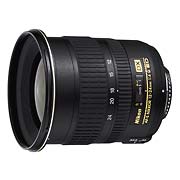
"My favorite lens is the 12-24mm f/4G ED-IF AF-S DX Zoom-Nikkor," says Klifton Keplinger.

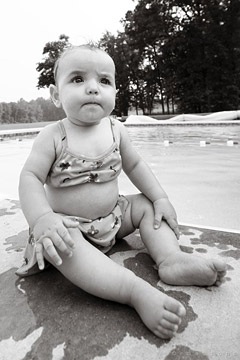
"I shoot mainly child and wedding photography, and surprisingly this lens works into both. I use it along with the 50mm f/1.8 and 85mm f/1.4 to make my perfect kit."

"Even though I shoot more with the 50mm and 85mm, the 12-24mm adds a dimension to the compositions that really makes things look out of the ordinary. Instead of thinking 'traditional portrait' when I view a photo made with the 12-24mm, I tend to think 'National Geographic.' It also leads more to the environment the portrait was taken it, making you feel more involved in the photograph and what is going on."

klifton_portrait.jpg

To tell us about your favorite lens, all you have to do is send an email to derrick@thedigitalstory.com with "Your Name: My Favorite Lens" in the subject line. Provide a paragraph or two about why you like your favorite lens so much. Include the brand, focal length, maximum aperture, and camera body you mount it on. If you have an anecdote about your lens, please include it. You may also submit a picture you took with the lens to illustrate why you like it so much.

Technorati Tags: , ,

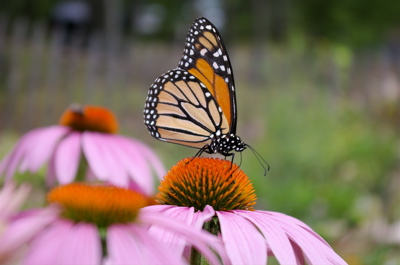
Illuminated Butterfly

"I was at my sister's cottage and this butterfly landed near me," said Eric Knapp. "I was holding my camera and I quickly turned and took a shot. However, in the camera's display the butterfly was too small and too dark. Then I remembered two of Derrick's tips on taking better pictures. The first tip was "fill flash," and the second was "move closer." So I climbed inside the electric deer fence and popped up the flash on my Pentax *ist DS. The butterfly held still for a few more seconds and I took this shot at 1/180 sec., f 5.6, at 55mm, with the flash on. The ISO was set to 200."

If you have an interesting candid you'd like to share, take a look at our Submissions page, then send us your Grab Shot. If we publish it, you'll receive an ultra cool custom carabineer keychain.

Technorati Tags: , ,

Returning Home from Iceland

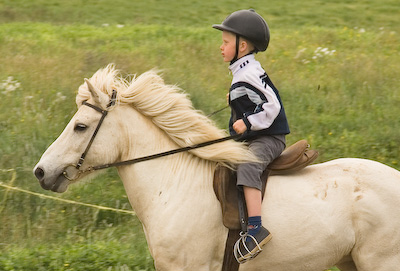
Boy Riding Horse

As I write this, we're packing up the Epson R2400 printers here in the workroom and getting ready to leave Nesbud for our return to Reykjavik. We're prepared for tonight's presentation at the Apple Store in Iceland's capital. We have a stack of amazing 13" x 19" prints that we worked on all day yesterday, in addition to a Lightroom-generated slideshow. You can get a glimpse at some of the images by visiting Adventure Gallery 3, which features the work of over a dozen of the photographers working here in Iceland.

As you look at the work, keep in mind that the photographers used only the Develop module in Lightroom for their image editing. The only time people jumped over to Photoshop was when there was image sensor dust that had to be removed with the cloning tool. As of now, there isn't that function in Lightroom.

Saturday morning we head back home. Life will return to normal here on The Digital Story. I appreciate your joining me in Iceland for this week's dventure.

Technorati Tags: , ,

Location Model Shoot in Iceland

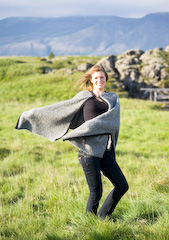
Model in Iceland

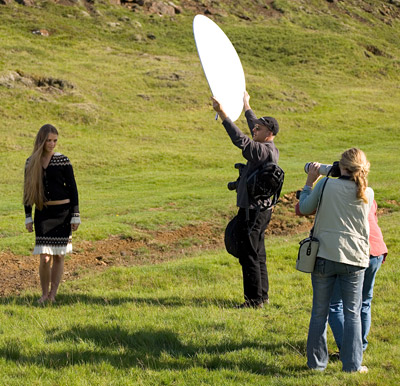
On Wednesday I was able to work with Maggie Hallahan, a commercial photographer based in San Francisco. She had made arrangements with Eskimo, an Iceland agency, to have five models come up to Nesbud for a shoot. Maggie had borrowed designer sweaters made here locally for the women to wear while we photographed them in the environment.

One of the things I enjoyed about this shoot was having photographers on hand to hold reflectors and assist with the models. We shot existing light only, using reflectors for fill light or shading as necessary. Because of the long days here, we started shooting at 4pm and didn't put away our cameras until 11pm.

I used the ExpoDisc to set my white balance in the changing light. That way I didn't have to worry about color correction in post processing, which is a big deal when working such long hours.

The shoot went well, and I ended up with over 400 images. That's a lot of data when you're talking about 12 megapixel Raw files.

Technorati Tags: , ,

Looking Around

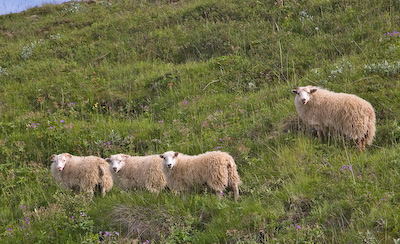
Sheep in Iceland

I was hiking in the Nesbud countryside yesterday. The trails are much different than those in California. Here, it isn't so much a trail as it is a thin line of trampled grass with the occasional maker staked into the ground. As such, I often discovered that I had strayed, and would have to find a marker to get back on track.

The Iceland sheep and horses are popular subjects. They have amazing hair that moves in the breeze, and the backdrop is almost always interesting. Since I'm the photo editor as well as photographer on this trip. I spend lots of time looking at images by my peers. Some amazing stuff for sure, and well beyond shots of the local livestock -- although some of the horse images are among the best I've seen.

I've just posted the second Adventure Web Gallery with images by famous photographers such as John Isaac and Michael Reichmann. Sometimes, when we're traveling in small groups, I feel like the sheep I've posted here -- standing on the hillside, looking around, ready to dash off at a moment's notice.

Technorati Tags: , ,

sony_a100.jpg

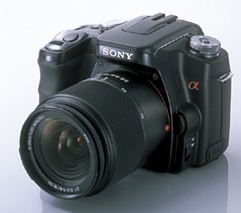
A sophisticated 10-megapixel DSLR with lens for under $900? That's what Sony is offering with their new Alpha D-100. This outfit should be especially appealing to folks who own Minolta SLR lens that will work nicely on this new body.

In a recent review on DP Review, Phil Askey concluded that Sony has produced a real contender here. The picture quality is great. And the merging of Minolta and Sony creativity has yielded some innovative features such as Eye-Start AF and In-hardware Dynamic Range Optimization. The In-body SteadyShot system provides about 2 stops of additional shutter speed latitude with any lens you mount.

The complaints were few. Noise levels are a little high at ISO 800 and 1600, and the proprietary hot-shoe design limits fewer third party flash options. But in the end, the Alpha A-100 earned a "Highly Rated" from DP Review.

Technorati Tags: , ,

se_w810i.jpg

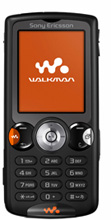
Until recently, no photographer in his right mind would consider taking snapshots with a cameraphone. But the recent wave of high-tech handsets are featuring 2-3 megapixel sensors with autofocus lenses and sometimes even flash.

In this podcast I explore one of the latest cameraphones, the Sony Ericsson W810i, and discuss tips and tricks for using these devices. Yes, they are now legitimate snapshot machines, especially when paired up with Bluetooth enabled printers that make output a cincch.

Listen to the Podcast

Now that I've piqued your curiosity, it's time to listen to today's audio show titled, "Getting Serious with Cameraphones." You can download the podcast here (28 minutes).