Recently in Photography

  Page 264 of 381 in Photography  

Photographer's Emergency Kit: The Movie

In a recent podcast, I described my photographer's emergency kit. Everything fits in a 3.25" x 3.25" filter box. Now, you can watch the movie where I open up the box and show all of the contents.

So, what goes in your photographer's emergency kit?


twitter.jpg Follow me on Twitter


I've been testing the new Olympus E-5 Digital SLRthat has pro-level construction, but lots of creative features that you often don't see on this type of camera. One of those features is a complete set of art filters (pop art, soft focus, grainy film, pin hole, diorama, cross process, dramatic tone, and more).

Dramatic Tone Filter on Olympus E-5 
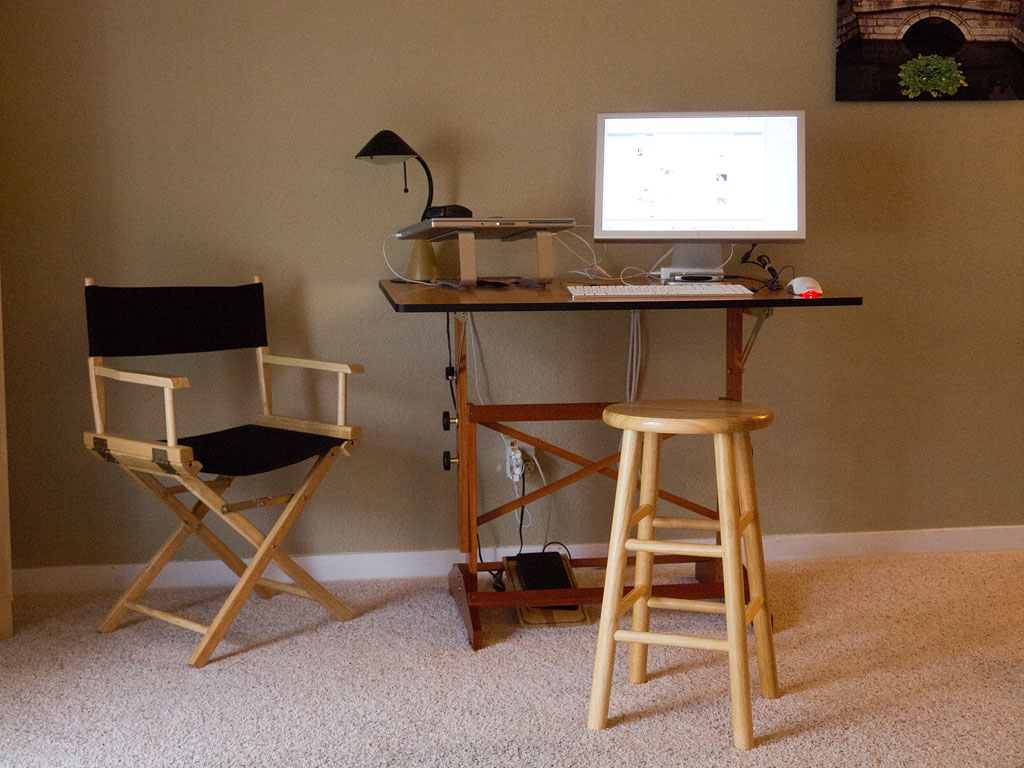
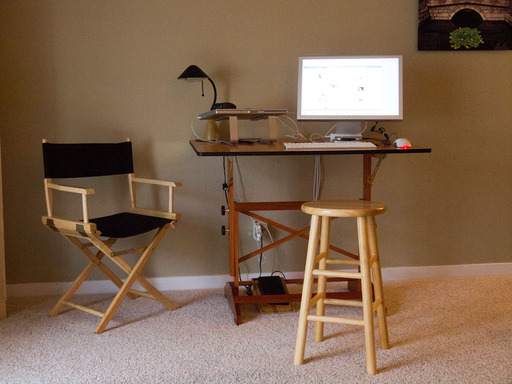
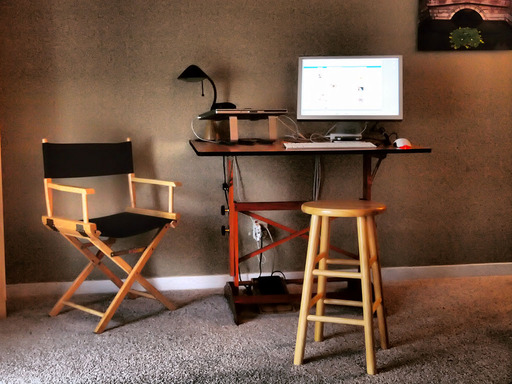
The new Dramatic Tone art filter on the Olympus E-5 converts even a mundane image into something more interesting. Click on photo for larger version.

The capture process is straight forward. You pick one of the art filters from the menu, and the E-5 adds the effect in-camera. You don't have to do any manipulation yourself. I shoot in Raw so I get the original unadulterated image, and I get the Jpeg art filter version.

Normally Exposed Image with Olympus E-5 If you're shooting Raw, you also get the non-art filter version so you have access to both images.

There are interesting applications for art filters. I think they can help you explore the possibilities of a composition while you're still in the field. If you see something you like, you can further fine tune based on the "art filter preview" you've created. Art filters may also help photographers who don't enjoy post production manipulation add some spice to their catalog. And with the advent of the iPad, you can shoot something artistic and upload it easily right on the spot.

So, my question to you, would you use art filters on your DSLR? You may have them now and not even realize it. We're seeing them more than ever. Is that based on user feedback or are manufacturers trying to distinguish their hardware from others? Let me know what you think.


twitter.jpg Follow me on Twitter


How many megapixels do you expect for a top of the line DSLR? 12? 14? 18? 21? And what are the other factors that are important to you tied with sensor performance? We check-in with this ongoing topic today.

Listen to the Podcast

You can also download the podcast here (27 minutes). Or better yet, subscribe to the podcast in iTunes. You can support this podcast by purchasing the TDS iPhone App for only $2.99 from the Apple App Store.

Monthly Photo Assignment

Indoor Lighting is the December 2010 Photo Assignment. You can read more about how to submit on our Member Participation page. Deadline for entry is Dec. 31, 2010. Entries must be recorded with indoor lighting only.

TDS Summer 2011 Photography Workshop

We're making plans now for the Summer 2011 TDS Photography Workshop. If you want your name on the reserve list, just drop me a line.

More Ways to Participate

Want to share photos and talk with other members in our virtual camera club? Check out our Flickr Public Group. It's a blast!

Podcast Sponsors

Red River Paper -- Try the $7.99 Sample Kit.

Make Your Photos Sizzle with Color! -- SizzlPix is like High Definition TV for your photography.

Blurb believes passionately in the joy of books - reading them, making them, sharing them, and selling them. Learn more by visiting Blurb on The Digital Story.


Technorati Tags:
, , , , ,


If you've just bought a Mac or upgraded iLife, and are ready to master the new features in iPhoto '11, then I think you'll enjoy iPhoto '11 Essential Training on Lynda.com. Here's a short introduction.

There's more than four hours of training presented in a series of short movies that you can watch as many times as you want until you feel comfortable with each particular technique. It's truly learning at your own pace. Even if you've never used Lynda.com before, there are three free movies that you can view right now: Working in Full Screen Mode, Hiding Photos, and Creating Smart Albums.

Your source for software training.

I receive lots of mail about how much people like learning software via my titles on Lynda.com. If you're ready to dig into iPhoto, or want to give a loved one the gift of knowledge, then take a look at iPhoto '11 Essential Training.


twitter.jpg Follow me on Twitter


PhotoBox for the iPad Comes of Age

Boinx PhotoBox

The current release of PhotoBox by Boinx Software (V 1.1) brings a truly useful image review tool to photographers working in the field. Unlike the earlier version that had to copy lower resolution images to the app, you can now access the full resolution files, even if they're Raws. I recently tested it for an event shoot at a professional basketball game with an Olympus PEN E-PL1 in Raw mode. When shooting sports, one of the first things I look for is sharpness. With PhotoBox, you can upload a handful of images, browse them in the "lightbox" view, then zoom in to 1:1 for a close look at the detail. Being able to do this on location gives you confidence that your camera settings are on the mark.

Zoomed Image Image displayed at 1:1 on PhotoBox. It looked great on my camera's LCD, but I could tell in PhotoBox that it wasn't quite as sharp as I would like. Click on image for original view.

The application includes some other helpful tools, such as luminance and RGB histograms, highlight and shadow clipping overlays, pixel dimensions, and file size. You can set your own tolerance levels for the highlight and shadow clipping in the preferences (gear icon in upper right corner of the app).

Once back home, you can enjoy even a closer look at your work by connecting the iPad to a VGA-compatible display and using PhotoBox as the driver -- a nice touch if you need it.

Boinx has overcome many of the limitations of the earlier iPad iOS to create a useful tool for discriminating photographers working in the field. This latest version (1.1) is definitely worth a look. You can buy PhotoBox for $4.99 in the App Store.

Oh, and one final note. You might see lower customer ratings for PhotoBox in the App Store than you would expect for the version I've described here. The previous version (1.0) wasn't as smooth or useful as what I've recently tested. Just something to keep in mind.


twitter.jpg Follow me on Twitter


As part of my work as the Photography Evangelist for Lowepro, I'm always seeking input from photographers about their gear. Recently I asked the Lowepro community, "What does your dream bag look like?"

lowpro_bag_grab_fall2010.jpg What is the perfect bag for you?

Responses were posted on the Lowepro Facebook page, Twitter, and sent to me via email. I then posted an article on the Lowepro blog, summarizing the basic themes from the community. You might want to take a look if you like this stuff.

One of my favorite ideas was adding a second strap to sling bags, such at the SlingShot 202 AW, so you could wear it backpack style for longer treks. When you switched to shooting mode, the strap could be tucked out of the way allowing you to work sling style.

There's lots of great feedback in the post, including adding All Weather covers to the Fastpack series, what makes a great bag for student photographers, and more. It's fun to read what people share.


twitter.jpg Follow me on Twitter


My Canon 60D Review

canon_60d_18-135.jpg

Macworld Magazine published my formal review of the Canon EOS 60D with lab results. For those of you who heard my preliminary remarks on podcast 251, you know that I've enjoyed testing and learning about this latest DSLR from Canon.

In the Macworld review, I spend a fair amount of time covering what I call its "notable features," such as in-camera Raw processing and the articulated LCD. You might want to check out that list if you're considering the 60D. In short, however, my pros and cons are:

Pros

  • Vari Angle LCD
  • Wireless flash control built in
  • Excellent movie recording with external mic jack and audio control
  • In-camera raw processing and image resizing
  • Extensive software bundle included
  • Good battery performance
  • Excellent image quality, even at higher ISO settings

Cons

  • Poor Auto White balance performance indoors under tungsten lighting
  • Slow focusing in Live View
  • Clumsy access to Movie mode

  • twitter.jpg Follow me on Twitter


    Find the Right Glass with LensHero

    lens_hero.jpg

    Looking to add a new lens to your DSLR kit? You might enjoy browsing a site called LensHero. To get started, you enter the type of camera you're using and the amount of money you have to spend (you may want to consult your spouse beforehand). Then pick the category of glass that interests you, such as macro, wide angle, telephoto, fisheye, low light, etc.

    LensHero then presents you with lenses that meet your criteria, complete with specs, pricing, user reviews, and of course, a link to buy. I enjoyed just seeing what types of lenses were available for my Canon 60D, and how much they cost. I like the low light options myself.

    So, for fun, or for serious shopping, you might want to visit LensHero.


    twitter.jpg Follow me on Twitter


    Here are 10 items that I keep in a 3" plastic filter box that are invaluable when I'm working on the go. It's my photographer's survival kit.

    Photographer's Survival Kit Photographer's Survival Kit - When you're in the field, many of these small items become invaluable. Listen to the podcast to learn why.

    Note: TDS Podcast listeners (iOS and Android) have a movie waiting for them that shows me demonstrating all of the contents of this kit.

    Listen to the Podcast

    You can also download the podcast here (33 minutes). Or better yet, subscribe to the podcast in iTunes. You can support this podcast by purchasing the TDS iPhone App for only $2.99 from the Apple App Store.

    Monthly Photo Assignment

    Indoor Lighting is the December 2010 Photo Assignment. You can read more about how to submit on our Member Participation page. Deadline for entry is Dec. 31, 2010. Entries must be recorded with indoor lighting only.

    TDS Summer 2011 Photography Workshop

    We're making plans now for the Summer 2011 TDS Photography Workshop. If you want your name on the reserve list, just drop me a line.

    More Ways to Participate

    Want to share photos and talk with other members in our virtual camera club? Check out our Flickr Public Group. It's a blast!

    Podcast Sponsors

    Red River Paper -- Try the $7.99 Sample Kit.

    Make Your Photos Sizzle with Color! -- SizzlPix is like High Definition TV for your photography.

    Blurb believes passionately in the joy of books - reading them, making them, sharing them, and selling them. Learn more by visiting Blurb on The Digital Story.


    Technorati Tags:
    , , , , ,


    I've created a step-by-step guide for laying out fine art note cards in Aperture 3 and printing them with your inkjet printer using Red River Paper stock. A few things have changed since I published the original article for laying out cards in Aperture, so I recommend that Aperture 3 users follow the settings in this article.

    The biggest difference that I encountered using Aperture 3.1 and Mac OS X 10.6.5 with an Epson R2400 printer, was that creating a "custom paper size" befuddled the printer causing it to do nothing. To work around this problem, I designed a new template in Aperture 3 that is based on a standard Letter Size sheet (8.5" x 11"). By doing this, you should be able to print these 7" x 10" cards (folded to 5" x 7") with just about any photo printer.

    Here are the steps I used:

    1. In Aperture, create a custom theme
    2. Turn on Show Layout Options
    3. Create a photo box 5.75" x 4.25" and place it like this
    4. Add a text box for the back of the card
    5. Place your type and rotate it 180 degrees
    6. You can choose a type style
    7. Be sure to turn off page numbering
    8. Now, all you have to do is print your card

    I recommend that you turn on Aperture's Proofing Profile (View > Proofing Profile) for the type of paper you're using. It saves you from having to make test prints. Speaking of paper, there are a variety of surfaces to choose from in the Red River Card Shop. You can get high quality envelopes there too. I generally use #7163 for my card projects.

    One finishing touch to consider is creating a handsomely designed 4"x6" insert for your note card. I print these in iPhoto '11 using one of the flat card templates. They look great!

    More Aperture Tips and Techniques

    To learn more about Aperture 3, check out my Aperture 3 Essential Training on Lynda.com. Also, take a look at our Aperture 3 Learning Center. Tons of free content about how to get the most out of Aperture.


    twitter.jpg Follow me on Twitter