This is The Digital Story Podcast #759, Oct. 6, 2020. Today's theme is "Should You Create a Photography Budget?" I'm Derrick Story.
Opening Monologue
Photography gear should not be an impulse buy, especially when that decision sends a $2,500 charge to your credit card. By the same token, new gear helps keep us motivated and creating new images. So how do we balance the two forces? My argument is an approved photography budget. And I'll explain why on today's TDS podcast.
Should You Create a Photography Budget?
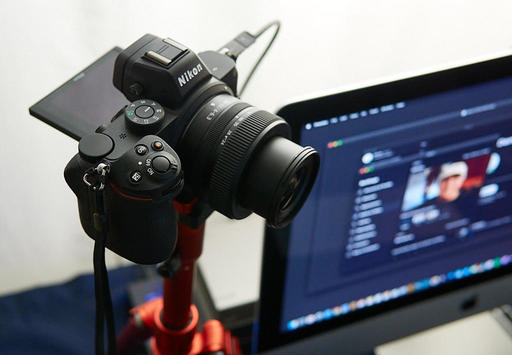
After the first week of shooting with the Nikon Z5 mirrorless camera with its 24-50mm lens, I started asking myself, "where can I reasonably come up with the $1,700 to buy this kit?"
I was so impressed with the images I was making from the Eastern Sierra and Lake Tahoe with the camera. It wasn't too heavy, the compact 24-50mm lens was performing beyond my expectation, and I had lots of Nikon glass that I could use with an adapter. I was so very, very tempted.
Fast forward three weeks later - I boxed up the Nikon Z5 and attached the shipping label to return it to B&H Photo who had let me use it for a month. By this point, I was OK sending it back. I didn't want to, but it was the right decision.
Why? Because that $1,700 plus another $400 for accessories was not in my 2020 photography budget. In fact, we're only in October, and I have less than $700 left to spend. So back to New York the Z5 goes.
Even though on one level I hate them, I'm a big fan of budgets. I have an overall monthly for the business, a break-out budget specifically for gear, and I create budgets for trips as well. Well, I did anyway until 6 months ago.
My photography budget protects me from me. I know how easily a new camera or lens can turn my head. So easily, in fact, that I usually have to create a pros and cons list in addition to a budget to reach a sound decision.
Earlier this year, I wanted the Olympus OM-D E-M1 Mark III. It was $1,800 then. Now you can get one for $1,400. That's still twice as much as my remaining $700.
And I can't justify it because my Mark II is still an amazing camera and I'm currently without photo assignments. I also wanted (and still covet) the Olympus M.Zuiko Digital ED 12-45mm f/4 PRO lens. It's now available for $549. If it's still at that price in late November, I may go for it.
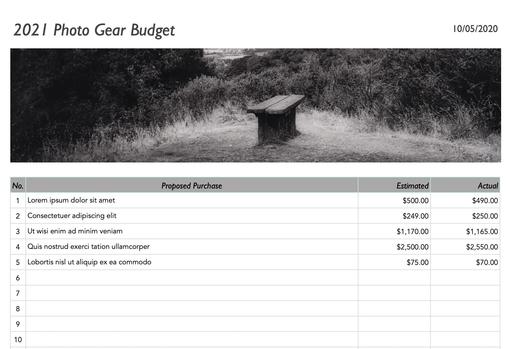
The point that I'm trying to make is that photography budgets bring rational conversations to gear acquisition. And now is the time to start working on yours for 2021.
My is based off the dollar amount that I anticipate I'll have available for investing in new equipment. So that forces me to look at overall projected income and expenses.
Once I have that number, I reduce it by one-third to keep me from accidentally over-spending since other expenses tend to rise unexpectedly.
One tip that I have for married photographers is to complete your analysis well ahead of time, then have it pre-approved by your partner. So now you only have to have one potentially difficult conversation instead of many spread out through the year.
And finally, create a separate gear account and start funding it right way. That allows you to take advantage of programs like Payboo by B&H that saves you paying sales tax and interest if you pay off the purchase by the next billing cycle.
My new camera for the year was the Fujifilm X100V. And I love it as much today as that moment back in March when I first laid hands on it.
I hope I do equally well with my decision making in 2021.
Panasonic Doesn't Expect Olympus Owners to Switch To Its Products
You can read the entire article here on PetaPixel.
In the wake of Olympus' finalized deal with Japan Industrial Partners to assume control of the company's imaging business, Panasonic apparently isn't very hopeful that many of Olympus' Micro Four Thirds photographers will make the jump over to Panasonic camera equipment.
Panasonic has for years seen its positioning of MFT as complementary to that of Olympus, rather than as a direct competitor. While Olympus excels at image quality and technological advancements in still image capture, Panasonic has spent the lion's share of its energy in video capture.
Panasonic expanded out of the MFT market with its S series of cameras which both diversified and bolstered its camera line, while Olympus remained set in its ways with a recommitment to MFT. It's possible to see that refusal to expand as a reason for Olympus needing to bow out of the imaging market entirely, but Panasonic has repeatedly informed us that it does not intend to abandon MFT. And while Panasonic has released several full-frame cameras since its last flagship MFT body, the company will still to this day strongly throw its support behind the format if asked.
I'm curious. Olympus shooters, does this resonate for you? Or are you giving Panasonic a second look?
The Online Eastern Sierra Photography Workshop
I'm thrilled to announce the Online Eastern Sierra Photography Workshop on November 6-7, 2020.
This event will be unlike others that you may have read about or even attended yourself. We are taking the popular components of the TDS physical workshops and digitizing them. Here are a few examples.
- The Opportunity to Share Your Photos with Me and the Class - Even though the live event begins on Friday, Nov. 6, You will receive lesson tutorials on Oct. 21 and 28, then have time to go outside and practice these techniques. If you wish, you can share your favorite images from the practice sessions to be incorporated in the workshop.
- Small Group for a More Personal Experience - Even though it's an online event, class size is limited to 15 to ensure you have ample opportunities to get your questions answered (by me and other class members).
- Ongoing Conversations Beyond the Event Itself - I'm setting up a page online that will feature content from our event with the ability for ongoing conversations among class members.
Even though I'm using the Eastern Sierra as a backdrop for my tutorials, your photography and contributions to this workshop could be from anywhere in the world. In other words, it's all about the photography, not the specific location.
Since this is our first online event of this type, the tuition is only $150. Seats are limited and available on a first come, first served basis. Sign up today by visiting the Online Eastern Sierra Photography Workshop page at theNimblePhotographer.com.
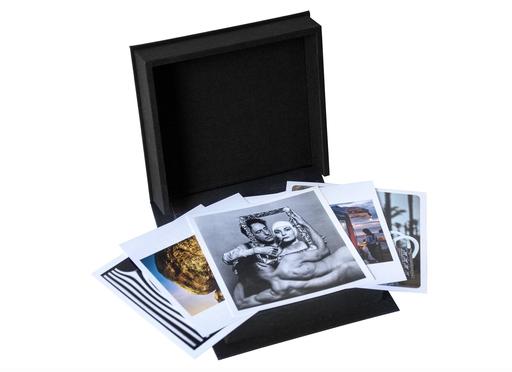
The New Donation Kit for Carefree Shipping of Found Film Cameras
We have more time around the house than ever. And you finally dove into that bedroom closet that's been begging for some organization.
If you found a film camera that you're no longer using, our new Donation Kit makes it easy to pack and ship. Just visit the Contact Form on thenimblephotographer.com, click the box next to Donating a Film Camera, and let me know what you have. In your note, be sure to include your shipping address.
If it's a camera we can use for the shop, I'll send you a Donation Kit that includes a USPS Priority Mail shipping box and prepaid label. All you have to do is tape it up, insert the camera, and add the label. USPS will pick up your shipment from the front door of your house during their regular mail delivery. It's that simple!
Your donation help get analog gear in the hands of aspiring fine art photographers, and the proceeds help support this podcast.
Updates and Such
Inner Circle Members: A big thanks to those who support our podcast and our efforts!
B&H and Amazon tiles on www.thedigitalstory. If you click on them first, you're helping to support this podcast. (The Digital Story is supported by its audience. When you purchase through links on our site, we may earn an affiliate commission.) And speaking of supporting this show, and big thanks to our Patreon Inner Circle members:
Affiliate Links - The links to some products in this podcast contain an affiliate code that credits The Digital Story for any purchases made from B&H Photo and Amazon via that click-through. Depending on the purchase, we may receive some financial compensation.
And finally, be sure to visit our friends at Red River Paper for all of your inkjet supply needs.
See you next week!
Product Links and Comments
There are product links in this article that contain affiliate tags. In some cases, depending on the product, The Digital Story may receive compensation if you purchase a product via one of those links. There is no additional cost to you.
You can share your thoughts at the TDS Facebook page, where I'll post this story for discussion.