Recently in Photography

  Page 331 of 381 in Photography  

Aperture as a Layout Program

aperture_postcard.jpg

Many photographers don't realize that there's a powerful layout program within Aperture. You can use these tools to design custom posters, postcards, fliers, menus, title graphics for slideshows, and, oh yes, books. That's right, Apple has cleverly labeled this layout program as a book-making tool.

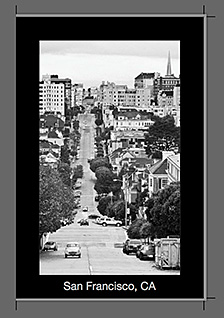
The big change came with Aperture 2 and its Custom layout option that you'll find in the Book Type popup menu when you're first setting up your book project. Choose it, and you can design any size page you want. I created a postcard layout that I keep handy for churning out keepsakes while on the go.

I then reveal the Show Layout Options located in the "gear" popup menu. And finally, I switch to Edit Layout, which lets me do things such as add a photo border any size I want.

edit_layout.jpg

For font control, just return to Edit Content mode (the button to the left of Edit Layout), highlight the text, then right-click (or CTRL-click) on it to reveal the Font option. And don't forget, you can adjust your image anytime you want by clicking on its thumbnail and pressing the "H" key to reveal the Adjustment HUD.

I recorded a good podcast with Joe Schorr, Apple Senior Product Manager, that talks about all of these techniques. It's a good listen.

Bottom line is this: not only is Aperture a powerful photo management application, it also provides you with robust options for output. Once you create your custom layout in Aperture, you can print, save to PDF, or generate a JPEG from your creation. That's downright awesome.

Technorati Tags: , , , ,

...when you can't even afford the rebate amount.

hassy_offer.jpg

Just saw this on PhotographyBLOG this morning. I'll tell you though, that Hassey is a heck of a camera. If you want to know more about the offer, check out story.


Now Available! The Digital Photography Companion. The official guide for The Digital Story Virtual Camera Club.

  • 25 handy and informative tables for quick reference.
  • Metadata listings for every photo in the book
  • Dedicated chapter on making printing easy.
  • Photo management software guide.
  • Many, many inside tips gleaned from years of experience.
  • Comprehensive (214 pages), yet fits easily in camera bag.

Technorati Tags: , , ,

santa_barbara_mission.jpg

My friend Bruce Heavin stopped by the Lynda.com studio late this afternoon with a trunk full of Canon glass wanting to know if I would go shooting with him. Bruce cofounded Lynda.com, is a terrific artist, and hangs out in our virtual camera club. I was ready to go in about five minutes.

I decided to try the hefty Canon EF 28-300mm f/3.5-5.6L IS USM. It's not everyday that you get to go shooting in Santa Barbara with a $2,300 lens hanging over your shoulder. And what was just as fun, I was toting the Rebel XTi, so I had the crop factor that made the lens a virtual 450mm IS hunk of glass.

Even though it's a solid 3.7-pound zoom that dwarfed my XTi, it's a balanced lens and not that bad to carry around. Actually, its weight makes it easier to steady while shooting.

The focusing is smooth and fast. You can adjust the drag on the push/pull zoom to accommodate your personal taste. I loosened it up for easy zooming, and still didn't have a creep problem. Even though I was shooting into the sun often, I didn't have any flare problems while the lens hood was attached. And the IS is amazing. I was shooting handheld with shutter speeds around 1/180th with the zoom all the way out. The images are sharp with terrific contrast.

I left the 28-300 on my camera body all night, hoping that Bruce would mistake it for one of my lenses. But alas, I had to give it back. I really like this lens, and hope to mount it on the 5D someday.

You can see more images captured with the Canon EF 28-300mm f/3.5-5.6L IS USM on my Flickr photostream.

Photo of the Santa Barbara Mission by Derrick Story.

Event Calendar

Events! See the TDS Event Calendar for photography workshops, speaking engagements, and trade show appearances.


Technorati Tags: , ,

hdr_sequence.jpg

In a recent podcast I asked the question, HDR: Do We Still Need It?. "Yes, we do," answers Landon Michaelson. He goes on to explain how he crafted his Wet Fields image. It's an outstanding example of pushing dynamic range creatively. He applies his own term to the process, Hybrid Exposure Compensation, and explains how he did it.

Capture

"I was standing in the mud on the edges of these expansive daffodil fields in the Skagit Valley of Washington State," said Landon. "I wanted to keep the scene more of how it felt to be standing here. The sky was bright, even though the sun was behind cloud banks and only peeked out later in the morning."

"I had circled around 3/4 of this field looking for a good lineup of the clouds, breaks in them, the fields and the placement of the horizon line. The reflections in the foreground caught my eye, as did the lines in this vantage point. I use a Sigma 10-20 4-5.6 EX lens for this shot, and crouched down to give just enough daffodils to go off into the distance, but not too few or too many (too high or too low)."

"I framed in the reflections and waited for the wind to die down a bit, then fired of 5 quick exposures, one stop apart,hand-held while braced in the crouch position (monopod and tripod get very muddy here)."

The sequence to the right shows the resized JPG files shot with the RAW files. EXIF: Nikon D300, Matrix Metering, Manual Exposure, f/11, 10mm, ISO 200, WB = cloudy, auto-bracketing (-2, -1, 0, +1, +2)

"I looked at the histogram for the five shots, liked what I saw for field capture of the data and moved on to the next composition."

Post Production

wet_fields.jpg

"I use a variety of tools to merge my exposures, a term I coined as HEC (Hybrid Exposure Compensation), which is just a fancy way of saying the workflow is fairly organic; using what tools I have and what I need on an image by image basis to meet my creative goals for the shot. I don't label any of my exposure merges as HDR, because one method is never used the same way twice and no one tool does it for me."

"In this case I loaded the 5 NEF RAW files into Photomatix Pro 2.5.2 - great tool for helping remove the slight movement in the individual blooms due to the breeze. I output one TIFF file via the "Tone Compressor" tool and got the sky the way I wanted it and how I felt about seeing it. I output another via the Tone Compressor tool for the foreground and middleground. I then output a third TIFF with the "Details Enhancer" tool to give some localized contrast and balance to the shot, as needed in post."

"I loaded the foreground/middleground shot into Photoshop CS3 Extended. I then loaded the sky layer on top, and the details enhanced layer on top of that. I did a hard line transition with a layer mask between the sky and the daffodils at the horizon line. I then changed the details enhance layer mode to soft light and with a layer mask and a Wacom painted in and out areas of this adjustment layer that got the scene close to how I liked it."

"Next I added a Selective Color adjustment layer to help the colors not have other muddy colors in them (taking some yellow out of the cyans for instance). Soft light layer to put more contrast in the sky above. Hue/saturation adjustment layer to pull -9 out of saturation for the entire image. In this result, it was all about seeing the scene to completion with how I saw the scene, or felt about seeing the scene. Not meant as a documentation of standing there. Hard & soft edge GND filters could have been used too, but one more thing to worry about while crouching in the mud."

Final Thoughts

"In the end I am pleased with the outcome. There was a lot of dynamic range in that sky alone, so I was able to keep it under control with this approach. When I printed this image I chose to take a little bit of the contrast increase out of the shot. Once on paper I thought it was a little too surreal, but I personally like a touch of surreal in the real and a touch of real in the surreal. Just not too far."

Photos by Landon Michaelson.

More Tips from The Digital Photography Companion

"How I Did It" is a new feature of The Digital Story featured on The Digital Photography Companion mini site. These are techniques from virtual camera club members who have built upon information in The Digital Photography Companion, or have come up with new tips altogether.

We're building a living library of knowledge for everyone to use (and contribute to). If you have a "How I Did It" tip to share, just send it to me with the sample photo, and put "How I Did It" in the email subject.


santafeworkshops-int.gif

Events! See the TDS Event Calendar for photography workshops, speaking engagements, and trade show appearances, including my Beginning Workflow with Adobe Photoshop and Lightroom on June 22-28, 2008 in Sante Fe, New Mexico.


Technorati Tags: , , , , ,

sigma-dp1.jpg

So another theory bites the dust. For months I've thought that if high-end compact cameras only packed bigger sensors, we would get better high-ISO performance and be able to use these devices for existing light photography in dim environments. But our first test case has not proven this theory to be true.

DP Review just analyzed the new Sigma DP1 compact that uses an image sensor that's nearly the size of a Nikon APS-C sensor, which is many times bigger than the standard 1 1/8" chip found in most compacts. You can see the size comparison on the first page of the DP review. Yet, in their wrap-up of the DP1's features, they write:

"While the DP1 can produce some brilliant results in daylight, it is almost completely useless in any low light situations. At higher sensitivities you'll find large amounts of chroma noise in your images, and you start losing detail. Turning on the flash won't help you much either, it is very low power and takes ages to recycle. Chances are you would not be able to focus anyway. The AF gives up completely once you dim the lights and there is no AF help light on the DP1."

Ouch!

So, this big Foveon sensor is no better in low light than my tote-around point and shoot. Of course, there could be other contributing factors to this, such as the Foveon technology itself, the supporting electronics, or some other thing that I just don't get. But the bottom line is, our first test case for putting a big sensor in a small camera fails to improve low light performance.

So, for now anyway, looks like I'll stick with my Canon G9. Maybe Sigma will go back to the drawing board and improve performance with the DP2.


Now Available! The Digital Photography Companion. The official guide for The Digital Story Virtual Camera Club.

  • 25 handy and informative tables for quick reference.
  • Metadata listings for every photo in the book
  • Dedicated chapter on making printing easy.
  • Photo management software guide.
  • Many, many inside tips gleaned from years of experience.
  • Comprehensive (214 pages), yet fits easily in camera bag.


Technorati Tags: , , ,

ebag_front.jpg

Digital gear needs protection from excessive heat when working in summer weather. For these conditions, you may want to use a thermal bag to keep your gear from overheating. I like this eBags Crew Cooler because it has a second compartment on top where you can put your cool items, yet keep them separate from your gear in the insulated bottom compartment.

There are plenty of zippered pockets for accessories, dual handles, shoulder strap, and lots of storage (15 x 8.5 x 10.5 inches), yet the Crew Cooler only weighs 2 pounds.

ebag_back.jpg

The eBag isn't cheap ($39.99 on Amazon), but if you want a professional insulated bag that's also good for food storage, then it's worth the investment.

Technorati Tags: , , , , ,

Two books that show you how to take better pictures, then process them with ease. Good photography starts with good capture. The Digital Photography Companion gives you creative tips and technical advice for taking top-notch digital photos in a wide range of conditions. In other words, this book will help you make your pictures look better than everyone else's.

Get it Right at Capture

The Digital Photography Companion Buy The Digital Photography Companion on Amazon

The Digital Photography Companion shows you how to:

  • Choose the right camera (DSLRs, compact cameras, or hybrids) and learn all of the typical features they offer, such as face detection, image stabilizers, diopter adjustment, focus assist light, RAM buffer, and more.
  • An A-Z guide of digital camera controls explains everything from Aperture Value (Av) Mode and Autoexposure to White Balance, the Zoom/Magnify Control, and everything in between
  • Advice for a variety of photographic adventures, such as capturing existing light portraits, creating powerful landscape images, and shooting fireworks, underwater portraits, infrared photos, and more, along with lighting and filter tricks.
  • Complete advice for sharing your photos, converting from color to balck & white and more, plus an overview of photo management applications, from Adobe Photoshop Lightroom to Apple iPhoto.
  • Printing doesn't have to be a painful experience. Learn various options, including direct printing without a computer, ordering out, and selecting the right inkjet printer for home (and what to do with it once you get it there.)
  • You also get an appendix with Quick Reference Tables, as well as other useful tables scattered throughout the book.

Take Control of Your Pictures on the Computer

The Photoshop CS4 Companion for Photographers Buy The Digital Photography Companion on Amazon

But don't let your creativity end when you click the shutter. Become just as masterful on the computer as you are with the camera. The Photoshop CS4 Companion for Photographers is your complete workflow guide from uploading the images to the computer, to sharing them with the world.

Many photographers, even the pros, feel overwhelmed by all the options that Photoshop provides. Fortunately, The Photoshop CS4 Companion for Photographers spotlights only the critical tools you'll need most often in one compact reference. Professional photographer and bestselling author Derrick Story teaches you how to quickly and efficiently organize and edit your photos without compromising the originals.

The Photoshop CS4 Companion for Photographers lays out an easy to follow workflow that starts with uploading your images to the computer, organizing them, and marking your best shots. From there, you'll see how to quickly:

  • Make basic adjustments such as cropping, color balance, and tonal adjustments
  • Use advanced tools for black & white conversion, spot removal, batch processing, and more
  • Refine your images using adjustment layers, masking, and smart objects
  • Learn specific recipes for retouching portraits, swapping colors,

Two Books, One Complete Course in Photography

By having The Digital Photography Companion and The Photoshop CS4 Companion for Photographers at your fingertips, you have a complete course in photography at your disposal.

Post a mini review below, and Derrick Story will send you a signed author plate for each book you own to make them official signed copies.

Post a Mini Review

Let us know what you think about either of these books. Post a mini review right here.

d_james_upoint.jpg

Dominique James has posted an interesting piece on Viveza's U-Point technology. I'm also a big fan of the work going on over at Nik Software. This latest plug-in for Aperture -- which is also available for Photoshop CS3 -- makes localized editing a snap.

If you're not a huge fan of channels and masks in Photoshop, take a peek at what Nik is up to. It might change the way you work. Oh, and one other thing. If you buy Viveza for Photoshop, the registration number works for the Aperture plug-in too, and the other way around. It's like getting a 2 for 1.

Screenshot created by Dominique James.


santafeworkshops-int.gif

Events! See the TDS Event Calendar for photography workshops, speaking engagements, and trade show appearances, including my Beginning Workflow with Adobe Photoshop and Lightroom on June 22-28, 2008 in Sante Fe, New Mexico.


Technorati Tags: , , , ,

earthquake_ny-times.jpg

The New York Times has published an excellent photo gallery of the earthquake aftermath in China. If you haven't followed the coverage, there are some powerful photographs here.

Image in screenshot by Color China Photo, via Associated Press.

Technorati Tags: , ,

eye-fi-explore.jpg

Eye-Fi Explore looks like a typical SD Card, but it's actually a 2GB storage and wireless device that can add geographic location labels to your images. In other words, maybe we finally have an easy way to geotag our images.

I haven't tested this yet, so I'm not sure how it works. But I am interested. If anyone has additional info, please post a comment.

Event Calendar

Events! See the TDS Event Calendar for photography workshops, speaking engagements, and trade show appearances.


Technorati Tags: , , , ,