This is The Digital Story Podcast #775, Jan. 26, 2021. Today's theme is "What to Do with Your Old Digital Camera?" I'm Derrick Story.
Opening Monologue
As time marches on and we acquire new gear, there remains the question of what to do with our aging cameras. Unless it's a relatively new model, chances are good that it isn't worth much on the used market. So then what? I present some ideas on today's TDS Photography Podcast.
What to Do with Your Old Digital Camera?
I try to limit the amount of excess stuff in my home and at work. This takes a surprising amount of vigilance. I've learned that if I slack off just for a year or so, I'll notice things piling up in my closet and on the shelves.
Most of these items can be recycled, some can be donated, but I've noticed that digital cameras occupy an unique niche in this challenge that isn't easily managed.
First of all, they still work. Just because a camera doesn't have the latest specs doesn't mean it isn't useable. Second, they usually represent a sizable investment. And finally, I often have an emotional attachment because of the places I've been and the things I've done with a camera.
As a result, I've worked up some ideas that make this challenge palatable. And I thought that I would share them with you.
5 Ideas for Used Digital Cameras
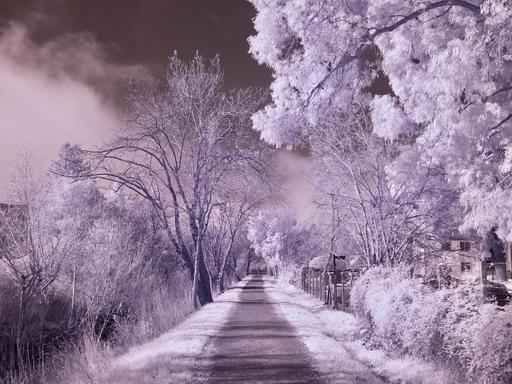
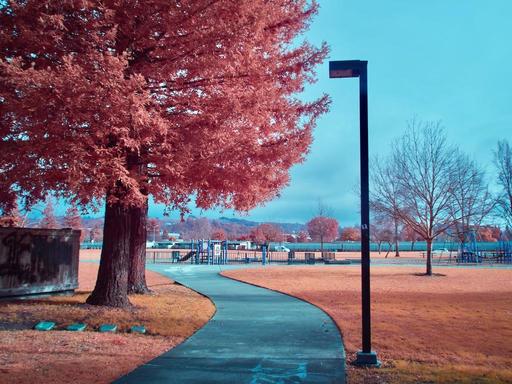
- Convert it to an Infrared camera - This is a great way to keep an old friend by your side. As I discussed last week, IR photography is invigorating. And you may just fall in love all over again. I recommend Kolari Vision for this service.
- Swap it for other gear that you need - I've done this more than I would have imagined possible. If I have a camera that I want to upgrade to a newer model, I've been lucky enough to trade it for some other gear that I needed.
- Donate it to education For many students, equipment costs is a barrier to them taking a photography class. And many high schools and junior colleges accept donations to help mitigate this problem.
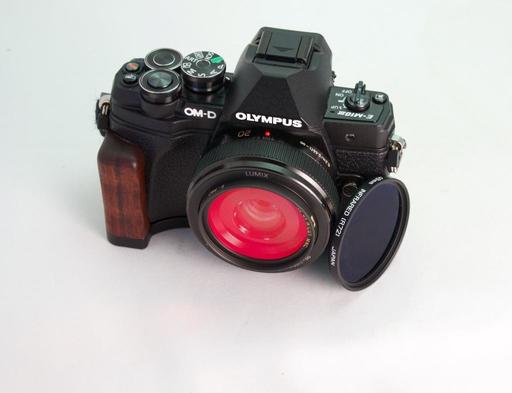
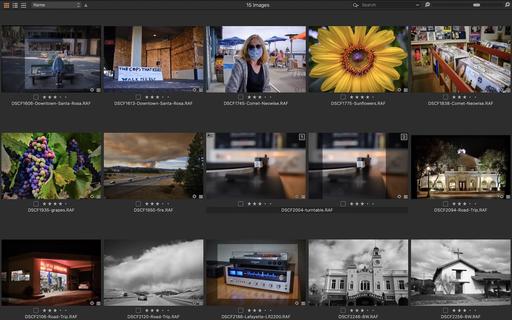
- Find a specialty use for it - I did not want to part with my Olympus OM-D E-M5 Mark II, even though I wasn't using it in the field any longer. I now keep it in the studio for my product photography for TheFilmCameraShop and for my blog posts on TDS. Web publishing doesn't require lots of pixels, and my older cameras work perfectly in this scenario.
- Use it in high risk situations - Whether it's a river raft trip or as a loaner to someone learning photography, it's far better to meet an ill fate with a camera that you're no longer depending on.
The bottom line is, nobody likes to be put out to pasture, not even digital mechanical devices that can still have purpose in life. Pull that camera off the shelve and see what you can do with it.
The Infrared Photography Workshop
If you want to learn the ins and outs of IR photography from the comfort of your home during this online event, then check out The Infrared Photography Workshop that begins in mid-March.
We'll start with an orientation meeting in early February to help you get your gear in order. That will give you time to get situation and familiar with your camera. We then begin instruction in mid-March.
You will learn how to:
- Choose best IR filter to start with.
- How to test your existing digital camera for infrared sensitivity.
- Learn about the different types of IR conversions for digital cameras.
- See how different IR filters produce wildly different results.
- Learn how to fine-tune your images with software you already own.
- Discover advanced techniques to take your images to the next level.
You can sign up now for $145. Inner Circle Members, visit out Patreon site for a discount coupon code.
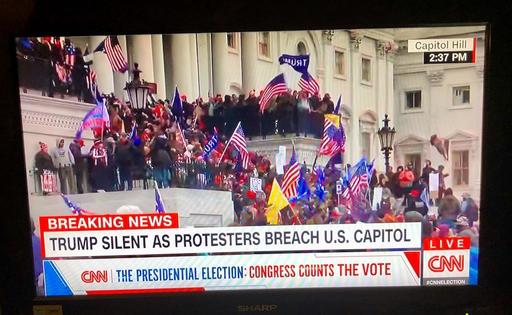
Turning Off Your Camera on a Zoom Call Helps Save the Planet
You can read the article here on PetaPixel.
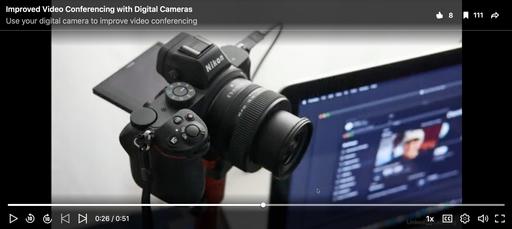
If you often find yourself in Zoom meetings in which others on the call don't need to see your face, you now have a great excuse for leaving your camera off: it can help save the environment.
A new study conducted by researchers at Purdue, Yale, and MIT has found that one hour of videoconferencing emits up to 1 kilogram of carbon dioxide, uses up to 12 liters (3.2 gallons) of water, and requires a piece of land the size of an iPad Mini.
In their new paper titled "The overlooked environmental footprint of increasing Internet use" and published in the journal Resources, Conservation and Recycling, the scientists noted that leaving your camera off during that hour-long call could reduce that footprint by a whopping 96 percent.
Turning off a camera for 15 hour-long meetings every week would reduce carbon dioxide emissions by 9.4 kilograms (20.7 pounds) per month. If one million Zoom users did this, they would save 9,000 tons of CO2, the equivalent of coal-powered energy used by a city of 36,000 in that same month.
The New Donation Kit for Carefree Shipping of Found Film Cameras
We have more time around the house than ever. And you finally dove into that bedroom closet that's been begging for some organization.
If you found a film camera that you're no longer using, our new Donation Kit makes it easy to pack and ship. Just visit the Contact Form on thenimblephotographer.com, click the box next to Donating a Film Camera, and let me know what you have. In your note, be sure to include your shipping address.
If it's a camera we can use for the shop, I'll send you a Donation Kit that includes a USPS Priority Mail shipping box and prepaid label. All you have to do is tape it up, insert the camera, and add the label. USPS will pick up your shipment from the front door of your house during their regular mail delivery. It's that simple!
Your donation help get analog gear in the hands of aspiring fine art photographers, and the proceeds help support this podcast.
Virtual Camera Club News
Waiting List for a Second Session of Integrating iPhone into a Pro Photography Workflow Online Workshop
The first session of "Integrating iPhone into a Pro Photography Workflow" Online Workshop has sold out. But I've created a wait list for a second session that would begin in mid-February. If we get enough interest for a second session, I will open registration for it.
If you're interested in attending, just go to The Nimble Photographer and click on Workshops. There's no charge to get on the wait list.
In this workshop you will explore:
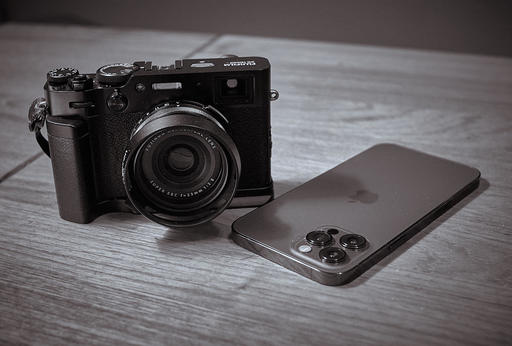
- Working with just one digital camera and an iPhone.
- Taking advantage of a versatile fast prime lens on your digital camera and using iPhone for additional focal lengths.
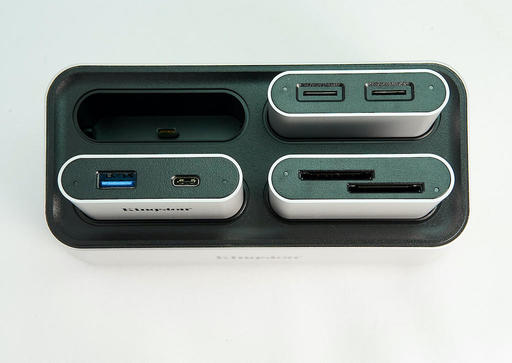
- Perfecting a RAW workflow with the iPhone.
- Leveraging Apple ProRAW for those who have iPhone 12 Pro.
- Building a kit that allows you to travel lighter without compromising capability.
- Post processing tips and techniques using Photos on Mac, iPad, and iPhone.
- Investigating other software and workflows to augment your imaging prowess.
Inner Circle Members: A big thanks to those who support our podcast and our efforts!
Affiliate Links - The links to some products in this podcast contain an affiliate code that credits The Digital Story for any purchases made from B&H Photo and Amazon via that click-through. Depending on the purchase, we may receive some financial compensation.
And finally, be sure to visit our friends at Red River Paper for all of your inkjet supply needs.
See you next week!
Product Links and Comments
There are product links in this article that contain affiliate tags. In some cases, depending on the product, The Digital Story may receive compensation if you purchase a product via one of those links. There is no additional cost to you.
You can share your thoughts at the TDS Facebook page, where I'll post this story for discussion.