This is The Digital Story Podcast #673, Feb. 5, 2019. Today's theme is "3 Stories About the Dawn of a New Flickr Era." I'm Derrick Story.
Opening Monologue
Photographers with free Flickr accounts will be limited to 1,000 photos starting today. Pro users see their annual fee rise to $50. Given all of the other options that we have in the marketplace, why should we even concern ourselves with this? I'll provide not one, but three answers to this, and more, in today's TDS Photography Podcast.
3 Stories About the Dawn of a New Flickr Era
Answering the question, "Why should we care?" is a dicy proposition with any topic these days. So I thought I would start by telling a true story that one of our listeners recently experienced.
The Story of Charles Peterson and the U.S. Postage Stamp.
Charles recently sent this email to me:
One of my photos was used as a reference for painting a USPS stamp celebrating the 150th anniversary of the completion of the transcontinental railroad. The photo is of a replica of Union Pacific Engine 119. It was taken on December 29th, 2013 at the Golden Spike National Historical Site, Box Elder County, Utah. This engine is a copy of the locomotive that met the Central Pacific Railroad's Jupiter engine at Promontory Summit in 1869 during the Golden Spike ceremony commemorating the completion of the First Transcontinental Railroad.
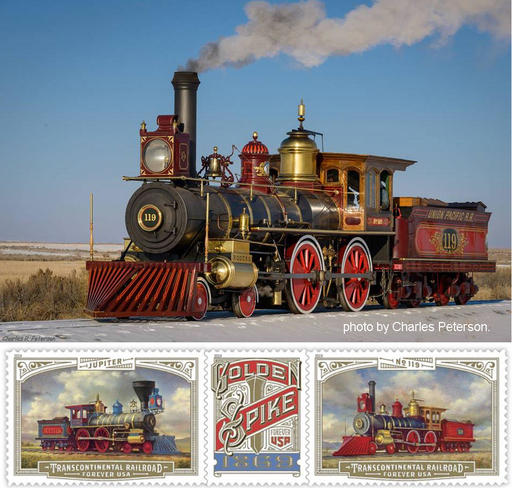 Art director Greg Breeding designed the issuance," the Postal Service said. "Michael J. Deas painted the Jupiter and No. 119 stamps. Kevin Cantrell illustrated the stamp depicting the ceremonial golden spike and did the border treatments and typography for all three stamps.
The Transcontinental Railroad stamps will be issued as a set of three in a pane of 18, with a May 10 first-day ceremony in Promontory Summit, Utah. The railroad's last spike was driven on that date and at that location 150 years earlier, in 1869.
"Two different stamps feature the Jupiter and the No. 119 locomotives that powered the trains carrying the officers and guests of two train companies to the Golden Spike Ceremony held when the two rail lines were joined at Promontory Summit in Utah," according to the Postal Service.
The two train stamps appear to be horizontal commemorative size; the third stamp is smaller and depicts the golden spike that was a prominent part of the ceremony.
So how did Chuck become involved?
In February of 2017, I was contacted by a research company called PhotoAssist (http://photoassist.com/) that, among other things, helps the USPS find reference materials for creating stamps. They apparently found my photo on Flickr.
Last September they told me they wanted to use my photo and sent me a contract for $750. I have found Flickr to be a very important resource for sharing my photography. I use Creative Commons - Noncommercial - No Derivatives license. Many of my pictures have been used by conservation organizations, government agencies, schools, etc. I post medium resolution files and allow them to be downloaded. I have been paid for a few things but that was not my goal.
I highly recommend visiting Chuck's Flickr page, petechar
.
The Digital Story - Digital Photography Public Group
If you seek a community for your photography, there is a vibrant one right under your nose.
Current membership for The Digital Story - Digital Photography Public Group is 3,286 photographers publishing 78,551 images. Thousands of visitors scroll through these photographs annually, and this is also the source for the TDS Member Photo of the Day. Over the years I have curated 36 Galleries of Amazing Images, and we are stronger today than ever.
To create this place of sharing, exploring, and enjoying high quality photography, without Flickr, would be a much different proposition all together.
Why This is the Dawn of a New Flickr Era
Back in November 2018, Thomas Hawk wrote this in his article titled, Why Limiting Free Users to 1,000 Photos on Flickr is a Smart Move:
Besides the obvious business model reasons why this is a smart decision for Flickr and their users, there are other important reasons this makes Flickr better as well.
One of the things I noticed after Flickr began offering 1 terabyte for free to users was that many users simply began using Flickr as a backup site for all of their photos. Instead of sharing their best photos with a community, they simply dumped everything on their hard drive to Flickr and left and went away. These photos were then indexed for search and populated the service littering it with low quality content (screengrabs, 1,000 bad photos in a row of fireworks, 3,000 poorly composed photos in a row of somebody's sister's wedding, etc.).
By focusing Flickr's vision on photo sharing and community rather than simply another online photo backup dump this makes the visual experience better for those of us who are actually there to share photos and engage with each other.
Also, if people are willing to pay for something they tend to put more effort into it. If you are paying for something and perceive it's value you'll care more, contribute more and be a part of something. These are the accounts that I value on Flickr the most.
Under the new business model, not only will Flickr become more financially stable, it will also begin to evolve upwards in terms of artistic quality.
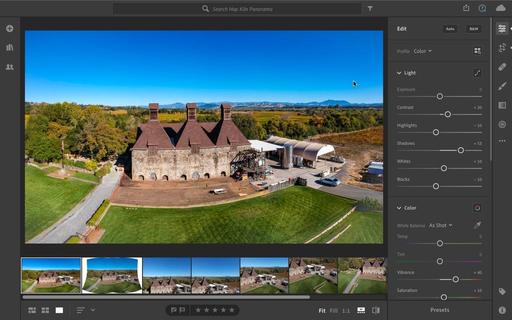
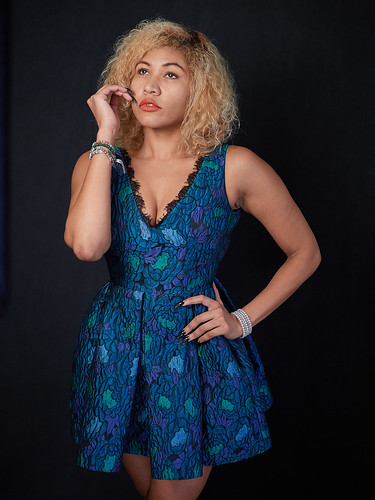
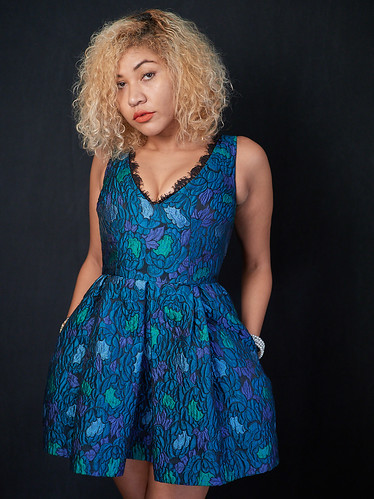
How Portfoliobox Helped Me Connect with Models
Recently, I had to find new models to help me with some upcoming projects. In the past, my success rate for connection hadn't been as high as I thought it should be.
However, this time in my follow up notes, I included a link to my new Portfoliobox site - derrickstoryphotography.com. The turnout has been amazing.
I asked one model how important the About Me page plus the curated galleries were to her decision to work with me. She said it was vital. "I want to know that I'm working with someone who is legit and who will capture me in the best light. Your site gave me that confidence."
I've added my Portfoliobox site to the nav bar on TheDigitalStory.com as the About Me page. I can't think of a better way to introduce myself to the public.
Photo Contest: Up Close
To enter, send your best close-up image to thenimblephotographer@gmail.com by Feb. 12, 2019. Subject Line: Up Close. Entrant must have captured the image and performed all of the post production on it. Recommended size of the image is 2000 px on the longest edge. The selected image will be featured on TheDigitalStory and the photographer will receive a 1-Year Pro Account with Portfoliobox.
Speaking of winners, congratulations to Rhys Gwyn - Tops in the TDS B&W Portrait Challenge. To honor his top entry, Rhys will receive a 1-year Portfoliobox Pro site upgrade. Way to go!
To create your own Portfoliobox site, click on the tile or use this link to get started. If you upgrade to a Pro site, you'll save 20 percent off the $83 annual price.
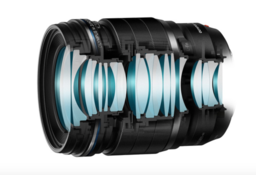
Do You Have a Lens that You will Never Sell?
I read this interesting article on FStoppers, where the author stated that he would never sell his Canon EF 135mm f/2.0 telephoto.
This got me thinking about my current stable of optics and if any would qualify for the "Do Not Sell" franchise tag. After some pondering, I did come to the conclusion that my Panasonic 20mm f/1.7 and my Olympus PRO 45mm f/1.2 both deserved the franchise tag.
Do you have a lens that you would never sell? If so, share it in the comments area of the Facebook post about this podcast.
TDS Workshops Update
Joshua Tree Update
Our Spring workshop in the high desert is sold out. But but I promise that we'll share reports from the event.
San Francisco Street Photography Workshop
I think after 5 great seasons, this workshop has run its course. At the moment, I don't have enough deposits to move forward with the event, so I'm going to cancel it. Thanks to everyone who has made this event one of my favorites!
Sonoma Coast Workshop Update
I've secured a beautiful home for us just south of Bodega Bay. This will serve as our headquarters during the event. There's plenty of room for our classroom and presentation work, plus beautiful areas for relaxing, and even sleeping accommodations for those who wish to stay there.
If you do want to join us July 17-19, and I hope you do, please visit the Workshops Signup Page and place your $100 deposit. That will secure your ability to attend when official registration begins later this month. You can also read more about the event on the TDS Workshops page.
Updates and Such
Inner Circle Members: Our new Photo Challenge is RAW Capture. Check your Patreon page for the details and prize. And thanks for supporting this podcast!
B&H and Amazon tiles on www.thedigitalstory. If you click on them first, you're helping to support this podcast. And speaking of supporting this show, and big thanks to our Patreon Inner Circle members:
And finally, be sure to visit our friends at Red River Paper for all of your inkjet supply needs.
See you next week!
More Ways to Participate
Want to share photos and talk with other members in our virtual camera club? Check out our Flickr Public Group. And from those images, I choose the TDS Member Photo of the Day.
Podcast Sponsors
Red River Paper - Keep up with the world of inkjet printing, and win free paper, by liking Red River Paper on Facebook.
Portfoliobox - Your PortfolioBox site is the best way to show off your best images.
The Nimbleosity Report
Do you want to keep up with the best content from The Digital Story and The Nimble Photographer? Sign up for The Nimbleosity Report, and receive highlights twice-a-month in a single page newsletter. Be a part of our community!
Want to Comment on this Post?
You can share your thoughts at the TDS Facebook page, where I'll post this story for discussion.

 "In Between Storms" - Fujifilm XF10 - Photo by Derrick Story
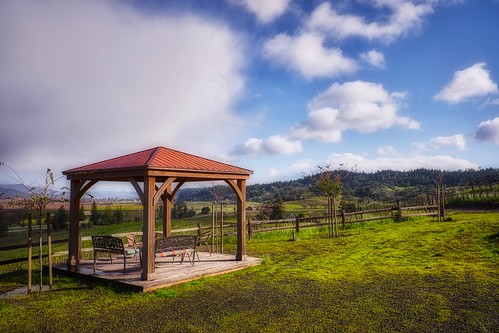 "Gazebo on a Rainy Day" - Fujifilm XF10 - Photo by Derrick Story