This is The Digital Story Podcast #724, Feb. 4, 2020. Today's theme is "Is DxO PhotoLab 3 the Alternative You've Been Looking For?." I'm Derrick Story.
Opening Monologue
We spend a fair amount of time talking about Lightroom, Luminar, Capture One, and Photos. But there's another quality image editor out there that should be in the conversation as well: DxO PhotoLab 3. It features powerful tools, digestible interface, and reasonable cost. And we're going to pull back the curtain on this terrific app on today's TDS Photography Podcast.
Is DxO PhotoLab 3 the Alternative You've Been Looking For?
I first became a fan of DxO software with OpticsPro for Photos. It's this wonderful editing extension that I use to this day that provides top notch lens corrections within the Photos app.
As a result of this good experience I've been following the French software company, and with the release of PhotoLab 3, decided to get serious about learning it. I can tell you right now, this was time well spent.
PhotoLab 3 is available in two versions: Essential ($129) and Elite ($199). Both are excellent, but you get some additional sophisticated tools with Elite, plus 3 activations (instead of two). So I'm going to focus my comments on the Elite version.
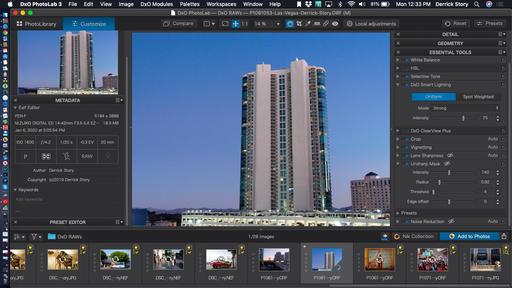
PhotoLab 3 is a complete image organization and editing application. It's PhotoLibrary displays the contents of the hard drive it is pointed too. For photographers who have an organized Finder-based system, this is a perfect match.
But you can also create Project in the PhotoLibrary that allow you to work with images from different sources without disrupting your Finder-based organization. So you can have it both ways. Plus you have star ratings and pick/reject functionality with filtering capability that make it easy to cull your shoots.
But the real fun begins when you click on the Customize tab and have the opportunity to edit your images with PhotoLab's powerful tools. In addition to the usual suspects that you would expect there, here are some of my favorite features.
- DxO Optics Modules - In many ways, this is the heart of PhotoLab. As you upload RAW files, the app identifies the lenses and cameras used, then asks for permission to download the corresponding modules. These provide outstanding lens corrections that truly improve your pictures.
- DxO Smart Lighting - Intelligent dynamic range expander that recovers highlight detail and unblocks shadows. You have complete control over its intensity.
- DxO ClearView Plus - Improves contrast and sharpness of images by removing the effects of atmospheric haze and fog. Again, you have control over how much or little you use.
- PRIME Noise Reduction - Probably the best in-app noice reduction I've used. It is flat out impressive.
- Control-Point Technology for Localized Editing - Precise control points give you tremendous control over your corrections.
Other goodies that I really appreciate includes the integration of Nik Collection and FilmPack 5. You can work with the Nik tools from within the PhotoLab environment. It's very convenient.
For those on Macs, there's an Add to Photos button that makes it super easy to send any image within PhotoLab over to your iCloud environment for sharing among your devices and backup. This function works flawlessly, and I love using it while on the road.
Additional features include excellent Metadata display with Keyword functionality, tons of built-in presets, strong compare tools, customizable workspaces, copy and paste corrections, virtual copies, and retouch tools.
I've been using it on my super-nimble 11" MacBook Air travel computer, and it performs like a champ on that machine. Bottom line is this, DxO PhotoLab 3 should be part of any serious photo management conversation. It's outstanding.
TDS Soundbites
We have a new feature that publishes every Wednesday called TDS Soundbites. They are technology tidbits that are 5 minutes or less. I cover digital photography, audio, mobile computing, smart home, and more.
If you haven't checked them out yet, all you have to do is look for the newest Soundbite in the Recent Entries box on thedigitalstory.com, or enter SoundBites in the Search box and click on the Search button.
So far, I've covered in-Camera RAW Processing, Slow-Sync Flash, and Business Card Flash Modifier. And I have a new SoundBite ready to go this Wednesday.
They're perfect for your next coffee break!
The Oben CT-3565 Carbon Fiber Tripod - Inner Circle Reviews
Editor's Note: This guest blog post by David Hearne is part of our Inner Circle Reviews program. You can learn more about David at the end of this article.
In the last decade plus, a major trend in photography has been towards high quality but lighter, easier to carry equipment. Our Derrick Story describes it as nimble photography. For nature and landscape photographers, such as myself, a tripod is an essential tool, and to borrow from a popular saying "the best tripod is the one you have with you".
High quality but more compact tripods have evolved right along with our cameras. The Oben CT-3565 Carbon Fiber Tripod (3.2 lbs) clearly fits in the category of compact, light weight but stable support for Micro 4/3s and other small cameras.
My impressions are formed by comparison to 2 tripods that I own: a Gitzo 1228 carbon fiber with a Markins base/Arca Swiss Mono Ball (5.5 lbs) and a MeFOTO Roadtrip Classic aluminum with Q1 ball head (3.6 lbs). The Oben 3565 and the MeFOTO Roadtrip are similar tripod systems with very similar performance.
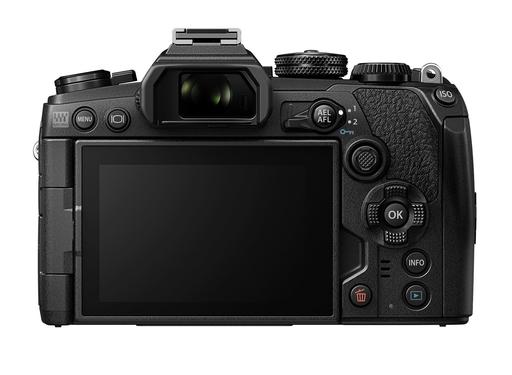
Job 1 for tripods and ball heads is stability. I evaluated stability using my E-M1X mounted with a 40-150mm/2.8 m.Zuiko PRO lens (4 lbs total). Note, the center column was not raised for this evaluation. With camera and lens mounted, the Oben 3565 ball head easily locked the camera in place and maintained framing.
However, with both the Oben and the MePhoto tripod legs pushing down on the camera will flex the fully extended legs. My Gitzo rig is decidedly more stable. By zooming out to 150 mm the deflection can be detected on the LCD at times when pushing the shutter and may generate enough movement to cause a slightly out of focus shot. Collapsing the skinniest leg greatly reduces this flex. To completely eliminate this flex a best tripod practice is to use a 2s shutter release delay, especially on travel tripods. However, the collapsed length (16 in) and lower weight are acceptable trade offs for me and the Oben is easily carried on my hiking daypack. My Gitzo rig is just too heavy and bulky for me to hike with.
The Oben 3565 is indistinguishable from the MeFOTO Roadtrip in several features including the rapid twist locks and working height. Compared to the MeFOTO, the Oben 3565 has some nice touches.
Like the MeFOTO, a bubble level is integrated into the Arca Swiss release plate. Additionally the plate tightening screw also has a level that can be utilized when vertical shooting using the 90 degree slot. The locks for the leg spread positions (3) are spring loaded and legs repositioned more easily than on the MePhoto.
The Oben 3565 comes with an alternate short column which allows a minimum working height of 9.5 inches. The MePhoto short column is a $30 accessory. Finally the Oben has integrated spiked feet. The MePhoto comes with interchangeable spiked feet.
In summary, the Oben CT-3565 Carbon Fiber Tripod ($210) is a quality travel/hiking tripod for micro 4/3s cameras at a very good value price point.
About the Author
David Hearne is a photographer based out of North Carolina. You can visit his website, American Roots Photography, to see his images and learn more about him.
David is also a member of The Digital Story Inner Circle where he gained access to the Oben 3565 Carbon tripod for this review.
Update for the TDS 2020 Photography Workshop Season
What makes these events so special? It's the magic blend of fellowship, location, inspiration, and focus. You can actually be single-minded about your craft. I'll take care of everything else.
When I was discussing this on our Patreon site, one Inner Circle member raised a concern about the class presentation on the final day. I'm going to tell you what I say at every workshop. This is not a competition. It is the most supportive creative environment that you will ever share your work with. And no matter your skill level, the floor is yours to discuss your experience and share a few images. I promise you, you will love it.
When you decide which event is best for your, jump over to our 2020 Workshops Signup Page and place a $100 deposit to secure your place. Only participants on the Reserve List who have placed a deposit will be eligible to register for a workshop. If you have questions or need more information, fill out the "Send Me Info!" request form. I'll get back to you asap.
- LA Street Photography Experience - March 13-15, 2020 - 1 Seat Remaining - This hands-on workshop guides you on an exploration of classic Los Angeles locations and architecture. Our excursions will take us as far west as Venice Beach, as well as famous movie spots and the back streets of this fascinating Southern California area. Limited to 9 participants and featuring two instructors (Derrick Story and Mike Boening), you will enjoy great photography, food, and friendship with our fellow enthusiasts. Three days, $749. You can place your deposit here.
- Humboldt Redwoods and Coast Workshop - May 12-14, 2020 - 0 Seats Remaining -- Our home base for this experience is in the hospitable town of Fortuna that's on the banks of the Eel River. From there we explore the magnificent redwood groves of Humboldt County and the rugged coastline of Northern California. This workshop explores three distinct ecosystems in a satisfying 3-day event. Limited to just 9 participants, you can reserve your spot and learn more about this event here.
- Lassen Volcanic Park Photo Workshop - July 16-18, 2020 - 2 Seats Remaining -- We'll convene at a spacious cabin at Lake Almanor that serves as our HQ. From there we explore the stunning Lassen landscape, peaceful shores of Lake Almanor, and the magnificent mountain night skies. This hands-on photo workshop is limited to 8 participants and is a wonderful blending of experience, camaraderie, and artistry. Limited to just 8 participants, you can reserve your spot and learn more about this event here.
- The Eastern Sierra Photography Workshop - Oct. 1-3, 2020 - 2 Seats Remaining - Our event is headquartered at the Silver Maple Inn in Bridgeport, CA - gateway to Bodie, Mono Lake, and June Lake. We'll take advantage of the magical morning light to photograph some of the most unique landscape in North America. We'll photograph the sparkling night skies of the Sierra and explore rustic urban environments. Limited to just 9 participants, you can reserve your spot and learn more about this event here.
Updates and Such
Inner Circle Members: A big thanks to those who support our podcast and our efforts!
How to Watch Photos for macOS Catalina and iPadOS - Learn everything you need to know about Photos for the Mac and iPad by checking out my latest course on LinkedIn Learning and on lynda.com. This course is perfect for Mac and iPad based photographers who shoot with iPhone, Mirrorless, and DSLR cameras. It covers both photography and movies. And if I say so myself, it's a lot of fun.
B&H and Amazon tiles on www.thedigitalstory. If you click on them first, you're helping to support this podcast. (The Digital Story is supported by its audience. When you purchase through links on our site, we may earn an affiliate commission.) And speaking of supporting this show, and big thanks to our Patreon Inner Circle members:
Affiliate Links - The links to some products in this podcast contain an affiliate code that credits The Digital Story for any purchases made from B&H Photo and Amazon via that click-through. Depending on the purchase, we may receive some financial compensation.
And finally, be sure to visit our friends at Red River Paper for all of your inkjet supply needs.
See you next week!
More Ways to Participate
Want to share photos and talk with other members in our virtual camera club? Check out our Flickr Public Group. And from those images, I choose the TDS Member Photo of the Day.
Podcast Sponsors
Red River Paper - Keep up with the world of inkjet printing, and win free paper, by liking Red River Paper on Facebook.
Skillshare is an online learning community with thousands of classes for creators, entrepreneurs, and curious people everywhere. Get two months of learning for free by visiting www.skillshare.com/tds.
The Nimbleosity Report
Do you want to keep up with the best content from The Digital Story and The Nimble Photographer? Sign up for The Nimbleosity Report, and receive highlights twice-a-month in a single page newsletter. Be a part of our community!
Want to Comment on this Post?
You can share your thoughts at the TDS Facebook page, where I'll post this story for discussion.
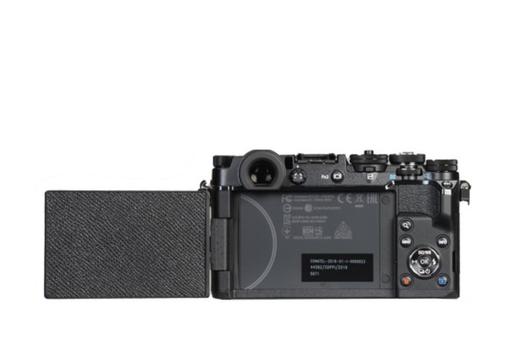
 The 35mm angle of view from a Fujifilm X100V.
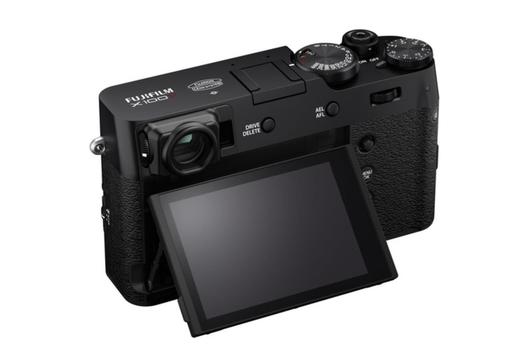
 The 50mm angle of view from a Fujifilm X100V.
 The 70mm angle of view from a Fujifilm X100V.