This is The Digital Story Podcast #729, March 10, 2020. Today's theme is "My Approach to Coronavirus in 2020." I'm Derrick Story.
Opening Monologue
Having seen my fair share of natural disasters over the last few years, I've refined my approach to decision making in challenging situations. My inclination is to get the facts, evaluate their potential implications, and build a course of action based on that information. Coronavirus is the latest phenomenon for us to contend with. And today I'll talk about my approach as a journalist and artist to the threats and fears surrounding it.
My Approach to Coronavirus in 2020
I was thinking back to my life 10 years ago, and how simple it seemed in comparison to today.
Before I start, I want to say that if anyone in our community is under the weather as a result of seasonal flu of COVID-19, I hope you feel better soon. I care about everyone in our community.
So, we all know about the headlines - the stock market's recent dive, supply chain difficulties for the technology industry, the lack of vaccine for COVID-19, and the introduction of a new term, "social distancing".
What I think would be more productive for our time together today is for me to relay what I've witnessed firsthand over the last couple weeks, and then talk about plans moving forward for our community. Let's start with my firsthand accounts from recent activity.
- Sharks vs Maple Leafs at SAP Center
- Warriors vs 76ers at Chase Center
- Holiday Inn Express in Burlingame
- Cancellation of jobs by LinkedIn and others
- Questions about TDS Workshops
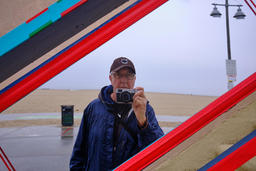
When I've been in public, I've seen very little coughing. I treat every surface outside of my house as a potential germ-spreader. So I'm careful not to touch my face until I can throughly wash my hands.
When I arrived at the Holiday Inn Express, I wiped down the room including door knobs, phones, remotes, and countertops with disinfectant wipes. I carry tissues and folded paper towells in my pocket incase I do have to touch my face, but I also use them for public surfaces as necessary. I've also been keeping my phone, laptop, iPad, and cameras clean.
Additionally, I've added an hour a night to my sleep, and increased my water intake using the refillable bottle that I always have with me now. I'm also getting as much fresh air as possible and maintaining my exercise routine. I want to be a strong and vibrant as possible right now. And I don't want to create a constant environment in my nose and throat when virus like to congratulate.
I've thought a lot about social distancing, and I've decided that under the current circumstances, I'm going to continue to interact with others. If the numbers change in the areas that I'm working, I will reevaluate my behavior based on those numbers. Until then, I will continue to go about my work.
In terms of our workshop season for 2020, I do not anticipate any changes to our schedule. We're in Los Angeles this week, and I'll be reporting what I experienced there in next week's show. We have our own cottage, which I can wipe down. It will only be us going inside and out of that area. In public, we'll practice appropriate hygiene for the times we live in.
The subsequent events are all in remote locations: Humboldt, Lassen, and Eastern Sierra. I will be able to maintain clean environments at all of those venues. And personally, I think the escape from daily headlines will greatly benefit our artistic pursuit of photography.
I want to remind you that point of this segment is not to make recommendations for you. You have your own process for that. But since our lives are intertwined, I want you to know how I plan to move forward over the course of this year. I think it's important for you to know where I stand and what you can count on. If things change, I will update my plans based on those facts.
Here's What You Can Count on From Me in 2020
The podcast will continue to publish weekly on Tuesdays. Regular posts will continue to flow to thedigitalstory.com, Facebook, Twitter, and Instagram. I will maintain my photography jobs with clients, and best that I can, my teaching for LinkedIn Learning and lynda. And we're going to continue to have workshops in great locations throughout California.
My prediction is that 2020 will be a tough financial year for me and many other solopreneurs. But I've built-in some diversity to help offset the losses. We have a loyal Patreon audience. I have level-headed photography clients. And I have the ability to develop new products quickly in a changing environment.
There may not be much that you feel like you can depend on right now. But know that this corner of your world is there for you. I'll see you next week once I return from Southern California.
Do You Have a Film Camera that Needs a Good Home?
Over the last year, I've received donations from TDS members who have film cameras that need a good home. What I do is inspect the items, repair and clean as I can, then list them in TheFilmCameraShop where I can find a good home for them. If you're interested in donating, please use the Contact Form on TheNimblePhotographer site. And thanks for you consideration!
The Upcoming iPhone 12 Pro May Pack a 64MP Camera
You can read the entire article by visiting this link to PetaPixel.com.
If you use an iPhone and megapixels are your thing, the upcoming iPhone 12 may delight you with its camera specs. A new leak suggests that Apple is working to stuff a 64-megapixel sensor into its next top-of-the-line smartphone.
The leaked details were shared by the popular YouTube channel EverythingApplePro, which received the information from tech leaker Max Weinbach, who nailed several iPhone leaked details in 2019.
"For the first time in years, Apple will be crossing the megapixel threshold that they've been at for quite some time -- 12 megapixels -- and bumping up the sensor quality, potentially up to 64 megapixels," Filip Koroy of EverythingApplePro says in the 12-minute video. "Weinbach is reporting that they're testing various sensor sizes. 64 megapixels would be the Sony sensor, very likely, and Apple will be focusing heavily on the camera for the iPhone 12 Pro."
The aperture of the ultra-wide lens on the next iPhone will reportedly be bumped up in size from f/2.4 to around f/1.6 or f/1.7, possibly to allow for Night Mode when using that camera. And the minimum focusing distance is said to be decreasing on the ultra-wide camera, allowing for macro photos to be shot with it. Other features and specs Weinbach is hearing include an improved Smart HDR, a bigger battery (by about 10 percent), a 120Hz display, and 5G.
Update for the TDS 2020 Photography Workshop Season
Those of you on the registration list for the Humboldt Redwoods Workshop, keep an eye out for the registration packet that will go out later this week. We have a great event for you, and I'll be working with you to ensure that you are fully prepared to take advantage of this wonderful opportunity. Plus, we had one seat open up (moved to another workshop), so if you want to join us, hop over to the 2020 Workshops Signup Page and get on the Reserve List.
If you have questions about the other workshops, feel free to drop me a line using the Contact Form on www.thenimblephotographer.com.
When you decide which event is best for your, jump over to our 2020 Workshops Signup Page and place a $100 deposit to secure your place. Only participants on the Reserve List who have placed a deposit will be eligible to register for a workshop. If you have questions or need more information, fill out the "Send Me Info!" request form. I'll get back to you asap.
- LA Street Photography Experience - March 13-15, 2020 - 1 Seat Remaining - This hands-on workshop guides you on an exploration of classic Los Angeles locations and architecture. Our excursions will take us as far west as Venice Beach, as well as famous movie spots and the back streets of this fascinating Southern California area. Limited to 9 participants and featuring two instructors (Derrick Story and Mike Boening), you will enjoy great photography, food, and friendship with our fellow enthusiasts. Three days, $749. You can place your deposit here.
- Humboldt Redwoods and Coast Workshop - May 12-14, 2020 - 0 Seats Remaining -- Our home base for this experience is in the hospitable town of Fortuna that's on the banks of the Eel River. From there we explore the magnificent redwood groves of Humboldt County and the rugged coastline of Northern California. This workshop explores three distinct ecosystems in a satisfying 3-day event. Limited to just 9 participants, you can reserve your spot and learn more about this event here.
- Lassen Volcanic Park Photo Workshop - July 16-18, 2020 - 2 Seats Remaining -- We'll convene at a spacious cabin at Lake Almanor that serves as our HQ. From there we explore the stunning Lassen landscape, peaceful shores of Lake Almanor, and the magnificent mountain night skies. This hands-on photo workshop is limited to 8 participants and is a wonderful blending of experience, camaraderie, and artistry. Limited to just 8 participants, you can reserve your spot and learn more about this event here.
- The Eastern Sierra Photography Workshop - Oct. 1-3, 2020 - 2 Seats Remaining - Our event is headquartered at the Silver Maple Inn in Bridgeport, CA - gateway to Bodie, Mono Lake, and June Lake. We'll take advantage of the magical morning light to photograph some of the most unique landscape in North America. We'll photograph the sparkling night skies of the Sierra and explore rustic urban environments. Limited to just 9 participants, you can reserve your spot and learn more about this event here.
Updates and Such
Inner Circle Members: A big thanks to those who support our podcast and our efforts!
How to Watch Photos for macOS Catalina and iPadOS - Learn everything you need to know about Photos for the Mac and iPad by checking out my latest course on LinkedIn Learning and on lynda.com. This course is perfect for Mac and iPad based photographers who shoot with iPhone, Mirrorless, and DSLR cameras. It covers both photography and movies. And if I say so myself, it's a lot of fun.
B&H and Amazon tiles on www.thedigitalstory. If you click on them first, you're helping to support this podcast. (The Digital Story is supported by its audience. When you purchase through links on our site, we may earn an affiliate commission.) And speaking of supporting this show, and big thanks to our Patreon Inner Circle members:
Affiliate Links - The links to some products in this podcast contain an affiliate code that credits The Digital Story for any purchases made from B&H Photo and Amazon via that click-through. Depending on the purchase, we may receive some financial compensation.
And finally, be sure to visit our friends at Red River Paper for all of your inkjet supply needs.
See you next week!
More Ways to Participate
Want to share photos and talk with other members in our virtual camera club? Check out our Flickr Public Group. And from those images, I choose the TDS Member Photo of the Day.
Podcast Sponsors
Red River Paper - Keep up with the world of inkjet printing, and win free paper, by liking Red River Paper on Facebook.
The Nimbleosity Report
Do you want to keep up with the best content from The Digital Story and The Nimble Photographer? Sign up for The Nimbleosity Report, and receive highlights twice-a-month in a single page newsletter. Be a part of our community!
Want to Comment on this Post?
You can share your thoughts at the TDS Facebook page, where I'll post this story for discussion.