Recently in Photography

  Page 296 of 381 in Photography  
Adobe Shortcut App

Here's a nifty Adobe AIR application that provides you with lots of shortcuts for most of CS4 software, including Photoshop, InDesign, SoundBooth, Acrobat Pro, and more. I say most because the app doesn't include shortcuts for Bridge and Adobe Camera Raw. Still, for the price (free!), it's great having dozens of Photoshop shortcuts at your fingertips there on the desktop.

If you don't have Adobe AIR installed, you'll be prompted to do so. But that's easy enough. Plus there are lots of additional useful AIR apps that you may want to take advantage of. You can download the application here.


twitter.jpg Follow me on Twitter

-


As I've been testing the VF-2 Electronic Viewfinder for the Olympus E-P2, I've found that it excels in certain applications. My favorite so far is when I use my Zeiss manual focus lenses (from my Contax film days) on the digital Olympus. In my first round of testing with the older E-P1, the lenses certainly worked fine and gave me the different look that I wanted. The problem was, I found it difficult to manually focus the Zeiss lenses with the 230,000 LCD on the back of the E-P1, especially outdoors in daylight.

When I had a chance to try the new Olympus E-P2 that's now in stock for $1,100 with electronic viewfinder and zoom lens, I thought that the VF-2 might make it easier to work with the manual focus lenses. I was right. What a difference!


Portraits of Jenn captured with an Olympus E-P2 and Zeiss 50mm lens. These images have been processed in Photoshop. But you can see rawer versions on the TDS Flickr page. I toned some of them, but didn't do any retouching. (Click for larger images here.) Photos by Derrick Story.


I start by mounting the Rayqual CY M 4/3 adapter on the E-P2, then choosing the Zeiss lens that's best for the assignment. For this portrait shoot with Jenn, I chose the 50mm f/1.7 Planar and shot with it wide open. The lighting was overcast that afternoon in Ventura, and I wanted a dreamy effect with very soft background. In order for this to work at all, I would have to nail the focus on Jenn's eyes, then let everything go the way it wanted with the shallow depth of field. The VF-2 really helped. I didn't have to use any focusing aids at all. I just looked through the viewfinder, twisted the lens barrel to the left and right until the focus because clear. Plus, I felt more professional looking through a viewfinder rather than holding the LCD up to my face.

The character of the Zeiss lens is unique compared to my Olympus digital glass. The best way for me to describe it is, it's the difference in sound quality that you get from a vinyl LP record compared to a digital MP3. Everything seems a little warmer, less edgy. However, some photographers, especially those who look at every pixel, might not like this rendering. But for certain types of portraiture, I love it.

One thing you don't get with this scenario is complete metadata. You have to remember or note the aperture setting you used, because the camera has no way to record it. The nice thing about the E-P2, however, is that image stabilization is in the body, not the lens. So you still get IS even with these older lenses.

I'm going to do some more testing with different glass. I really like having the option to create a completely different look, yet still have all the conveniences of the digital workflow.


twitter.jpg Follow me on Twitter

-


A Day with Photoshop Elements 8

I loaded my copy of Photoshop Elements 8 on to the computer in the recording booth at Lynda.com for a day of screencasting. I wanted to use Adobe's latest version of its consumer image editor, because the movie project I'm working on involves getting professional looking pictures from a compact camera. So, I figured that using software that costs $63 made more sense than $200 or $500.

pse_8.png

The Mac version of PSE 8 uses Bridge CS4 and Adobe Camera Raw 5. The Windows version uses the Organizer. Since I'm a big fan of Bridge, I thought this was a good fit for me showing the differences among photos. Bridge and PSE 8 work well together, although it's not quite as smoothly as with Photoshop CS4.

Once I was working in Elements itself, things went well. All of the Photomerge technologies are amazing, and they are easily accessible under the New menu at the top of the interface. I built a couple panoramas in real time (didn't have to stop recording video), and I was happy to see that the Transform tool is included in PSE 8 for cleaning up the stitched images afterward.

If you're used to image editing in Photoshop CS, then you have to make a few interface adjustments in Elements. If you want to get to Levels for example, it's a little buried in the Enhance menu (Enhance > Adjust Lighting > Levels). But if you're new to Photoshop, this sequence makes sense. And that's who this application is designed for. It was nice of Adobe, however, to retain the CMD-L shortcut for Levels for us old cronies.

One thing that I really miss in PSE is Smart Sharpen. The two sharpening filters you do have -- Unsharp Mask and Adjust Sharpness -- have been moved from the Filters menu to the Enhance menu. Again, this probably makes sense for newbies, but seems weird to me. After all, they are filters, aren't they? But no Smart Sharpen, which I truly like in CS4. There is an Auto Sharpen, but I don't know what's going on there. It sounds kind of dangerous to me.

But at the end of the day, there are more than enough image editing tools to get the job done. And lots of Auto tools if you're willing to let the application make the decisions. I had no problem navigating the menus once I got used to the handful of interface changes, and the results were just fine.

Personally, I think Photoshop Elements 8 for the Mac is worth the price alone for the merging technologies, Bridge CS4, and ACR with all the latest profiles. The image editor itself, though pared down compared to CS4, it still top notch. And if you're trying to help that photo enthusiast in your life move to the next level (without breaking the bank), I think this application would be on the short list of essentials.

When I first started recording training titles with Lynda.com, everything was screencasting. I'd sit in a recording booth with a producer on the other side of the glass, and explain into a mic what I was demonstrating on the computer. The audio and screen capture would then be combined into a QuickTime movie and published.

I still do a lot of screencasting, but in 2009 we decided that many of my upcoming titles would benefit by including live action video too. As you can image, this adds a whole new level of complexity to the project. After some trial and error, our first success was the Natural Light Portraits Photo Assignment where I combined live action demonstration of photo technique with screencasts that analyzed the results. We followed this approach with two more photo assignments, that are also doing well.

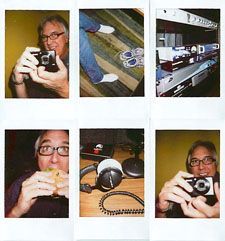
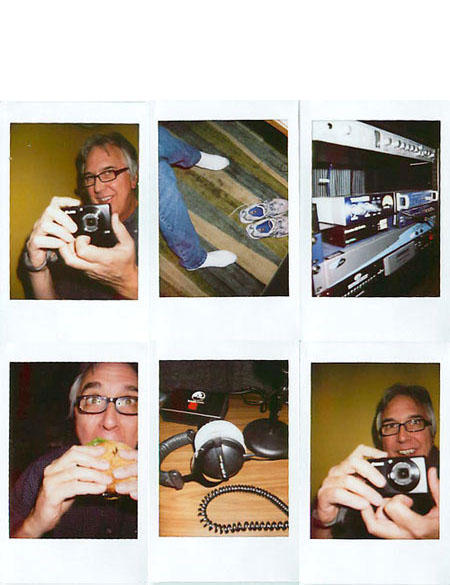
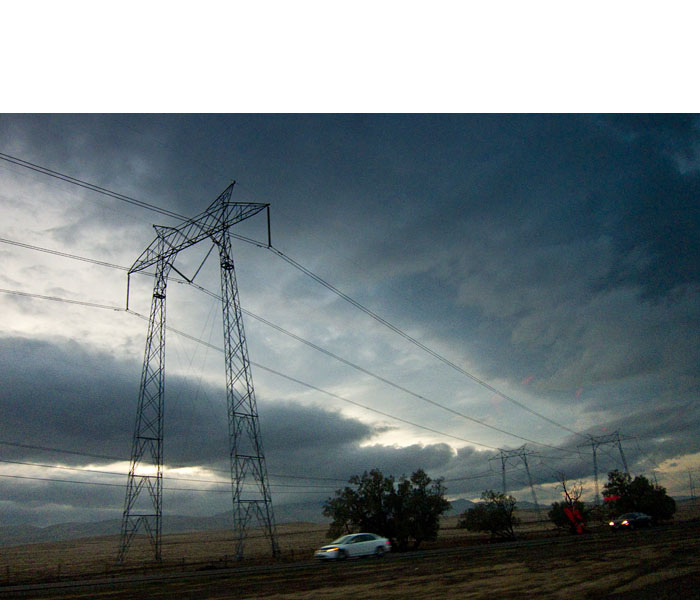
This led to a more ambitious project that we're currently shooting in Ventura, CA. I can't release the title yet, but I can say that it involves getting stunning photos from cameras such as the Canon S90. This project combines live action in the studio and on location, plus screencasting in the booth. I have a few shots from the live action shoot outside that we recorded on Tuesday, and I thought you might like a sneak peek.

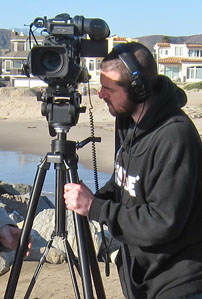
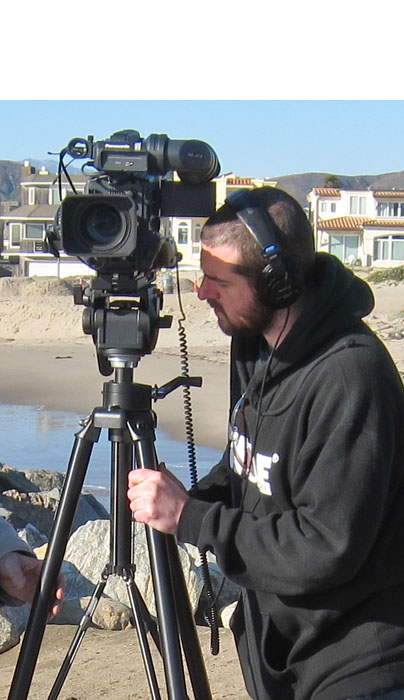
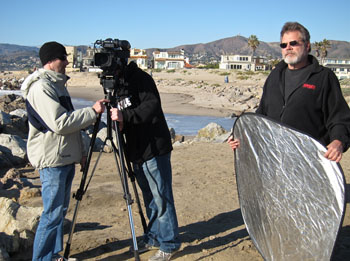
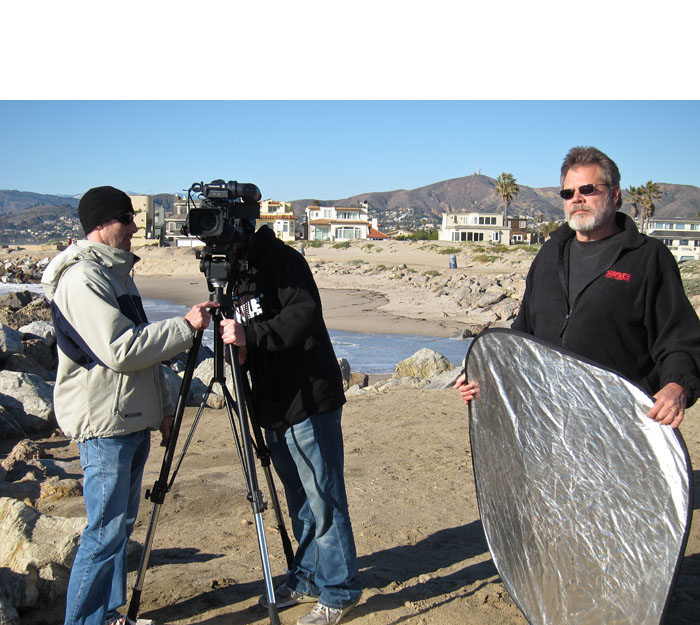
Generally, we work with a 4-person crew, which is highly efficient in movie making. Our filmmaker, Jacob Cunningham, shown here working the camera, directs the shoot in coordination with the producer, Samara Iodice. Along with me, we are the decision makers on the spot. And there are many decisions to be made. Jacob, by the way, also shoots documentaries, and is a local celebrity. We also have a lighting expert, Loren Hillebrand (holding the reflector in the top shot), and a grip, Andrew. Loren has years of filmmaking experience, and I've yet to encounter a lighting problem that he could not solve. This is the kind of experience you need when working with a small crew.

We script out my lines beforehand, then in the field I have to work from memory. This is a bit of a challenge, but we do it this way because we like having the takes complete. Yes, the editors are fantastic, but they already have a long list of things to do. Fixing one of my brain freezes isn't really time efficient in this scenario. So when I botch a take, we shoot it again until I get it right.

This is where my preparation is so important. I need to know the content cold. Because when you're standing in front of the camera, there are a dozen things racing through your mind. And if you don't know exactly what you're going to say, you won't nail the take. I usually take a couple weeks to prepare my content before heading to Ventura for the shoot.

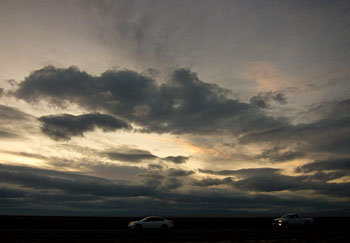
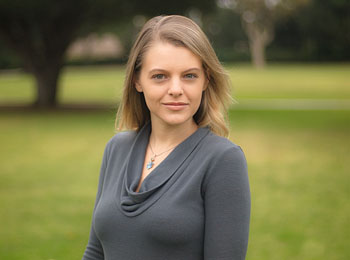
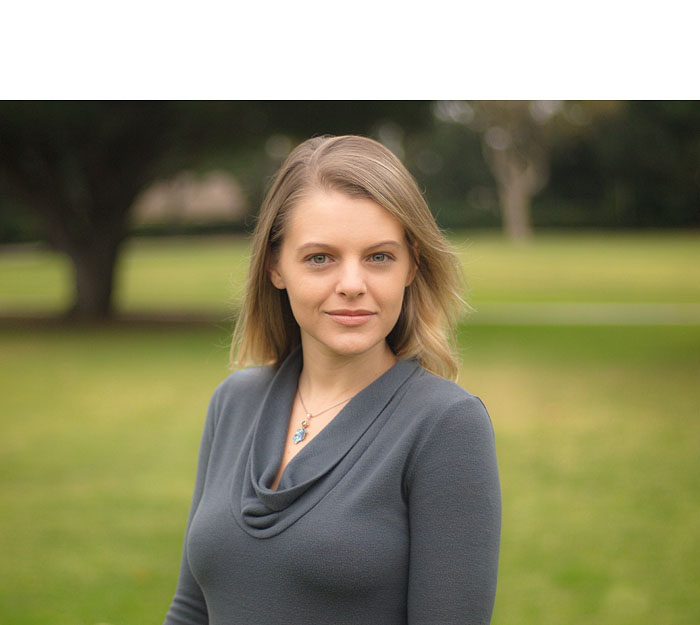
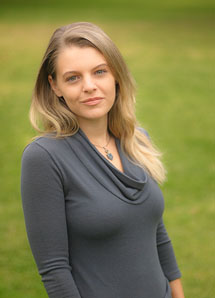
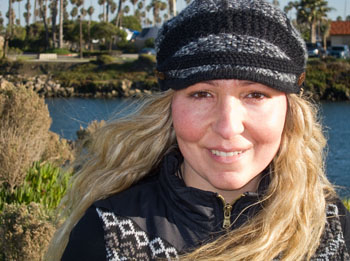
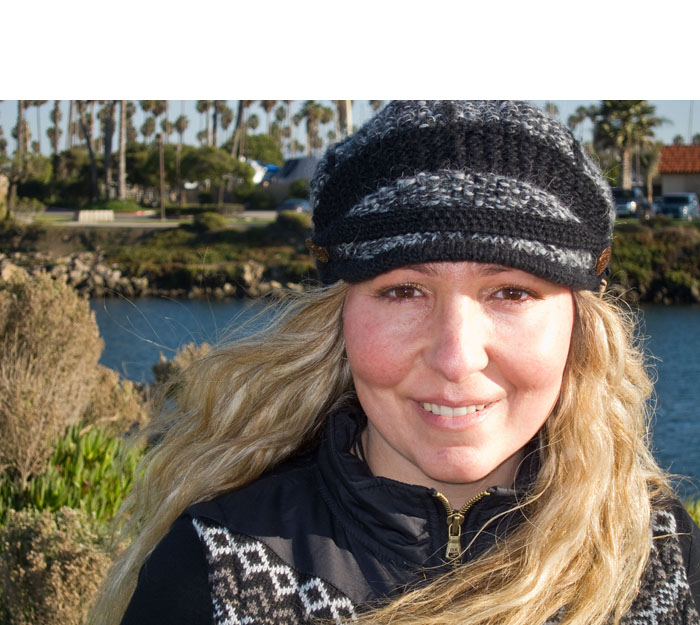
Even with all of this planning, things never go the way you think. For example, at the last minute, our model backed out. So our producer, Samara, had to stand in and model in addition to her other duties. This image of her is one that I captured with the Canon S90 while discussing portraits.

These unplanned challenges always cause a chain reaction. In this case, Loren had to run the slate, then once we were rolling, go back, grab the reflector, and manage the lighting. It's a constant exercise in problem solving. This is part of the excitement, and it's also the reason why I'm dog tired by the time I return to the hotel room.

After the shooting is completed, all of the content is logged and handed over to the editors. These folks are great, and they improve the work we did in the field. Once the edited rushes have gone through testing, we finalize the footage and release the title into the Online Training Library for our viewers to use and learn from.

I'm hoping that the project we're working on this week will be released in early Feb. 2010. Once it's out, I'll have more anecdotes to share. But for now, I've got to head to the studio, because I have a full day of screencasting ahead of me.


twitter.jpg Follow me on Twitter

-


sdhc_memory_card.jpg

How do you pick the right SDHC card for you? Should it be 30X, Class 6? What do those terms even mean? In this podcast I explain the three most important criteria for choosing the right memory card: capacity, read/write speed, and class. The bottom line is, many photographers don't have to spend the big bucks for super fast cards, unless they have cameras that can take advantage of that speed.

I've also written an article for Macworld Magazine titled, Buy the right SD card for your camera that spells out everything I discuss in this podcast. If you're interested in this subject, you might want to read it.

Listen to the Podcast

You can also download the podcast here (17 minutes). Or better yet, subscribe to the podcast in iTunes.

Monthly Photo Assignment

Embrace is the Dec. 2009 Photo Assignment. You can read more about how to submit on our Member Participation page. Deadline for entry is Dec. 31, 2009.

More Ways to Participate

Want to share photos and talk with other members in our virtual camera club? Check out our Flickr Public Group. It's a blast!


twitter.jpg Follow me on Twitter

-


Podcast Sponsors

SiteGrinder lets you take ownership of your websites. Effortlessly output pages right from Photoshop.

Red River Paper -- Try the $7.99 Sample Kit.

Add Magic to Your Slideshows -- FotoMagico presentations are so amazing that your audience will be asking how you did it.


Technorati Tags: , , , , ,

"Sideways Mini Cooper" - Grab Shot 190

"I shot this in Berlin during the November anniversary of the fall of the Berlin Wall," writes Roderick James. "This Mini dealership near what was Checkpoint Charlie had a Mini 'stuck' to the wall. Shot using my Canon G10, 30th sec @ f2.8, ISO 800."

"Usually, I wouldn't consider shooting at ISO 800 on my compact camera, but at least I was able to get the shot. Upon my return from the trip, I downloaded Derrick's podcast (no. 204) which convinced me I was right to 'loosen up' a little."

This is a perfect example of what I discussed in the ISO podcast. At ISO 100, the shutter speed would have been around 1/4 of a second, and the image would have been soft from camera shake.

Photo by Roderick James. Click on image to zoom to larger size.

If you have a candid you'd like to share, take a look at our Submissions page, then send us your Grab Shot. We'll try to get it published for you on The Digital Story.

And you can view more images from our virtual camera club in the Member Photo Gallery.


twitter.jpg Follow me on Twitter

-


Technorati Tags: , , ,

micro_adjustment.png

After reading "This lens is soft" and other myths by Roger Cicala, I decided to bone up on the micro adjustment feature for my Canon 5D Mark II. Essentially, this is designed to correct minor focusing problems. You may have heard the terms "front focusing" or "back focusing." It means that the lens and the camera are not in perfect focusing alignment. According to Cicala, many pro bodies, including the Canon 7D, 1DIII, 1DsIII, 5DII, 50D; Nikon D3, D3x, D300, D700; the Pentax K20D, the Olympus E-30 and E-620 have a microcalibration feature that allows you to better match problem lenses to the camera bodies.

The owner's manual for my Canon 5D Mark II cautions, however, that using micro adjustment should be the exception, not the rule.

"Normally, this adjustment is not required. Do this adjustment only if necessary."

That being said, if you have a camera that provides micro adjustment, and you suspect that a particular lens could use a little correction, you might want to investigate this further.


twitter.jpg Follow me on Twitter

-


The Lowepro D-Wrap is a clever way to protect your camera and never lose its case. And for only about $12, it makes a superb stocking stuffer.

The case itself is made out of durable Neoprene fabric that wraps around the camera and is secured by a Velcro closure. It attaches to the body via a sliding tripod screw that easily loosens via a fold down handle to allow access to the battery and memory card. When you take picture, just open the case and let it hang down out of the way. When finished, it "wraps back up" protecting the camera. I'm currently using the D-Wrap to protect my Canon PowerShot S90.

You can watch an informative movie about how to use the D-Wrap on the Lowepro video page. Keep in mind that it's designed for compacts. My S90 is the largest camera it can accommodate comfortably. The case looks great, and it really protects the camera nicely.

More Gift Ideas for Photographers

If you haven't checked out my Top 10 Gifts for Photographers, be sure to take a look. I have links to all of the items, and there's an audio podcast on that page that describes everything in detail.


twitter.jpg Follow me on Twitter

-


nikon-s220-122x160.jpg

Here's a list of cameras gone wrong. For various reasons these devices should be avoided at all costs. I love articles like this.

Check out The Worst Cameras of 2009 by the folks over at Digital Camera HQ. It includes the Fuji J20, Nikon S220, Pentax W80, Kodak C180, and more.

You've been warned!

Want to make your own holiday greeting card? We have everything you need right here, including a free downloadable image that's cropped to fit perfectly on the cover of a 5"x7" holiday card. If you've never printed your own cards, take a look at this article: Professional Photo Art Notecards Using Aperture and Red River Paper. You can also set up these projects in Photoshop and Lightroom too. One reader even used Microsoft Word.

To get the image of the Christmas Cactus, just go to the TDS Flickr page, click on the All Sizes link above the Christmas Cactus picture, and then click on the Original link. This loads up the master image. Then all you have to do is download it using the link above the image.

These cards are gifts unto themselves. They are perfect for family, friends, your kids' teachers, your hair cutter... anyone that you want to wish "happy holidays" to. So go get that high resolution image, and make something pretty.

If you want to share one of your holiday shots with our virtual camera club, then upload it to the The Digital Story - Digital Photography Public Group and tag it with "Greeting Card". I'm sure others will appreciate the gesture.


twitter.jpg Follow me on Twitter

-