This is The Digital Story Podcast #661, Nov. 13, 2018. Today's theme is "The 2019 TDS Workshop Season." I'm Derrick Story.
Opening Monologue
Every year we strive to make our photography events even more compelling than the season before. For 2019, we have what I consider our best offering to date. Four unique events in fantastic destinations at truly affordable prices. And in today's TDS Photography Podcast, I will share each one of them with you. So sit back, tune in, and contemplate the possibilities for your next photography adventure.
The 2019 TDS Workshop Season
Here is the event slate for 2019! You can reserve your spot by visiting the 2019 TDS Workshops page and placing your $100 deposit for the event of your choice.
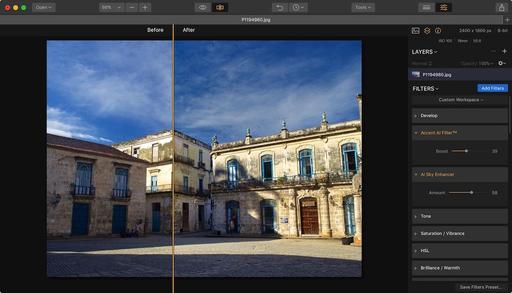
- Joshua Tree National Park - March 13-15, 2019 - This will be our first workshop visit to Joshua Tree. This fascinating environment is perfect for landscape work by day and night photography once the sun sets. We'll also visit the Salton Sea to capture migratory birds and to explore this unusual body of water. During our lab sessions, there will be instruction on maximizing your results with Aurora HDR, Lightroom CC, and Luminar. Add a little aerial photography, and we're set for photographically satisfying adventure. Three days, $725
- San Francisco Street Photography - April 26-28, 2019 - We'll work entirely on location in San Francisco. We'll book a hotel in picturesque Union Square that will serve as our headquarters during the event. No rental car will be necessary. We'll explore the City's hidden treasures and capture them through our lenses. And we're adding new shooting locations again this year, including twilight assignments. This is San Francisco like you've never seen it before. And as a bonus, Olympus Visionary Mike Boening will be joining the teaching staff and leading sessions on street shooting and night photography. Two instructors, three days, small group, and all for just $725. (That's right, it's 3 full days in one of the most photogenic cities in the U.S.)
- The Sonoma Coast Exploration - July 17-19, 2019 - Northern California's rugged coastline is the perfect setting to fine-tune our landscape and long-exposure water images. Plus, we'll visit a former Russian fort, movie locations, and interesting fishing villages. This workshop is the perfect escape from summer heat and humidity while adding hundreds of beautiful images to your photo library. During our lab sessions, there will be instruction on maximizing your results with Aurora HDR, Lightroom CC, and Luminar. If a workshop could be relaxing and stimulating all at the same time, this is it. 3 days - $725.
- Humboldt Redwoods Photography Workshop - Sept. 18-20, 2019 - There is magic in the forest. If you've never experienced the magnificent redwoods of Humboldt County, you are in for a treat. Every detail of this vibrant ecosystem presents a photographic opportunity. The fern-covered floor with Dogwoods and azaleas, the towering Redwoods, fallen logs across bubbling streams... so much to work with. Additionally, we'll explore the fascinating Eel River and its wildlife. During our lab sessions, there will be instruction on maximizing your results with Aurora HDR, Lightroom CC, and Luminar. This workshop will delight your eyes and satisfy your soul. 3 days - $725
You can reserve your spot by visiting the 2019 TDS Workshops page and placing your $100 deposit for the event of your choice.
The Portfoliobox Inspirational Photographer
I got to thinking about some of the great PortfolioBox photographers out there, and how they could inspire us both artistically, but also in terms of our presentation online. So I started digging.
Each week for the month of November, I'm going to feature an inspirational photographer who uses Portfoliobox as his/her platform for presenting their work. This week I want to point you to Eva Fidziukiewicz. Not only is her fashion work outstanding, but her unique Portfoliobox design is equally appealing.
If you've signed up for a Portfoliobox Pro account, and have published at least one page, then send me the link to that site. Use the Contact Form on the Nimble Photographer and provide your name, the link, and the subject of the page or site you've published. I will add it to our PortfolioBox Pro Directory.
To create your own Portfoliobox site, click on the tile or use this link to get started. If you upgrade to a Pro site, you'll save 20 percent off the $83 annual price.
Using Aperture and Automator to Add IPTC to Your Pictures
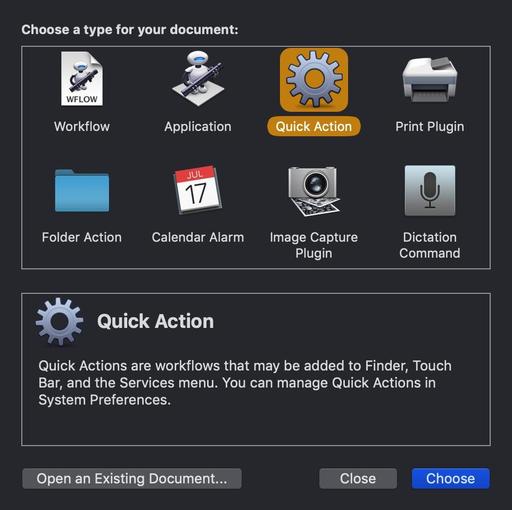
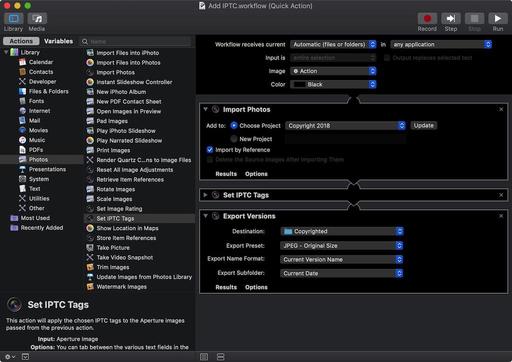
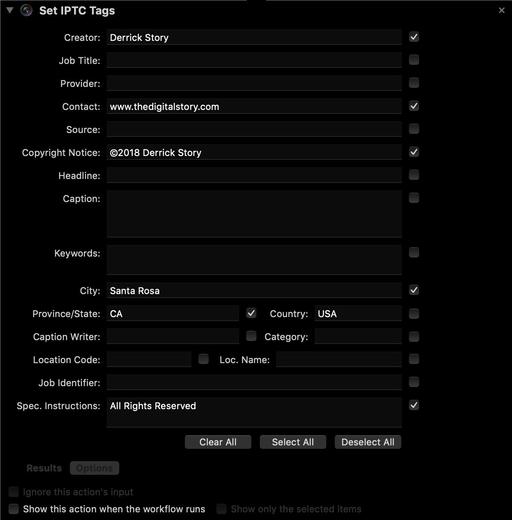
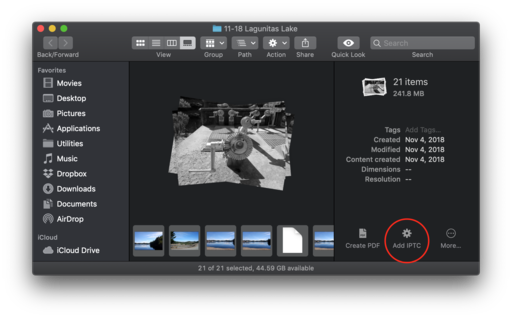
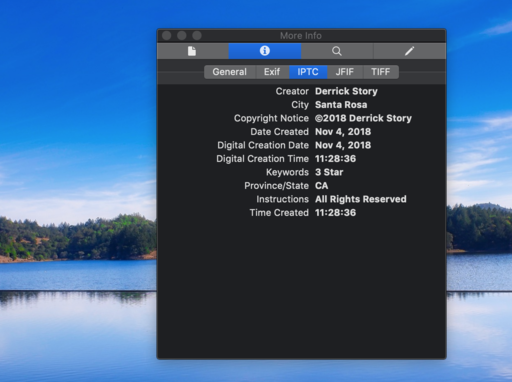
Former Aperture users... don't delete the app quite yet. I have a helpful, practical purpose for keeping it on your hard drive: to add IPTC metadata (semi-automatically) to your pictures.
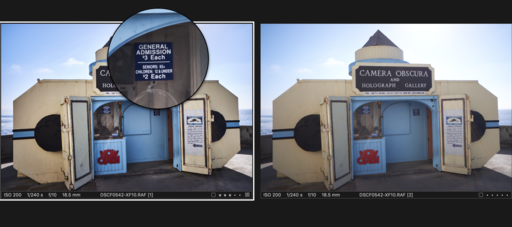
I'm using the Automator/Aperture tandem to include my copyright and author info with images that may fall outside my normal workflow, and don't have camera functions to include them. I've been adding data to iPhone images and those from the Fujifilm XF10. Here's how it works.
Coming Next Week - The Official 2018 TDS Holiday Gift Guide
That's right. It's that time of year. And I have handpicked 10 fun, creative, useful gift suggestions for that favorite photographer in your life (who also might be you!). You definitely won't want to miss this show.
Updates and Such
Inner Circle Members: Continuing this month - Photo Critique. Check out the post on Patreon. Send your images to me with the subject line, "Photo Critique." More details on our Patreon page.
B&H and Amazon tiles on www.thedigitalstory. If you click on them first, you're helping to support this podcast. And speaking of supporting this show, and big thanks to our Patreon Inner Circle members:
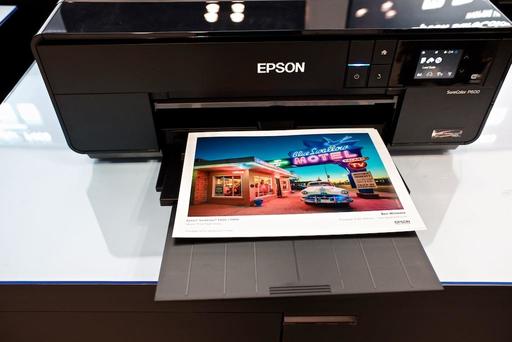
And finally, be sure to visit our friends at Red River Paper for all of your inkjet supply needs.
See you next week!
More Ways to Participate
Want to share photos and talk with other members in our virtual camera club? Check out our Flickr Public Group. And from those images, I choose the TDS Member Photo of the Day.
Podcast Sponsors
Red River Paper - Keep up with the world of inkjet printing, and win free paper, by liking Red River Paper on Facebook.
Portfoliobox - Your PortfolioBox site is the best way to show off your best images.
The Nimbleosity Report
Do you want to keep up with the best content from The Digital Story and The Nimble Photographer? Sign up for The Nimbleosity Report, and receive highlights twice-a-month in a single page newsletter. Be a part of our community!
Want to Comment on this Post?
You can share your thoughts at the TDS Facebook page, where I'll post this story for discussion.