Recently in Photography

  Page 106 of 385 in Photography  

One of the most handy light modifiers that I have around the studio is the Rogue FlashBender 2 Reflector (XL Pro, Silver) . Originally, I was using it as a medium contrast main light for strobe work. But I've found a couple more uses that have become just as valuable.

xl-pro-reflector.jpg

This particular FlashBender is larger than most (12" wide) plus has a "super soft silver" surface. I originally fell in love with this coating when using the Rogue Super Soft Silver Reflector. It's literally not too soft, not too hot.

And because of the large surface area, I can move it close to the subject and create portraits with pop.

reflector-with-ruler.jpg

But what I've also discovered is that the XL Pro is a handy reflector without a flash. I've been using it for on-the-go outdoor portraits and window-lit product shots. Because this modifier folds flat and can stash practically anywhere, I find myself stuffing it in my bag and reaching for it often.

It's easy to hold with one hand (portrait reflector), and it stands on its own for product shots.

product-fill.jpg

The Rogue XL Pro Reflector is available for $59. And it's one of the most versatile modifiers in my bag of tricks.

The Nimbleosity Report

Do you want to keep up with the best content from The Digital Story and The Nimble Photographer? Sign up for The Nimbleosity Report, and receive highlights twice-a-month in a single page newsletter. Be a part of our community!

Want to Comment on this Post?

You can share your thoughts at the TDS Facebook page, where I'll post this story for discussion.
Photos for macOS can do so much more than many photographers realize. And to show you just how powerful it can be, I've just published Photos for OS X: Extensions for Local Adjustments.

clean-up-extension.jpg

In this title, I take a deep dive into six editing extensions that provide local adjustments, letting you work on just part of the photo (in addition to easy to use presets and other goodies they include). The extensions I feature are: Color Filters, Filters for Photos, Tonality, Snapheal, and BeFunky. Plus, I fire up External Editors and roundtrip with Photoshop and Exposure X, all from within Photos for macOS, and all totally non-destructive.

localized-adjustments-1.jpg

If you're a Photos user, or if you want to see the real potential of this image management app for Mac users, then take a look at the free welcome movie that provides an overview of the course.

Master Photos for OS X

(It's More Powerful than You Think)

For hands-on tutorials, be sure to take a look at Photos for OS X Essential Training on lynda.com. I cover everything you need to know to get the most from this surprisingly powerful image management application.

The Apple Photos Book for Photographers

For photographers who are more than just casual snapshooters, or who are making the transition from Aperture or iPhoto, The Apple Photos Book for Photographers shines a light on the sophistication of this app and the ecosystem it taps into. Available as an eBook now, and coming to print later this year.

Get it for $15 using checkout code APPLE15!

Want to Comment on this Post?

You can share your thoughts at the TDS Facebook page, where I'll post this story for discussion.

As I talked about in this week's TDS podcast, the Olympus TG-4 is my favorite tough camera. It captures wonderful images in all conditions, including underwater, captures in RAW, and has built-in WiFi and GPS. The geotagging is what I want to cover today.

photos-gps.jpg

The GPS function in the TG-4 works quite well. It requires less than a minute to acknowledge a new location so it can add it to an image. My experience has been that if I pull it out of my pocket, turn it on, and start taking pictures, the first image might not be geotagged, but the subsequent pictures are.

update-gps.jpg

An easy way to check the status of the GPS is to press the Info button a couple times to bring up the readouts. If you see the GPS coordinates in the upper right, as in the illustration above, then you're probably in good shape. If not, you can tell the TG-4 to update by pressing the OK button.

I upload the Jpegs via WiFi to my iPhone 6S or iPad mini (I can get the RAWs later if I need them.) I like using O.I. Share for this. Plus it lets me know if there are geotags for the images via a cute little satellite icon. Those files are automatically added to my iCloud library, which means they are now on all of my Apple devices, including Photos for macOS on the MacBook laptop.

TG-4_Geotagged.jpg

From this point, I can build Smart Albums for the geotagged images, view them on a map by using Get Info for a single image, or by clicking on the general location name in the Moments view to see where an entire group of shots are plotted. Thanks to geotagging by the TG-4, I don't have to rely on my memory to recall where I took a particular shot. And when I'm traveling, this is a wonderful benefit.

Sidenote: a terrific iOS app for viewing and adjusting metadata for tagged images is Metapho in the App Store.

Master Photos for OS X

(It's More Powerful than You Think)

For hands-on tutorials, be sure to take a look at Photos for OS X Essential Training on lynda.com. I cover everything you need to know to get the most from this surprisingly powerful image management application.

The Apple Photos Book for Photographers

For photographers who are more than just casual snapshooters, or who are making the transition from Aperture or iPhoto, The Apple Photos Book for Photographers shines a light on the sophistication of this app and the ecosystem it taps into. Available as an eBook now, and coming to print later this year.

Get it for $15 using checkout code APPLE15!

Want to Comment on this Post?

You can share your thoughts at the TDS Facebook page, where I'll post this story for discussion.
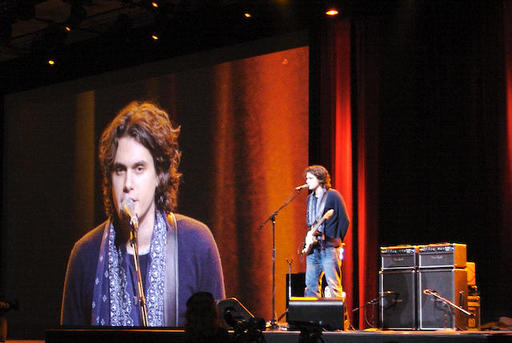
This is The Digital Story Podcast #542, July 26, 2016. Today's theme is "The Cameras of Summer." I'm Derrick Story.

Opening Monologue

Life is much different during the summer months compared to the rest of the year. I don't wear proper shoes most of the time. Long pants are reserved for business meetings and going out to dinner. And my wardrobe of camera gear definitely changes too. And that's the focus of today's photography podcast.

The Cameras of Summer

I'm pretty darn active this time of year. Most of my errands are on bike. I go hiking on the weekends. And any chance I get, I'm in the water.

As much as I love my E-M5 Mark II, it doesn't come with me on many of these adventures. My summer wardrobe consists of a tube of sunblock and the Olympus TG-4 16 MP Tough Camera. Let's take a closer look at it.

summer-camera-maui-web.jpg

  • 4X wide-angle optical zoom with fast f2.0 high speed lens
  • Waterproof to depths of 50 feet, Freeze proof to 14 degrees F, Shockproof to 7 feet, Crushproof to 220 lb.
  • RAW capture, Live Composite, Underwater modes with Underwater HDR
  • Wi-Fi / GPS / e. Compass - serves as my watch and compass too
  • 1080P HD video
  • USB charging for on-the-go
  • Earned a DP Review Gold Award in August 2015

I go into more detail about the virtues of tough cameras in the first story of today's podcast.

In the News

Flickr ownership changes hands as Verizon acquires Yahoo via DP Review.

Telecom giant Verizon will acquire Yahoo and its web properties, including Flickr and photo blogging site Tumblr, for $4.83 billion. It seemed possible that Yahoo might sell its photo-sharing sites separately, as the company announced in March that it was accepting bids for its web properties. Today's announcement confirms that both Flickr and Tumblr will remain a part of Yahoo as it changes hands to Verizon.

Verizon owns AOL and Huffington Post, a point that Yahoo CEO Marissa Mayer spins as a positive for her company's outlook. In a statement published on Yahoo today, Mayer emphasized that joining forces with AOL could help strengthen Yahoo's mobile offerings.

The Third Episode of Nimble Photographer Podcast will be Live this coming Friday

In the third episode, "Busted" that will soon be available for our Patreon members, I explore my untimely introduction to being a southpaw, and how that affected my nimbleosity.

Ultra Fast Nikon Tele

Petapixel just posted Nikon 105mm f/1.4 Lens Leaked, To Be World's Fastest 105mm saying that a new Nikon AF-S Nikkor 105mm f/1.4E ED lens has been leaked early, offering us a glimpse at the soon-to-be world's fastest 105mm prime lens. The full-frame prime N (Nano Crystal Coat) lens will have a gold ring and won't have Vibration Reduction (VR). Nikon's existing 105mm has VR but is slower at f/2.8. Digicame-info says the new 105mm will have an emphasis on bokeh quality.

Updates and Such

TheFlimCameraShop on Etsy

As part of the Film Project I've been working on since December, I shoot with a variety of SLRs so I can talk about the various experiences that I've had with them. Those cameras have been cleaned, tested, and seen at least one roll of film. Once I've completed what I needed to do for the book, I put many of them up for sale in TheFilmCameraShop on Etsy. If you haven't been over there for a look, I think you'll enjoy it. I have a tile on The Digital Story that will take you directly to the shop.

And finally, be sure to visit our friends at Red River Paper for all of your inkjet supply needs.

See you next week!

More Ways to Participate

Want to share photos and talk with other members in our virtual camera club? Check out our Flickr Public Group. And from those images, I choose the TDS Member Photo of the Day.

Podcast Sponsors

Red River Paper - Keep up with the world of inkjet printing, and win free paper, by liking Red River Paper on Facebook.

MacPaw Creators of CleanMyMac 3 and other great software for Apple computers. Visit www.macpaw.com today.

Hedge for Mac - The fast solution for moving photos and videos from memory cards to drives, or drives to drives for that matter. Learn more at Hedge for Mac.

The Nimbleosity Report

Do you want to keep up with the best content from The Digital Story and The Nimble Photographer? Sign up for The Nimbleosity Report, and receive highlights twice-a-month in a single page newsletter. Be a part of our community!

Want to Comment on this Post?

You can share your thoughts at the TDS Facebook page, where I'll post this story for discussion.

One of the primary reasons that I moved from Aperture to Capture One Pro was that I felt comfortable with its organization tools. Yes, I like my catalog neat and tidy, and here's how I do that.

groups-and-projects.jpg

It's all about the hierarchy. At the top are Groups, which is Capture One terminology for what we typically call folders. I create my top level Group by navigating to User Collections, then clicking on the + icon. I then choose Group Inside...

For my catalog, this is usually a year, such as 2016. Moving forward, I keep my images in Projects, which look like little file boxes. Click on your Group once to highlight it, then click on the + and choose Project Inside... to create a new Project inside of that Group.

Projects need Albums to contain the actual image files. Click on your newly-created Project to highlight it, then click on the + icon, and choose Album Inside... from the popup menu. You are now setup to put images inside your User Collection.

When your images first are copied to the Catalog, usually from a memory card, by default they arrive in Catalog Collections > Recent Imports. Select all of those thumbnails from the last import, and drag them to the Album you created inside of the Project in the User Collections area. You have now successfully organized your first shoot.

Now all you have to do is continue down this path, creating nested Groups as necessary. You might want to add a Smart Album or two at the top of the list in the Group. You can click and drag these elements to place them in any order you want.

So the hierarchy looks something like this:

  • User Collections
  • Top Level Group
  • Nested Group
  • Project
  • Album

I like a clean workspace. I feel like I'm more productive in an organized environment, and the tools in Capture One Pro make that easy.

More Capture One Pro Tips and Techniques

Improve your skills by watching Capture One Pro Essential Training now available on lynda.com. More than 5 hours of tips, tricks, and techniques. Plus many free movies using advanced techniques.

I've also created a dedicated Capture One Pro Training page on The Digital Story. You can follow all of the tips and techniques that I publish in one convenient spot.

Thinking About Making the Transition from Aperture or Lightroom? - Download my free eBook titled, Rocky Nook's Guide to Moving to Capture One Pro. I show you the steps to create a test library, then build the foundation for a smooth transition to Capture One Pro.

Want to Comment on this Post?

You can share your thoughts at the TDS Facebook page, where I'll post this story for discussion.

Photo sharing is great, as long as you're not showing any more than you're comfortable with. A quick trip to the Privacy and Safety settings in Flickr Mobile insures that your posts are handled in a manner that you're comfortable with.

flickr-privacy.jpg

In the following video, I review settings for Default Post Privacy, Location Privacy, Photo Safety Level, and the Safe Search Filter, for both iOS and Android devices. These establish the experience that's appropriate for you, both sharing and viewing.

These adjustments only take a few minutes. And I highly recommend that you review them today on your mobile device running Flickr.

More Flickr Tips and Techniques

If you want to master Flickr on your mobile device, check out Flickr Mobile: Photo Sharing Anywhere. Desktop users might be interested in Sharing Photos with Flickr. Of course the platforms work well together too, and I discuss how you can integrate all of your devices to create a seamless photography workflow.

Want to Comment on this Post?

You can share your thoughts at the TDS Facebook page, where I'll post this story for discussion.
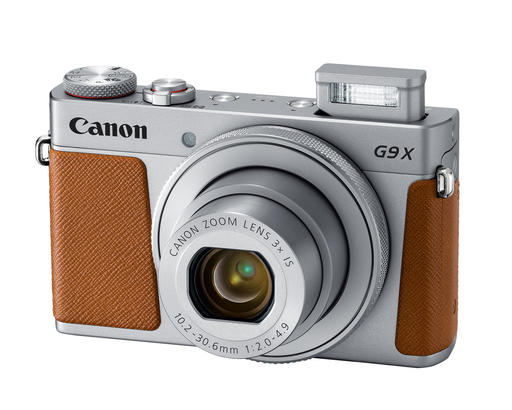
Sometimes when I look at a shot, I think to myself: "I like it, but it needs something." If I'm working in Photos for macOS, that something can be Intensify by Macphun.

intensify-macphun-web.jpg

The reason why I like Intensify is because it's a different approach to image enhancement than HDR. Intensify uses a combination of pro contrast, structure, and detail boost to "bring the image forward." The best way to start is to peruse the presets listed on the right side of the interface, then fine tune your selection with the Adjust tools.

You also have options for working in layers and localized work. Once you've tuned the shot, click on the Save Changes button, and you're returned to Photos. The process is totally non-destructive. You can revert to original at any time, or view the previous version by pressing the M key while in Edit mode.

I've found that Intensify helps me find that little extra juice that I know I want, but am not always sure how to create. It's one of my secret weapons in my Photos for macOS bag of tricks. (Well, I guess not so secret anymore...)

Master Photos for OS X

(It's More Powerful than You Think)

For hands-on tutorials, be sure to take a look at Photos for OS X Essential Training on lynda.com. I cover everything you need to know to get the most from this surprisingly powerful image management application.

The Apple Photos Book for Photographers

For photographers who are more than just casual snapshooters, or who are making the transition from Aperture or iPhoto, The Apple Photos Book for Photographers shines a light on the sophistication of this app and the ecosystem it taps into. Available as an eBook now, and coming to print later this year.

Get it for $15 using checkout code APPLE15!

Want to Comment on this Post?

You can share your thoughts at the TDS Facebook page, where I'll post this story for discussion.
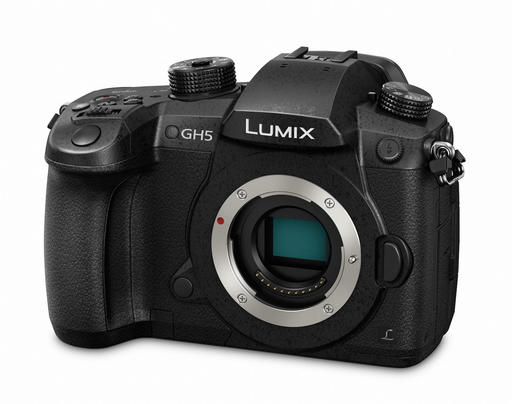
This is The Digital Story Podcast #541, July 17, 2016. Today's theme is "Moose Peterson Coffee Break." I'm Derrick Story.

Opening Monologue

If someone asked you, "What would you rather do this morning... tackle that big writing project you've been procrastinating on, or have Moose Peterson stop by to shoot the breeze?" Well, I can tell you what my answer was... and I turned on the recorder to share the conversation with you. Listen in on today's TDS podcast.

Moose Peterson Coffee Break

When Brad Pitt has a new movie out, chances are good that he'll make an appearance with Jimmy Fallon on the Tonight Show. And when Moose Peterson is in town putting the finishing touches on his new MP Backpack Series for MindShift Gear, the odds are I can get him to come by my studio for a morning chat. After all, I'm only about 5 minutes away from Think Tank Photo headquarters.

Derrick-Moose.jpg Derrick Story and Moose Peterson, photo by Sharon Peterson.

So sure enough, both Moose and his wife Sharon joined me for coffee recently. We sat around the big table here at the studio, and I fired up the audio recorder and just set it in the middle of all of us. I wanted you to be able to listen in just like you were here with us.

Moose has this terrific new backpack that's a collaboration between the Petersons and MindShift Gear. It was just announced yesterday, so I thought you might enjoy hearing about it directly from the Moose's mouth. So here we go.

In the News

Lightroom Mobile 2.4 is Wildly Impressive via The Digital Story.

The other exciting recent announcement, in my opinion, was Lightroom Mobile 2.4 for both iOS and Android. The releases are a bit different, and on the iOS side, we now get RAW editing and localized adjustments.

So I put this new version through its paces, and share my impressions with you.

The Second Episode of Nimble Photographer Podcast is Now Live

One of my favorite shows of the first season, "Baggage" is now live for our Patreon members. In this episode, I read and discuss four different stories that relate to our camera bags. And thanks to all of our new Patreon supporters who signed up this week.

Real Camera Stores

I've started this series on theAnalogstory.com called Real Camera Stores. If you haven't read any of them yet, you might want to click on the link. But more importantly, if you have a real camera store that you want to share with the world, I'd love to hear about it. Just send me the scoop, with a photo if you can, to theAnalogstory@gmail.com.

Updates and Such

Just Released!: The Apple Photos Book for Photographers

You can get your eBook copy of The Apple Photos Book for Photographers for $15 by using the checkout coupon: APPLE15. That saves your 5$ off the price.

And finally, be sure to visit our friends at Red River Paper for all of your inkjet supply needs.

See you next week!

More Ways to Participate

Want to share photos and talk with other members in our virtual camera club? Check out our Flickr Public Group. And from those images, I choose the TDS Member Photo of the Day.

Podcast Sponsors

Red River Paper - Keep up with the world of inkjet printing, and win free paper, by liking Red River Paper on Facebook.

MacPaw Creators of CleanMyMac 3 and other great software for Apple computers. Visit www.macpaw.com today.

Hedge for Mac - The fast solution for moving photos and videos from memory cards to drives, or drives to drives for that matter. Learn more at Hedge for Mac.

The Nimbleosity Report

Do you want to keep up with the best content from The Digital Story and The Nimble Photographer? Sign up for The Nimbleosity Report, and receive highlights twice-a-month in a single page newsletter. Be a part of our community!

Want to Comment on this Post?

You can share your thoughts at the TDS Facebook page, where I'll post this story for discussion.
I don't think a lot of photographers realize just how easy it is to digitize their film negatives. I'm going to show you the few basic steps that I use with Capture One Pro. My method was inspired by the excellent article, How to Convert Negatives to Positives Using Capture One by Quentin Decaillet.

negative-scanning-web.jpg

First you have to take a picture of your negative and save it as a RAW file. I have a simple setup where I use a macro lens on my Olympus OM-D to photograph a negative on a lightbox. I use a large skylight filter to keep the neg flat while I shoot it. Works great.

scanning-the-neg.jpg

Then I load the RAW file into Capture One Pro. Select the Levels adjuster and invert the dark and light values. It's simple: in the bottom boxes below the graph, enter 255 where 0 is, then enter 0 where 255 was. Save this as a preset. You now have a positive.

levels-adj-web.jpg

At this point, I typically just adjust the luminosity to taste, add a little clarity and sharpening, and call it a day. I tend not to mess with color much because I like the film look supplied by the negatives themselves.

P7181076-TFP016-Scan.jpg SMART Train Dry Run, Santa Rosa, CA - Contax 137 MA in Aperture Priority Mode at f/16. Yashica 42-75mm zoom. Fujicolor Superia 400 expired film. Photos by Derrick Story.

The point is, you can put film negatives to work right away for social and general web publishing. Take a picture, invert the levels, and enjoy.

More Capture One Pro Tips and Techniques

Improve your skills by watching Capture One Pro Essential Training now available on lynda.com. More than 5 hours of tips, tricks, and techniques. Plus many free movies using advanced techniques.

I've also created a dedicated Capture One Pro Training page on The Digital Story. You can follow all of the tips and techniques that I publish in one convenient spot.

Thinking About Making the Transition from Aperture or Lightroom? - Download my free eBook titled, Rocky Nook's Guide to Moving to Capture One Pro. I show you the steps to create a test library, then build the foundation for a smooth transition to Capture One Pro.

Want to Comment on this Post?

You can share your thoughts at the TDS Facebook page, where I'll post this story for discussion.
When I heard the news that Adobe had released Lightroom Mobile 2.4 for iOS and Android, I couldn't wait to test it on my aging iPad mini 2. I figured if it could process RAW files and add local adjustments on that device, Adobe has really created something special. And fortunately, they did not disappoint.

local-adjust-LR-mobile.jpg Applying a local adjustment in Lightroom Mobile 2.4 on my iPad mini 2

I started with a fresh memory card in my Olympus OM-D E-M5 Mark II and set the file format to RAW only. I then snapped a few pictures and put the memory card in the Apple Lightning Card Reader, then imported two files via Photos to my iPad mini 2. I opened one of the images in Lightroom Mobile 2.4.

show-raw.jpg The RAW badge confirms that I'm working on a RAW file.

The first thing I noticed when reviewing the Camera Roll in LR Mobile was the RAW badge over the image that I had just imported into the iPad. So right away I got confirmation that I was indeed working in the format that I wanted.

I then began testing highlight and shadow recovery. For me, that's the quickest way to distinguish editing a RAW from a Jpeg. And indeed the recovery was elegant in both areas, just like working with RAWs on my Mac.

adjusted-image.jpg The editing tools worked smoothly and as expected, providing the results that I wanted.

After a few color adjustments, I applied a gradient screen in the lower left corner to tone down those highlights, then finished off with a dash of clarity. Even on an iPad mini 2, the work flowed smoothly and the results were as one would expect on a computer. This was truly impressive.

I then opened Lightroom CC on my MacBook and inspected the shot I had edited on the iPad. It looked the same as on my iPad. (Yes, it automatically synced and was waiting for me.) The image was a full-sized RAW file complete with all of the adjustments I had made in Lightroom Mobile.

lightroom-cc-version.jpg All of my iPad edits display properly in Lightroom CC on my Mac.

For all of these features, you'll need a Creative Cloud account, which I've been maintaining for sometime now to stay current with Photoshop and Lightroom. And now Lightroom Mobile 2.4 elevates my nimble cloud-based workflow to new heights. And the fact that it works on a humble iPad mini 2 is even more impressive. Well done, Adobe!


Nimble Photographer Logo

Lightroom Mobile 2.4 has a very high Nimbleosity Rating. What does that mean? You can learn about Nimbleosity and more by visiting TheNimblePhotographer.com.