Recently in Photography

  Page 74 of 385 in Photography  

Not only are layers easy to use in Luminar 2018, they are fun as well. Using an adjustment layer to replace a boring sky is a perfect example.

In this free video, I show you how to create a new adjustment layer, then add and adjust a dynamic sky to improve a scenic photo. This technique only takes a few minutes to learn. And it can really improve some of your images.

Use an image layer to replace a sky from Luminar Essential Training by Derrick Story

In the past, you may have thought that layers weren't for you. With Luminar 2018 and my training videos, you may just change your mind about that.

Replace-Sky-Luminar-1024.jpg

Rock Luminar with my new Essential Training

You learn all the ins and outs of Luminar 2018 via my Essential Training on lynda.com and on LinkedIn Learning. It's fun, and I promise, you will learn a lot.

A Kingston Trio of New SD Cards

I like families with colorful members. Apparently, Kingston does as well. They've recently announced a flashy new trio of memory cards using the Canvas moniker. And I've had a chance to try them out.

Kingston-Trio-Web.jpg

All three family members are built tough. They feel good when inserting and ejecting from the camera. The Write Protect switch is firm and won't accidentally disable your card. This is a frustration I've experienced too many times with other brands.

The real difference among the models is speed. Canvas Select cards, the most affordable, are rated 80MB/s read and 10MB/s write. Canvas Go cards are 90MB/s read and 45MB/s write. While the top of the line Canvas React cards are 100MB/s read and 80MB/s write.

You can preorder a 64GB SDXC Canvas React for $34.95, a very reasonable price for a card of this caliber. And if your speed needs are more modest, you can save money with the 64GB Canvas Select for $26.50. Card capacities range from 16GBs to 256GBs. You can visit the Kingston site for more details about each family member.

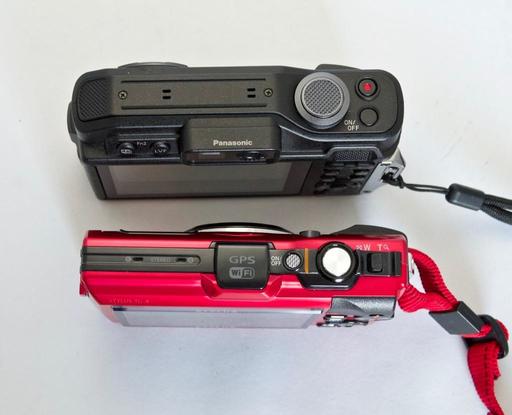
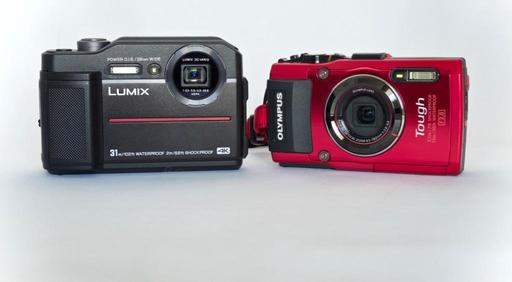
I'm using the Canvas Select in the Olympus Tough TG-5, and the Canvas React in the Olympus OM-D E-M1 Mark II. It feels good to have fresh memory cards in them both.

You can share your thoughts at the TDS Facebook page, where I'll post this story for discussion.

This is The Digital Story Podcast #627, March 20, 2018. Today's theme is "An Office on the Road." I'm Derrick Story.

Opening Monologue

One of the great things about being a Nimble Photographer is the ease at which I can travel. In just a few days I will be on the road for a couple weeks. It will be an opportunity to add new images to my library and enjoy a change of scenery for my work. Yes, that's right, my work. And in this week's show I'll explain how I'm going to pull that off.

An Office on the Road

I'll be bouncing around to a few locations in the Hawaiian Islands. And because I'm on the go so much, I want to push my nimbleosity to the limits.

Dashpoint-30-1024.jpg Olympus OM-D E-M10 with 14-42mm EZ zoom lens and the Lowepro Dashpoint 30 pouch.

My gear bag is already packed, and I'm testing it here at home. I'm using a Lowepro Fastpack 150AW that is extremely compact. It fits anywhere, under any seat, in any overhead compartment, and easily next to me in a restaurant. Since I will always have my bag with me, it must be light and thin.

Speaking of light, it weighs in at 12.5 pounds for my entire kit, and that includes a 13" laptop. Here are the contents:

The cameras are all packed in individual tight-fitting cases inside the Lowepro backpack. I can grab any individual camera as I'm dashing out the door for a bite to eat or to run an errand. I also save space by using wrist straps instead of longer neck straps. You might not think it makes that much difference, but it does.

With this kit, I can handle all of my work over the next two weeks, and all I need is an Internet connection and occasional power.

Do You Have a Film Camera that Needs a Good Home?

Over the last year, I've received donations from TDS members who have film cameras that need a good home. What I do is inspect the items, repair and clean as I can, then list them in TheFilmCameraShop where I can find a good home for them. If you're interested in donating, please use the Contact Form on TheNimblePhotographer site. And thanks for you consideration!

Dates Announced for the Burney Falls and Lassen Volcanic National Park Workshop

We have our cabin reservations secured for Sept. 27-29, 2018 for the Burney Falls and Lassen Volcanic National Park Workshop. Here's more about it.

Aerial Photography Workshop Update

Public registration is now open for the Sonoma Country Hot Air Balloon and Drone Photography Workshop, June 8-10, 2018. We're combining two very fun aerial activities into one workshop. Be sure to get on the Reserve List for this one!

Come Join me at the Skylum Photography Public Group

I'm now moderating the Skylum Photography Public Group, and I would love to have interested members from our audience join me there.

Updates and Such

You can become a member of our Inner Circle by clicking on this link or by clicking on the Patreon tile that's on every page of The Digital Story.

B&H and Amazon tiles on www.thedigitalstory. If you click on them first, you're helping to support this podcast. And speaking of supporting this show, and big thanks to our Patreon Inner Circle members:

And finally, be sure to visit our friends at Red River Paper for all of your inkjet supply needs.

See you next week!

More Ways to Participate

Want to share photos and talk with other members in our virtual camera club? Check out our Flickr Public Group. And from those images, I choose the TDS Member Photo of the Day.

Podcast Sponsors

Red River Paper - Keep up with the world of inkjet printing, and win free paper, by liking Red River Paper on Facebook.

The Nimbleosity Report

Do you want to keep up with the best content from The Digital Story and The Nimble Photographer? Sign up for The Nimbleosity Report, and receive highlights twice-a-month in a single page newsletter. Be a part of our community!

Want to Comment on this Post?

You can share your thoughts at the TDS Facebook page, where I'll post this story for discussion.
The Think Tank Storyteller 8 is a well-designed combination of high quality materials and compact design at an affordable price: $69.

Storyteller-Front-1024.jpg

This nimble shoulder bag is perfect for a day outing when you want to travel light and work quickly. The top flap provides quick access to all of your gear, yet it shields the contents of the bag from those around you.

IMG_1714.jpg

It's big enough to accommodate a DSLR and a couple lenses, or a substantial mirrorless kit. I tested it with a PEN-F, 14-42mm EZ zoom, Pentax KP, 18-50mm DA zoom, and Olympus PRO 45mm f/1.2 prime. All of these items fit easily in the main compartment of the Storyteller 8.

IMG_1710.jpg

On the inside of the top flap there are two memory card holders and a very nice zippered pocket that allows you to see its contents. There's also a handy backside pocket on the outside that's perfect for subway tickets and other quick access items. And the front pocket area has all sorts of nooks and crannies for your accessories.

Here's a more complete list of the bag's features:

  • StoryTeller 8 fits an 8" tablet in front pocket
  • Adjustable padded shoulder strap
  • Secure closure for main compartment
  • Two memory card pockets to separate empty and full cards
  • Zippered pocket for valuables
  • Expandable front pocket fits additional gear
  • Stretchable side pocket fits a water bottle
  • Premium quality materials ensure durability
  • High quality YKK RC zippers
  • Seam-sealed rain cover included in front pocket

I found the Storyteller 8 a very easy bag to work out of. I wore it cross-shoulder while exploring the city. When I saw a shot, I would swing it around, open the top flap, grab the camera and shoot - all in one easy motion.

The bag is constructed of very high quality materials. And it does include a rain cover if the weather turns on you.

I liked the Storyteller 8 so much that I procured two of them to give away at our upcoming San Francisco Street Photography Workshop on April 26. (All photographers will get a bag, but two very lucky ones will receive their own Storyteller 8s.) It's the perfect companion for urban adventure.

It's no secret that I'm a huge fan of Luminar for revealing the artistic soul trapped inside my images. And now to help others master this application, I have a new training on both lynda.com and on LinkedIn Learning.

Highlights of this movie title include:

  • Providing you with a Quick Start chapter that gets you up and running in just minutes.
  • Showing you how to quickly enhance your images with Luminar's beautiful presets.
  • How to build your own custom workspace tailored to your individual needs.
  • Explaining how to master Layers for professional image editing results.
  • And delving into the world of creative techniques with LUT mapping, B&W, and more.

luminar-essential-training-web.jpg

I hope you stop by and spend some time with me and Luminar.

Rock Luminar with my new Essential Training

You learn all the ins and outs of Luminar 2018 via my Essential Training on lynda.com and on LinkedIn Learning. It's fun, and I promise, you will learn a lot.

When you open a Live Photo in Photos for macOS High Sierra, you have a number of creative possibilities. With that original content, you can create an animated GIF or simulate a long exposure, such as with water. I show you how to tap this resource in this movie.

Apply Live Photo effects from Photos for macOS High Sierra Essential Training by Derrick Story

Live Photo adds yet another creative possibility to iPhone photography. Learn about it, and so many more things, in my Photos for macOS High Sierra Essential Training.

live-photos.png

New Photos for macOS High Sierra Training!

Is it time for you to learn the ins and outs of the latest version of Photos? Take a look at Photos for macOS High Sierra Essential Training on LinkedIn Learning, or on lynda.com. Maximize your iPhone photography and complement the work you do with your mirrorless cameras as well. You'll love your cameras even more...

Also be sure to check out my new book, The Apple Photos Book for Photographers, 2nd Edition. It's completely up to date!

You can share your thoughts at the TDS Facebook page, where I'll post this story for discussion.

This is The Digital Story Podcast #626, March 13, 2018. Today's theme is "The Anti-Zoom Challenge." I'm Derrick Story.

Opening Monologue

I have three lenses sitting on my drafting table at the studio: 28mm, 45mm, and 85mm. And each day, when I go for my walk to deliver orders from TheFilmCameraShop, I pick one. And everything that I shoot for the next 40 minutes is with that focal length. In today's TDS podcast, I discuss why I think this practice has made me a better photographer.

The Anti-Zoom Challenge

All three of those lenses are Zeiss that mount to my full frame Contax 35mm cameras. Each has a maximum aperture of f/2.8 and must be manually focused. I also have a couple Zeiss zooms, but I don't use them for this exercise. "Why would that be?" you might ask.

My all-time favorite manual focus lens is the Zeiss Tessar 45mm f/2.8. It's a pancake lens that is beautifully sharp and has a unique quality. Among other things, it has forced me to get closer to strangers than I might have wanted to, and at other times, encouraged my to find another angle far enough back to accommodate a very large subject. That lens makes me creative. And once the juices are flowing, more creativity follows.

Just when I start to get comfortable, I'll switch to the 85mm Sonnar. Because its maximum aperture is f/2.8, it's relatively compact and is easy to bring along for street photography. The world looks much different through the Sonnar, and suddenly, I'm challenged all over again. I find myself taking shots that I had overlooked dozens of times before.

It's exciting to shoot with one lens. Themes develop, ideas flow, and there's a continuity among the shots that lend themselves to photo essays.

Finally, Some More m4/3 MTF Testing: Are the 40s Fabulous?

Published on the Lens Rental Blog. Here's the scoop.

leica-lens-1024.jpg

The performance of the Voigtlander 42.5mm f/0.95 ($799) is spectacular. Of course, you also have to be OK with manually focusing, but still, that's a lens worth considering.

If you want a f/1.2 lens in this focal length, well, let's face it, it will probably come down to whether you want Power OIS or not. If you don't, the Olympus 45mm f/1.2 PRO ($1,199) is slightly less expensive and has less variation. But a good copy of the Panasonic 42.5 Noctitron ($1,398) is also excellent.

Both of the less expensive lenses in this range deliver a lot of bang for the buck. They have very good image quality, and if you don't need the widest aperture, they give you a lot for 1/3 the price of the wide-aperture duo.

If I were most interested in this focal length for portraits, I'd probably want the Olympus Zuiko Digital f/1.8 ($349); that field curvature will help throw everything other than the subject out of focus. For landscapes or architectural shooting, the flat field of the Panasonic 42.5mm f/1.7 ($348) would be an advantage.

Dates Announced for the Burney Falls and Lassen Volcanic National Park Workshop

We have our cabin reservations secured for Sept. 27-29, 2018 for the Burney Falls and Lassen Volcanic National Park Workshop. Here's more about it.

The San Francisco Street Photography Workshop Update

I've published an informative article on the San Francisco Street Photography Workshop that you may want to take a look at.

San Francisco Street Photography - April 26-28, 2018 - We'll work entirely on location in San Francisco. Our hotel in picturesque Union Square will serve as our headquarters during the event. No rental car will be necessary. We'll explore the City's hidden treasures and capture them through our lenses. As always, we're adding new shooting locations again this year, including twilight assignments. This is San Francisco like you've never seen it before. And as a bonus, Olympus Visionary Mike Boening will be joining the teaching staff and leading sessions on street shooting and night photography. Two instructors, three days, and all for just $695. (That's right, it's 3 full days in one of the most photogenic cities in the U.S.)

Come Join me at the Skylum Photography Public Group

I'm now moderating the Skylum Photography Public Group, and I would love to have interested members from our audience join me there.

Updates and Such

I now have the dates for the Sonoma Country Hot Air Balloon and Drone Photography Workshop, June 8-10, 2018. We're combining two very fun aerial activities into one workshop. Be sure to get on the Reserve List for this one!

You can become a member of our Inner Circle by clicking on this link or by clicking on the Patreon tile that's on every page of The Digital Story.

B&H and Amazon tiles on www.thedigitalstory. If you click on them first, you're helping to support this podcast. And speaking of supporting this show, and big thanks to our Patreon Inner Circle members:

And finally, be sure to visit our friends at Red River Paper for all of your inkjet supply needs.

See you next week!

More Ways to Participate

Want to share photos and talk with other members in our virtual camera club? Check out our Flickr Public Group. And from those images, I choose the TDS Member Photo of the Day.

Podcast Sponsors

Red River Paper - Keep up with the world of inkjet printing, and win free paper, by liking Red River Paper on Facebook.

The Nimbleosity Report

Do you want to keep up with the best content from The Digital Story and The Nimble Photographer? Sign up for The Nimbleosity Report, and receive highlights twice-a-month in a single page newsletter. Be a part of our community!

Want to Comment on this Post?

You can share your thoughts at the TDS Facebook page, where I'll post this story for discussion.
Using Signs to Help Tell the Story

I remember hearing in class once, "If you put a sign in a picture, people will read it." Sounds obvious, right? But the point is that they will read it first before exploring other elements in the composition. And you can use this to help tell the story.

IMGP3607-mustard-1024.jpg "End" - Burned cypress trees from the Santa Rosa fires. Photo by Derrick Story.

One of my ongoing photo essays is covering the aftermath of the fires that ravaged Santa Rosa last October. There's a juxtaposition to life here right now. On one hand, the fields are green from the rain, and the skies have returned to their pretty blue. Against that backdrop, there are burned trees, trucks filled with debris, and bare foundations where houses once stood.

I've noticed how existing signs suddenly take on new meaning (like the End sign above in front of burned cypress trees), or how signs suddenly appear as a result of the event itself, as shown below.

Larkfield-Signs-1024.jpg "Larkfield Estates" - Photo by Derrick Story.

In both cases, I find them compelling elements that add more dimension to the storytelling. Signs are often interesting in themselves, but when combined with an overall composition, they can help make the picture more effective.

You can share your thoughts at the TDS Facebook page, where I'll post this story for discussion.
One of my favorite new features in Capture One Pro 11 is redesigned layers. Now, you can access them in practically every adjustment tool, and we have plenty of powerful, yet easy to use masking tools for localized edits on each of those layers.

layers-capture-one-11-web.jpg

If you haven't experienced them yet, I have a treat for you. Here's 5-minute movie that introduces you to the new Layers, how to use them, and the tools available within them. You'll be up and running right away.

Learn about the redesigned layer approach from Capture One Pro 11 Essential Training by Derrick Story

This video is from my new course titled, Capture One Pro 11 Essential Training on LinkedIn Learning. You can also tune in on lynda.com if you prefer your training there. Either way, I have four hours of entertaining education that will help you master this excellent photo management and editing application.

You can share your thoughts at the TDS Facebook page, where I'll post this story for discussion.
om-d-45mm.jpg

In a sea of smartphones, the Olympus OM-D E-M10 Mark II with the Olympus 45mm f/1.8 prime stands head and shoulders above the crowd.

This affordable kit is compact enough to accommodate arena regulations for admittance, yet can bring the action close with a fast aperture telephoto.

The kits currently sells for $449 for the camera and $349 for the lens. So for less than $800, I have a powerful, interchangeable lens camera that I can walk through security with, and in all honesty, costs less than my current iPhone.

T-Shirt Toss "T-Shirt Toss" - Warriors vs Nets, Oracle Arena. Photo by Derrick Story.

I'm able to shoot at 180mm effective focal length at f/1.8. How do I do this? I use the Jpeg SuperFine setting, Aperture Priority, and the 2X digital doubler that I set via a function button so I can switch back and forth between 90mm and 180mm. These settings also provide some softening to the background, which is difficult to achieve with a smartphone under these conditions.

Decked Out for the Game "Decked Out for the Game" - Warriors vs Nets, Oracle Arena. Photo by Derrick Story.

If I set the ISO to 1600, I can capture at 1/1000th of a second, wide open, for the play on the floor. This gives me the ability to stop action.

Dray Gets Rejected "Dray Gets Rejected" - Warriors vs Nets, Oracle Arena. Photo by Derrick Story.

The E-M10 Mark II has all the other features that I need for fan photography, such as built-in image stabilization, pop-up flash, tilting LCD screen, electronic viewfinder, HD video recording, and good battery life. I can send the images to my iPhone via the Olympus app, so publishing on the spot is easy as well.

Halftime Show "Halftime Show" - Warriors vs Nets, Oracle Arena. Photo by Derrick Story.

Smartphones are handy, but when I want the ability to get close to the action in the arena, plus soften the backgrounds a bit, I want my Olympus OM-D E-M10 Mark II with the Olympus 45mm f/1.8 prime. For spectator photography, it's a winner.

You can share your thoughts at the TDS Facebook page, where I'll post this story for discussion.