Recently in Photography

  Page 353 of 385 in Photography  

Want to learn new photography tips and tricks firsthand? I have a number of teaching and speaking events lined up for 2007, and I'm going to publish monthly updates here on TDS. I've also created an Events Calendar so you can peek ahead, especially if you're planning a trip to Northern California.

July 2007 Events
F05001.jpg

This highlight for July is the Sony/Pop Photo Digital Days coming to Sheraton Gateway Hotel, 600 Airport Blvd., Burlingame, CA 94010, (650) 340-8500. I'll be speaking on Lightroom on the 21st and CS3 on the 22nd.

In August, I have an all day workshop in Santa Rosa on Aug. 18 titled, I've Taken Great Photos, Now What?. You can sign up at the SRJC Community Ed page. I highly recommend this event. You'll have a great time and get plenty of information for your post production workflow. Sign up today!

August 2007 Events
aug_07_events.jpg

If you see something on the Events Calendar that you like, you can email me first to confirm the date and find out additional details. My contact information is on the Submissions page.

Technorati Tags: ,

iphone_box-web.jpg

I really like the iPhone and wouldn't dream of parting with mine, but believe me, my affection stems not from the built-in 2-megapixel camera. Here are a few tidbits about the iPhone capture you should know:

You can send pictures you take with the iPhone via the device's Mail application. Your image is sampled down to 640x480 and added as an attachment. You have no other wireless option for sending your pictures. That being said, email is very easy.

The iPhone does, however, communicate well with iPhoto (Mac users only). Connect your iPhone, and it shows up as a tethered camera in iPhoto's Source pane. When you download the images to iPhoto, they come in at the full 1200x1600 resolution. Unfortunately, you don't get any substantial metadata other than the f-stop. So you have no idea about shutter speed, ISO, or focal length.

Taking pictures with the iPhone couldn't be simplier, too simple in fact. You have no settings or preferences at all, so you can't adjust the white balance, ISO, or even use a self-timer. Just point the camera and click the shutter... that's it.

I certainly can appreciate Apple's efforts to keep things simple. And I'm hoping that we get more functionality up the road via software updates. But if you're a big camera phone shooter, you will probably be disappointed with this device as it ships now. We'll see what the future brings.

Shown here is a sample photo I took in the shade of a patio in the middle of the day. I'm guessing that I was too close to the subject for precise focus, and I had no focus confirmation while attempting the shot. So this is what I got.

I do like the big viewing screen for capturing and viewing photos, and if I had just a few controls, I think I could overlook its other shortcomings. In the meantime, I think I'll watch some YouTube videos.

Technorati Tags: ,

panasonic_fz8_sm.jpg

I've been testing the Panasonic DMC-FZ8 for a few months now, and I've just discovered a review on Camera Labs that echos many of my findings. If you're interested in the FZ8, I recommend that you go over to their site and read up on this nifty Panasonic camera.

Overall, I like the DMC-FZ8 because for about $298 US you get a 12X Leica zoom lens with a maximun aperture of f-2.8, Raw mode that can be read by Lightroom 1.1 and Adobe Camera Raw 4, 16:9 aspect ratio for both movies and stills, long battery life, very light and compact body, electronic viewfinder, manual controls, live histogram, image stabilization, intelligent ISO, and a filter ring that is perfect for attaching a polarizer.

On the downside, there is more image noise at higher ISOs (400 and up) than with a Digital SLR (such as a Canon Rebel XTi) and Panasonic's noise reduction can be a little aggressive, resulting in slight smearing visible at 100 percent on a HD screen (but I haven't noticed it in prints). Both of these nits exist in almost all of the competitive models often costing more than the FZ8 (such as Sony's Cyber-shot DSC-H9). Also, the lens only goes as wide as 36mm, but extends all the way out past 400mm on the telephoto end.

Bottom line, I love shooting with this camera at 16:9 in Raw mode using the long Leica telephoto lens. I think it's a perfect addition to your camera collection if you're looking for a compact super-telephoto that records in Raw.

Technorati Tags: ,

Adobe released version 1.1 of Lightroom today, and it includes lots of new features. My favorite, and probably the overall crowd pleaser, is Catalogs. Basically, this functionality enables you to create entirely new Lightroom libraries (even though they are calling them catalogs), then switch among them as needed.

open_catalog.jpg
Choose File > Open Catalog... to change catalogs.

I keep a basic catalog on my MacBook Pro internal hard drive, but I have larger, more extensive catalogs on external drives. If I want to switch, all I have to do is use the File > Open Catalog command, and Lightroom takes me to a dialog box where I can navigate to the catalog of my choice. I have to then relaunch Lightroom, and presto, I'm looking at a whole new set of images. it works very well.

change_catalog.jpg
Then just select the catalog file you want to access, and relaunch Lightroom.

My photographer friend, Mikkel Aaland has published a nice overview of his favorite new features over on Inside Lightroom titled, What I Like About Lightroom 1.1. Also, his book editor, Colleen Wheeler, has posted, Photoshop Lightroom Adventure Book Covers Lightroom 1.1. This is a book near and dear to my heart since I joined Mikkel on the Adventure, and I have images in the book that's soon to be released.

I'll be talking lots more about Lightroom 1.1, but in the meantime, if you already own Lightroom, go download it... 1.1 is a free update.

Technorati Tags: ,

huey_pro.gif

Mike Pasini recently reviewed the hueyPRO on Imaging-Resource.com. I was curious about the results from Mike's testing because I didn't have a very good experience with the original huey. (After several attempts with the original model, I felt my monitor wasn't calibrated as accurately as I would like, and I haven't used the device since.)

In his review, I don't feel like Pasini gives the new huey a resounding endorsement. He does say, "The Pantone hueyPRO makes it affordable and easy to calibrate and profile your monitor, a good solution for the amateur photographer with multiple monitors who may not have the additional cash to go with a higher-end solution like the ColorVision Spyder2 Pro." Well, the list price for the ColorVision Spyder2PRO is $249 US, and the list for the new hueyPRO is $129. I use the Spyder2PRO and like the results, so I guess it all boils down to the price difference between the two devices (and possibly their portability with the hueyPRO taking less room in the laptop bag).

However, I just checked on Amazon.com, and you can get the Spyder2PRO for $176. So you might want to read the Imaging-Resource review carefully to see if the hueyPRO is worth saving a few bucks.

Technorati Tags: ,

ap_vs_lr.jpg

Rick LePage writes in his comprehensive comparison of Lightroom and Aperture, "While both Aperture and Lightroom perform the role of image manager and photo editor admirably, each program has plenty of unique features that set it apart. To determine which program is best for you, you’ll need to assess your work style and then choose the one whose features best support that process. I’ll lead you through the most significant differences and help you decide which will benefit you most."

If you're a Windows user, I think you'll appreciate Rick's breakdown of Lightroom. For those on the Mac, the side-by-side comparison of features is truly helpful. Either way, Rick LePage's Aperture vs. Lightroom: The new digital darkroom is a must read for those considering either or both of these applications.

Technorati Tags: ,

iceland_wedding.jpg

You only need to know three things to get great prints from your inkjet printer. Sure, you can add many micro-steps in between to refine your output, but if you follow this workflow exactly as I list it, your prints will improve.

First, calibrate your monitor. I like the Pantone Eye-One Display LT Monitor Color Calibrator for about $163 US, but any good colorimeter will work.

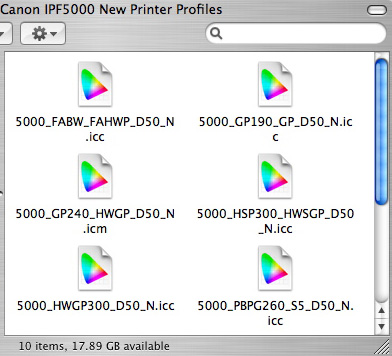
Next, match your ICC profiles and printing paper. Usually the easiest way to do this is to buy paper manufactured by the same company that makes your printer. If you have an Epson, buy Epson paper. The corresponding ICC profile will be available in your printer dialog box because they are loaded on to your computer when you install the print driver. If they're not there, go to the manufacturer's web site, download them, and install them on your own.

Finally, let the application control the color management (Photoshop, Lightroom, Aperture, etc.). Make sure you're using the matching ICC profile (usually called out under "Profile") for the paper that's in your printer, and you're set.

Printing can be that easy. This conversation came up (again) while chatting with photographer friend Colleen Wheeler. She had just published Beginner's Luck: Paper Matters to the Inside Lightroom web site. Her story of getting a good print for Father's Day will resonate with many of you.

Now go off and print something beautiful!

Technorati Tags: ,

disco_drop.jpg

Even though Mac OS X does a perfectly fine job of burning optical discs, there are times when I want additional software to help me with important jobs. Such was the case recently when I was on the road with my MacBook Pro and wanting to copy a DVD.

On my older PowerBook, I have a copy of Toast. It does an admirable job of copying and creating DVDs and CDs. But the upgrade price is steep, too steep, and I hadn't added it to my Intel Mac yet.

I had heard about Disco, and for less than the upgrade to Toast, I could download Disco and have every feature I needed right now. It's a Universal Binary app that is fast, beautiful, clever, and works great. I like the simple user interface that makes it easy to tap the intelligent technology beneath the hood. Its core features include:

  • Use of all Apple supported external and internal CD/DVD burners.
  • CD multi session support.
  • Support for CD/DVD-ReWritable disc burning and erasing.
  • Create CD/DVDs based on the following file systems: Hybrid, HFS+, UDF, PC Joliet, ISO 9660.
  • Create Audio CDs from non iTunes protected Quicktime supported audio.
  • Easily switch between the creation of MP3 or Audio CDs when ever you want.
  • Drag and drop changable track order.
  • Create CDs based of VIDEO_TS and AUDIO_TS folders.
  • Easily create backups with use of Spanning.
  • Automatically divides any number of files across multiple discs when the files won't fit on one single disc.

Capable yes, but a big part of Disco's enjoyment is how fun it is to use. When you're burning a disc, smoke emanates from the UI. When I accidently put a bad disc in my Mac, Disco notified me that I had just created a coaster... little things to pass the time while taking care of business.

disco_coaster.jpg

You can download Disco right now and burn up to 7 discs to see if you like it. My guess is that you will. Then you can buy it for $29.95 US. You'll save money now, and on the upgrades too.

Technorati Tags: ,

dekebytes_v_point.jpg

In his latest article on O'Reilly Digital Media, dekeBytes: A Taste of Vanishing Point 2.0 in Photoshop CS3, Deke McClelland says, "The Vanishing Point filter was one of the way-cool additions to Photoshop CS2. And it's gotten even better in CS3. Now you can connect non-perpendicular surfaces and wrap an image around multiple surfaces at a time."

He shows exactly how this works by melding an image around a virtual DVD case. Sample files are provided so you can follow along. It's a good tutorial if you're interested in learning how to use the Vanishing Point filter.

Technorati Tags: ,

ellen_anon.jpg

Ellen Anon writes in her recent post, Memory Card Failures, that "Sooner or later it happens to almost all digital photographers - at least all those who shoot a lot. You check some of the images in camera and they look good. You load the memory card into the reader and wait for the images to appear in Aperture’s import window. But nothing happens. You push the card into the reader a little more firmly and make sure the reader is attached properly to the computer, but still there’s no sign of the card showing up on the computer."

"The first time it happens it’s hard not to panic, especially if the card contains shots that will be difficult to replicate. Plus you wonder if the card is corrupt and should be replaced, or if you can salvage it. And you wonder if it just happened out of the blue or if you somehow contributed to the failure."

What follows is some good information about handling memory cards and what to do when things go wrong. Also, check out the discussion at the bottom of the post. Some great comments by knowledgeable people round out this helpful article.

Technorati Tags: , , ,