Recently in Photography

  Page 225 of 385 in Photography  

creative_cloud_announcement.jpg

Adobe CEO Shantanu Narayen stepped on stage at the de Young Museum in San Francisco to reveal the path to Adobe's future. Adobe is hoping that it's a path upward to the Creative Cloud.

Adobe's vision of cloud computing goes beyond hosting software and sharing pictures. They see a complete creative environment, a virtual studio that integrates tools, assets, published work, and ideas. On a basic level, V1 looks like this.

  • Creative Cloud membership provides users with access to download and install every new Adobe CS6 application announced at the event and two new HTML5 products, Adobe Muse and Adobe Edge preview.
  • Creative Cloud integrates Adobe's creative tablet applications, such as Photoshop Touch, into everyday work -- seamlessly synchronizing and storing files in the cloud for sharing and access on any device.
  • Creative Cloud members will be able to easily deliver mobile apps to iOS and Android marketplaces and publish, manage and host websites.
  • Adobe Creative Cloud members will have access to application upgrades, including new CS point-product features, before they are launched as part of major CS updates, as well as inventive new products and services as they emerge.
  • Adobe Creative Cloud membership is US$49.99 per month, with an annual contract. A special introductory offer of US$29.99 per month for CS3, CS4, CS5 and CS5.5 individual customers is also available.

creative_cloud_setup.jpg

But on an idealistic level, Adobe wants to build a virtual studio where participants have all the tools they need in an inspirational environment -- not only to create their work, but to easily publish it also. Unlike box software, where the manufacturer builds it then ships, the Creative Cloud will represent ongoing work by Adobe personal as well as its customers. New ideas inspire updates not tied to release schedules.


Setting up for the Creative Cloud event at the de Young Museum in San Francisco.


Artistic inspiration was the theme of the day. The event was held at one of San Francisco's best museums. The independent artists who created the imagery for Creative Suite 6 were present for the event. And Adobe showed off its in-house talent via demos by respected artists such as Jeff Veen.

Will it work? The keys to success will be in the many details that will be grappled with over the coming months. But the concept is solid. My recommendation is, for those of us who are Adobe customers, is to keep an open mind and take a close look at how you could make it work for you. Like any community, the more of us who participate, the better the odds of success.


The Digital Story on Facebook -- discussion, outstanding images from the TDS community, and inside information. Join our celebration of great photography!


If you're an outdoor photographer who likes stream crossings on a fallen log, jogging down a winding trail, or mountain biking on a brisk Spring day, you'll probably like carrying your camera gear in the just-announced Flipside Sport.

Flipside Sport 15 and 10 Liter Two models of the Lowepro Flipside Sport. You can see the complete set of images on the TDS Flickr page.

Available in two colors (orange and blue) and two sizes (15 liter and 10 liter), the Flipside Sport is designed with a comfortable, lightweight harness system. This allows you to secure the bag to your body and maintain balance during transport.

Flipside Sport 10 Liter Back

Access to your gear is provided via the zippered rear flap.You don't need to remove the backpack to get to your camera. Simply slide off the shoulder straps and swing the bag around with the waist belt still attached.

70-200mm inside Flipside Sport 10 Liter

The smaller of the two bags, the 10 liter, will accommodate a 70-200mm f/2.8 IS L zoom on a Canon 5D Mark II body or equivalent, plus the 24-105mm f/4 L lens. The larger bag holds more.

Tripod Sleeve

Other handy features include innovative tripod transport sleeve, hydration pouch, removable camera box with cover, and an All Weather cover. You can learn more about the Flipside Sport series at lowepro.com/flipside. More images available on the TDS Flickr page.The bag should be available in May 2012.

Author's note: This is a pre-release announcement. The Lowepro URL should be updated by midday Monday, April 23.


The Digital Story on Facebook -- discussion, outstanding images from the TDS community, and inside information. Join our celebration of great photography!


The killer feature in Apple's 3rd generation iPad is the Retina display. The 9.7-inch LED-backlit glossy widescreen shows your pictures with 2048-by-1536-pixel resolution at 264 pixels per inch. And you will notice the difference right away.

ipad_screen_comparisons.jpg

One of the first tests I ran was to open my favorite shots in Minimal Folio on both the iPad 2 and the New iPad, then place the displays side by side. The difference is stunning. The New iPad isn't only the best mobile display I've seen, it's one of the most impressive ways to look at my images, period. It's like having a collection of SizzlPix that you can carry in your backpack.

My workflow for moving images out of Aperture and on to the iPad has changed a bit as a result. I've created a new export preset that saves the images at 2048 on the longest side at 264 resolution. I then upload the files to Dropbox so they will be available to Minimal Folio on the iPad. The files are bigger now than the 1024s I previously used, but the payoff is more that worth it.

So that leads us to the question that I and many photographers grapple with: "Is the Retina display worth the price of upgrade?"

If you use the iPad as a portfolio to display your work: yes.

If the iPad is an important part of your photography workflow: yes.

If the iPad is more of an email, web browsing, Facebook tool: you can probably wait, just don't look at The New iPad in the meantime.

The iPad 2 is a fantastic device. I was very happy with mine and still use it daily. But I needed the New iPad with its improved camera and Retina display for a project I'm working on. And even after reading the marketing copy and in-depth reviews, I was still shocked by the brilliance of the display. It's an amazing tool for photographers.


The Digital Story on Facebook -- discussion, outstanding images from the TDS community, and inside information. Join our celebration of great photography!


This is one of the oldest, and most affordable tricks, for close up photography: the reverse ring. With this $10 adapter that you screw into the filter threads on the front of your 50mm lens, you can turn it around and mount it to the camera face first. By doing so, you increase the magnification of the lens substantially.

canon_50mm_reverse_ring What's wrong with this picture? (The lens is mounted backwards!)

We used this trick in the film days, but it was hard to predict results with it. Since the lens is reversed, you don't have autofocusing or auto exposure. But now, thanks to Live View on most DSLRs, you can see exactly what you get before pressing the shutter button.

moth_revierse_ring.jpg Moth photographed with lens reversed and with a wide open aperture.

Also keep in mind that with most of today's autofocus lenses, you don't have an aperture ring to control depth of field. So you're shooting wide open, often creating a bit of a "Lens Baby" look.

But since the lens is reversed, you can use any make or model glass that has the right filter thread diameter. So that old Pentax 50mm you have in the closet that does have an aperture ring, can now be pressed into service on your modern DSLR.

And like many of these types of techniques, an hour or two of experimentation can spur your creativity and lead to something really interesting.


The Digital Story on Facebook -- discussion, outstanding images from the TDS community, and inside information. Join our celebration of great photography!


Ring flash is useful for macro and portrait photography. Yesterday I reviewed the impressive Orbis Ring Flash and bracket that combines versatility with professional results. And even though it's more affordable than much of the competition, it will still set you back $249.

If you want to experiment with ring flash lighting before making that kind of investment, take a look at the DIY Ring Flash Kit that you build yourself for $35 including the bracket.

Step 14

A few days after placing your order, you receive a flat box with the contents of your kit and a well-written instruction guide.

Step 1

I spent about 20 minutes assembling the components. If you want to see all of the steps involved, take a look at my Flickr set titled DIY Ring Flash Assembly.

Once completed, I mounted my Canon 320 EX Flash and took some pictures. The ring light worked remarkably well, and this is definitely a good way to become familiar with this type of lighting.

Step 17 Small Audi A3 model photographed with just the DIY ring light.

If you decide you like this type of flash modifier, I would consider getting a more sturdy rig such as the Orbis Ring Flash. The DIY kit isn't as sturdy, and it's a bit clunky to use. Another downside is that if you want to use a strobe with a larger flash head, such as my Canon 580 EX, you have to stretch the opening of the modifier to make it fit. Plus, you wouldn't want to show up at a model shoot with this attached to your camera.

That being said, the DIY Ring Flash Kit is a great weekend project that will introduce you to the joys of ring lighting. We'll be playing with this one over the weekend during my Close Up Photography Workshop.


The Digital Story on Facebook -- discussion, outstanding images from the TDS community, and inside information. Join our celebration of great photography!


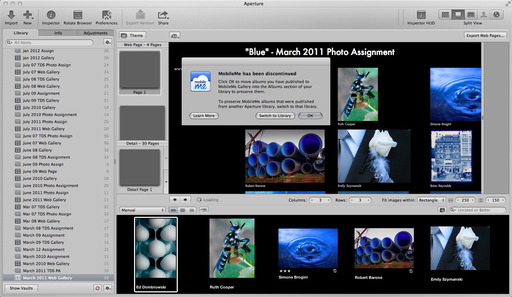
With the closing of MobileMe, and Flickr seeming to fall behind the pack, it reaffirmed my belief that it's best to have complete control over your photos. In this week's podcast, I talk about the balance between local storage, online storage, and sharing via social media. Each avenue presents its own challenges and benefits. The trick is using them correctly, and staying on top of the game.

Listen to the Podcast

You can also download the podcast here (30 minutes). Or better yet, subscribe to the podcast in iTunes. You can support this podcast by purchasing the TDS iPhone App for only $2.99 from the Apple App Store.


Enter to Win a Nikon 1 with 10-30mm zoom lens by "Liking" Red River Paper Facebook Fan Page.


Monthly Photo Assignment

Macro is the April 2012 Photo Assignment. You can read more about how to submit on our Member Participation page. Deadline for entry is April 30, 2012.

More Ways to Participate

Want to share photos and talk with other members in our virtual camera club? Check out our Flickr Public Group. And from those images, I choose the TDS Member Photo of the Day.

Podcast Sponsors

Red River Paper -- The $7.99 Sample Kit is back! And with free shipping.

Make Your Photos Sizzle with Color! -- SizzlPix is like High Definition TV for your photography.

Need a New Photo Bag? Check out the Lowepro Specialty Store on The Digital Story and use discount code LP20 to saven 20% at check out.


Technorati Tags:
, , , , ,


Orbis Ring Flash with Bracket

For my upcoming Close Up Photography Workshop, I needed a ring flash that would work with each student's lighting gear. After some research, I bought the Orbis Ring Flash with Bracket. It looks like I made a good choice.

bee_on_lavender_web Bee on lavender captured with a handheld Canon 60D, 100mm f/2.8 L macro, and the Orbis Ring Flash.

The Orbis slips over the head of standard hot shoe flashes. I'm testing it with a Canon 580 EX. (You'll need a dedicated flash cord too, so if you don't have one, add that to the budget.) I purchased the "system" kit that includes the ring flash and bracket directly from Orbis for $249. It's not cheap, but if you compare it to other dedicated ring flash systems, it's less expensive than most.

Once everything is put together, it's a fairly bulky rig. But I found it surprisingly easy to handle. I used my left hand to hold the middle of the bracket while pressing the shutter release with my right. I felt that it was easier to steady the camera with the Orbis bracket than with just the camera and lens alone.

orbis_ring_flash.jpg

The bracket allows for adjustment of both flash and camera. So you can configure the rig to your particular photo gear. After a day's use, I consider the bracket a necessity. The Orbis would be unwieldy to use without it.

Thanks to the dedicated flash cord, you have TTL flash metering that makes exposure a snap. I used flash exposure compensation for some of my shots. But for the most part, I just let the camera control the flash while I concentrated on my subject.

The Orbis feels well made, and it should last a good long time. Keep the sturdy cardboard box for storage when the ring flash is not in use.

Even though I purchased the Orbis for the workshop, I know I'm going to enjoy using it for portraits and macro work for years to come. I give it a thumbs up.


The Digital Story on Facebook -- discussion, outstanding images from the TDS community, and inside information. Join our celebration of great photography!


A Beauty in Black and White

I shoot everything in color. Actually, Raw, to be precise. And once I've done my sort and decided which images I like best, I begin to consider the possibilities. One of those considerations is B&W.

Leah Gerber
Model: Leah Gerber.

As others have said before, color sometimes just gets in the way. Not always, but there are those times when I want to experience the composition and tonality without distraction. For those images, I've started a SmugMug gallery dedicated to B&W.

For me, B&W is a frame of mind, I usually don't mix those images in with color photographs. Even in my portfolio, B&W has its own chapter.

As for processing, initial sorting steps are handled in Aperture 3. After I've decided which images are going to be converted to monochrome, I open them in Nik Silver Efex Pro 2,which gives me the control to process the images just the way I want. I use the Aperture plug-in version, so my photos come back to Aperture for finishing touches.

B&W isn't for every shot. But for the right images, it's an amazing way to view the world.


The Digital Story on Facebook -- discussion, outstanding images from the TDS community, and inside information. Join our celebration of great photography!


You can create inkjet contact sheets with Aperture by following four basic steps. These are useful as proof sheets for client review, or as a handy way to tell a story with multiple images. There are a variety of options for adding text to the pages too. Here's how.

Step 1 - Select the Images

Step 1 - Select Images

In Aperture's thumbnail mode, select the images you want to add to the contact sheet. Just CMD-click on the shots to choose them. Then go to File > Print Images.

Step 2 - Set Rows and Columns

Step 2 - Set Rows and Columns

In the following dialog box, select the number of rows and columns you want. The fewer you choose, the larger the images. Don't forget to choose your printer and paper size also! Then click on the "More Options" button in the lower left corner to reveal the Metadata panel.

Step 3 - Choose Metadata

Step 3 - Choose Metadata

Here you can choose the type of information you want on your contact sheet, such as title, file name, etc. The text itself is pulled from the metadata associated with the picture.This includes EXIF, such as the file name and date of capture, and IPTC, such as the caption information and title you may have entered. Now, click Print.

Step 4 - Print Dialog Box

Step 4 - Print Dialog Box

You'll be presented with one more dialog box, this one is part of the print driver software. Make your selections and click Print. In just a few minutes, your contact sheet will emerge from the printer.

Advanced Tips

If you want to make a preset of your contact sheet, click on the little gear menu at the bottom of the dialog box in Step 3. Choose "Duplicate Preset" from the popup menu. Give your preset a descriptive name by clicking on it. The next time you want to print this type of contact sheet, just choose your preset.

If you'd rather generate a PDF instead of paper output, click on the PDF button in the lower left corner of the Print dialog box in Step 4. Choose "Save as PDF."

More Aperture Tips and Techniques

To learn more about Aperture 3, check out my Aperture 3 Essential Training on Lynda.com. Also, take a look at our Aperture 3 Learning Center. Tons of free content about how to get the most out of Aperture.

My next open Aperture Workshop is scheduled for Nov. 2012, in Santa Rosa, CA. You can get on the pre-registration list, plus learn about all the other photography workshops offered this season by visiting the TDS Workshops page.


The Digital Story on Facebook -- discussion, outstanding images from the TDS community, and inside information. Join our celebration of great photography!


aperture_info_panel.jpg

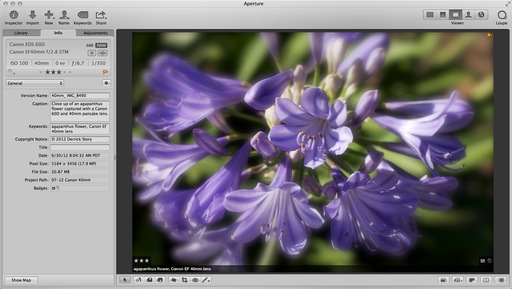
Both Aperture and Lightroom provide excellent tools for organizing images in your library. A common question I hear during workshops is about the difference between Flags, Stars, and Color Labels. Here's a quick overview on how I use them.

Star Ratings

I use stars to rate the quality of an image. A great picture will be 4 stars, good is 3, and acceptable is 2. I recommend making two passes to rate photos. First pass is just a "yay or nay" review. If it's an acceptable image, give it 2 stars (a yay). If not, no stars at all (nay).

Then, on the second pass, only review the 2 star photos. I usually put them in an Album (or Collection in Lightroom). You've now had a chance to see the entire shoot and have better perspective on the relative quality of the images. Upgrade the best shots to 3 or 4 stars. These should be the only pictures you spend image editing time on.

Color Labels

aperture_color_labels.jpg

Use the color dots for categories. You could assign one color, for example, to shots that you've uploaded to the web. Another color might be used for images that you've printed. If you have a frequent client, he or she might deserve their own color label. You can assign names to labels by going to Preferences > Labels.

Flags

Flags are useful for temporary collections. Let's say that you want to isolate and look at a handful of images. Mark them with a flag, then in thumbnail mode, go to the upper right corner of Aperture and click on the search icon. Choose Flagged from the popup menu. Only those images will be displayed on your screen. Click on the "X" in the search box when you're done to reveal all of the images in that project.

aperture_flagged.jpg

More Aperture Tips and Techniques

To learn more about Aperture 3, check out my Aperture 3 Essential Training on Lynda.com. Also, take a look at our Aperture 3 Learning Center. Tons of free content about how to get the most out of Aperture.

My next open Aperture Workshop is scheduled for Nov. 2012, in Santa Rosa, CA. You can get on the pre-registration list, plus learn about all the other photography workshops offered this season by visiting the TDS Workshops page.


The Digital Story on Facebook -- discussion, outstanding images from the TDS community, and inside information. Join our celebration of great photography!