Recently in Photography

  Page 119 of 385 in Photography  

Adding Geotags in Photos for OS X

This is one of the easiest ways to add location information to any photo, captured with any camera. Just open the image in Photos for OS X, and follow the simple steps that I show you in this movie from Photos for OS X Essential Training on lynda.com.

By doing so, not only are you adding geotags to your pictures, but Photos also recognizes this information for search. So, for example, if you add geotags to the MGM Grand Hotel in Las Vegas, you can also search for images using any of those labels.

geotagging-photos.jpg

If you prefer articles to videos, you might want to read my How to Geotag in El Capitan Photos App. And for other hands-on tutorials, be sure to take a look at Photos for OS X Essential Training on lynda.com.

More Help and Insights on Photos for OS X

Don't forget about the Photos for OS X Special Feature Section on The Digital Story. It's a roundup of tutorials, videos, and articles focused on helping you master Apple's latest photo management software. You can also find it under Photography in the top nav bar.

Want to Comment on this Post?

You can share your thoughts at the TDS Facebook page, where I'll post this story for discussion.
The DXO ONE workflow just got a little easier for Mac users. Now there's an Optics Pro editing extension just for the DxO ONE camera and Photos for OS X. And it works pretty well.

dxo-one-photos-os-x.png

Instead of having to use a completely separate app, previously DxO Connect, ONE shooters can now import their RAW/Jpeg pairs directly into Photos for OS X. Then, simply select the image for adjustment, go to Edit mode (make sure you're working on the RAW file), and choose DxO Optics Pro for the DxO ONE from the list of editing extensions.

dxo-editing-extension.png

This gives you access to lens corrections, Smart Lighting, white balance, and DxO ClearView. There are presets within the adjustments to help you get the look you want. After doing so, click on Save Changes, and you're returned to the standard Photos for OS X editing environment. Here, you can continue to work on your picture if necessary using Photos' standard toolset.

The adjustments are quite powerful. Compare the top image, processed with the Optics Pro editing extension, with the middle photo that's straight out of the camera. Both Smart Lighting and ClearView can add a lot of pop to a picture.

The editing extension is free, but of course you have to have a DxO ONE camera to use it. If you don't have the ONE, there's also DxO Optics Pro for Photos that uses modules for many of the common camera/lens combinations.

optics-pro-olympus.png

When DxO loads modules for both camera and lens, the corrections are quite impressive. And even when a lens module does not load, such as with my Olympus 17mm f/1.8 prime, the Smart Lighting and ClearView still provided lots of pop to the image. (I was disappointed, however, when a lens module would not load for editing a photo. I suspect this process will be smoothed out in future updates.)

DxO Optics Pro for Photos is currently on sale for $9.99 in the Mac App Store. You'll need Mac OS X El Capitan and a 64-bit processor to run either app.

More Help and Insights on Photos for OS X

To learn all the ins and outs of the latest version of Photos, take a look at Photos for OS X Essential Training on lynda.com. And don't forget about the Photos for OS X Special Feature Section on The Digital Story. It's a roundup of tutorials, videos, and articles focused on helping you master Apple's latest photo management software. You can also find it under Photography in the top nav bar.

DXO_0394.jpg Here's an image captured with the DxO ONE camera and processed with the Optics Pro editing extension in Photos for OS X.

Want to Comment on this Post?

You can share your thoughts at the TDS Facebook page, where I'll post this story for discussion.
This is The Digital Story Podcast 511, Dec. 22, 2015. Today's theme is "Breaking New Ground." I'm Derrick Story.

Opening Monologue

In my mind, setting an important goal for 2016 is different than a New Year's Resolution. A resolution is typically to fix something that's wrong. "I'm going to lose 10 pounds in 2016 because I weigh too much." Setting a goal is enhancing one's life or career by endeavoring something new.

The theme of today's show is Breaking New Ground. I'm going to talk about ways in which we can become better artists, technicians, and business people though setting just one goal and working toward it.

Breaking New Ground

Every December I sit down and think about what I could achieve in the coming year. This isn't an exercise in fuzzy abstracts, such as, "I want to become a better person," or "This is the year I finally make it big." My goal is more concrete than that.

I figure if I can keep doing what I'm already doing, and add one more skill, product, or revenue stream, then I'm moving in the right direction. Think about how this can add up over the course of a single decade?

The goal I set for 2015 was to finally get my newsletter, The Nimbleosity Report, off the ground. I didn't finally launch until November (the latest I've ever achieved an annual goal). But I did make it happen, and I'm having a ball with it. I truly wish I had started it earlier.

PC120666-lens-f-stop.jpg

I have some good possibilities for 2016. Some of them I can't share because they involve other companies, and I don't want to jinx myself. Others are very personal, such as finishing my book, "The Nimble Photographer," or publishing "The Film Project."

Regardless of which one I settle on - I still have a week to do so - it will most likely improve my working life. And that's really my bottom line: moving in the right direction.

I'll discuss this in more detail during the feature story of today's show."

In the News

Apple Has 800 People Working on the iPhone Camera - 60 Minutes covered by Petapixel

Apple is one of the largest companies in the world, the iPhone is Apple's biggest and highest-earning product, and the camera on iPhones is the device's most used feature. So, it makes a lot of sense that Apple would dedicate 800 "engineers and other specialists" toward making the iPhone camera as awesome as possible.

Apple reveals that there are 200 separate individual components in each tiny iPhone camera module. The camera's stabilization system uses 4 wires that are just 40-microns in width -- less than half a human hair -- to hold the suspension and stabilize the camera from hand shake. Finally, get this: each time you capture a photo with an iPhone, there are 24 billion operations that happen just for that one snapshot.

Meet ImageFramer's Jacob Gorban

A few weeks ago, I received this email from a Mac Developer named Jacob Gorban. I want to read you his note, then talk about the app he has developed.

"Hello Derrick, I'm the founder of Apparent Software and ImageFramer was the first OS X application I released, back in 2006.

My dad is a die-hard hobby photographer, and I caught the bug too. My mom paints. All this led me to the idea to develop an application that will help to visualize frames, either for actual presentation or as a helper tool in planning real-life framing of the pieces of art.

ImageFramer has evolved a lot over the years, and at its current version I believe it to be a mature and capable piece of software. Yet ease and speed of use was always my priority, and the feedback that I receive from customers corroborates that it was the right approach.

I would love to know your opinion on it, as a professional photographer and fellow Mac user.

So, I did try Jacob's software, and I love it. So I'm going to spend some time over the next few week's discussing its array of features. I thought today I should start with creating frames for your holiday greeting cards.

Jacob has set up an ImageFramer Landing Page specifically for TDS listeners, with sweet discounts on the 3 different versions of the app. Please go over and take a look.

Products We Love: The Tenba Cooper 13 Slim

It's official, the Tenba Cooper 13 Slim is my camera bag of the year, winning over the much-discussed Peak Design Everyday Messenger. Why, because it's more nimble (hence the term Slim in its name), costs $20 less, and more professional looking (personal opinion). I've been using this bag on location, in rainy conditions, and around the studio, and it is the clear winner for my camera bag of the year.

The Screening Room

This week's Screening Room selection is Lightroom Insider Training: Mastering the Develop Module with Bryan O'Neil Hughes.

In this course, Adobe's Bryan O'Neil Hughes explores the Develop module in depth, stepping through each of the module's core tools and sharing insights on each along the way. The course concludes with chapters on essential time-saving tools, taking photos from Lightroom to Photoshop for further enhancement, and editing images on smartphones and tablets with Lightroom for mobile.

Member Quotes of the Week

Intelligent comments culled from The Digital Story Facebook page.

In regard to Sunday's Facebook Post: "Tenba Cooper 13 Slim - Exceptional Shoulder Bag," we had a great exchange between two virtual camera club members, and I want to share it with you now.

Bob wrote: "It looks promising. But I wish Tenba and the other bag makes would get away from the inserts, they waste a lot of room in the bag."
William replied: "And therein lies the problem for bag designers, Bob. I like bags with inserts and that you can remove them!"
So then Bob replied: "So you're the cause of the problem. I should have known :-)"
And William finished: "A man has to do what a man has to do!"

Post your thoughts on our Facebook page. Believe me, I read them.

Why Prints Are So Important

Photography has always been about preserving memories and history for the future. Today that means protecting images from the vagaries of technological change. Remember the floppy disk? How about the PhotoCD? Good luck easily retrieving data from either! Remember that today's file formats and storage devices may not always be available.

If you want to preserve your memories you need to make a print. Your kids and grandkids will appreciate the effort. A thought from Red River Paper

Found Treasure

Registration is open for The 2016 Street Photography Workshop in San Francisco. And I've posted the full preliminary itinerary on the Workshops page. And if you plan on ordering through B&H Photo or Amazon, please stop by the TDS site first, click on their respective ad tile, then place your order. That extra step helps support the site.

See you next week!

More Ways to Participate

Want to share photos and talk with other members in our virtual camera club? Check out our Flickr Public Group. And from those images, I choose the TDS Member Photo of the Day.

Podcast Sponsors

lynda.com - Learn lighting, portraiture, Photoshop skills, and more from expert-taught videos at lynda.com/thedigitalstory.

Red River Paper -- Keep up with the world of inkjet printing, and win free paper, by liking Red River Paper on Facebook.

ImageFramer Take your photos to the next level with ImageFramer. Visit www.apparentsoft.com today.

MacPaw Creators of CleanMyMac 3 and other great software for Apple computers. Visit www.macpaw.com today.

The Nimbleosity Report

Do you want to keep up with the best content from The Digital Story and The Nimble Photographer? Sign up for The Nimbleosity Report, and receive highlights twice-a-month in a single page newsletter. Be a part of our community!

Want to Comment on this Post?

You can share your thoughts at the TDS Facebook page, where I'll post this story for discussion.
Turn Off Photos for OS X Auto Launching

It's an aggravation that many photographers just don't want: having to manually quit Photos for OS X every time a memory card is connected to the computer. But it doesn't have to be that way.

photos-import-web.jpg

The scenario goes like this: you insert a memory card or connect your camera to a Mac running El Capitan, and the import dialog for Photos for OS X pops up begging for attention. This is great if your intention is to import into Photos. But if not, that's annoying.

If you use the same image capture device all the time, the fix is easy. Just uncheck the box next to "Open Photos for this Device." The problem is, depending on how your memory cards are formatted, or if you use a variety of cameras, you'll still experience the unwanted import dialog.

Fortunately Melbourne-based photographer Ben Fon published an easy fix on Petapixel that uses the following command applied in the Terminal app:

defaults -currentHost write com.apple.ImageCapture disableHotPlug -bool YES

The Terminal app is located in your Utilities folder, and the process is as simple as opening the app, pasting this command in there, pressing Enter (the return key), and closing the app. I tested it, and it seems to work just great (Thanks Ben!).

I suspect that Apple may provide us with a user friendly fix up the road. If they do indeed, then you can turn off this action by going back to the Terminal app and typing:

defaults -currentHost write com.apple.ImageCapture disableHotPlug -bool NO

Of course, if you use Photos for OS X as your primary picture management application, then you probably don't care about any of this. But you may be interested in learning more about using Photos. If that's the case, be sure to take a look at Photos for OS X Essential Training on lynda.com.

More Help and Insights on Photos for OS X

And don't forget about the Photos for OS X Special Feature Section on The Digital Story. It's a roundup of tutorials, videos, and articles focused on helping you master Apple's latest photo management software. You can also find it under Photography in the top nav bar.

Want to Comment on this Post?

You can share your thoughts at the TDS Facebook page, where I'll post this story for discussion.
Every now and then I use a bag and think to myself, "These guys thought of everything." That's the case with the new Tenba Cooper Luxury Canvas 13 Slim Camera Bag. This messenger caught my eye when first announced, in large part because of its handsome design. Now I've had a chance to test it for a week.

I like it because it is indeed slim: only 5.5" deep, so it hangs at your side like a bag should. Even when I pack it full of gear, including two mirrorless cameras, lenses, MacBook Pro 13" laptop, iPad mini, and accessories, it holds its shape.

Tenba-PC190714.jpg

The peach-wax cotton canvas is soft to the touch and looks great. The hardware complements the fabric perfectly including real leather trim, brushed metal fasteners, and an attractive front zipper that also serves as an accent. Inside, the protective camera compartment is removable, allowing for quick relocation to a hotel safe and enabling the Cooper to be used as a regular messenger bag.

Tenba-PC190702.jpg

You don't have to raise the front flap to access your gear. A top zipper allows for quick retrieval of a camera or lens. In fact, everything is easy to find. I keep my iPad in the front compartment, laptop in the back, and camera get in the center area. I can quickly reach everything via a zipper.

Tenba-PC190708.jpg

Speaking of which, the 13" laptop is stored in a separate back compartment. This makes it very easy to remove when going through airport security, yet it's against your back for protection. And if you're thinking that might not be comfortable in transit, that has not been the case for me. I keep the iPad mini in the front compartment for quick access.

Tenba-PC190704.jpg

Inside the bag there are plenty of individual compartments for smaller items. If you pull down on the front flap before lifting it, the velcro-like fasteners are virtually silent. It's a nice touch. I'm stashing an OM-D E-M5 Mark II and a Panasonic GM5 in the main compartment. I've added a couple of lenses too. There's also plenty of room for my accessory pouch, glovers, pens, etc.

Tenba-PC190727.jpg

This Cooper Slim goes beyond being just practical, however. Every detail from zipper pull, to trolly sleeve, to leather bottom has been designed with great care. The side pockets have vertical zippers so you can place the item inside, then zip up to secure it. Really smart. And I've relocated the pad for the shoulder strap to the carry handle. This makes the grip even more comfortable, and if I need the pad on the shoulder strap, I can relocate again.

The bottom line is that I plan on using this bag for years to come. Since it's only 14.5" wide, I can take it anywhere. If the weather turns bad, it includes a form fitting rain cover, and when I sit it down on the table at a business meeting, it's handsomely appropriate for that occasion too.

The Tenba Cooper 13 Slim is now available for $229. And if you need a bigger version of this bag, Tenba makes that too.


Nimble Photographer Logo

The Tenba Cooper 13 Slim has a high Nimbleosity Rating. What does that mean? You can learn about Nimbleosity and more by visiting TheNimblePhotographer.com.

Don't Forget to Shoot the Food

Amid the present unwrapping and rekindling of old memories, family gatherings usually feature a healthy serving traditional fare. And as such, those memories are worthy of capture too.

holiday-cake-1024.jpg

The combination I used during our Thanksgiving celebration was the Panasonic Lumix GM5 with the Panasonic 20mm F/1.7 II prime lens. This cake shot was at ISO 800, f/1.7, 1/60th of a second, with exposure compensation set to +1/3. I set the camera right on the table for a dramatic angle.

I also found a good reference article for this sort of thing: 18 food photography tips for the holidays. If nothing else, it will send you to the fridge for a snack.

The bottom line is that attractive food shots add a lot to the holiday story. And in many cases, family recipes are a treasured (and delicious) part of those memories.

The Nimbleosity Report

Do you want to keep up with the best content from The Digital Story and The Nimble Photographer? Sign up for The Nimbleosity Report, and receive highlights twice-a-month in a single page newsletter. Be a part of our community!

Want to Comment on this Post?

You can share your thoughts at the TDS Facebook page, where I'll post this story for discussion.
vello.jpg

The Vello FreeWave Fusion Basic Wireless Flash Trigger System for Canon or Nikon cameras provides wireless flash and remote firing at an affordable price. I've been testing the Canon version with my 5D Mark II, using it for both outdoor flash photography and as a handy way to fire the camera from a distance.

The basic features include:

  • Frequency: 433 MHz
  • Flash Triggering Range up to 50'
  • Shutter Triggering Range up to 150'
  • Dual-Function Shutter Release
  • Five-Second Delay Mode on Transmitter
  • Single, Continuous, Bulb, & Timer Modes
  • One 23A & Two AAA Batteries Included

The kit comes with a variety of cables to connect the receiver to your camera. This enables the wireless trigger function.

vello-1.jpg Kit comes with everything you need.

vello-3.jpg System set for off-camera flash.

There is no TTL control, so flashes with manual settings are best for this rig. Both the transmitter and receiver are well designed, easy to operate, and fairly robust. And I think it's particularly cool that you get dual functionality from a single set.

The Vello FreeWave Fusion Basic Wireless Flash Trigger System is on sale for only $29.95 through Dec. 17, 2015 at B&H Photo. After that, it's still quite affordable at $39.95.

The Nimbleosity Report

Do you want to keep up with the best content from The Digital Story and The Nimble Photographer? Sign up for The Nimbleosity Report, and receive highlights twice-a-month in a single page newsletter. Be a part of our community!

Want to Comment on this Post?

You can share your thoughts at the TDS Facebook page, where I'll post this story for discussion.

This is The Digital Story Podcast #510, Dec. 15, 2015. Today's theme is "Photo App Smackdown." I'm Derrick Story.

Opening Monologue

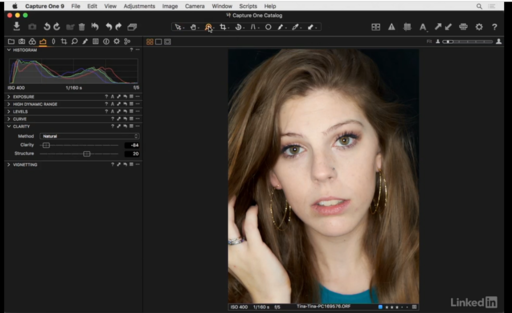
So I've been promising everyone that I'm going to make a photo management decision by the end of the year. And true to my word, I have a trio of apps that will fill my toolbox in 2016. And that's what the focus of today's show will be.

Photo App Smackdown

It's difficult for me to replace Aperture with just one application. At the same time, this is an opportunity for me to broaden my horizons. My photography today is different than a decade ago, and weaving these three apps together satisfies my needs right now.

Core Management App: Capture One Pro 9 operating as a managed Catalog.

Cloud Based App and Video Organizer: Photos for OS X for backing up my iPhone photography, sharing online, video management, and plug-in fun.

exposure-x-editing.jpg

Fast Turnaround: Exposure X for sorting through a memory card quickly, rating images, applying edits, and sending photos along their way.

I explain my reasoning behind all three of these apps in today's feature story.

In the News

FAA Announces Drone Registration Date - c't Digital Photography

Registration for unmanned aircraft begins Dec. 21, 2015, says the FAA in a recent press release. This new requirement applies to owners of small unmanned aircraft (UAS) weighing more than 0.55 pounds (250 grams) and less than 55 pounds (approx. 25 kilograms) including payloads such as on-board cameras.

The normal registration fee is $5, but in an effort to encourage as many people as possible to register quickly, the FAA is waiving this fee for the first 30 days (from Dec. 21, 2015 to Jan 20, 2016). The form is online and can be completed at www.faa.gov/uas/registration.

Clean Out the Cruft

I've been testing CleanMyMac 3, and I have to tell you, I love this app. Using the Smart Clean feature, I removed 20GBs of cruft from my MacBook Pro.

Glow QuadraPop Portable Softbox

I don't know if you saw my review of the Glow QuadraPop Portable Softbox, but this is a nifty lighting accessory sold by Adorama. The kit comes with an adapter ring that you insert the flexible aluminum rods into, then expand it to a full 24" wide by 34" tall - a nice surface area for waist up portraits.

I originally tested it with a strobe. But I've since figured out how to mount a LCD light inside, and I'm digging it even more. I'll use it again for an upcoming portrait shoot on Wednesday.

The Screening Room

This week's Screening Room selection is Photos for OS X Essential Training with yours truly.

In this title I show you the ins and outs of this maturing application from a photographer's point of view. I explain how to use the new and sophisticated geotagging function. And I demonstrate the editing extensions, which provide an open door to this application that third party developers are using to add powerful new features.

Member Quote of the Week

Intelligent comments culled from The Digital Story Facebook page.

In regard to Monday's Facebook Post: Our 10 Favorite Film Cameras of All Time (by Shutterbug Magazine) - Rob Costain wrote: "I moved from Kodak Instamatic to an Olympus OM-10 in 1981, but my favourite camera of all is still the used Olympus OM-2 that replaced my OM-10. The OM-2 is small compared to its contemporaries and you can see why the Olympus E-Mx series is such a hit. I don't use my OM-2 much anymore, but I still keep it loaded with film."

Post your thoughts on our Facebook page. Believe me, I read them.

Adobe Lightroom Notecard and Greeting Card Templates

If you use Adobe Lightroom, Red River Paper has a collection of Fine Art Card Templates that you can download and use to simplify creating your greeting cards. They're free, and there are even tutorials on how to use them.

Found Treasure

The next edition of The Nimbleosity Report comes out this Wednesday, Dec. 16. You don't want to miss this issue! Sign up today to get in on the action.

Registration is open for The 2016 Street Photography Workshop in San Francisco. And I've posted the full preliminary itinerary on the Workshops page. And if you plan on ordering through B&H Photo or Amazon, please stop by the TDS site first, click on their respective ad tile, then place your order. That extra step helps support the site.

See you next week!

More Ways to Participate

Want to share photos and talk with other members in our virtual camera club? Check out our Flickr Public Group. And from those images, I choose the TDS Member Photo of the Day.

Podcast Sponsors

lynda.com - Learn lighting, portraiture, Photoshop skills, and more from expert-taught videos at lynda.com/thedigitalstory.

Red River Paper -- Keep up with the world of inkjet printing, and win free paper, by liking Red River Paper on Facebook.

inkdot Innovative printing output and accessories for the creative photographer. Visit www.inkdot.com today.

MacPaw Creators of CleanMyMac 3 and other great software for Apple computers. Visit www.macpaw.com today.

The Nimbleosity Report

Do you want to keep up with the best content from The Digital Story and The Nimble Photographer? Sign up for The Nimbleosity Report, and receive highlights twice-a-month in a single page newsletter. Be a part of our community!

Want to Comment on this Post?

You can share your thoughts at the TDS Facebook page, where I'll post this story for discussion.
The first thing I noticed after setting up the Glow QuadraPop 24" x 34" Portable Softbox was how light it was. My testing rig consisted of a Sunpak flash (with manual adjustments), wireless trigger, and Manfrotto light stand. Once assembled, the setup felt very balanced and easy to move around.

film and camera.jpg

The QuadraPop is designed for portability, making it a good choice for home studios and location work where it needs to be collapsed and expanded quickly. The kit comes with an adapter ring that you insert the flexible aluminum rods into, then expand it to a full 24" wide by 34" tall - a nice surface area for waist up portraits.

film and camera 1.jpg

The flash and trigger (or hard wire if you use that) mount on a sliding rail. Position the flash so the head is inside the softbox. The light is modified by twin diffusers: one inside the unit, and the other attached using velcro on the outside. I would rate the output at medium hardness. It's flattering for portraits, but retains an edge. The results that I liked best used a reflector on the fill side of the subject.

Because the QuadraPop is so light, and it really is, it's also a good choice for product shooting when you'd want to position the unit on top of the item facing down. It balances well on a standard boom, and is easy to position. You could also have an assistant simply hold it.

The mounting unit can be adapted to a variety of flash units and moonlights via its custom interchangeable ring adapters. The UV-A and UV-R diffuser materials and are heat resistant, an the non-fluorescent dyes protect the fabric from that aging yellow cast that we've seen happen to some of our older modifiers. The reflective surface inside is quite bright, and it appears durable too.

I selected the rectangular shape for my work, but it's also available as an octagon or round. And sizes range from 20" to 38" on the widest side.

modifier-in-use.jpg

The Glow QuadraPop 24" x 34" Portable Softbox is currently on sale for $128 (normally $160). That's a good value considering its portability, ease of setup, and quality materials.

The Nimbleosity Report

Do you want to keep up with the best content from The Digital Story and The Nimble Photographer? Sign up for The Nimbleosity Report, and receive highlights twice-a-month in a single page newsletter. Be a part of our community!

Want to Comment on this Post?

You can share your thoughts at the TDS Facebook page, where I'll post this story for discussion.

The one thing I learned while working on Photos for OS X Essential Training is that there's more to this application than I realized... especially after the new El Capitan release.

In this title I show you the ins and outs of this maturing application from a photographer's point of view. I explain how to use the sophisticated geotagging function. And I demonstrate the editing extensions, which provide an open door to Photos allowing third party developers to add powerful new features.

Take a look at the overview movie and table of contents. Then you might want to revisit this intelligent photo app that's right under your nose.

photos-esst.jpg

More Help and Insights on Photos for OS X

And don't forget about the Photos for OS X Special Feature Section on The Digital Story. It's a roundup of tutorials, videos, and articles focused on helping you master Apple's latest photo management software. You can also find it under Photography in the top nav bar.

Want to Comment on this Post?

You can share your thoughts at the TDS Facebook page, where I'll post this story for discussion.