Recently in Photography

  Page 109 of 385 in Photography  

This is The Digital Story Podcast #535, June 7, 2016. Today's theme is "To RAW or Not." I'm Derrick Story.

Opening Monologue

Many years ago I was giving a digital photography talk and was covering the scenarios where I thought shooting RAW was appropriate. A voice from the back exclaimed, "But why wouldn't you shoot RAW all the time?" My answer was a simple, "Why sir, I don't do anything all the time." Now years later, my opinion remains unchanged.

To RAW or Not

I have three capture modes that I usually choose from: RAW only, RAW+Jpeg, and Jpeg only. Today we're going to play a little guessing game. I'm going to put forth a shooting scenario, then pause and let you guess which capture mode I would use for that situation. Then I'll give you the answer and tell you why.

PC160499_DxO (1).jpg

  1. Auto race at a speedway
  2. High school senior portrait
  3. Wedding for hire
  4. Executive portraits for a commercial client
  5. Son's birthday party
  6. Family reunion
  7. European vacation
  8. Weekend backpacking trip
  9. Fall color in the Eastern Sierra
  10. Semi-pro baseball game

Answers: 1)Jpeg, 2)RAW, 3)RAW+Jpeg, 4)RAW, 5)Jpeg, 6)Jpeg, 7) RAW+Jpeg, 8)RAW, 9)RAW+Jpeg, 10)Jpeg

In the News

Magnum signed square print sale returns for third year as reported by DP Review.

Signed or estate stamped prints for $100 from over 60 Magnum photographers and artists will be available for a limited time, from 9am EST on Monday 6 June until 11pm Friday 10 June 2016, here: shop.magnumphotos.com

Magnum's Square Print sale is back, offering up museum-quality signed prints for just $100 each. Upwards of 70 prints are on sale from photographers like Martin Parr, Alex Webb, Rene Burri, Eve Arnold, Tim Heatherington and many more. Each photographer contributed an image that plays on a theme of 'The More or Less Decisive Moment(s)'.

The 6x6" prints are available for five days only, starting now through 11pm ET on Friday, June 10 at shop.magnumphotos.com.

Robust Backups with Hedge

I've been using Hedge for Mac for backing up my recent shoots. Essentially what I've been doing, is as soon as I get to my computer, I insert the memory card, run Hedge, and backup its entire contents to an external drive.

Then, when it's time to decide if the images go into Capture One Pro, Photos for OS X, Lightroom, or somewhere else, I just import them from the external drive. Once the shots are in two places, I'm free to erase the cards. Hedge is the software that makes this entire process so easy.

  • Hedge is the fastest app for importing and backing up media on OS X.
  • The simplest interface you'll find, yet very powerful under the hood.
  • It's built with video, photo and audio in mind.
  • Import multiple sources to multiple destinations, at the same time.
  • Hedge's Fast Lane is the fastest copy/verification engine you'll find.
  • Optimized for files 100 MB and larger, it's even faster than Finder.
  • Every file copied by Hedge is cross-verified with the original.
  • Full support for NAS, RAID and uploading to cloud providers.
  • Use Scripts to sort, transcode, rename, tag your media after import.
  • There's a free version and a premium version. Use this URL, hedgeformac.com/tds and save 20 percent off the price of the pro version that provides the full Hedge experience with Fast Lane copies, unlimited simultaneous transfers, plus NAS and RAID support.

    Do You Have a Film Story to Share?

    If you love film photography and would like to be featured on theAnalogstory.com, just send me a few paragraphs and up to six film-based pictures to theanalogstory@gmail.com. And if you have been over there lately, there's tons of great content.

    Updates and Such

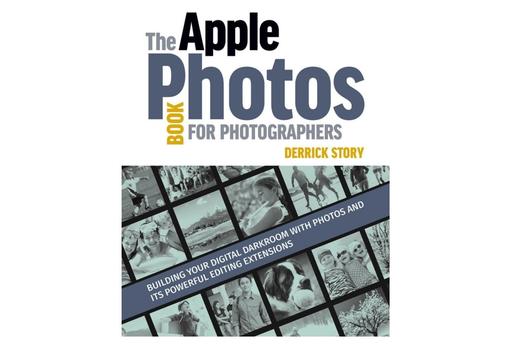
    Just Released!: The Apple Photos Book for Photographers

    You can get your eBook copy of The Apple Photos Book for Photographers for $15 by using the checkout coupon: APPLE15. That saves your 5$ off the price.

    And finally, be sure to visit our friends at Red River Paper for all of your inkjet supply needs.

    See you next week!

    More Ways to Participate

    Want to share photos and talk with other members in our virtual camera club? Check out our Flickr Public Group. And from those images, I choose the TDS Member Photo of the Day.

    Podcast Sponsors

    Red River Paper - Keep up with the world of inkjet printing, and win free paper, by liking Red River Paper on Facebook.

    MacPaw Creators of CleanMyMac 3 and other great software for Apple computers. Visit www.macpaw.com today.

    The Nimbleosity Report

    Do you want to keep up with the best content from The Digital Story and The Nimble Photographer? Sign up for The Nimbleosity Report, and receive highlights twice-a-month in a single page newsletter. Be a part of our community!

    Want to Comment on this Post?

    You can share your thoughts at the TDS Facebook page, where I'll post this story for discussion.
A week from today many of us will be watching the WWDC keynote on our Apple TVs. Most folks will be listening for what's new in their favorite area of technology. For myself, I'm keenly interested in the next chapter of digital photography with Apple tools.

In many ways, I feel like we've been putting together a jigsaw puzzle the last couple years. The evolution of iPhone cameras, iOS photography apps, iCloud, and Mac-based software have all been spread out on a table while we try to figure out how to assemble them.

photos-for-osx-edit.jpg

The missing piece has been Photos for OS X. Although a lovely application in its own right, it's hardly the Aperture/iPhone replacement that enthusiast photographers were hoping for... at least at first.

The emergence of Editing Extensions has provided much-needed functionality for adjusting our pictures. And depending on which extensions you have available on your Mac, you can do everything from retouching a portrait to creating an HDR landscape. Add robust iCloud connectivity, and the pieces are truly beginning to make sense.

So what's missing? What I and many others will be hoping for on Monday, June 13 is improved digital asset management. Simply marking a picture as a favorite isn't adequate. If Photos for OS X is ever going to become that software that's it's capable of, then Apple needs to address the front end of post production.

It's then next chapter that I want to write for my book. And if Apple provides that missing piece, the picture that we've been hoping to see should be worth the wait.

The Apple Photos Book for Photographers

For photographers who are more than just casual snapshooters, or who are making the transition from Aperture or iPhoto, The Apple Photos Book for Photographers shines a light on the sophistication of this app and the ecosystem it taps into. Available as an eBook now, and coming to print later this year.

Want to Comment on this Post?

You can share your thoughts at the TDS Facebook page, where I'll post this story for discussion.

How I Use Flickr

Flickr remains an important component in my online photography presence. But how I use this platform has changed over the years.

dancing-ladies.jpg "The Dancing Ladies" by Derrick Story. Shared on the TDS Flickr page

When I first signed up long time ago, there weren't the variety of options for photo sharing that exists today. For example, there was no Instagram. I mention that particular service for a reason, because I love Instagram. Yet, my embracing it did not replace my activity on Flickr; it augmented it. And that's the story I tell in the following video: How my use of Flickr has evolved to where it stands today.

In general, that's what I like about new technology... such as Instagram compared to Flickr. It helps me fine tune my workflow. Instead of forcing one tool to meet all of my needs, I can tap the strengths of a handful of tools to create a better experience.

Take a look at my video titled, Tips for Using Flickr, and see what you think. How can you leverage these tools to create the best photo experience possible for you?


More Flickr Tips and Techniques

Sharing Photos with Flickr is a deep dive into this venerable online photography platform, focusing on how to best use its tools with a Mac or Windows computer. I show you how to configure Flickr to automatically backup your images, organize them, and share your favorites with friends, family, and the entire online universe. This training will show you how to best take advantage of Flickr's 1TB of free online storage and its comprehensive set of imaging tools.

Want to Comment on this Post?

You can share your thoughts at the TDS Facebook page, where I'll post this story for discussion.

In addition to the Polaroids I want to digitize, I have lots of snapshots that I'd like to share online. I haven't done much of that in the past because, quite honestly, it was just too much hassle. But now, I have a simple workflow using my iPhone and Photos, that has changed all of that.

Chris Polaroid Portrait.jpg "Chris" by Derrick Story with a Polaroid MiniPortrait 203 Passport Camera.

First, I scan the print with the iPhone 6S and the Unfade app for iOS. This gives me an excellent source file that is semi-corrected too.

The image is automatically saved to my iCloud account, so it's there waiting for me on my Mac. I open it in Photos for OS X and apply the Enhance tool in the Edit menu. If I need to do more, I can use one of my favorite Editing Extensions such as Pixelmator Retouch or BeFunky.

The adjusted image is saved back to iCloud and is available on all of my iOS and Mac OS X devices. From there, I can share at will. The entire process takes about 5 minutes.

Do You Like Film?

Take a look at theAnalogstory - Film Photography in the Digital Age. We cover great 35mm cameras, personal stories from film photographers, quick tips, and even a camera shop. Stop by, won't you?

Want to Comment on this Post?

You can share your thoughts at the TDS Facebook page, where I'll post this story for discussion.

Apple Photos Book Cover.jpg

Do you think that Photos for OS X is some lightweight app just for iPhone-toting snapshooters? You're wrong. And I explain why in my latest guide, The Apple Photos Book for Photographers.

Photos for OS X has two things that neither Aperture nor iPhoto ever had: Amazing iCloud integration and a far more sophisticated architecture for third party software.

Let's address the later first. I'm not talking about roundtripping. Editing Extensions don't require creating bulky Tiff files to send to outside applications. You stay within the Photos ecosystem when applying advanced techniques such as HDR, B&W, skin softening, etc., even to the point that you can undo the changes from the editing extensions in Photos itself. You can even see the before and after in your Photos editing environment.

As for iCloud integration, it's amazing. Work on an image in Photos for OS X or Photos for iOS, and the changes are propagated to the other devices automatically. Backup is handled for you. The flexibility and response time is incredible.

So how do you take features like this and integrate them into a photography workflow? That's just one of the many topics I address for photographers in this book.

Photos-Book-Spread.jpg

So who is this for? Any shooter who likes the Apple ecosystem, wants powerful simplicity in their software, and enjoys using tools designed by great developers such as Macphun, DxO, and Affinity.

The Apple Photos Book for Photographers takes you on a journey into the world of photography like you've never read in a software guide before. I open chapters with anecdotes about my experiences as they pertain to the subject at hand. I cover the tools and techniques that help you simplify your workflow without giving up craftsmanship or creativity. You're going to love this ride.

We're releasing the eBook version right now. And you can get it for only $15 if you use Coupon Code APPLE15 at checkout. The print book will be out later this year. Start your journey now and explore what Photos for OS X can do for your photography.

Sunny 16 Rule for Fast Response

When I'm out exploring the world on my bike, I always have a camera with me. And if I'm shooting film, I tend to set the exposure using the Sunny 16 Rule to enable quick captures of the life rushing by me. (I use this for digital cameras too. More on that later.)

firetruck-in-action.jpg "Firetruck" - Captured with a Pentax ME Super and a Pentax 35-70mm zoom lens, Fujicolor 200 film. Photo by Derrick Story.

Case in point is the firetruck shot. I heard the siren approaching. I pulled off to the side, put the camera to my eye, and pressed the shutter. All of this in a manner of seconds without any time to make an adjustment.

Shooting with ISO 200 film, I had the shutter speed set to 1/500th of a second with the aperture at f/11 - my version of Sunny 16. Then I don't have to worry about the light meter being fooled or the camera delaying the capture in any way.

The Sunny 16 Rule is shutter speed set to the film ISO, aperture set to f/16, in bright sunny conditions. As lighting changes, you can adjust either the aperture or shutter speed keeping in mind that one full f/stop equals one full shutter speed, equals one full ISO setting.

For this shot with the Pentax, Sunny 16 would dictate 1/250th at f/16 with the Fujicolor 200 film loaded. If I open up the aperture one stop to f/11, then all I have to do is increase the shutter speed one full setting to 1/500th.

The interesting thing about Sunny 16 is that it gives your images, whether captured on film or digitally, a different look. The blacks are black and the whites are white. Light meters analyze scenes and often try to preserve shadows or prevent highlights from blowing out. Sunny 16 just lets everything fall where it will. You'll notice it. And you can try it today with your digital camera.

The other thing about it, regardless of what medium you're using for capture, is that it puts you in touch with reading light. Suddenly you're thinking about luminance in a more focused way. It's a great way to sharpen your skills. See what you think...

Do You Like Film?

Take a look at theAnalogstory - Film Photography in the Digital Age. We cover great 35mm cameras, personal stories from film photographers, quick tips, and even a camera shop. Stop by, won't you?

Want to Comment on this Post?

You can share your thoughts at the TDS Facebook page, where I'll post this story for discussion.

This is The Digital Story Podcast #534, May 31, 2016. Today's theme is "Your Go-To Portrait Set Up." I'm Derrick Story.

Opening Monologue

I just joined Linkedin a couple weeks ago as part of my work with lynda.com. I love the site and seeing what former co-workers are up to. One thing about it that has made me smile is how many of my portraits are being used as profile shots. Many of these were done with my "Go-To Set Up." And that's what I'm going to lead off with today.

Your Go-To Portrait Set Up

Many of the portrait shoots that I do are for friends, co-workers, and business associates. Often, these are not formal affairs. The subject feels like he or she is having a good hair day and likes the attire they are wearing, and the timing is good for a headshot.

go-to-portrait.jpg

As a result of these requests over the years, I've developed a quick go-to approach that can accomplish the task in about 10 minutes, but yield excellent results. I thought that I'd share my approach with you today, so you can create your own. Believe me, you'll use it often.

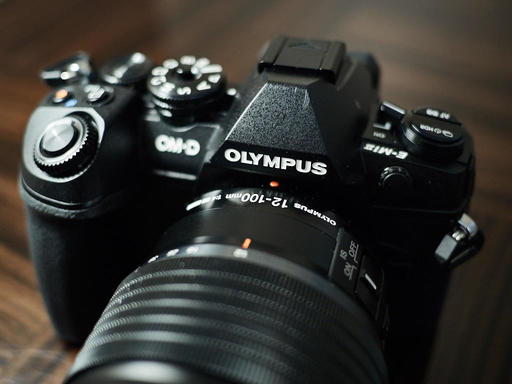
  • Camera and Lens: My favorite combination is the Olympus M.Zuiko Digital ED 40-150mm f/2.8 PRO ($1,399) mounted on my Olympus OM-D E-M5 Mark II. If that lens isn't in my bag at the moment, anything between 90mm and 150mm will work great.
  • Fill Light: I've really taken a liking to the 32" ExpoImaging Rogue Collapsible 2-in-1 Reflector. The white side reflects a soft, natural light, and the silver is the best silver coating I've seen: not too hot, but adds a good sparkle. If you don't have an extra set of hands to hold the reflector, you can have the subject do so since this is a head shot. Pay attention to the position of the shoulders if you go this route.
  • RAW+Jpeg: I consider this an essential part of the shoot, especially for women over 40. Why, because I use the Soft Focus Art Filter on the OM-D. That gives me a Jpeg with the effect applied, and if it doesn't work, I use the RAW file. BTW: set the Art Filter through the Super Control Panel using Picture Mode. This approach gives you far more control.
  • Hair Light: Typically, I find a spot outside in open shade. I like to position the subject so some light is falling on the hair, using the reflector to fill in face. Hair lighting adds a real professional touch to the image.
  • Body Language: Remind the subject to keep their weight on one foot of the other, never flat-footed. Encourage them to stand straight with good posture. If possible, have the arms slightly bent at their sides. And position them so their body is facing off-camera with their head turned toward the lens.
  • Post Processing and Delivery: Make sure the white balance is a pleasing skin tone. Don't over edit the photo. You want the person to look like themselves, but on a good day. If you do go with the softening filter, sharpen the image back up in post with clarity and edge sharpening. You'll still get the benefits of the filter without the image looking overdone. Deliver a handful of favorites online and let them download the ones they like.

In the News

How to Figure Out What Light Modifier To Use as reported by the Phoblographer.

Many photographers just getting into working with light specifically are often very confused about what light modifiers to use. But they're also never quite sure what they should use for the type of work that they're doing. The true answer is that everyone is making good stuff these days and that very few people will be able to look at an image and immediately tell what light modifiers you're using in the same way that they won't be able to tell your camera, lens, etc for the most part. Instead, it's all about the type of photo that you're trying to create.

Gear We Love

I've been testing the Think Tank Retrospective 7 for my urban shooting, and here's what I're liking about it.

  • Size - It's big enough for any of my mirrorless kits without creating a nuisance in crowded environments.
  • Materials and Design - Love the fabric and craftsmanship.
  • Collapsable but Sturdy - It really holds its shape well in use. But the bottom panel folds upward so I can pack the Retrospective in my suitcase for travel. This is the bag I'll be using for my Photo Walks at the Out of Chicago Conference next month.
  • Great Pocket Organization - The double front pocket arrangement is amazing, but all of them are spot on.
  • Sound Silencer System - To velcro or not, the choice is yours!
  • I have a Think Tank Photo tile on all the pages of The Digital Story. If you go over there to look, please use the link I provide in the article, or the advertising tile. All TDS listeners will receive a free gift with their order and free shipping.

    Updates and Such

    Coming Soon: The Apple Photos Book for Photographers

    I've been working on a guide to Photos for OS X that's written for photographers who want to use this application at a high level. I cover workflow, iCloud integration, and editing... at the enthusiast level.

    We're releasing the eBook version soon, then will go to print after Apple announces its updates to the app at WWDC. This is an exciting, ongoing project that I think you'll want to be a part of. And you can join me every step of the way via the signup page we've created. This is going to be fun...

    And finally, be sure to visit our friends at Red River Paper for all of your inkjet supply needs.

    See you next week!

    More Ways to Participate

    Want to share photos and talk with other members in our virtual camera club? Check out our Flickr Public Group. And from those images, I choose the TDS Member Photo of the Day.

    Podcast Sponsors

    Red River Paper - Keep up with the world of inkjet printing, and win free paper, by liking Red River Paper on Facebook.

    MacPaw Creators of CleanMyMac 3 and other great software for Apple computers. Visit www.macpaw.com today.

    The Nimbleosity Report

    Do you want to keep up with the best content from The Digital Story and The Nimble Photographer? Sign up for The Nimbleosity Report, and receive highlights twice-a-month in a single page newsletter. Be a part of our community!

    Want to Comment on this Post?

    You can share your thoughts at the TDS Facebook page, where I'll post this story for discussion.

Have you been waiting for great prices on a new mirrorless camera? Olympus has just announced their Summer Sale, and you can save between $100 and $200 on a great body.

om-d-em5-mark2-body.png

Here's how it shakes out...

The Olympus OM-D E-M5 Mark II drops from $1,099 to $899 for a limited time during the sale.

The Olympus OM-D E-M1 also drops $200 to $899. This is a great camera, but my word of caution is that I think it's soon to be replaced by the Mark II. So if you want the latest and greatest, you may want to wait and see what happens with this model.

And finally, the Olympus OM-D E-M10 Mark II drops $100 to $549.

These are all body-only prices, but it looks like there are really good lens bundle options that reflect the same degree of savings. So if you need an optic too, I'd look into those.

In terms of what cameras are going to get refreshed next, my guess is that we'll see a new E-M1 Mark II before the end of the year. After that, a possible E-M5 Mark III in 2017, but that's no sure thing because the Mark II is so good. And I don't think we'll see an immediate refresh on the E-M10 either, at least not in 2016.

The Nimbleosity Report

Do you want to keep up with the best content from The Digital Story and The Nimble Photographer? Sign up for The Nimbleosity Report, and receive highlights twice-a-month in a single page newsletter. Be a part of our community!

Want to Comment on this Post?

You can share your thoughts at the TDS Facebook page, where I'll post this story for discussion.

unfade-logo.png

I have my share of old family prints that I'd like to digitize. So I decided to give Unfade for iOS ($4.99) a test with my iPhone 6S. It's easy to use and does a reasonable job of helping us move prints from the shoebox to our favorite social network site.

For the first image, I captured the shot using the built-in camera app for the iPhone. The second image was recorded with Unfade. No additional retouching was applied to either shot. This is how they came out of the camera.

Straight Capture with iPhone 6S

iPhone-Camera.jpg

Unfade Capture Using iPhone 6S

Unfade-Scan.jpg

By the way, that's me in the lower right corner with the mustache.

Unfade did remove some of the magenta tint and improved the overall skin tones. Plus it automatically cropped the image for me. The app is easy to use and allows for sharing via the usual suspects, including your Camera Roll and social network sites.

Is it a good investment for $4.99? I'll leave that to you. But I'm glad I have it, and I will probably use it regularly for quick scans of old photos.

Do You Like Film?

Take a look at theAnalogstory - Film Photography in the Digital Age. We cover great 35mm cameras, personal stories from film photographers, quick tips, and even a camera shop. Stop by, won't you?

Want to Comment on this Post?

You can share your thoughts at the TDS Facebook page, where I'll post this story for discussion.

I've just finished testing Aurora HDR Pro 1.2.2 standalone app and Editing Extension for Photos for OS X, and this version includes some terrific enhancements plus additional RAW compatibility.

Red-Tractor-1024.jpg "Red Tractor" - Captured with an iPhone 6S and processed in Photos for OS X using its editing tools and Aurora HDR Pro Editing Extension. Image by Derrick Story.

One of my favorite improvements is the ability to sync Favorite presets between Aurora HDR Pro standalone and the Aurora HDR Pro Editing Extension. Very nice. The RAW compatibility for new cameras includes:

  • Canon 80D, 1300D, 1DX MkII
  • Leica M (Typ 262)
  • Nikon D5
  • Olympus Pen F, SH-3
  • Panasonic DMC-GX80/85, DMC-TZ80/81/85/ZS60, DMC-TZ100/101/ZS100
  • Samsung Galaxy S7 (SM-G935F)
  • Sony ILCA-68, ILCE-6300, RX1R II, RX10 III
  • DxO ONE Digital Camera
  • Fujifilm X-Pro2

hdr-pro-tractor.jpg To complement all of the powerful slider tools, there are dozens of presets to help you get your image on the right track.

Aurora HDR Pro is a wonderful Editing Extension for Photos for OS X. In addition to being a robust HDR processor, the software includes many advanced sliders such as Top & Bottom Lighting, Tone Curve, Layer Control, and Denoise. Plus, it features seven categories of presets, which is a great way to figure out the starting point for your editing.

You can get $10 Off Aurora HDR Pro plus receive $90 worth of bonuses here.

Master Photos for OS X

(It's More Powerful than You Think)

For hands-on tutorials, be sure to take a look at Photos for OS X Essential Training on lynda.com. I cover everything you need to know to get the most from this surprisingly powerful image management application.

More Help and Insights on Photos for OS X

Don't forget about the Photos for OS X Special Feature Section on The Digital Story. It's a roundup of tutorials, videos, and articles focused on helping you master Apple's latest photo management software. You can also find it under Photography in the top nav bar.

Want to Comment on this Post?

You can share your thoughts at the TDS Facebook page, where I'll post this story for discussion.