If you have QuickTime on Mac or Windows, you can make a cool digital flipbook in just minutes. "What the heck is that?" you say. Well, it's a sequence of photographs played in rapid succession and saved as a QuickTime movie. You can see for yourself with the flipbook I created called The Bridge.
First, Take the Shots
All I did was catch a ride across the Golden Gate Bridge with my Canon Digital Rebel XT pointed at the passing bicyclists. I had the camera set to burst mode so I could fire off a series of shots quickly. I took pictures from one end of the bridge to the other.
Next, Sequence the Shots
I then uploaded the shots to a folder and launched QuickTime Pro. If you don't have the Pro version of QuickTime, it's $29 from Apple and available upon purchase. It has all sorts of nifty editing and presentation tools. The function we use for this project is called Image Sequence.
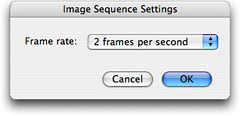
Go to File > Open Image Sequence... and navigate to the first image in your folder of shots. Click Open, and you'll be presented with the Image Sequence Settings, as shown here. I usually select "2 frames per second" from the pop up window because I like things to move along at a good clip. But you can pick any setting that suits you.
Finally, Add a Little Audio
Click OK, and QuickTime will build your digital flipbook and open it in a 640 wide window. All you have to do now is add the audio. I usually grab a free loop out of GarageBand and make it as long as the flipbook I've just created. Once you've exported the file out of GarageBand (or whatever audio tool you use including QuickTime itself), the add it to your flipbook.
Make sure the scrub head is positioned at the beginning of the movie, then go to Edit > Add to movie... You audio is now positioned as a sound track to accompany your flipbook. Go to File > Save As, give you completed work a name, and click the radio button "save as self-contained movie." You're finished!
The version of The Bridge I posted here was exported as iPod compatible so I can include it with my other whacky projects on my iPod video.
Give it a try... it's a really quite fun.
Technorati Tags: digital photography, technique, software


