Recently in Photography

  Page 285 of 385 in Photography  

Raw+Jpeg Workflow on an iPad

Even at this early stage in its development, the iPad has become a important part of my photography workflow. As I described in The Nimble Photographer, I can travel light (less than 6 pounds), but still be able to capture and manage high quality photographs. The key for me is using the Raw+Jpeg workflow.

In my latest Macworld Magazine article, A photographer's workflow for the iPad, I explain step-by-step how I work with the basic tools on the iPad to manage this.


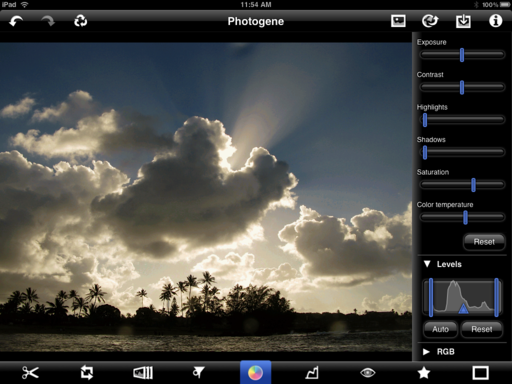
Raw+Jpeg on an iPad Imported Raw+Jpeg pairs on an iPad using the Camera Connection Kit. What do you do from here? Click on image to enlarge.


The trick is to shoot Raw+Jpeg at capture and upload the pairs to the iPad via the Camera Connection Kit. Then when you're back in the office, offload the Raws to your computer, and leave the Jpegs you want on the iPad. Being able to separate the pairs is important because you don't want to fill up your iPad with large files.

I use the 3G model of the iPad, so I'm able to view, manipulate, and send off photos while still in the field. This is terrific for posting to social networking sites, blogs, or even sharing images with family and friends. Yet I know I have the Raw masters for more detailed post production when I return home.

You'll notice in the follow up discussion on the A photographer's workflow for the iPad article, there are still a lot of tools that photographers want, but aren't available yet on the iPad. This is always the case with a new device. But I predict that within months we'll have more capable applications that further enhance our ability to work on the run.

More iPad Articles

How to Create and Deliver Content for the iPad

Acme Made iPad Cases for Style and Protection

Will the iPad Squish my Photos?

The $2 iPad Stand

Bluetooth Keyboard and iPad - A Powerful Combination

Turn Your iPad into a Live Camera

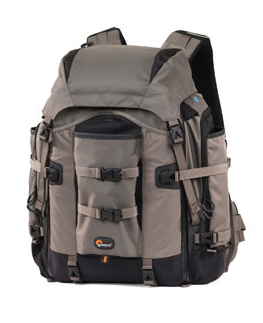
Lowepro Classified 160 AW is Perfect Bag for iPad Toting Photographers

Coolest iPad Apps for Photogs? Keynote and CameraBag

"iPad for Photographers" - Digital Photography Podcast 219


twitter.jpg Follow me on Twitter

-


In-camera panorama processing seems like one of those features that's just too good to be true. But after testing this function with a Sony Alpha NEX-5, I'm here to say it's for real.

Sweep Panorama with Sony NEX-5 This sweep panorama of a high school football field was captured with a Sony NEX-5 with a 16mm f/2.8 lens. Click to enlarge.

The process is simple. You set the camera in Sweep Panorama mode, press the shutter, then pan your scene following the marker in the viewfinder. Once the image is completed, go to Playback mode, and your panorama is ready for viewing.

The finished resolution is 8192×1856 (15.2 MP), so you don't get the mega-dimensions that you'd see if you took a series of images and stitched them together in Photoshop. But what you do get is an impressively merged photograph that's ready to share right out of the camera. Click on the image above to examine a larger version. Not bad.

Moving objects do present a problem for Sweep Panorama. So this technique is best applied to static scenes (although the effects of movement are sometimes interesting and worth playing with). This technology will hopefully lead to more expansive shots from photographers who like showing the big picture.

More on the Sony NEX-5

Eye-Fi Control on Sony NEX-5

"Sony NEX-5: Where Does it Fit?" - Digital Photography Podcast 228

Viewing Sony's NEX-5 AVCHD Movies on a Mac


twitter.jpg Follow me on Twitter

-


Clown Fish

Editor's Note: The following article and photos are by Dennis Adams, co-author of Step Zero: Getting Started on a SCUBA Photo Trip. Dennis is a TDS listener and wanted to contribute his expertise to our Outdoor Life section.

Considering the Canon S90 for UW Photography

I have been a world traveler and Under Water (UW) for many years. While I travel with a large, heavy, very capable DSLR that is enclosed in an UW housing and supported by two large UW strobes to illuminate the dark UW subjects, I also travel with a small P&S with an UW housing. The P&S serves as a walk around camera and a backup UW camera.

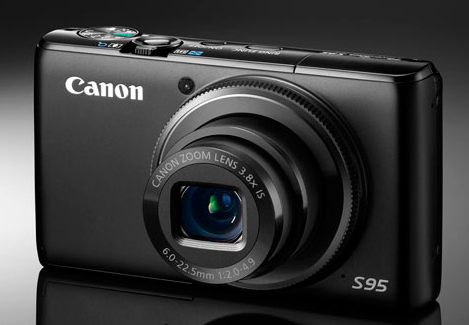
Your praise of the Canon S90 sparked my interest, as my current P&S is getting close to 7 years old and newer cameras have much more capability. In addition to your review of the S90, I researched and discovered that there are several manufactures producing UW housings for the S90.

I wanted an UW housing that was of proven durability, repairable, flexible, and lightweight. I tend to use my equipment for many years and only upgrade when there is a substantial performance improvement. Using antique equipment does not bother me as long as it does what is needed.

Equipment

I found an excellent review of UW P&Ss at Backscatter.com. I selected the S90 because:

  • It is physically small
  • Has excellent photographic performance and from a world class photo company
  • Will produce RAW image files
  • There are several UW housings to choose from

The S90 has with three excellent housings available:

  • Canon housing $
  • Ikelite housing $$
  • Fisheye aluminum housing $$$$
  • I selected the Ikelite housing because of their excellent demonstrated performance across all their products and world class factory repair support. A wide angle lens may be attached or removed from the housing while underwater. Other manufactures also produce a more capable macro lens for UW use (than what is included with the S90).

    Sea Fan

    I was upgrading my 15 year old strobes to the new Sea & Sea YS-110a, which will connect to my camera via the usual electrical sync cord, or the newer fiber optic sync cord. I connected the camera end of the fiber optic sync cord for these new strobes to a small, home fabricated, plastic bracket held in place on the outside of the housing over the S90 flash with black electrical tape. This held the fiber optic cables in place so the camera flash would travel though them to the optical sync ports on my larger external flashes. The black tape also blocked any light from the camera flash going straight forward and causing backscatter from the particulates in the water. All strobes could then be easily connected either to the new housed S90, or my old housed DSLR with my Ultra Light Control System (ULCS) arms and handles.

    Performance

    The S90 fits snugly into the small Ikelite housing, and all camera controls are accessible by pushing housing buttons, twisting knobs or gear driven rings. I have operated my UW cameras in the manual mode for the past 30 years, and the S90 was no exception. With the camera set to manual mode:

    • The ISO set to 100 (I wanted max quality)
    • The flash set to forced-on and output power set to "minimum" (this low setting saved S90 battery power and still provided sufficient flash power to travel through the fiber optic cables to trigger the optical sync sensor on my external strobes)
    • The aperture setting was controlled via the twist knob on the front of the housing, (the aperture setting and strobe output power determine the subject illumination in UW photography)
    • The shutter speed was set to 1/60, 1/125 or 1/500 via the buttons on the back of the housing to obtain he desired background sea color of nice ocean blue or dark black. (the shutter speed setting determines the background color in UW photography)
    • The focus was set to auto and spot.
    • The image format was set to RAW only.

    (I have not yet tried the video mode UW as I don't have UW video light to bring out the colors, but I may try natural light video in the future)

    With these control settings, I was properly configured and was able to obtain proper subject and background exposure by adjusting camera controls and/or the output power of the external strobes. The S90 performed extremely well. The photos were in focus, properly illuminated, the background as desired and the image quality fully acceptable.

    The Macro camera function enabled me to record small fish and the wide angle UW attached lens enabled me to photograph large subjects while I was very close (being close UW eliminates most the floating gunk between your camera and the subject). While S90 does not have the rapid sequential photo, high focusing speed, or flexibility of my housed DSLR, I was able to take excellent photos with normal P&S planning.

    I recommend without reservation that you or others purchase an UW housing for your S90 so you too may enjoy its UW performance. Which housing you choose will depend on your desired usage and how much you wish to spend.

    Thanks Dennis for that excellent review. I am now inspired to get a housing for my S90! As I mentioned at the top of the article, Dennis Adams is co-author of Step Zero: Getting Started on a SCUBA Photo Trip.

    The Sony Alpha NEX-5 is part compact, part DSLR. It's 10 oz body houses a 14.6 CMOS APS-c sensor, plus lots of other top notch features such as a 3" tilting LCD, 7 fps burst mode, and full HD movie recording. I think it's a good camera for those upgrading from a point and shoot. I explain myself in this week's podcast.

    sony_nex-5.png

    Listen to the Podcast

    You can also download the podcast here (27 minutes). Or better yet, subscribe to the podcast in iTunes. You can support this podcast by purchasing the TDS iPhone App from the Apple App Store.

    Monthly Photo Assignment

    Float is the June 2010 Photo Assignment. You can read more about how to submit on our Member Participation page. Deadline for entry is June 30, 2010.

    JD Felton was the "Sizzlpix Pick of the Month" for Photo Assignment 50. Who will be the winner for Photo Assignment 51? The prize is an 11"x14" Sizzlpix of the winning photograph.

    More Ways to Participate

    Want to share photos and talk with other members in our virtual camera club? Check out our Flickr Public Group. It's a blast!


    twitter.jpg Follow me on Twitter

    -


    Podcast Sponsors

    Red River Paper -- Try the $7.99 Sample Kit.

    Make Your Photos Sizzle with Color! -- SizzlPix is like High Definition TV for your photography.


    Technorati Tags: , , , , ,

    The Heads Up Displays, often referred to as the HUDs, are some of the application's most distinctive features. By taking just a few minutes to learn their essential keystrokes and capabilities, you can speed up your workflow considerably.

    In this 2:34 movie, I cover the Inspector, Keywords, and Lift and Stamp Heads Up Displays.


    More Aperture Tips and Techniques

    To learn more about Aperture 3, check out my Aperture 3 Essential Training on Lynda.com. Also, take a look at our Aperture 3 Learning Center. Tons of free content about how to get the most out of Aperture.


    twitter.jpg Follow me on Twitter


    I've been testing the Sony Alpha NEX-5 camera and had to figure out a workflow to manage the video it captures. One of the formats that Sony uses for movies is AVCHD, which can be difficult when working with QuickTime on a Mac. Fortunately, I have a few tips to make it easier.

    Sony NEX-5 Movie in QuickTime Video from a Sony NEX-5 playing in QuickTime.

    First, and easiest, don't use AVCHD! That's right, you have an option. Go to the Image Size menu on the NEX-5, navigate down to Movie, and select MP4 instead of AVCHD. That was easy.

    If you set the NEX-5 as a mountable drive or use a card reader, you can peer into the contents of its memory. To find your MP4 videos, go into the MP_ROOT folder, and you'll see MP.4 files that can be opened directly in QuickTime. Simply drag and drop. This gives you full size 1920x1080 video files. In my test, a 34 second file weighed-in at 51 MBs.

    Another route for Mac users is to launch the latest version of iMovie, then click on the Open Camera Import Window icon (CMD-I). iMovie can recognize the NEX-5 and import the video clips you've recorded. You can then edit them, add titles, and do all of the post production stuff that you'd normally handle in iMovie.

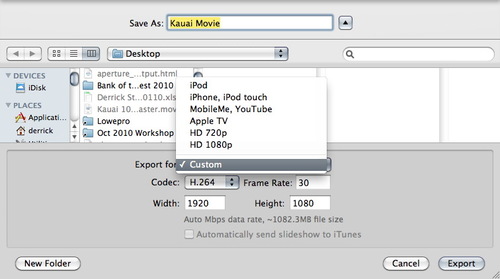
    When it's time to export for QuickTime viewing, an efficient way to go is to select Share > Export Movie. Then click on the HD preset in the dialog box. You'll end up with a high quality 1280x720 movie that you can play in QuickTime or any device that reads the .MOV format. That same 34 second movie was 43 MBs after going through this process.

    And finally, Aperture 3 (and yes, iPhoto 09 too) can recognize the MP4 movies and import them. This worked when I connected the camera via its USB cable or used a card reader. For me personally, Aperture 3 is the easiest way to import, trim, and catalog videos captured with the Sony NEX-5. Unfortunately, Aperture 3 doesn't support the .ARW Raw files, but hopefully that will come up the road.

    For those who prefer working with the AVCHD format, all of this might seem like a lot of fuss. But I think it's great that Sony gives you a MP4 option for those who prefer it.

    More on the Sony NEX-5

    Eye-Fi Control on Sony NEX-5

    Sweep Panorama Is Impressive on Sony NEX-5

    "Sony NEX-5: Where Does it Fit?" - Digital Photography Podcast 228


    twitter.jpg Follow me on Twitter

    -


    A good night's sleep is just as important on location as at home. Regardless if you're camping outdoors or crashing on a friend's living room floor, the REI Self Inflating Camp Bed is so comfortable that you'll forget you're on the road.

    REI Camp Bed

    Self-inflating truly works. No pumps or compressors are required. Simply unroll the mat, open both air valves, and watch as the mattress expands to over 3" in thickness. It seems like magic. But it works thanks to the foam inside the 150-denier polyester shell expanding and drawing in air. And unless you need a very firm sleeping surface and blow additional air in through the valves, the Camp Bed does all the work. Another advantage with the foam interior is increased insulation from the cold ground. This mattress has an R-Value of 7, which is excellent protection. Combined with cloth-like top cover, you'll feel at home just about anywhere.

    The downside? The Camp Bed weighs-in a tad over 6.5 lbs. That's too heavy for backpacking, but excellent for car camping. And because of the foam interior, it doesn't roll up as compactly as less luxurious mats. The regular size (72" long by 25" wide) sells for $99 at REI. The X-Large version, which is the model I tested, is 78" long by 29" wide. It sells for $109.

    And how comfortable is the REI Camp Bed? Let me put it this way: I can sleep on my side and not feel the ground on my hips or shoulders. When's the last time you could do that camping?

    More tips and gear reviews in our new Outdoor Life section

    If you enjoy working and playing in nature, take a look at our new Outdoor Life section on The Digital Story. And if you forget the link, just click on Outdoor Life in the top navigation bar on the site. You can also contribute your own reviews of gear by sending them to me.


    twitter.jpg Follow me on Twitter

    -


    More than 20 articles and instructional videos are available in the new Aperture 3 Learning Center. And there's plenty more to come.

    If you're looking to upgrade to Aperture 3, or you just want to brush up on your skills, you can watch videos on portrait retouching, slideshow authoring, and how to use the new Curves adjustment (and lots more). There are helpful articles on topics such as reconnecting your master files in Aperture 3 or maximizing your workspace by enabling full screen mode.

    You can click on this link to visit the Aperture 3 Learning Center, or find it under the Photography section on The Digital Story.

    And to really dig into Aperture 3, check out my Aperture 3 Essential Training on Lynda.com. There's more than 8 hours of video instruction waiting for you.


    twitter.jpg Follow me on Twitter


    The Samsung NX10 is a mirror-less DSLR featuring a 14.6 MP APS-C CMOS sensor, 3" LCD, electronic viewfinder, Raw capability, 720p HD movie recording, and just about every control a serious photographer would want. All of this packed into a body that is smaller than your traditional SLR.

    samsung_nx10.jpg

    In this podcast, I walk through the performance and handling of this $650 camera by Samsung, plus talk about how its Raw files stack up against the in-camera processed Jpegs.

    Listen to the Podcast

    You can also download the podcast here (27 minutes). Or better yet, subscribe to the podcast in iTunes. You can support this podcast by purchasing the TDS iPhone App from the Apple App Store.

    Monthly Photo Assignment

    Float is the June 2010 Photo Assignment. You can read more about how to submit on our Member Participation page. Deadline for entry is June 30, 2010.

    Simone Brogini was the "Sizzlpix Pick of the Month" for Photo Assignment 49. Who will be the winner for Photo Assignment 50? We'll know very soon. The prize is an 11"x14" Sizzlpix of the winning photograph.

    More Ways to Participate

    Want to share photos and talk with other members in our virtual camera club? Check out our Flickr Public Group. It's a blast!


    twitter.jpg Follow me on Twitter

    -


    Podcast Sponsors

    Red River Paper -- Try the $7.99 Sample Kit.

    Make Your Photos Sizzle with Color! -- SizzlPix is like High Definition TV for your photography.


    Technorati Tags: , , , , ,

    This gallery will definitely bend your mind. The assignment for April 2010 was "Curve." Check out this outstanding collection of images from members of the TDS virtual camera club. And I mean this is an excellent collection of photographs. It's going to be tough to choose the SizzlPix Pick of the Month from this effort.

    David_L_Crooks.jpg

    The June 2010 assignment is "Float." Start working on your contribution now. Details can be found on the Member Participation page. You can now submit photo assignment pictures up to 800 pixels in the widest direction.

    Please follow the instructions carefully for labeling the subject line of the email for your submission. It's easy to lose these in the pile of mail if not labeled correctly. For example, the subject line for next month's assignment should be: "Photo Assignment: May 2010." Also, if you can, please don't strip out the metadata. And feel free to add any IPTC data you wish (These fields in particular: Caption, Credit, Copyright, Byline), I use that for the caption info.


    Photo by David L. Crooks. (Click on it to see enlarged version.) You can read more about how David captured this shot, plus see all of the other great images on the April 2010 Gallery page.


    Good luck with your June assignment, and congratulations to all of the fine contributors for April. It's a great collection of images.


    twitter.jpg Follow me on Twitter

    -


    Now Available! The Digital Photography Companion. The official guide for The Digital Story Virtual Camera Club.

    • 25 handy and informative tables for quick reference.
    • Metadata listings for every photo in the book
    • Dedicated chapter on making printing easy.
    • Photo management software guide.
    • Many, many inside tips gleaned from years of experience.
    • Comprehensive (214 pages), yet fits easily in camera bag.

    Technorati Tags: , ,