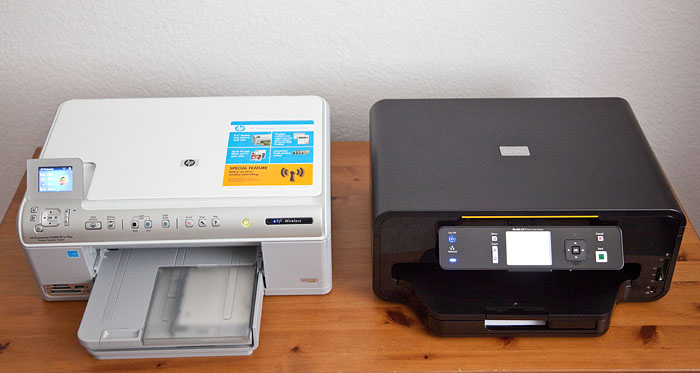
There was a time when photographers would no more consider buying a multifunctional printer than they would go on vacation with only a 64 MB memory card. But technology marches on, and today I have not one, but two "all-in-one" printers that tout excellent photo printing abilities. Behind door number one stands the HP C6380 All-in-One (left), and behind door number two challenges the Kodak ESP 7 All-in-One (right).
So who should consider an all-in-one for light office and photo output? I'd say amateur photographers who don't want to mess with ICC profiles (let the printer choose the settings), who don't need photos bigger than letter size, and who don't print more than 500 images a year. If you fall into that category, you should read on.
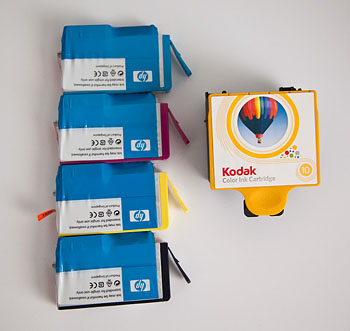
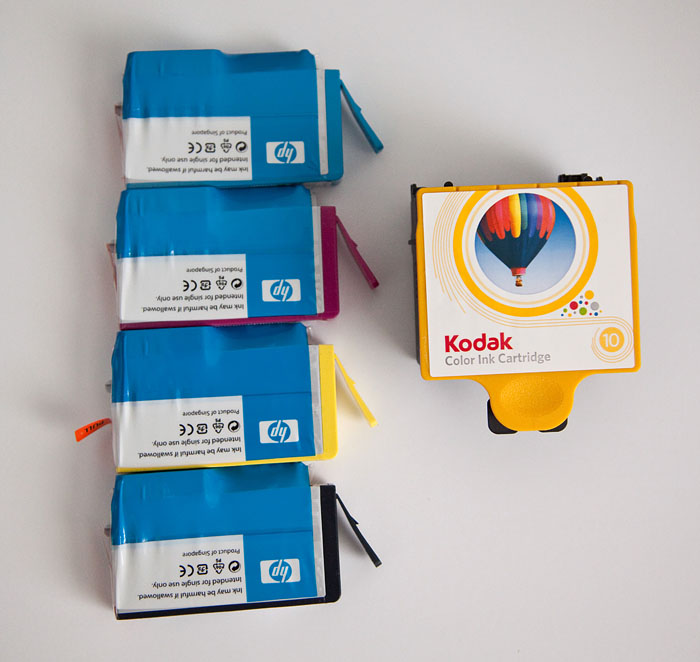
Both the HP and the Kodak are light to carry, have footprints that will fit on a dinner placemat, and provide printing, scanning, copying, and WiFi connectivity. Each printer has two paper trays: bottom for letter size output (plain paper or photo stock) and top for photo snapshots. Even though these printers are Mac and Windows friendly and come with good software, you can go for days without using a computer with them. That's because most functions can be controlled via their respective LCD panels, and they both accept USB Flash drives and standard camera memory cards. Once difference you'll notice is that the HP has four individual photo ink cartridges while the Kodak uses a single photo ink unit. (See the illustration above for a comparison; HP individual cartridges on the left.) Each retails for around $199 US, but until June 28th, the HP is on sale for $149.99 (via the HP web site.
Unpacking and setting up both printers is easy. I averaged 30 minutes for each, and that included connecting them to my WiFi network. Neither include USB cables, so if you don't go wireless, make sure you have a cable available. Both devices are handsome in their own way, enhanced by colorful LCDs that presented me with easy to understand menus. I never had a problem navigating either device. One thing you should note, however, is that both printers are fairly noisy, with the HP spending more time grinding its gears. I would say these are definitely office printers, with hopefully, no one trying to sleep in the same room.
There's been some talking back and forth between HP and Kodak about how much it costs to print with their machines. I'll address that, but it's just as important to me how they perform. So I've put together a small battery of torture tests to see if either printer is worthy of residing in the office of a the hobbyist photographer. I was careful to conduct the tests fairly, using the same originals and a stop watch for timing, with each unit set to "out of the box" automatic settings.
This review is geared toward photo enthusiasts who are considering an all-in-one printer for their home office. Since I happen to be an enthusiast myself, I devised tests that were interesting to me, providing information that I would want to know about costs, output performance, image quality, and paper durability. If you're not a photographer and these issues aren't as important to you, then you might want to check out other reviews of these devices.
Basic Office Skills
Since these are multifunctional machines, we should take a look at copying and scanning. Each device has a letter-sized scanner on top that can be used for black & white or color business copies. In the paper tray, I used Staples Inkjet Paper (letter size, 24 lb, 98 bright). Here's the first battery of tests. The times listed are how long each printer took to complete the task.
Black and White Copies (10 copies from original)
HP - 1:55.7 -- Kodak - 1:57.2. Both printers did a good job of producing clean B&W copies in reasonably fast time. Edge: This one's a tie.
Full Color Copies (5 copies from original)
HP - 3:03.9 -- Kodak - 2:37.3. The HP spent some time going through a printer preparation cycle before beginning job, but its quality was noticeably better on plain paper, especially in the reds and with detail reproduction. The Kodak was a bit faster, but print quality was acceptable at best. Reds lacked saturation and detail. Edge: HP 6380.
Scan Document and Save as Electronic File
HP - 00:27.9 -- Kodak - 00:50.3. The HP saves the scanned document as a Jpeg and wrote it to a USB Flash drive. I converted it to PDF using Preview on a Mac. I would have preferred to skip the conversion step and have the HP save to PDF. The Kodak, however, did not have the option to save to USB Flash drive, so I chose save to my Mac wirelessly. That didn't work. The Kodak constantly hung on the job. So I tried the other option of saving to memory card, and that worked like a champ. The output from the Kodak was also a Jpeg, and it had more saturated colors, but with some artifacts. The HP colors were more muted, and there were no artifacts. Plus, the HP saved the Jpeg file at 300 ppi to Kodak's 72 ppi. Edge: HP6380.
Basic Photo Printing Skills
Now, here's where it gets a bit more interesting for me. Two companies pitted against one another, both take a lot of pride in their photo printing.
Snapshot Reprint Test (4x6 color photo placed on scanner glass and reproduced to 4x6 color output - 1 print -- all settings were on automatic, no computer involved.) Note: I used HP ink and paper designed for the C6380 and Kodak ink and paper designed for the ESP 7. For more on that, see the "Dunking the Prints" section below.
HP - 1:13:4 -- Kodak - 1:15.9. HP print quality was excellent, color reproduction was near perfect, great contrast. The Kodak print displayed a moderate purple shift on blues, less contrast, average detail reproduction. Edge: HP C6380.
iPhoto Print Test 4 x 6 (iPhoto print job sent from calibrated Mac using WiFi -- all settings were on automatic, used manufacturers ink and paper.)
HP - 1:16.9 -- Kodak - 51.4. HP had better contrast, excellent color fidelity
Kodak output had less contrast, slight color shift. Edge: Another Tie (HP gets slight nod for output quality; Kodak printed faster).
Letter Sized Output on Third Party Photo Paper (iPhoto print job sent from calibrated Mac using WiFi -- all settings were on automatic, used manufacturers ink and Red River Arctic Polar Luster paper.)
HP - 1:12.9 -- Kodak - 2:07:0. Both output had noticeable color shift and neither print was acceptable. Edge: neither.
Printing Torture Test
The final set of tests were the most demanding of them all. These were designed to see how output from these printers will hold up under adverse conditions. First, I started with the dunk test, where 4" x 6" prints were immersed in water for 10 minutes. Then I hung them off the edge of the counter for the droop test. And finally I let the prints air dry for the curl test.
Dunking the Prints
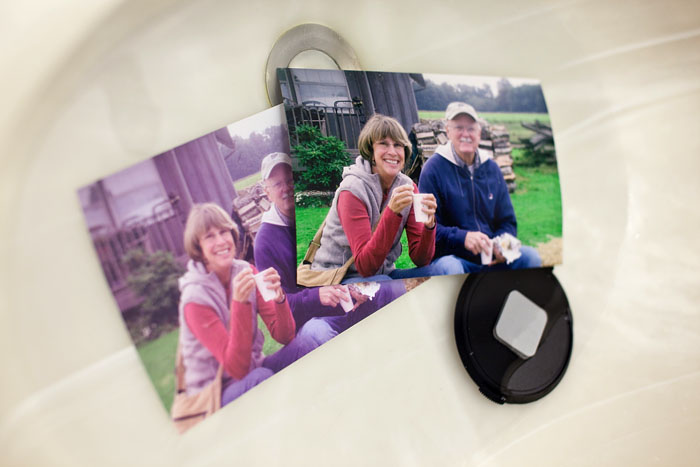
After making prints from the same file, I immersed them in water for 10 minutes. For the HP prints, I used the HP 564 Series Photo Value Pack-150 sht/4 x 6 in that lists for $34.99 US includes enough ink and paper to make 150 4" x 6" prints (which works out to a little over 23 cents a print). For the Kodak images I used the KODAK Premium Photo Value Pack that's selling for $19.99 US and provides ink and paper to make 135 4" x 6" prints (which works out to be about 15 cents a print).
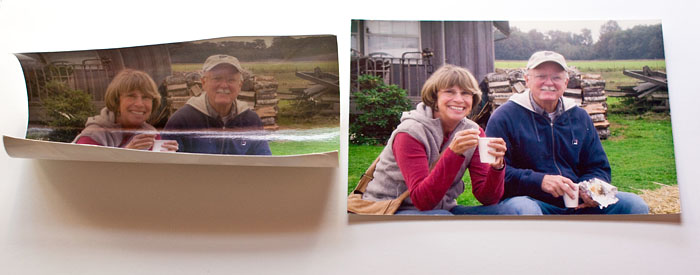
As you can see in the third illustration (Kodak print on the left, HP print on the right), the Kodak paper absorbed water and the the image colors shifted. Edge: HP C6380.
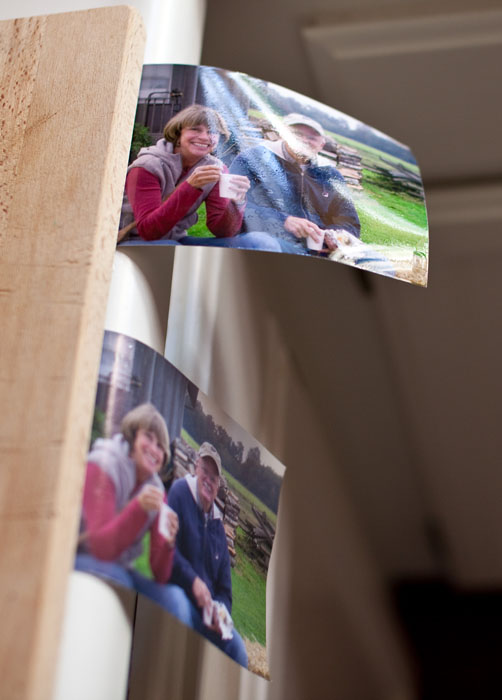
The Droop Test
After the prints were soaked in water, I hung them off the edge of the counter. The Kodak print (on the bottom) drooped nearly all the way down to the side of the counter. The HP print (top) still had decent resistance to gravity. Edge: HP C6380.
The Curl Test
While the prints were still wet, I set them up in a dish rack to let them dry at room temperature. Once they were completely dry, I laid them out on a flat surface and photographed them. As you can see in the bottom illustration, the Kodak image (left) curled quite a bit compared to the HP image on the right. Edge: HP 6380
The "Kodak Advantage" vs HP's "Lab Quality"
On their web site, Kodak states "All KODAK Inkjet Photo Papers are porous. That means they dry instantly, so you can go from picture to print in seconds. Plus, our papers absorb inks faster, so your pictures won't smear or smudge." If I read this correctly then, the Kodak papers didn't fare well in my Dunk, Droop, and Curl tests by design. HP, on the other hand, likes to use the term, "lab quality" for their prints, and their materials have a very different feel, again by design.
The price difference per print is about 8 cents using these materials, with Kodak providing the cost savings. If you printed 300 4" x 6" snapshots a year (25 prints a month), then using these Kodak supplies, you would save $24 a year. If you upgraded your Kodak materials to the Ultra Premium Photo Paper, then your per print cost would go up to over 40 cents a print, and the cost savings then would be in HP's favor.
So it seems to me that when you compare Kodak and HP using these devices for primarily photo output, you get what you pay for. HP's prints do feel and look like prints from a traditional photo lab. They're very durable and will hold up well to handling. Kodak Premium paper costs less, and if you're not as picky about color fidelity and contrast, and don't mind a more porous paper, then you can save a few bucks using the KODAK Premium Photo Value Pack in the ESP 7.
The Final Word
When you compare the HP C6380 All-in-One to the Kodak ESP 7 All-in-One from a photography point of view, it really comes down to your priorities. Both units do what they're designed to do and look going doing it. But the photo output is quite different between them.
Personally, I lean toward the HP C6380 because I do like those lab quality prints. And at 23 cents each, they seem like a great value. Plus, the scanning unit in the C6380 produced cleaner images with fewer artifacts. And regardless of which printer you use, make sure you spend a little time learning all of its features. Both the C6380 and the ESP 7 include a lot of capability for the dollar.
 Follow me on Twitter
-
