Recently in Photography

  Page 38 of 385 in Photography  

Just over a decade ago on June 16, Olympus added a completely new camera to their lineup: the E-P1. To this day, with the arguable exception of the PEN-F, it was their most handsome Micro Four Thirds design.

Olympus PEN E-P1 My favorite E-P1 kit with 17mm f/2.8 pancake lens and the optical viewfinder attachment. All photos by Derrick Story.

Just before the official launch in 2009, Olympus pulled together a press junket to New York City to introduce the camera and provide the opportunity to test it for our reviews. After a couple days of shooting, I knew this little gem had great potential. It was so light and versatile. I just wanted to have it with me all the time.

Olympus E-P1 NYC June 2009: Press corps on the Staten Island Ferry with PENs in hand. Photo by Derrick Story with the Olympus E-P1.

The basic specs for the first Olympus Micro Four Thirds were quite decent for its time.

  • 12.3 megapixels on a Four Thirds CMOS sensor
  • ESP multi patterned, Center-weighted average (60 percent), and Spot (2 percent) metering
  • Shutter speeds: 1/4000 to 60 seconds, 30 minutes
  • LCD: 3" 230,000 pixel TFT LCD on screen with live preview
  • $899 list price

Olympus PEN E-P1

Two physical things that I liked about the camera, aside from its compact size, were how the "sunken" mode dial (on top) and the vertical sub-dial (on the back) were designed. They were truly unique among the camera's peers. And I thought they were absolutely beautiful. We haven't seen the vertical back dial since... too bad!

The back LCD, handsome as it was, only displayed 230,000 pixels. And unless you had the VF-1 optical viewfinder, you had to compose on that fixed-back, relatively low resolution screen. That wasn't a problem indoors, but out in the bright sunlight it could be a challenge. As a result, outside I shot primarily with the 17mm and the optical viewfinder. It should be noted that even this first model had the beloved Super Control Panel that fills the entire back LCD with vital information.

Olympus PEN E-P1

The image quality was quite good. And the E-P1 instantly became my go-everywhere travel companion. I also used the 14mm-42mm zoom (28mm-84mm equivalent), but the 17mm pancake was my favorite optic on it. I was rarely concerned about the 12MP resolution (my Nikon D700 is 12MP as well), the color was excellent, and the E-P1 was packed with many creative features, such as Art Filters that we didn't see on DSLRs at the time.

Olympus PEN E-P1

One very cool feature on the top panel was the Super Sonic Wave Filter indicator (SSWF). When you first turn on the camera, ultrasonic vibrations are used to remove dust and dirt from the image pickup device's filter surface. The tiny blue light next to SSWF flashes during the cleaning process. It only takes a second or two, but I really like the visual indication.

I'm also a fan of the glowing green circle around the On/Off button that lets you know the camera is powered up. Again, this is stuff that you just don't typically see on digital cameras. And those little touches really add to the shooting experience.

P6174169.jpeg

The Olympus E-P1 is a camera that I will never sell. Even though it's petite, it's a big part of photographic history, and still a good shooter even today. (Although now I like to mount the 17mm f/1.8 on the camera with the optical viewfinder.) And if you want to turn heads in a crowd, just pull out the E-P1. People are fascinated by this neo-classic. And they will ask you what kind of film do you use in it.

You can share your thoughts at the TDS Facebook page, where I'll post this story for discussion.

This is The Digital Story Podcast #743, June 16, 2020. Today's theme is "Questions I'm Asking Myself Before Wielding a Camera Out on the Streets." I'm Derrick Story.

Opening Monologue

I saw an aerial photograph yesterday of a weekend protest in Los Angeles. For as far as the eye could see, people filled a wide boulevard from side to side. As a street photographer, my initial impulse was to be a part of it; to document this momentous moment in time. But I had to remind myself that this is not a Sunday farmers market, and that I need to be honest about justifying my presence. Those thoughts are the lead story of today's TDS photography podcast.

Questions I'm Asking Myself Before Wielding a Camera Out on the Streets

Over the years I've earned a fair amount of street creed for my urban photography. I've lead workshops, published photos, and written articles. But all of that means nothing right now in any big city in America.

DSCF1631-Downtown-Santa-Rosa-BLM-1024.jpg

Why? Because what's going on at the moment is far more important than any photo project that I'm working on. To be honest, my credentials are not valid in downtown LA, Atlanta, or Minneapolis.

That doesn't mean that I stand on the sidelines or that I can't document what's going on. But I need to ask myself some hard questions first to help me proceed with integrity.

Here are three of those questions.

  • What is to be gained by my presence?
  • - My view is, that every person who is peacefully protesting has purpose. So, as a photographer, what would mine be? To be able to post a cool image in Instagram is not a legitimate reason to be there taking pictures. I need to be better than that.

  • Am I confident that my images would send the message that I intend? - This is a tricky one. People are often blinded by their biases. A perfect example is someone who tells you they don't have any. My personal feeling is that we need some knowledge about our subject to accurately report on it. I have never been on the receiving end of racism. And even though I hate the thought of it, I may not be qualified to document it. Bottom line, I'm not confident that I know where all of my blind spots are. I want to do the right thing.
  • What is the best way for me to participate? - I think by doing this. By offering things to consider to help our community of photographers come as close to their intentions as possible. To urge people to look inside before taking their cameras outside and putting them in the face of another.

Photography can be such a powerful medium. And I think this moment in time presents a good opportunity for us to talk about the responsibilities that come with that power.

One ideal that I've tried to embrace over the years when taking pictures on the street is to show respect for life and acknowledge that my view of the world is probably different than many of those whom I photograph. So far, that guiding light has served me well.

So, in that spirit, I'm going to try to be as honest with myself before taking my camera out on to the streets.

Just Released! Organizing and Archiving Digital Photos

It's a concern that lingers in the mind of just about every digital photographer: "How do I preserve my digital images and make them accessible while doing so?"

If you've had those thoughts, then help is available now. My latest LinkedIn Learning/lynda.com title, Organizing and Archiving Digital Photos is a complete course that shows you a variety of options and techniques to take control of protecting your image collection.

As your photo library grows, it becomes more important to back up your work. In this course, I teach the concepts and techniques behind efficient photo management for the long haul. First, I compare a few selected photo storage philosophies and techniques. I then show you how to create an ultralight backup system for travel, also back up photos stored on a laptop (or desktop), and finally, review archiving strategies for storing photos for decades.

Here are just a few of the talking points that I cover in the training.

  • Creating an ultralight backup system for travel.
  • Sending images from cameras to mobile devices.
  • Internal vs. external hard drives (both have their roles).
  • Organizing photos in managed vs. referenced catalogs vs. Finder-based.
  • Re-archiving images from older hard drives (do this before they fail!).
  • Integrating cloud services into your overall strategy.
  • Including a few tips you might not have considered, such as making archival prints of your best images.

You can start fine-tuning your workflow today by watching Organizing and Archiving Digital Photos on LinkedIn Learning and on lynda.com. It's a great way to begin the process of protecting your digital media for years to come.

Are Canon's Rumored Super-Telephoto Lenses a Serious Threat to Olympus?

You can read the entire article here that's published on Fstoppers.

Canon is offering super-telephoto lenses as well as 1.4x and 2x teleconverters. What does this mean? A full frame Canon mirrorless body will be able to shoot at 600mm and 800mm, heavily encroaching on where Olympus does its best work, but with a significantly better sensor. Now admittedly, the widest aperture of an f/11 lens and whether the 100-500mm, 600mm, and 800mm are compatible with the teleconverters is up for debate, but it's probably unlikely. I would say 1,600mm at f/22 and the autofocus still working is borderline impossible, but I'm not sure on that matter.

  • Canon RF 50mm f/1.8 STM
  • Canon RF 85mm f/2 Macro IS STM
  • Canon RF 70-200mm f/4L IS USM
  • Canon RF 100-500mm f/4.5-7.1L IS USM
  • Canon RF 600mm f/11 DO IS STM
  • Canon RF 800mm f/11 DO IS STM
  • Canon RF 1.4x
  • Canon RF 2.0x

Really?

The Essential Steps to Impressive Video Conferencing

If you want to learn more about looking and sounding great for your next online interaction, then I think you'll very much enjoy my latest online workshop, The Essential Steps to Impressive Video Conferencing.

This 1-hour deep dive focuses on the 3 major areas of successful online interaction: Audio, Video, and Environment. During the course, I walk you through a variety of techniques that range from simple using gear that you already have, to improving your chops through a few inexpensive purchases.

The course is currently available for free to our Inner Circle Members on Patreon. Members, just go to our Patreon site, and all the information will be there. If you're not already an Inner Circle Member, you can join us for $5 a month.

The course is also available on our Nimble Photographer Workshop Page for $14.95.

I have tons of great tips and techniques waiting for you there. If you want to get serious about how you come across during online meetings, classes, interviews, and family interactions, then you definitely will want to watch this course.

Digitizing Family Memories Course Now Available Online

Each of the four classes will outline a specific set of steps for you to accomplish. By the end of the course, you will have an organized digital archive of your most valuable family images.

You can sign up for the course by visiting the Workshops page on The Nimble Photographer. The course fee is a reasonable $39 (on sale right now). It includes the 4 class videos, class notes, and access to the class forums that are a part of each movie.

Updates and Such

Inner Circle Members: A big thanks to those who support our podcast and our efforts!

Due to the coronavirus pandemic, we've had to postpone our July photography workshop at Lassen Volcanic Park. We so still have on the schedule, however, our Eastern Sierra event in October.

How to Watch Photos for macOS Catalina and iPadOS - Learn everything you need to know about Photos for the Mac and iPad by checking out my latest course on LinkedIn Learning and on lynda.com. This course is perfect for Mac and iPad based photographers who shoot with iPhone, Mirrorless, and DSLR cameras. It covers both photography and movies. And if I say so myself, it's a lot of fun.

B&H and Amazon tiles on www.thedigitalstory. If you click on them first, you're helping to support this podcast. (The Digital Story is supported by its audience. When you purchase through links on our site, we may earn an affiliate commission.) And speaking of supporting this show, and big thanks to our Patreon Inner Circle members:

Affiliate Links - The links to some products in this podcast contain an affiliate code that credits The Digital Story for any purchases made from B&H Photo and Amazon via that click-through. Depending on the purchase, we may receive some financial compensation.

And finally, be sure to visit our friends at Red River Paper for all of your inkjet supply needs.

See you next week!

More Ways to Participate

Want to share photos and talk with other members in our virtual camera club? Check out our Flickr Public Group. And from those images, I choose the TDS Member Photo of the Day.

Podcast Sponsors

Red River Paper - Keep up with the world of inkjet printing, and win free paper, by liking Red River Paper on Facebook.

The Nimbleosity Report

Do you want to keep up with the best content from The Digital Story and The Nimble Photographer? Sign up for The Nimbleosity Report, and receive highlights twice-a-month in a single page newsletter. Be a part of our community!

Want to Comment on this Post?

You can share your thoughts at the TDS Facebook page, where I'll post this story for discussion.

organizing-course-graphic.jpg

It's a concern that lingers in the mind of just about every digital photographer: "How do I preserve my digital images and make them accessible while doing so?"

If you've had those thoughts, then help is available now. My latest LinkedIn Learning/lynda.com title, Organizing and Archiving Digital Photos is a complete course that shows you a variety of options and techniques to take control of protecting your image collection.

Here's an introduction to the course that will give you a feel for its approach.

linkedin-promo-graphic-1024.jpg

As your photo library grows, it becomes more important to back up your work. In this course, I teach the concepts and techniques behind efficient photo management for the long haul. First, I compare a few selected photo storage philosophies and techniques. I then show you how to create an ultralight backup system for travel, also back up photos stored on a laptop (or desktop), and finally, review archiving strategies for storing photos for decades.

Here are just a few of the talking points that I cover in the training.

  • Creating an ultralight backup system for travel.
  • Sending images from cameras to mobile devices.
  • Internal vs. external hard drives (both have their roles).
  • Organizing photos in managed vs. referenced catalogs vs. Finder-based.
  • Re-archiving images from older hard drives (do this before they fail!).
  • Integrating cloud services into your overall strategy.
  • Including a few tips you might not have considered, such as making archival prints of your best images.

You can start fine-tuning your workflow today by watching Organizing and Archiving Digital Photos on LinkedIn Learning and on lynda.com. It's a great way to begin the process of protecting your digital media for years to come.

You can share your thoughts at the TDS Facebook page, where I'll post this story for discussion.

Frederick and I fired up the mics for the current edition of This Week in Photo. The interview provides some great background for Digitizing Family Memories and we touch on Essential Steps to Impressive Videoconferencing as well.

DFM-with-FVJ.jpg

If you've already viewed either of these online courses, I think you'll find the Behind the Scenes information interesting and entertaining. And if you haven't participated in the classes yet, this will help you understand them better.

A big shout-out to Frederick for having me on the show!

You can share your thoughts at the TDS Facebook page, where I'll post this story for discussion.

This is The Digital Story Podcast #742, June 9, 2020. Today's theme is "Data Visualization for How You Shoot." I'm Derrick Story.

Opening Monologue

We record EXIF data with every picture we take. But how often do we use it? If we examine our camera settings over a period of time with a specific model, we can learn a lot about how we capture images. This information can help us change the look of our pictures, plus assist us with buying decisions for new gear. And the best part is, this exercise is both easy and cheap. Learn how on today's TDS Photography Podcast.

Data Visualization for How You Shoot

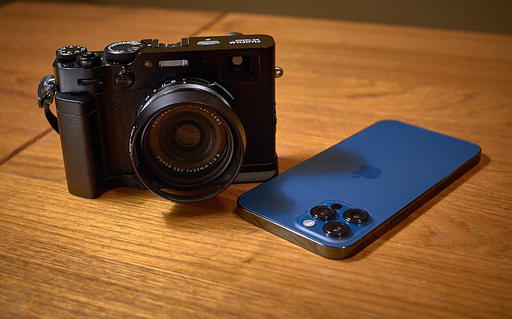
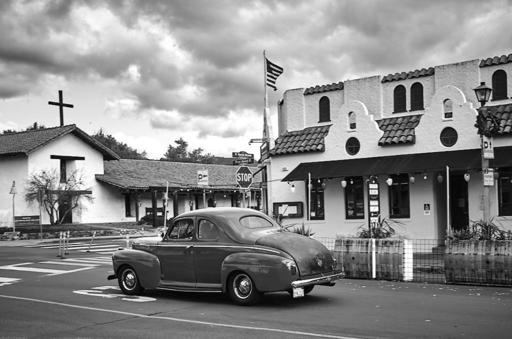
I've been shooting with the Fujifilm X100V since March because if I do walk out the door, it is for street photography. My inclination has been to set the camera in Program mode with Auto ISO. My thinking was that things happen so quickly in urban environments, that I don't want to miss a shot because of camera settings.

This has worked quite well for me. And combined with choosing the appropriate film simulation, I have been really pleased with the shots. But, that being said, I didn't really have a feel for the actual camera settings used. Nor was I able to analyze how those settings are influencing the look of my pictures. So I decided that I wanted to do some analysis.

EXIF-Stats-1.jpg

I had read about PhotoStatistica, a $2.99 app for the Mac that's a photo EXIF analysis too. You can point it to a Photos Library, Capture One Catalog, or a folder full of pictures, and it will analyze the EXIF data and present it to you in a variety of visualizations including bar graphs and pie charts.

Once you've created a stats sheet, you can save it as a .photostats file, or export it in CSV format. With the former, you can revisit it at any time, and with the latter, you can incorporate it into other reporting documents.

As for my shooting, it was really interesting. Here are the highlights for my street photography with the Fujifilm X100V.

  • Most Common Aperture Setting was f/5.6 - I think a lot of this happened because of program mode in decent lighting. When I look at aperture bands (or groups) f/4-f/8 was 45 percent of the time, and f/2-f/4 was 41 percent of the time. I rarely shot over f/8.
  • 65 precent of the time I shot at ISO 200 - Another 20 percent at ISO 160. Rarely did I hit ISO 400 or above.
  • Nearly half the time I was using Exposure Compensation - So even though I was in Program mode 85 percent of the time, I used EC frequently to tailor the shot to my tastes. And more often than not, I was overexposing when I did.
  • Exposure times were all over the map - My number one exposure setting was 1/15th, but even that was only 12 percent of the time. The balance was spread over dozens of settings.
  • My most common time of day was 3-4pm. - That actually really surprised me. Subsequent bands were also in the afternoon. Clearly, I'm not a morning person when it comes to street photography.

This data gives me much to think about. Now I'm going to go back and look at the corresponding pictures and think about what I like, and what I want to change. It's going to be interesting to see the adjustments that I make as a result.

Tethered Product Photography with Capture One Pro for Better Efficiency

This has been the year of making my workflows better, and one of the improvements that I wanted to make was increasing the efficiency of creating product shots for TheFilmCameraShop. My theory was that using Capture One's excellent tethered capability would speed things up. And now that I've done it, I was right.

Tethering involves connecting a supported camera via USB cable directly to a computer running Capture One Pro. Once the connection is made, the camera will appear in the Capture Tab where you have a myriad of options and controls. I'll talk about those a bit more in this segment.

You can read the entire article here.

The Essential Steps to Impressive Video Conferencing

If you want to learn more about looking and sounding great for your next online interaction, then I think you'll very much enjoy my latest online workshop, The Essential Steps to Impressive Video Conferencing.

This 1-hour deep dive focuses on the 3 major areas of successful online interaction: Audio, Video, and Environment. During the course, I walk you through a variety of techniques that range from simple using gear that you already have, to improving your chops through a few inexpensive purchases.

The course is currently available for free to our Inner Circle Members on Patreon. Members, just go to our Patreon site, and all the information will be there. If you're not already an Inner Circle Member, you can join us for $5 a month.

The course is also available on our Nimble Photographer Workshop Page for $14.95.

I have tons of great tips and techniques waiting for you there. If you want to get serious about how you come across during online meetings, classes, interviews, and family interactions, then you definitely will want to watch this course.

Digitizing Family Memories Course Now Available Online

Each of the four classes will outline a specific set of steps for you to accomplish. By the end of the course, you will have an organized digital archive of your most valuable family images.

You can sign up for the course by visiting the Workshops page on The Nimble Photographer. The course fee is a reasonable $39 (on sale right now). It includes the 4 class videos, class notes, and access to the class forums that are a part of each movie.

Updates and Such

Inner Circle Members: A big thanks to those who support our podcast and our efforts!

Due to the coronavirus pandemic, we've had to postpone our July photography workshop at Lassen Volcanic Park. We so still have on the schedule, however, our Eastern Sierra event in October.

How to Watch Photos for macOS Catalina and iPadOS - Learn everything you need to know about Photos for the Mac and iPad by checking out my latest course on LinkedIn Learning and on lynda.com. This course is perfect for Mac and iPad based photographers who shoot with iPhone, Mirrorless, and DSLR cameras. It covers both photography and movies. And if I say so myself, it's a lot of fun.

B&H and Amazon tiles on www.thedigitalstory. If you click on them first, you're helping to support this podcast. (The Digital Story is supported by its audience. When you purchase through links on our site, we may earn an affiliate commission.) And speaking of supporting this show, and big thanks to our Patreon Inner Circle members:

Affiliate Links - The links to some products in this podcast contain an affiliate code that credits The Digital Story for any purchases made from B&H Photo and Amazon via that click-through. Depending on the purchase, we may receive some financial compensation.

And finally, be sure to visit our friends at Red River Paper for all of your inkjet supply needs.

See you next week!

More Ways to Participate

Want to share photos and talk with other members in our virtual camera club? Check out our Flickr Public Group. And from those images, I choose the TDS Member Photo of the Day.

Podcast Sponsors

Red River Paper - Keep up with the world of inkjet printing, and win free paper, by liking Red River Paper on Facebook.

The Nimbleosity Report

Do you want to keep up with the best content from The Digital Story and The Nimble Photographer? Sign up for The Nimbleosity Report, and receive highlights twice-a-month in a single page newsletter. Be a part of our community!

Want to Comment on this Post?

You can share your thoughts at the TDS Facebook page, where I'll post this story for discussion.

This has been the year of making my workflows better, and one of the improvements that I wanted to make was increasing the efficiency of creating product shots for TheFilmCameraShop. My theory was that using Capture One's excellent tethered capability would speed things up. And now that I've done it, I was right.

DSCF1790.jpeg

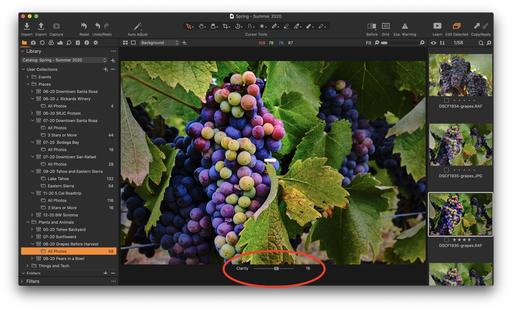
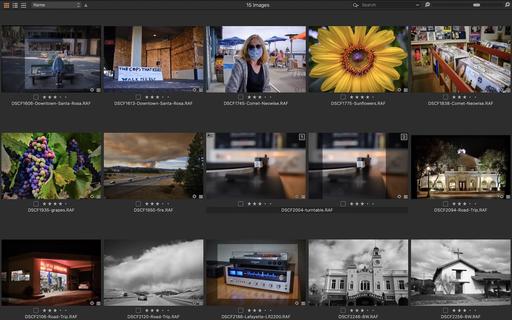
Tethering involves connecting a supported camera via USB cable directly to a computer running Capture One Pro. Once the connection is made, the camera will appear in the Capture Tab where you have a myriad of options and controls.

You can either control the camera from the application, or (as I do) shoot with the camera using its shutter button and instantly view the image on the computer screen. The advantage of this is you're looking at a large, detailed rendering where you can inspect every detail on the fly (and quickly) before moving on to the next shot. There are no surprises with tethered photography.

C1P-Tethered-2.jpg

C1P-Tethered-3.jpg

One of the features that really helps speed up this workflow is the "Copy from Last" setting in the "Next Capture Adjustments." It works like this: You take the first shot, then apply a few tweaks like cropping and exposure. The application remembers those adjustments and applies them automatically to the next image. It's fantastic.

The speed of the shoot really picks up at this point. Take a picture, adjustments applied, review it, take the next picture.

I've set up my shooting bay next to the worktable with my iMac. It's super convenient. My capture camera is a Nikon D700 with a modified focusing screen that gives me a micro prism collar and matte surface. This makes it easy to manually focus the Voigtlander Ultron 40mm f/2 SL IIS Aspherical lens. (BTW: the Voigtlander is a great lens for this task. It has a CPU chip for the Nikon, focuses as close as 1:4, and has beautiful image quality.) If I need more resolution than the 12MP from the D700 (which I rarely do), then I can switch to the Nikon D610 which has 24MP. But that feels like overkill for catalog product shots.

DSCF1787.jpeg

Capture One Pro tethers out of the box with most Nikons and Canons, and selected Sonys and Fujifilm cameras. Unfortunately, there isn't tethered support for Olympus and Panasonic Micro Four Thirds. Too bad, because my EM-1 Mark II with the 30mm macro would be a great capture device for this workflow as well.

Aside from that disappointment, what I really like about this system is that when I'm done with the shoot, I'm done. I've totally eliminated the post production step. I simply output my selects, upload them to TheFilmCameraShop, and I'm finished. I've just improved my efficiency for creating new catalog pages.

C1P-Tethered-5.jpg

One final note: Product photography isn't the most glamorous activity when you're a street photographer at heart. But I have to say, using the classic Nikon D700 with an upgraded SLR-style focusing screen and the beautiful Ulton 40mm lens that's as smooth as butter to operate, has made this otherwise mundane task quite enjoyable. Switching to tethered with Capture One Pro was the icing on the cake.

Learn Capture One Pro Quickly

If you're new to Capture One Pro, you may want to check out my latest online class, Capture One Pro 20 Essential Training on LinkedIn Learning, or, if you're a lynda.com subscriber, you can watch it there as well. It will get you up and running in no time at all.

If you don't have Capture One Pro yet, you can download the 30-day free trial (Mac/Win). No credit card is required, and it's a fully functioning version.

Product Links and Comments

There are product links in this article that contain affiliate tags. In some cases, depending on the product, The Digital Story may receive compensation if you purchase a product via one of those links. There is no additional cost to you.

You can share your thoughts at the TDS Facebook page, where I'll post this story for discussion.
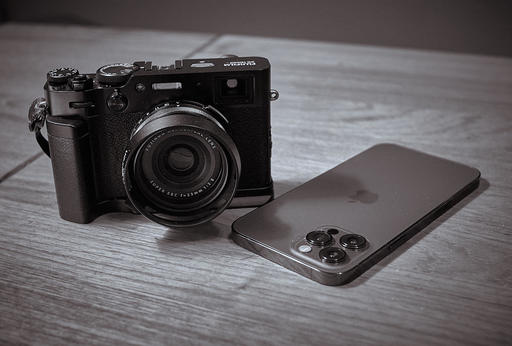
Online meetings, classes, and interviews are more prevalent than ever, and I don't see that changing. And with that, we're moving away from accepting bad video and annoying audio. The fact of the matter is, if you going to be effective in the new world, you'll have to be amiable online. And you can do that right now.

Derrick-Videoconference-2.jpg

Right off the top, I have a few tips for you. Then to double down on that, I have a 1-hour training titled, The Essential Steps to Impressive Videoconferencing that focuses on three key areas: audio, video, and environment.

5 Tips to Up Your Game

  • The Light on Your Face Should be Brighter than the Light Behind You - This is a perennial challenge that I see both online and even on TV. If the light behind you is too bright, the webcam will expose for it and not your face. Therefore, you will be rendered too dark and grainy. Find a way to dim the light behind and increase illumination shining on your face.
  • Make Eye Contact - It's important to look into the camera, not only while you are talking, but when listening as well. Too often people stare at the screen or drift off during the conversation. That will make the person speaking feel like you're not listening to them, even if you are. Practice looking directly into the camera as much as possible.
  • Check Your Bandwidth Before Important Meetings - There are two factors here to consider. First, your WiFi network. If you have more than one to choose from, determine which one is providing the best connection to the router and use it. Second, check your overall performance using a free service such as Speedtest. The rule of thumb is that you need a minimum of 1.5 Mbps for upload and download. My real world experience has taught me that the minimum is more like 5 Mbps, and more is better.
  • Make Good Audio a Priority - We all want to look good online, but our words are more important. Pleasant, clear audio makes people more receptive to what you are saying. There are a number of factors that contribute to good audio including the type of mic, its proximity to your mouth, and the acoustics of the room. If you want to hear how you sound, try a free Skype test call. It will record your online voice and play it back to you. And if you're using a computer for your videoconferencing (as opposed to your phone), then I recommend you use an external mic if you're not satisfied with the sound that's played back to you in testing.
  • Do a Dry Run 10 Minutes Before Your Online Meeting - If you have a conference call at 11 am, then sit down at your desk at 10:50 am for your dry run. Start by checking your bandwidth. Then check your picture and audio. On the Mac, I use QuickTime player. Go to File > New Movie Recording. Click on the little arrow that's next to the Record button to choose your camera and audio imput. Then make a short movie and listen to it. If everything checks out, then you should be good to go. Finally, log on to your conference site (Zoom, Skype, etc.) a couple minutes early to check your settings there. Once those are confirmed, you can be confident that you'll have a great start to the meeting.

I delve deeper into the details of these tips in The Essential Steps to Impressive Videoconferencing. But these alone should help you improve your presence online.

One final note, the online training I mention here is free to Inner Circle Members who support The Digital Story through Patreon. You might want to consider joining. Not only do you get this training, there are lots of additional benefits as well.

You can share your thoughts at the TDS Facebook page, where I'll post this story for discussion.
This is The Digital Story Podcast #741, June 2, 2020. Today's theme is "How to Interview and Record from Remote Locations." I'm Derrick Story.

Opening Monologue

I've talked a lot about preserving family memories from the past, but how about capturing what's going on right now? We may be physically separated from those we care about, but that doesn't mean that we can't capture their thoughts and feelings with video and sound. You can do it affordably and with excellent quality. And on today's TDS podcast, I'll show you how.

How to Interview and Record from Remote Locations

Some of the most important video that I have is of my late father talking about his life experiences. About a decade ago, I sat him down in front of a video camera and interviewed him. We were lucky. We were within driving distance of one another, so this was physically possible. And what he had to say was fascinating.

boys-online-1024.jpeg

Right now, our friends and family are experiencing things that future generations may appreciate. Imagine being able to hear what your Great Grandfather was thinking in the middle of the Great Depression? That wasn't possible then, but we can capture how others feel right now in the middle of this pandemic and social unrest. And we can do so remotely.

This podcast builds upon ideas and techniques that I've discussed in Digitizing Family Memories and in Call Recorder y Ecamm Software. You can record multitrack, picture in picture, or split screen video with audio. Then you can fine tune the content using Ecamm Movie Tools afterward.

If you want to see what this looks like, here's a picture-in-picture family discussion during shelter in place.

Basic Steps for Setting Up a Remote Interview

  • Make Sure Both Sides Can Videoconference
  • - In this workflow, both sides will need to be able to connect to Skype and communicate using audio and video.

  • Set Up Call Recorder Software on Your Computer - You can purchase the entire toolbox for $39, then install it on your computer and test it using Skype.
  • Keep the First Interview Relatively Short - Let the interviewee know ahead of time that you would like 2-3 interview sessions. Use the first session not only for content, but to evaluate the quality of the audio and video. Don't cover the most important topics in the first online meeting.
  • Keep the Limelight on the Person Being Interviewed
  • - Keep your interviewee front and center. You can be the embedded picture, or if you wish, side by side, but don't overshadow the person who is the star of the show.

  • Don't Be Afraid to Edit - There will be plenty of outtakes and dead air. Don't be afraid to trim as needed. Most of this will happen at the beginning of recording and at the end.

As I said earlier, it is important to preserve family memories from years ago. But I think it's also imperative that we hear from those we care about right now, and make that content available to future generations.

The Essential Steps to Impressive Video Conferencing

If you want to learn more about looking and sounding great for your next online interaction, then I think you'll very much enjoy my latest online workshop, The Essential Steps to Impressive Video Conferencing.

This 1-hour deep dive focuses on the 3 major areas of successful online interaction: Audio, Video, and Environment. During the course, I walk you through a variety of techniques that range from simple using gear that you already have, to improving your chops through a few inexpensive purchases.

The course is currently available for free to our Inner Circle Members on Patreon. Members, just go to our Patreon site, and all the information will be there. If you're not already an Inner Circle Member, you can join us for $5 a month.

The course is also available on our Nimble Photographer Workshop Page for $14.95.

I have tons of great tips and techniques waiting for you there. If you want to get serious about how you come across during online meetings, classes, interviews, and family interactions, then you definitely will want to watch this course.

Buy 3 M.Zuiko Lenses, Get an OM-D Body Free

This is a wild offer. Purchase these three lenses: 7-14mm f/2.8 PRO, 40-150mm f/2.8 PRO, and the 300mm f/4 PRO, and choose a Pro body: E-M1X, E-M1 Mark II, or E-M1 Mark III. You'll spend about $5,800 for the entire kit, but the savings range between $1,700 and $3,000 depending on which camera you choose.

You can learn more by visiting getolympus.com/freeomd. Offer valid June 1, 2020 through July 5, 2020. Available in the United States only. Customer must purchase all three lenses and one of the three OM-D bodies listed above at the same time in order to be eligible for the free camera body. All products must be purchased at full retail price.

I clicked on the Buy Now link, and it just took me over to a page to buy the camera, not the kit. So I would wait a day or so to see if they get this ironed out.

Digitizing Family Memories Course Now Available Online

Each of the four classes will outline a specific set of steps for you to accomplish. By the end of the course, you will have an organized digital archive of your most valuable family images.

You can sign up for the course by visiting the Workshops page on The Nimble Photographer. The course fee is a reasonable $39 (on sale right now). It includes the 4 class videos, class notes, and access to the class forums that are a part of each movie.

Updates and Such

Inner Circle Members: A big thanks to those who support our podcast and our efforts!

Due to the coronavirus pandemic, we've had to postpone our July photography workshop at Lassen Volcanic Park. We so still have on the schedule, however, our Eastern Sierra event in October.

How to Watch Photos for macOS Catalina and iPadOS - Learn everything you need to know about Photos for the Mac and iPad by checking out my latest course on LinkedIn Learning and on lynda.com. This course is perfect for Mac and iPad based photographers who shoot with iPhone, Mirrorless, and DSLR cameras. It covers both photography and movies. And if I say so myself, it's a lot of fun.

B&H and Amazon tiles on www.thedigitalstory. If you click on them first, you're helping to support this podcast. (The Digital Story is supported by its audience. When you purchase through links on our site, we may earn an affiliate commission.) And speaking of supporting this show, and big thanks to our Patreon Inner Circle members:

Affiliate Links - The links to some products in this podcast contain an affiliate code that credits The Digital Story for any purchases made from B&H Photo and Amazon via that click-through. Depending on the purchase, we may receive some financial compensation.

And finally, be sure to visit our friends at Red River Paper for all of your inkjet supply needs.

See you next week!

More Ways to Participate

Want to share photos and talk with other members in our virtual camera club? Check out our Flickr Public Group. And from those images, I choose the TDS Member Photo of the Day.

Podcast Sponsors

Red River Paper - Keep up with the world of inkjet printing, and win free paper, by liking Red River Paper on Facebook.

The Nimbleosity Report

Do you want to keep up with the best content from The Digital Story and The Nimble Photographer? Sign up for The Nimbleosity Report, and receive highlights twice-a-month in a single page newsletter. Be a part of our community!

Want to Comment on this Post?

You can share your thoughts at the TDS Facebook page, where I'll post this story for discussion.
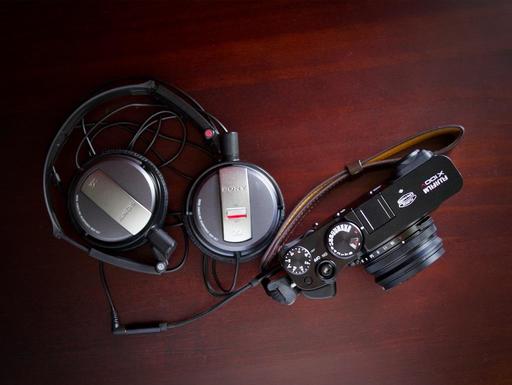
It got to a point after 30 days of isolation, that I would pull out my camera bags just to revisit my gear. I'd dust off the lens, check the battery, then fire off a few frames in the direction of the cat.

Olympus-PEN-F-Indoors-1024.jpeg

I hadn't shot with the Olympus PEN-F for a while, and I wanted to put it to work. Not just for goofing around, but for something meaningful. I began to consider it for a task that I never really thought about before: video.

After all, it does have a mini-HDMI port, flip screen, and some decent controls. I did a little research on the camera for movie making and didn't find a lot. El Gato didn't even have Olympus cameras on their "approved" list for Cam Link. My curiosity was piqued.

One of the nice things about the PEN-F is its size. It would actually fit in the MeFOTO SideKick bracket that was designed for smartphones. This was a big win, because the SideKick is really easy to adjust and work with.

Also, the HDMI output is clean with the PEN-F. That means that I can send just the image it sees without any settings display or other distracting information. And the image isn't cropped either. I was able to stream 1080p at full frame. This is a really big deal, because now this camera can be used as a super high quality webcam.

Another win was the Olympus 17mm f/1.8 lens. It provides a "not too wide" 34mm field of view (so I don't have to clean every corner of the room behind me), but better yet, the snap-focus feature allows me to easily use it as a manual focus lens on the fly, which I much prefer for video work. Focus once and don't worry about it.

I reprogrammed exposure compensation for the ring around the shutter button, so it's really easy to add or subtract exposure but just reaching up and moving it. I'm fortunate because I already had an El Gato Cam Link interface before the pandemic hit. They are hard to find now, even the IOGEAR Interface is backordered.

My point is, however, that I never thought of the PEN-F as a video camera. For me, it was a wonderful still photography urban explorer companion. But I wasn't getting to shoot with it that way. And I probably won't yet for a while.

But now I'm using it practically every day for my indoor video work. And I love it all over again! It was the main camera for my upcoming release of The Essential Steps to Impressive Video Conferencing course, and continues to work daily at the studio for video conferencing.

Who knows what other things your favorite camera can do. I'm sure it has some hidden talents as well. Get it out of the bag, fire it up, and see what you discover.

There are product links in this article that contain affiliate tags. In some cases, depending on the product, The Digital Story may receive compensation if you purchase a product via one of those links. There is no additional cost to you.

You can share your thoughts at the TDS Facebook page, where I'll post this story for discussion.
This is The Digital Story Podcast #740, May 26, 2020. Today's theme is "5 Ways to Improve Your Videoconference Presence." I'm Derrick Story.

Opening Monologue

One way or another, you're going to find yourself sitting in front of a webcam. It could be for work, for family, for class or even for a job interview. But unlike a lot of other modern day situations we find ourselves in, no one has really told us how to do this. That is, until today. I hope you enjoy the show.

5 Ways to Improve Your Videoconference Presence

Needless to say, I've had some interesting online conversations over the last couple months. I have seen parts of people's houses that I really wasn't prepared for. And then, there's been the mix of interesting lighting and tin can audio.

videoconference-setup-1024.jpeg

So, I've decided to take the microphone by the horns and do two things for my contribution to the greater video conferencing world. First, I have some tips today that are easy to enable and that you can do right now. Then second, later this week, I'm releasing "The Essential Steps to Impressive Video Conferencing," a 1-hour movie that covers audio, video, and environment. I'll talk more about it later this show. But I'm going to mention now that it will be free to our Inner Circle Members who support this podcast on Patreon.

But for the moment, let's get to those 5 tips.

5 Tips

  • Get Thee to Ikea - Your conference call lighting should be diffused and from the front. A good rule of thumb is that the light shining on your face should be brighter than the background. Go to Ikea.com and search on diffused lighting. You have choices among a number of lamps that would make perfect light sources for your online persona. And if you have a north facing window, that will work as well. Just put it in front of you, not behind. And finally, think Daylight Balance for your bulbs. Tungsten bulbs will render you orange and fluorescent tubes will make you green. Whatever light source you ultimately settle on, try to get it as close to daylight balance as you can.
  • Darling You Look Marvelous! - Unfortunately, the built-in 720p webcam for many laptops and desktop isn't a flattering camera. Plus, you can't really adjust it. But, if you can get your hands on a a digital interface, such as Cam Link, then you can connect your wonderful mirrorless camera. The difference is striking. I'm using an Olympus PEN-F with 17mm f/1.8 lens. Oh, and don't forget to look into the lens when talking!
  • What the Hell Is that Behind You?! - We don't want to see your bed, your laundry, nor your aluminum recycling bin - too much information of the wrong kind. Just like in photography, the background is almost as important as the subject. Keep it clean and don't show us anything that we don't want to see.
  • Sound as Good as You Look - Audio can also be a challenge. Some built-in computer mics are quite decent, but others leave much to be desired. If you have a set of AirPods, those can improve your sound for both computer conferencing or while on the phone. For details on how to set them up, check out my article, How to Connect AirPods to Your Mac for Videoconferencing.
  • Bandwidth, Bandwidth, Bandwidth! - If you've been cheaping out on your Internet service, you an endangered of becoming the zebra at the back of the pack in the new world. Video conferencing relies on data packets flying back and forth in real time, and that requires at least 1.5 Mbps (Megabits per second for both directions (download and upload). You can check your bandwidth here.

You can watch a BTS video of me using my rig. I have a USB mic with the PEN-F. More to come on this topic in the next story.

The Essential Steps to Impressive Video Conferencing

If you want to learn more about looking and sounding great for your next online interaction, then I think you'll very much enjoy my latest online workshop, The Essential Steps to Impressive Video Conferencing.

This 1-hour deep dive focuses on the 3 major areas of successful online interaction: Audio, Video, and Environment. During the course, I walk you through a variety of techniques that range from simple using gear that you already have, to improving your chops through a few inexpensive purchases.

The course will be available free to our Inner Circle Members on Patreon on Sunday, May 31. Just go to our Patreon site, and all the information will be there. If you're not already an Inner Circle Member, you can join us for $5 a month.

I will also make the course available on June 2 at our Nimble Photographer Workshop Page for $14.95.

I have tons of great tips and techniques waiting for you there. If you want to get serious about how you come across during online meetings, classes, interviews, and family interactions, then you definitely will want to watch this course.

A Shout Out to Members Who Have Sent Film Cameras

It's been wonderful interacting with the recent contributors to TheFilmCameraShop. Here's a shout out to: Greg, Sergio, Bill, Tim, Nonnie, David, Paul, and Dave. All of you rock!

If you found a film camera that you're no longer using, our new Donation Kit makes it easy to pack and ship. Just visit the Contact Form on thenimblephotographer.com, click the box next to Donating a Film Camera, and let me know what you have. In your note, be sure to include your shipping address.

If it's a camera we can use for the shop, I'll send you a Donation Kit that includes a USPS Priority Mail shipping box and prepaid label. All you have to do is tape it up, insert the camera, and add the label. USPS will pick up your shipment from the front door of your house during their regular mail delivery. It's that simple!

Your donation help get analog gear in the hands of aspiring fine art photographers, and the proceeds help support this podcast.

Digitizing Family Memories Course Now Available Online

Each of the four classes will outline a specific set of steps for you to accomplish. By the end of the course, you will have an organized digital archive of your most valuable family images.

You can sign up for the course by visiting the Workshops page on The Nimble Photographer. The course fee is a reasonable $39 (on sale right now). It includes the 4 class videos, class notes, and access to the class forums that are a part of each movie.

Updates and Such

Inner Circle Members: A big thanks to those who support our podcast and our efforts!

Due to the coronavirus pandemic, we've had to postpone our July photography workshop at Lassen Volcanic Park. We so still have on the schedule, however, our Eastern Sierra event in October.

How to Watch Photos for macOS Catalina and iPadOS - Learn everything you need to know about Photos for the Mac and iPad by checking out my latest course on LinkedIn Learning and on lynda.com. This course is perfect for Mac and iPad based photographers who shoot with iPhone, Mirrorless, and DSLR cameras. It covers both photography and movies. And if I say so myself, it's a lot of fun.

B&H and Amazon tiles on www.thedigitalstory. If you click on them first, you're helping to support this podcast. (The Digital Story is supported by its audience. When you purchase through links on our site, we may earn an affiliate commission.) And speaking of supporting this show, and big thanks to our Patreon Inner Circle members:

Affiliate Links - The links to some products in this podcast contain an affiliate code that credits The Digital Story for any purchases made from B&H Photo and Amazon via that click-through. Depending on the purchase, we may receive some financial compensation.

And finally, be sure to visit our friends at Red River Paper for all of your inkjet supply needs.

See you next week!

More Ways to Participate

Want to share photos and talk with other members in our virtual camera club? Check out our Flickr Public Group. And from those images, I choose the TDS Member Photo of the Day.

Podcast Sponsors

Red River Paper - Keep up with the world of inkjet printing, and win free paper, by liking Red River Paper on Facebook.

The Nimbleosity Report

Do you want to keep up with the best content from The Digital Story and The Nimble Photographer? Sign up for The Nimbleosity Report, and receive highlights twice-a-month in a single page newsletter. Be a part of our community!

Want to Comment on this Post?

You can share your thoughts at the TDS Facebook page, where I'll post this story for discussion.