Recently in Photography

  Page 105 of 385 in Photography  

Who is the Canon 5D Mark IV for?

Some news sites have labeled the Canon 5D Mark IV as the most anticipated camera of the year. I think in part that's because it has been a long time since we saw the Mark III. So fair enough.

canon-5D-v4-web.jpg

But a lot has changed over those years, and I'm wondering who this latest version is for? After all, it's a hefty investment at $3,499.

I think those who stuck with the 5D Mark II are prime candidates for this latest model. With the new sensor, vastly improved autofocusing, increased frame rate, and built-in wireless connectivity, it's finally time to demote the trusty Mark II to the role of backup camera. Plus, c'mon, how long has it been since your upgraded your DSLR?

I also think the 5D Mark IV is a good choice for freshly-minted professional photographers, especially those who cover events, weddings, and shoot portraits. If this camera has the longevity that the Mark II provided for those like me, then the $3,499 is a sound investment for the long haul.

Beyond those scenarios, however, the choices are less clear. With the innovations rolled out by Sony, Fujifilm, Olympus, and other mirrorless providers, plus the latest DSLR releases from Nikon and Pentax, the 5D Mark IV faces strong competition.

As for me, I'm waiting to see what Olympus is going to do the the OM-D E-M1 update, and the OM-D E-M5 Mark III. The OM-D line is providing me with everything that I want right now. And they are far more affordable.

Like I said, a lot has changed over the last few years.

Capture One Pro Tips and Techniques

Improve your skills by watching Capture One Pro Essential Training now available on lynda.com. More than 5 hours of tips, tricks, and techniques. Plus many free movies using advanced techniques.

I've also created a dedicated Capture One Pro Training page on The Digital Story. You can follow all of the tips and techniques that I publish in one convenient spot.

Thinking About Making the Transition from Aperture or Lightroom? - Download my free eBook titled, Rocky Nook's Guide to Moving to Capture One Pro. I show you the steps to create a test library, then build the foundation for a smooth transition to Capture One Pro.

Want to Comment on this Post?

You can share your thoughts at the TDS Facebook page, where I'll post this story for discussion.

This is The Digital Story Podcast #546, August 13, 2016. Today's theme is "The Black & White Project." I'm Derrick Story.

Opening Monologue

Over the past few days, I've been seeing the world in Black & White. "How?" you may ask. It's been through the viewfinder of my Olympus OM-D E-M5 Mark II, set in monochrome mode. And as a result, I saw the rugged landscape of Pt. Reyes in a whole new way. What I discovered is the subject of today's podcast.

The Black & White Project

I had toyed with this idea before. But after spending an entire day scouting for the TDS Pt. Reyes Photography Workshop, it dawned on me that the foggy mornings, hillsides covered in tall grasses, and charismatic trees were perfect elements for monochrome work. So that night, I pitched the idea to my workshop group.

P8214005-BW-Pt-Reyes.jpg

The key elements go like this...

  • The project works best for those who have mirrorless cameras with electronic viewfinders that let photographers compose the scene in monochrome.
  • Shooting in RAW+Jpeg allows for the Jpegs to be B&W, while still having a full color RAW of the scene.
  • With the absence of color, I found it easier to work with the main element of the composition.
  • I also slowed down, carefully zooming in and out looking for just the right arrangement of elements.
  • Then, on the computer, I found it interesting to see which shots looked better in B&W, and which ones in color, And shots were clearly one or the other.

I've published a small gallery of photos from this project so you can see what I was seeing through the viewfinder all weekend. I have to tell you, it was a blast.

In the News

How to Figure out what to charge for your next portrait assignment via The Phoblographer.

This is a challenge for freelancers and emerging pros alike. How much do you charge for a portrait shoot? The key is to analyze all the steps involved in the project, and the time that it takes to accomplish them, then attach a dollar amount to the endeavor.

I break my shoots into 3 categories: preparation, actual shoot time, and post production. All of those have to be accounted for. But also, you need to consider consultation, travel costs, and gear investment. This article helps put all of these things, and more, into an equation that will hopefully lead to to determining how much to charge.

Hedge Free License

Not sure if Hedge will improve your workflow speed drastically? Go to hedgeformac.com/tds, download the app, and you'll receive a free 10-day pass to give it a thorough test run. If you like, there's a link to a 20 percent discount there for you too."

And if you're a Lightroom user, try the free trial and think about how this could help your Lightroom import experience. Next week I'm going to discuss how Hedge can better integrate with Lightroom, and we want to hear your thoughts.

Keep these three things in mind...

  • Hedge is the fastest app for importing and backing up media on macOS.
  • Import multiple sources to multiple destinations, at the same time.
  • Every file copied by Hedge is cross-verified with the original.

There's a free version and a premium version. Use this URL, hedgeformac.com/tds and save 20 percent off the price of the pro version that provides the full Hedge experience with Fast Lane copies, unlimited simultaneous transfers, plus NAS and RAID support.

SmugMug is Helping Save 200 Million Photos Lost when Picturelife Died

When photo storage site Picturelife shut down, users were left high and dry without a way to access and/or download the images they had stored there. This didn't sit well with SmugMug, who reached out to Picturelife and, today, is helping reunite those photographers with their lost images.

In all, some 200 million files were lost into the ones and zeroes of Internet history when Picturelife went under--but out of this sad tale came 200 million opportunities for SmugMug to be both altruistic, and maybe snag a customer or two for themselves.

It's important to note that it will cost you nothing to take advantage of this offer from SmugMug. It's something SmugMug was adamant about.

You can read more about this and get the link to begin retrieving your images in this Petapixel article.

Updates and Such

The fourth episode of The Nimble Photographer Podcast is not posted for our Patreon supporters. If you wish to join the inner circle to support this show, click on the Patreon tile that's on all the pages of The Digital Story.

And finally, be sure to visit our friends at Red River Paper for all of your inkjet supply needs.

I'm currently working on an article that will show you the easiest way to print fine art greeting cards with Capture One Pro and Red River Fine Art Card Stock. I think C1 users are going to dig this. And I'll let you know as soon as it's live.

See you next week!

More Ways to Participate

Want to share photos and talk with other members in our virtual camera club? Check out our Flickr Public Group. And from those images, I choose the TDS Member Photo of the Day.

Podcast Sponsors

Red River Paper - Keep up with the world of inkjet printing, and win free paper, by liking Red River Paper on Facebook.

MacPaw Creators of CleanMyMac 3 and other great software for Apple computers. Visit www.macpaw.com today.

Hedge for Mac - The fast solution for moving photos and videos from memory cards to drives, or drives to drives for that matter. Learn more at Hedge for Mac.

The Nimbleosity Report

Do you want to keep up with the best content from The Digital Story and The Nimble Photographer? Sign up for The Nimbleosity Report, and receive highlights twice-a-month in a single page newsletter. Be a part of our community!

Want to Comment on this Post?

You can share your thoughts at the TDS Facebook page, where I'll post this story for discussion.
During our TDS Photography Workshop in Pt. Reyes, CA, I put forth the idea of working in B&W over the course of the event.

P8203873-BW-Tomales.jpg Skipper on Thistle flower. Olympus OM-D E-M5 Mark II with 40-150mm f/2.8 PRO zoom in monochrome mode. Photos by Derrick Story.

Since many of the participants had mirrorless cameras with electronic viewfinders, we could view the beautiful Northern California landscape in Black & White right there in our cameras. I consider this a wonderful feature that makes this type of capture even more exciting.

Another nice feature is the ability to shoot in RAW+Jpeg. In my case, my Jpegs were the monochrome images, recorded at full resolution with SuperFine compression. But I still had the corresponding RAWs for each shot. This provided me the luxury of choosing which version I liked best for any given scene.

P8214009-BW-Pt-Reyes Tomales Point. Olympus OM-D E-M5 Mark II with 14-42mm EZ zoom in monochrome mode.

I was surprised at how often I liked the monochrome better. Yes, I had anticipated that some of the landscape scenes would look great in B&W, but I was delighted that many of the wildlife images looked great too.

P8213932-BW-Pt-Reyes Olympus OM-D E-M5 Mark II with 40-150mm f/2.8 PRO zoom in monochrome mode.

Because the monochromes were Jpegs, I knew that I would be able to edit them quite as much as the RAW files (although they held up better than I anticipated). So I did try extra hard to get them right in the camera. I think this led to me slowing down a bit and really enjoying the experience of photographing the diversity of Pt. Reyes.

P8203907-BW-Tomales Olympus OM-D E-M5 Mark II with 9mm "lens cap" fisheye in monochrome mode.

A few of our photographers also went this route and created very artistic images. Others stuck with RAW and converted to B&W in post. But almost everyone shared a stunning monochrome or two during our class presentation at the end of the workshop.

P8203880-BW-Tomales Olympus OM-D E-M5 Mark II with 40-150mm f/2.8 PRO zoom in monochrome mode.

So what's my conclusion after this artistic experiment? I think I'm going to use this technique more often. I really don't have anything to lose with RAW+Jpeg, and I felt that my concentration was improved while shooting. Not to mention that I really like some of the images.

Capture One Pro Tips and Techniques

I cataloged and fine tuned these images with Capture One Pro. If you want to learn how to work with your photographs in this application, check out Capture One Pro Essential Training, now available on lynda.com. More than 5 hours of tips, tricks, and techniques. Plus many free movies using advanced techniques.

I've also created a dedicated Capture One Pro Training page on The Digital Story. You can follow all of the tips and techniques that I publish in one convenient spot.

Thinking About Making the Transition from Aperture or Lightroom? - Download my free eBook titled, Rocky Nook's Guide to Moving to Capture One Pro. I show you the steps to create a test library, then build the foundation for a smooth transition to Capture One Pro.

Want to Comment on this Post?

You can share your thoughts at the TDS Facebook page, where I'll post this story for discussion.
Camera LCDs Do Come In Handy

Generally speaking, I prefer the electronic viewfinders for composing shots. But there are times when the LCDs allow me to capture an image I would otherwise miss.

P8150011-TG4.jpg "Kitty on Upside Down Pot" by Derrick Story.

Parades and events when I need to hold the camera high over my head are the most common situations for LCD framing. But I encountered another scenario the other day where this technique came in handy.

There's a black kitten that loves to play in porch area at my studio. The other day he exhausted himself batting around a seed pod, and jumped up on this turned over pot for a break. I want to photograph him without scaring him off.

So I stood behind the wall inside the studio, next to my screen door, and extended the camera out behind the screen to take the picture. The kitten was fascinated by the appearance of my red TG-4 and a hand, but nothing more. I sure it was oddly entertaining for him.

I was able to see the LCD screen well enough to frame the shot and take the picture. The mesh screen door provided a bit of diffusion, and the light was pretty good. I would have never captured this shot if I had to stand there with a camera to my face looking through a viewfinder. That cat would have been long gone...

The Nimbleosity Report

Do you want to keep up with the best content from The Digital Story and The Nimble Photographer? Sign up for The Nimbleosity Report, and receive highlights twice-a-month in a single page newsletter. Be a part of our community!

Want to Comment on this Post?

You can share your thoughts at the TDS Facebook page, where I'll post this story for discussion.
This is The Digital Story Podcast #545, August 16, 2016. Today's theme is "Conservation Photography." I'm Derrick Story.

Opening Monologue

Most of us probably think that we're ethical photographers. But what does that really mean? Is it a common sense thing, or are there real guidelines to help us act responsibility when photographing landscapes, wildlife, and indigenous cultures? I explore this topic today with Alexandra Garcia, executive director of the International League of Conservation Photographers.

Conservation Photography

I met Alexandra Garcia at the MindShift Gear Headquarters in Santa Rosa, CA. She was working with them on a project, and agreed to take time out with me to talk about conservation photography.

alex-garcia-mindshift.jpg

And you get to listen in thanks to MindShift Gear, who is sponsoring this portion of the podcast, as part of their goal to help outdoor photographers engage with nature and to support the conservation of our environment.

We cover a lot of ground in this 30 minute interview. And I think you'll learn much and enjoy the conversation along the way.

mindshift-gear-logo-1024.jpg This interview with Alexandra Garcia is sponsored by MindShift Gear, supplier of innovative outdoor backpacks for adventure photographers.

In the News

The Top 10 DSLRs and Lenses Canon is Loaning Out at the Rio Olympics via PetaPixel.

Here's how the Canon loans went the first week of the Olympics...

  • EOS 1D X Mark II | Loaned 285 Times
  • EF 200-400mm f/4L IS USM Extender 1.4X | Loaned 231 Times
  • EF 70-200mm f/2.8L IS II USM | Loaned 211 Times
  • EF 400mm f/2.8L IS II USM | Loaned 131 Times
  • EF 24-70mm f/2.8L II USM | Loaned 130 Times
  • EF 600mm f/4L IS II USM | Loaned 126 Times
  • EOS 1D X | Loaned 123 Times
  • EF 8-15mm f/4L Fisheye USM | Loaned 105 Times
  • EF 16-35mm f/2.8L II USM | Loaned 84 Times
  • EOS 1D X Mark II VIP and EF 300mm f/2.8L IS II USM | Both Loaned 77 Times

Hedge Free License

Not sure if Hedge will improve your workflow speed drastically? Go to hedgeformac.com/tds, download the app, and you'll receive a free 10-day pass to give it a thorough test run. If you like, there's a link to a 20 percent discount there for you too.

Keep these three things in mind...

  • Hedge is the fastest app for importing and backing up media on macOS.
  • Import multiple sources to multiple destinations, at the same time.
  • Every file copied by Hedge is cross-verified with the original.

There's a free version and a premium version. Use this URL, hedgeformac.com/tds and save 20 percent off the price of the pro version that provides the full Hedge experience with Fast Lane copies, unlimited simultaneous transfers, plus NAS and RAID support.

Updates and Such

And finally, be sure to visit our friends at Red River Paper for all of your inkjet supply needs.

I'm currently working on an article that will show you the easiest way to print fine art greeting cards with Capture One Pro and Red River Fine Art Card Stock. I think C1 users are going to dig this. And I'll let you know as soon as it's live.

See you next week!

More Ways to Participate

Want to share photos and talk with other members in our virtual camera club? Check out our Flickr Public Group. And from those images, I choose the TDS Member Photo of the Day.

Podcast Sponsors

Red River Paper - Keep up with the world of inkjet printing, and win free paper, by liking Red River Paper on Facebook.

MacPaw Creators of CleanMyMac 3 and other great software for Apple computers. Visit www.macpaw.com today.

Hedge for Mac - The fast solution for moving photos and videos from memory cards to drives, or drives to drives for that matter. Learn more at Hedge for Mac.

The Nimbleosity Report

Do you want to keep up with the best content from The Digital Story and The Nimble Photographer? Sign up for The Nimbleosity Report, and receive highlights twice-a-month in a single page newsletter. Be a part of our community!

Want to Comment on this Post?

You can share your thoughts at the TDS Facebook page, where I'll post this story for discussion.
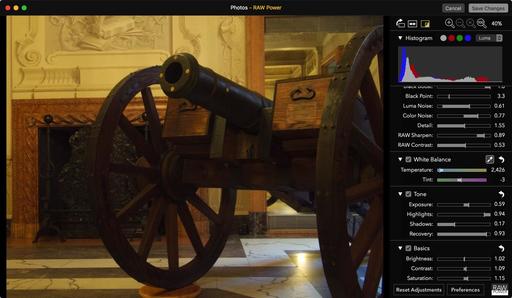
I've been having a blast this summer shooting with my Olympus TG-4, in part because it records the location data for every picture I take. Many of these images end up in my Capture One Pro catalog... geotags in all.

Capture-One-GPS-web.jpg

But what happens from there? To see what's going on, click on the Metadata tab (i) in the toolbar on the upper left side. You'll have to scroll down a bit, but there is an EXIF-GPS brick that lists latitude, longitude, and altitude. So you can indeed confirm that your image has location data.

Google_Maps-Location-web.jpg

There's also a "Show on map" label in the GPS box. If you click on it, you're transported to Google Maps where you can see your location, share it with others, or send it to a mobile device. You'll need an Internet connection for this to work.

If you didn't know the name of the place where you took the shot, you can copy it from Google Maps, return to the Metadata tab in Capture One Pro, and add the info to the IPTC location fields. It's not quite as seamless as Photos for OS X or Lightroom, but it does work well.

So as the Summer continues, I'm going to keep shooting with my TG-4 and uploading those files to my Capture One Pro catalog.

More Capture One Pro Tips and Techniques

Improve your skills by watching Capture One Pro Essential Training now available on lynda.com. More than 5 hours of tips, tricks, and techniques. Plus many free movies using advanced techniques.

I've also created a dedicated Capture One Pro Training page on The Digital Story. You can follow all of the tips and techniques that I publish in one convenient spot.

Thinking About Making the Transition from Aperture or Lightroom? - Download my free eBook titled, Rocky Nook's Guide to Moving to Capture One Pro. I show you the steps to create a test library, then build the foundation for a smooth transition to Capture One Pro.

Want to Comment on this Post?

You can share your thoughts at the TDS Facebook page, where I'll post this story for discussion.
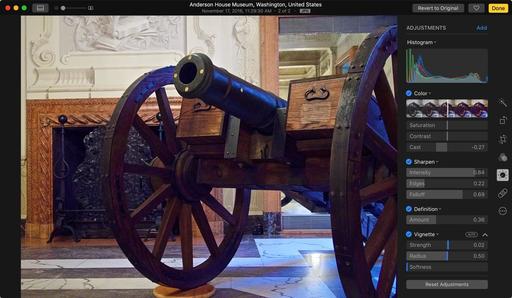
I don't know about you, but I sometimes capture horizons with my smartphone that aren't perfectly straight. (I'm sure it has nothing to do with my one-handed, cavalier shooting lifestyle.) Then there are other times when rotating an image to the left or right actually makes a more interesting composition.

straighten-flickr.jpg

If the destination for this image is Flickr, I can crop, rotate, flip, and straighten right there in the mobile app. This comes in especially handy if you're just ready to upload, notice that the image isn't quite right, and want to fix it without having to exit out of Flickr to another app. Here's a video on how this works.

This is just one of the many conveniences built into the Flickr Mobile app that works wonderfully on Android and iOS devices.

More Flickr Tips and Techniques

If you want to master Flickr on your mobile device, check out Flickr Mobile: Photo Sharing Anywhere. Desktop users might be interested in Sharing Photos with Flickr. Of course the platforms work well together too, and I discuss how you can integrate all of your devices to create a seamless photography workflow.

Want to Comment on this Post?

You can share your thoughts at the TDS Facebook page, where I'll post this story for discussion.
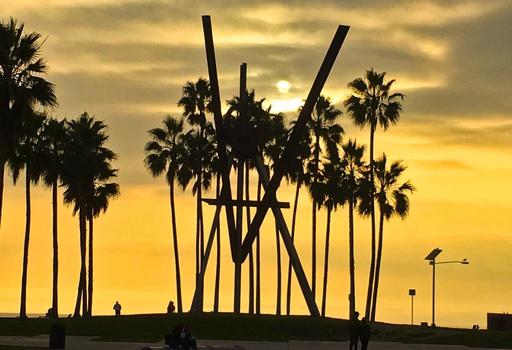
Mac Photographers managing a large catalog of images may prefer Capture One Pro to Apple's homegrown Photos app. But that doesn't mean they have to give up iCloud connectivity to do so. Here's how to connect your Capture One catalog to your iPhone and other iCloud-enabled devices.

export-folder.jpg

On Your Mac

The first thing you want to do is set up an Capture One Export folder in your iCloud Drive. I'm assuming that you have both iCloud and iCloud Drive enabled. If not, you'll need to do this first.

iCloud Drive will be available in the Favorites sidebar on the left side of any Finder window. Click on it once to open it, then create a new folder inside and label it Capture One Export. This will be the destination for the images that you want to export from Capture One Pro to your iOS device.

Create a New Process Recipe in Capture One Pro

Now go to the Output tool tab in Capture One Pro, and create a new process receipt. I would call it iCloud Export. Choose the parameters you want for the images that will be exported to your iCloud account. Here's how I set mine up.

iCloud-process.jpg

Now all you have to do is select one of more images, then run the iCloud Export process. The images will be placed in the Capture One Export folder, then shortly automatically uploaded to your iCloud account.

Seeing Your Images on the iPhone

icloud-drive.jpg

Now open the iCloud Drive app on your iPhone or iPad. You should see the Capture One Export Folder inside. Tap on it, and the pictures you exported from Capture One will be inside. From this point, you can save them to your Camera Roll (Save Image) or open them in another application. They're also available for Instagram, Facebook, and Twitter.

The good news is, that you don't have to give up pro level image management to enjoy iCloud connectivity. Set up your export folder today, and get those images onto your iOS devices.

More Capture One Pro Tips and Techniques

Improve your skills by watching Capture One Pro Essential Training now available on lynda.com. More than 5 hours of tips, tricks, and techniques. Plus many free movies using advanced techniques.

I've also created a dedicated Capture One Pro Training page on The Digital Story. You can follow all of the tips and techniques that I publish in one convenient spot.

Want to Comment on this Post?

You can share your thoughts at the TDS Facebook page, where I'll post this story for discussion.
This is The Digital Story Podcast #544, August 9, 2016. Today's theme is "Optical Threesome." I'm Derrick Story.

Opening Monologue

Since I embraced the philosophy of nimbleosity, I've pared down my lens combinations to groups of three. And unless I'm on a paying gig, that's all I carry. In today's show I share the contents of my five favorite camera kits, featuring a trio of lenses for each. For me, they're the perfect balance of effective photography and traveling light.

Optical Threesome

When I walk out the door prepared for a shoot, I typically have my iPhone, a camera body and three lenses. Now I've thought long and hard about the optics that I pack in my bag. And I've tested many combinations over the years. So I thought you might be interested in the upshot of this research.

lens-groupings-web.jpg

  • Everyday Kit: Olympus OM-D E-M5 Mark II - 14-42mm EZ zoom, 17mm f/1.8, and 45mm f/1.8
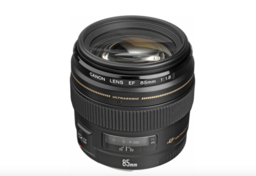
  • Portrait Assignment Kit: Canon 5D Mark II - 24-105mm f/4 L zoom, 70-200 f/2.8 L zoom, 85mm f/1.8 prime.
  • Super Nimble Travel Kit: Panasonic GM5 - Lumix 12-32mm zoom, Lumix 35-100mm zoom, and Lumix 20mm f/1.7 prime.
  • SLR Film Kit: Pentax ZX-5 - 35-80mm Pentax-F zoom, 70-200mm Pentax-F zoom, and 50mm f/1.7 Pentax-F prime.
  • Rangefinder Film Kit: Contax G1 - Zeiss 28mm f/2.8 and Zeiss 45mm f/2.0 prime lenses./li>

So here's my bottom line: Each of these kits provide me with the tools that I need for the job at hand. Yet, they allow me to move as lightly as possible through the world while I work.

In the News

Robbed Olympics Photographer Spots Thief Posing as Him in Venue via PetaPixel.

News Corp photographer Brett Costello was robbed of $40,000 in camera gear at a cafe in Rio a few days ago. Then yesterday, while covering an event at the Olympics yesterday, Costello spotted the thief pretending to be him..

While at the cafe on Thursday, Costello was approached by a woman who began speaking to him in Portuguese. As he was distracted, her accomplice grabbed his rolling case filled with high-end camera gear and took off in a getaway car.

Fast forward a few days. Yahoo Sports reports that while Costello was entering Sambodromo stadium yesterday for the men's archery competition, he noticed another man entering behind him wearing an official photo vest. But not just any vest: Costello's stolen photo vest.

Now Live! Photos for OS X: Extensions for Local Adjustments

Want to see how easy it is to apply local edits to your images using Editing Extensions? Take a look at my new lynda training, Photos for OS X: Extensions for Local Adjustments.

10 Reasons Why Wildlife Photographers Are Crazy

I enjoyed the article on F-Stoppers titled, 10 Reasons Why Wildlife Photographers Are Crazy. Thought I'd share the 10 reasons with you now, then let you jump over to the article as you have time.

  • It's been done.
  • Photo opportunities are rare.
  • No control over subject.
  • Wildlife can be dangerous.
  • The alone time.
  • The preparation.
  • Difficult to make a living.
  • Cost of equipment.
  • Cost of travel.
  • Cost of health.

And yet, people still do it...

Updates and Such

Welcome New Photographers to the TDS Inner Circle

I sent all of our Patreon supporters a note this last week. If you didn't see it, be sure to log into your Patreon account. And yes, the season finale of The Nimble Photographer Podcast airs this coming Friday. You can join the TDS Inner Circle by visiting our page at Patreon.com.

And finally, be sure to visit our friends at Red River Paper for all of your inkjet supply needs.

See you next week!

More Ways to Participate

Want to share photos and talk with other members in our virtual camera club? Check out our Flickr Public Group. And from those images, I choose the TDS Member Photo of the Day.

Podcast Sponsors

Red River Paper - Keep up with the world of inkjet printing, and win free paper, by liking Red River Paper on Facebook.

MacPaw Creators of CleanMyMac 3 and other great software for Apple computers. Visit www.macpaw.com today.

Hedge for Mac - The fast solution for moving photos and videos from memory cards to drives, or drives to drives for that matter. Learn more at Hedge for Mac.

The Nimbleosity Report

Do you want to keep up with the best content from The Digital Story and The Nimble Photographer? Sign up for The Nimbleosity Report, and receive highlights twice-a-month in a single page newsletter. Be a part of our community!

Want to Comment on this Post?

You can share your thoughts at the TDS Facebook page, where I'll post this story for discussion.
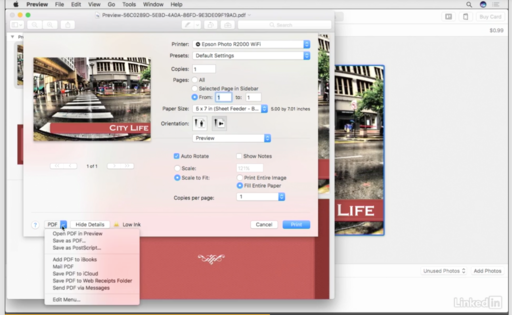
Despite being a diehard Capture One user, I prefer quick portrait retouches in Photos for macOS. Why? (That's crazy, right?) Well, actually it's not, and I'll explain why here.

skin-smoothing-movie.jpg

As you're probably suspecting right now, the key to this workflow is the editing extension functionality in Photos. In this case, I rely primarily on BeFunky and Pixelmator Retouch. Both have a variety of brushes, including soften, that makes it easy to apply basic improvements to a portrait. Here's a movie where I show you how I use a soften brush to minimize sunburn lines.

Other helpful tools include tooth whitening, eye brighting, skin tone, and of course, cloning. These are the common adjustments that I need for my people shots. And I have them right here in Photos.

Then, once I finish an image, it automatically propagates to all of my other computers and devices via iCloud. So the updated image appears on my iPhone, for example, and is ready to share with the world. This is a terrific workflow, especially for your personal work.

Master Photos for macOS

(It's More Powerful than You Think)

VIDEO TRAINING

Want to see how easy it is to apply local edits to your images using Editing Extensions? Take a look at my new lynda training, Photos for OS X: Extensions for Local Adjustments.

And for an overview of all of the great features in Photos, my Photos for OS X Essential Training will get you up and running quickly. I cover everything you need to know to get the most from this surprisingly powerful image management application.

INSTRUCTIONAL GUIDE

The Apple Photos Book for Photographers

For photographers who are more than just casual snapshooters, or who are making the transition from Aperture or iPhoto, The Apple Photos Book for Photographers shines a light on the sophistication of this app and the ecosystem it taps into. Available as an eBook now, and coming to print later this year.

Get it for $15 using checkout code APPLE15!

Want to Comment on this Post?

You can share your thoughts at the TDS Facebook page, where I'll post this story for discussion.