Recently in Photography

  Page 273 of 385 in Photography  

Setting Up the New MacBook Air

software_reinstall.jpg

The new MacBook Air is every bit as elegant in person as it appears on TV. When the shipment arrived this morning, I got right to configuration so I could take it on my trip tomorrow to PhotoPlus Expo in New York.

The typical Mac OS X apps were already loaded (including iLife '11) and backed up on the Software Reinstall USB Flash drive. No more DVDs. First app that I loaded was Aperture 3.1 to see how it would run on the Air. After transferring my photo library and testing for a short period of time, the MacBook Air handled Aperture just fine, even with a connected USB hard drive for my referenced files. I'll have more on this in an upcoming post. But for now, I feel confident going to New York with just the Air, even though I'm on assignment for Lowepro.

Physically speaking, I'm impressed with the keyboard. It's solid and comfortable to type on. It's not backlit, and I'm not surprised considering the thinness of this laptop. The 1440x900 backlit display is plenty bright. I actually have the brightness backed off a bit in normal room lighting. Photographs look terrific on the MacBook Air.

"Instant On" is definitely for real. When I open the laptop lid, rousing it from sleep, the screen illuminates after about a 1 second delay. Close enough to instant for me.

In general, performance is very snappy. I have the 13" 2.13 GHz model with 4 GBs of 1067 MHz DDR3 RAM. It's perfectly quiet, solid, and I think it's going to be fun to have on this New York assignment. Stay tuned for more.


twitter.jpg Follow me on Twitter


iPhoto '11 features an overhauled user interface and lots of fresh code beneath the hood. Touted features include Full Screen Mode, design templates for Email, new book making tool, and better syncing with your Facebook and Flickr sites. In this week's podcast, I take a look at the new iPhoto and share what I've learned using it.

iPhoto '11 Book

I've also published a review of iPhoto '11 on Macworld Magazine if you want more details and insights about Apple's consumer photo management application.

Listen to the Podcast

You can also download the podcast here (26 minutes). Or better yet, subscribe to the podcast in iTunes. You can support this podcast by purchasing the TDS iPhone App for only $2.99 from the Apple App Store.

Monthly Photo Assignment

Fall is the October 2010 Photo Assignment. You can read more about how to submit on our Member Participation page. Deadline for entry is Oct. 31, 2010.

TDS Spring 2011 Photography Workshop

We're making plans now for the Spring 2011 TDS Photography Workshop. If you want your name on the reserve list, just drop me a line.

More Ways to Participate

Want to share photos and talk with other members in our virtual camera club? Check out our Flickr Public Group. It's a blast!

Podcast Sponsors

Red River Paper -- Try the $7.99 Sample Kit.

Make Your Photos Sizzle with Color! -- SizzlPix is like High Definition TV for your photography.

Blurb believes passionately in the joy of books - reading them, making them, sharing them, and selling them. Learn more by visiting Blurb on The Digital Story.


Technorati Tags:
, , , , ,


Lowepro Pro Roller Attache x50

The recently announced Lowepro Pro Roller Attache x50 is an inventive 2-bags-in-one solution that I'm testing for my assignment to PhotoPlus Expo in New York City. I think this is a good trip for the bag because:

  • I'll be on the road for 5 days. Not too long, but certainly not an overnighter.
  • I'm on assignment. I have to take my pro gear and a computer.
  • I have to make a flight connection, so I want to bring my luggage onboard with me.
  • I want to have everything I need, but travel comfortably.
  • Once I arrive, I want to work comfortably.

To pack for the trip, I remove the shoulder bag from inside the roller and load it up with my Canon 5D Mark II, 24-105 mm zoom, 16-35 mm zoom, 50mm f.1.8, LED fill light, Canon 270 EX fill flash, mics, cards, batteries, amd filters. A 13" MacBook goes in the front computer sleeve, and the iPad goes in the back pocket. There's a trolly sleeve that allows me to slide the bag over the handle of the roller.

In the roller itself, I pack my Giottos Vitruvian tripodwith ball head, a couple changes of clothes, toiletries, battery chargers, and misc.

Once I arrive to the hotel, I'll unpack the roller, put the shoulder bag inside the drop-drawer tray, and use the wheels while I'm working on the job. There's a hideaway tripod mount in the extended handle of the bag that I can use as a lightstand while I'm working. When it's time to fly home, I go back to the original configuration.

The Pro Roller Attache x50 is well designed and high quality. It looks sharp lets me carry-on all of my luggage, and has the space and features I need to get the job done. It should be available in retail channels by the end of the year.

If you want to see a movie on how to use the device, here's one that I shot at photokina with the Canon 5D Mark II.


twitter.jpg Follow me on Twitter


Today Apple announced two new models of the MacBook Air. The larger of the two, 13.3", could be the mobile device that nimble photographers have been waiting for.

Macbook Air Dimensions

The specs are impressive:

  • 13.3" LED backlit display at 1440 x 900 pixels
  • Core 2 Duo processor (1.86 GHz) with NVIDIA GeForce 320M graphics
  • Full size keyboard and multi-touch trackpad
  • Up to 256 GB of Flash memory (no traditional hard drive)

Since the device weighs less than 3 pounds, has instant-on, 7 hours of working time, 30 days of standby time, plus you have USB input to Mac OS X, you get many of the benefits or a traditional laptop combined with the portability of an iPad.

This will most likely become the desired computer for photographers on the go. Given that the top-of-the-line model is priced at $1,599, I think many shooters will make the move right away. More to report soon.


twitter.jpg Follow me on Twitter


Is the 70-200mm zoom lens the most important glass in your camera bag? Many pros feel so. In today's podcast I explain why that's the one piece of photo gear I don't want to live without. Weddings, portraits, wildlife, landscape, events... you name it, I'm usually reaching for the 70-200. Listen in, and I'll give you some details.

White Rhinoceros White Rhinoceros photographed with a Canon 70-200mm f/2.8 and a 1.4x Canon extender on a Canon 5D Mark II. Photo by Derrick Story. Click on image for larger version.

Listen to the Podcast

You can also download the podcast here (29 minutes). Or better yet, subscribe to the podcast in iTunes. You can support this podcast by purchasing the TDS iPhone App for only $2.99 from the Apple App Store.

Monthly Photo Assignment

Fall is the October 2010 Photo Assignment. You can read more about how to submit on our Member Participation page. Deadline for entry is Oct. 31, 2010.

TDS Spring 2011 Photography Workshop

We're making plans now for the Spring 2011 TDS Photography Workshop. If you want your name on the reserve list, just drop me a line.

More Ways to Participate

Want to share photos and talk with other members in our virtual camera club? Check out our Flickr Public Group. It's a blast!

Podcast Sponsors

Red River Paper -- Try the $7.99 Sample Kit.

Make Your Photos Sizzle with Color! -- SizzlPix is like High Definition TV for your photography.

Blurb believes passionately in the joy of books - reading them, making them, sharing them, and selling them. Learn more by visiting Blurb on The Digital Story.


Technorati Tags:
, , , , ,


lexmark_interact_s605.png

Mac users who have an "all-in-one" printer and a WiFi network can take advantage of easy wireless scanning throughout the entire home or office. For my Snow Leopard computers, this is another of those " it just works" scenarios... as long as you know which buttons to push. To test this, I fired up three different all-in-ones: a Lexmark, HP, and a Kodak.

I then used the Preview app that comes installed with Mac OS X to control all operations. You can read the details from the test in my latest Macworld article, Scan Images Wirelessly with Preview. The bottom line is, there are some powerful capabilities waiting for you that can make your life easier.

Not only are you free of wires, allowing you to initiate and control a scan from every corner of the network, but there are also intelligent functions such as "detect objects" where the scanning software will create a number of individual scans from a document with many items on it. Very handy.

It's all quite easy, and most likely available to you right now. So start digitizing those documents.


twitter.jpg Follow me on Twitter


Portrait of an Ostrich

During the first day of the TDS Fall Photography Workshop, we loaded up our cameras and went shooting at Safari West. We had our own off-road vehicle with a pro photographer as the driver. As the afternoon sun began to set, the images took on a new life. This is one of many favorite portraits from the shoot.

Portrait of an Ostrich Portrait of an Ostrich by Derrick Story. Click on image for larger version.

I captured the image with a Canon 5D Mark II, 70-200mm f/2.8 L zoom with the 1.4x tele extender. The ISO was 800 with a shutter speed of 1/125 and f/4 aperture.


twitter.jpg Follow me on Twitter


It's that time again!

Tonight is the launch of the TDS Fall Photography Workshop. The highlight of this evening's festivities is the Lowepro Bag Grab.

lowpro_bag_grab_fall2010.jpg Here's what's up for grabs tonight. Click on image for larger version.

Each of the 8 workshop participants gets to choose a Lowepro bag from the heap. The order is determined by a drawing of name tags. I have extra bags in the pile so everyone has a chance to get a preferred choice. The selected bag goes home with the participant.

Red River Paper and SizzlPix Too

But wait, there's more... Each workshop attendee gets a prize package from Red River Paper. Tonight's package includes:

  • Pigment Ink Sample Pack (#9995)
  • UltraPro Satin Pack
  • Printer Cleaning Sheets Pack (#6371)

And on top of all of that, SizzlPix is offering each participant a 20 percent discount.

Upcoming Workshops

If you're interested in attending one of the TDS Photography Workshops for 2011, just drop me a note with the Subject Line: "TDS Workshop Reserve List" and ask that I add you. You'll get first crack at the workshops before the announcement goes out to the general public.


twitter.jpg Follow me on Twitter


I am Tempted by the Canon 60D

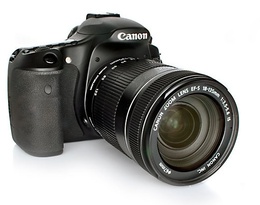
After playing with one at photokina, then continuing to study the specs, I have become quite tempted by the Canon EOS 60DDSLR body.

canon_60d.jpg

It all started with looking for a replacement for my Canon T1i. It's a great body, and I've enjoyed shooting with it, but there are some new features that I want for my work, primarily better video controls and an external mic jack. Initially, I was looking at the Canon EOS Rebel T2i upgrade, but the 60D gives me a swing out LCD, faster burst rate, in-camera Raw processing, image resizing, creative filters, and more.

Seems like for an extra couple hundred dollars, it's a better complement to my 5D Mark II. I'll let you know if I take the leap. As I said, I am very tempted.


twitter.jpg Follow me on Twitter


Adding a vignette in post production is one of those love/hate techniques. Some photographers think it's a powerful tool to move the viewer's eye to the most important part of the composition. Others think it is overused.

I think how it is used is the most important factor. If you go to the fx tab in Adobe Camera Raw 6, you'll find a very flexible post crop vignetting tool that gives you the controls you need for an elegant application of this technique.

Post  Crop Vignetting Post Crop Vignetting applied in Adobe Camera Raw 6.1. Click on image for full size version.

You have three styles to choose from: highlight priority, color priority, and paint overlay. I prefer the look of color priority for most images. Then you have five sliders: amount, midpoint, roundness, feather, and highlights. These give you the control you need to apply an artistic vignette.

The approach I recommend in the beginning, is to move the amount slider all the way to the left. That allows you to clearly see how the other sliders work. This is especially helpful for the roundness slider -- that actually changes the shape of the vignette -- and the feather slider that applies a subtle graduation. Once you have those adjustments set, then back off the amount slider to the appropriate level.

no_vignetting.jpg The Christmas Cactus without Post Crop Vignetting (preview is turned off). Click on image for full size version.

As you can see, there is quite a difference between the two versions. And there are countless variations to what I've done here. Keep in mind that when you work in Adobe Camera Raw, all of your edits are non-destructive. The original image is left unharmed, and you can go back and adjust the effect any time you want.

Adobe Camera Raw 6 is part of the Adobe Photoshop CS5 Upgradealong with Adobe Bridge CS5, which is included in the package too.


twitter.jpg Follow me on Twitter