Recently in Photography

  Page 313 of 385 in Photography  

The Olympus folks write: "This is the PEN Story in stop motion. We shot 60.000 pictures, developed 9.600 prints and shot over 1.800 pictures again. No post production! Thanks to all the stop motion artists who inspired us."

It's a terrific video celebrating the PEN history. And in my opinion, the tradition is going to continue with Olympus E-P1.

More Articles on the Olympus E-P1

If you're interested in the Olympus E-P1, check out my ISO Comparison post. I run at series of photos from the camera staring at ISO 100 all the way up to ISO 6400. I also have a podcast covering the features of the E-P1. I also have a First Look at the Olympus E-P1 article at Macworld Magazine. Another helpful tip is the Olympus E-P1 "Please Check the Status of Your Lens" Message. And finally, if you're interested in getting creative, take a look at Applying Olympus E-P1 Art Filters in Playback Mode.


twitter.jpg Follow me on Twitter

-


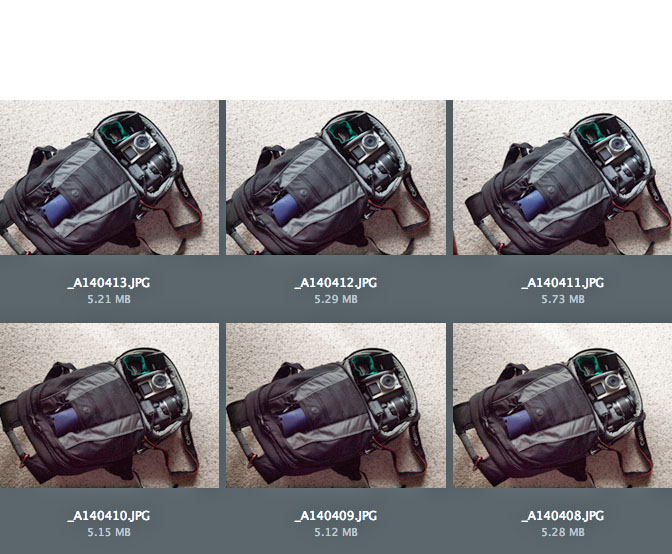
What goes in the camera bag this time? As I prepare for a return trip to Beijing, plus side visits to Japan and S. Korea, I want to travel light, yet have everything I need. I discuss the possibilities in this week's podcast.

Here's a hint for those of you who read these show notes. I'm leaning toward taking the Canon Digital Rebel T1i, battery grip with AAs, 70-200mm f/4 L, 24-105mm f/4 L IS, 18-55mm IS, and 50mm f/1.8. No external flash, but monopod with tripod ring for the 70-200mm. I'm also going to pack the Olympus E-P1 and the Olympus Stylus Tough 8000.

Interesting choices? I'll explain myself during the show.

Listen to the Podcast

You can also download the podcast here (26 minutes). Or better yet, subscribe to the podcast in iTunes.

Monthly Photo Assignment

Soft Background is the July 2009 Photo Assignment. You can create the effect when you shoot with a telephoto or wide aperture lens, or take care of it in post production with Photoshop. You can read more about how to submit on our Member Participation page. Deadline for entry is July 31, 2009.

More Ways to Participate

Want to share photos and talk with other members in our virtual camera club? Check out our Flickr Public Group. It's a blast!

Photo by Derrick Story at the Beijing Olympics in 2008.


twitter.jpg Follow me on Twitter

-


Podcast Sponsors

SiteGrinder lets you take ownership of your websites. Effortlessly output pages right from Photoshop.

Red River Paper -- Try the $7.99 Sample Kit.

Add Magic to Your Slideshows -- FotoMagico presentations are so amazing that your audience will be asking how you did it.


Technorati Tags: , , , , ,

Beautiful 4th of July weather that's perfect for picnicking and fun for sports. When the sun is high overhead, however, your photographs will be very contrasty. Often, what I like to do in these situations is shoot in Raw, then convert the images to B&W in post production. My eye likes gritty, contrasty monochrome images, and there's no better light for that than a high sun on a summer day.

I used one of my favorite street shooting rigs, the Canon Digital Rebel T1i (500D) with the 70-200mm f/4 L zoom. This combo is light, nimble, and provides great image quality. I shot in Raw because I knew I would need all of my options available when I got to post.

Photo by Derrick Story. Canon Rebel T1i, Canon 70-200mm f/4 L zoom. ISO 200.

I processed the photos in Aperture, including the monochrome conversions. It's funny how mood influences the choices I make in post. Today, I felt like pushing the edges, so that's exactly what I did with these shots. I much prefer these to the color versions, which are nice, but just don't have the same tooth.

You can see more images from this series on the TDS Flickr site.


twitter.jpg Follow me on Twitter

-


Fireworks

Pyromaniacs all across the States are gearing up for their favorite day: The 4th of July. Technically, it's an American holiday to celebrate independence from England. But we all know its true popularity stems from great BBQ and dazzling fireworks displays. If you want to capture your own fiery composition, here are a few tips.

Let's start with the basics: turn off your flash. Yes, you're going to be shooting in a dark environment, and if your camera is set to auto flash, it's going to fire. This is the last thing you want, so turn it off.

Next, break out the tripod. You're going to be using long exposures. Use a cable or remote release if you have one. If not, just gently press the shutter button with your finger.

Resist the urge to increase your ISO setting. Keep it at 100 to help reduce image noise. You'll also have to switch to manual exposure. Auto exposure will overexpose your dark skies turning them to mushy gray. Start with a manual setting of 3 seconds at F-5.6 or F-8, and see what you get. Adjust accordingly from there.

If your camera captures in Raw, you may want to consider it for this event. You'll have an easier time recovering blow-out highlights and controlling the shadow areas of the image.

Finally, use a wide angle lens so you can capture as much of the sky as possible. If you know the display is going to peak in a certain area, you can zoom in a bit. Remember, since you're shooting at the highest resolution possible, you can always crop your image later.

These tips will ensure that you come away from your 4th of July celebration with more than a tummy full of hot dogs and beer. Have a great time!


About the Photo
Brian C Davenport went to Windsor,Canada to shoot the Freedom Festival fireworks over the Detroit skyline. Here's how he got the shot.

"It was a very long day but the last 30 min was outstanding," said Brian. "Getting there early in the day gave us a front row seat, right on the shoreline to set up our tripods. I shot about 200 images during the day, and the fireworks shots came out really nice. It was a little tricky as this was a show where there were very few single bursts so there was alot of light in the air most of the time. I settled on 18mm, ISO 100, f8 and 3-5 sec exposure. These settings gave some definition to the bursts without too much "blow-out" of the highlights."

Technorati Tags: , ,

The Olympus E-P1 digital camera supports six Art Filters that allow you to apply effects in-camera. You have a choice of Pop Art, Soft Focus, Pale & Light Color, Light Tone, Grainy Film, and Pin Hole. You can apply the filters to both still images and video. To see how these work, just switch to "Art" on the top mode dial of the E-P1.

Even though you can apply these filters in shooting mode, I prefer to capture in Raw on the E-P1, then do my creative work later in playback mode. Any of the six filters can be applied at that time. The original, untouched Raw file remains in the camera, but you also get a full size 4032 x 3024 Jpeg with the effect. You can apply as many filers as you want to each master file. My personal favorite Art Filters are Pop Art, Soft Focus, Grainy Film, and Pin Hole.

The top image was captured in Raw mode on the Olympus E-P1 (click on it to see larger view). Then later, I applied the Pop Art Art Filter in playback mode. It would have been difficult to capture with the Art Filter on since I was already shooting through a car window. Photo by Derrick Story. See more examples on my Flickr set titled Olympus E-P1 Art Filters.

Technique for Applying Art Filters in Playback Mode

  1. Turn on camera and switch mode dial to "Art".
  2. Choose the Art Filter you want to apply from the six options. Press the OK button.
  3. Go to Playback mode and navigate to the image you want to apply the filter to.
  4. Press the Menu button and navigate to the Playback settings, third category from the top.
  5. Select Edit from this menu.
  6. Click on SEL IMAGE.
  7. Press the OK button and choose RAW DATA EDIT.
  8. Click YES.

The E-P1 will process the image, and within a few seconds you're looking at a new version of the shot with the Art Filter applied. It might seem like a lot of steps to accomplish this when you read the list above, but it actually goes quite fast in practice. Plus, you have the benefit of retaining the Raw file, and working quickly during the shoot. Get the best shot you can on the spot, then get creative later in playback mode.

Of all of the Art Filters, I think Soft Focus is the most practical. It provides a nice amount of filtration without destroying the detail in the image. But I'm sure you'll have your own favorites. This is a great activity for on the plane after flying home from vacation. Just fire up the Olympus E-P1 and get creative. Then, when you get home, download the images to your computer and enjoy.

More Articles on the Olympus E-P1

If you're interested in the Olympus E-P1, check out my ISO Comparison post. I run at series of photos from the camera staring at ISO 100 all the way up to ISO 6400. I also have a podcast covering the features of the E-P1. I also have a First Look at the Olympus E-P1 article at Macworld Magazine. Another helpful tip is the Olympus E-P1 "Please Check the Status of Your Lens" Message.


twitter.jpg Follow me on Twitter

-


Create Artistic Pet Silhouettes from Your Photos

groomer_has_it_web_sm.jpg

Sometimes you just don't know when you'll find inspiration for your next craft project. One of my favorite TV shows, Groomer Has It put a clever spin on the classic art form of black paper silhouettes. In many scenes, the interior walls were decorated with these cute pet profiles, so I was inspired to make one, too.

Take a frontal or profile picture of your pet. Print the image onto an 8.5" x 11" sheet of copy paper. Place your "photocopy" over a piece of black paper and staple the corners to secure the papers together. Use a sharp pair of scissors to cut around the details. Here's cutting a tip: if you move the paper and not the scissors, you'll get a cleaner edges on your silhouette.

When you're done trimming, adhere your cutout to a bright colored, patterned, or neutral background paper using a spray adhesive. Finally, frame Fluffy or Fido, and your artwork is complete!

Illustration from the Groomer Has It show on Animal Planet.

More Creative Output Projects

Be sure to visit our Creative Output studio for more great project ideas.

Hate ICC profiles? Confused by print dialog boxes? You can avoid these headaches and print without pain, if you're willing to give up a little flexibility. In this podcast I use the HP C6380 all-in-one printer as an example of pain-free printing. And of course, I add a few tips and tricks along the way.

Monthly Photo Assignment

Splash is the June 2009 Photo Assignment. You can capture anything from a child jumping in a pool to an olive dropping into a martini. You can read more about how to submit on our Submissions page. Deadline for entry is June 30, 2009 (but you have an extra day or so if you need it). The photo assignment for July is "Soft Background."

Listen to the Podcast

You can also download the podcast here (26 minutes). Or better yet, subscribe to the podcast in iTunes.

You also might be interested in my article, All-in-One Printer Torture Test: HP C6380 vs Kodak ESP 7 Review

Want to share photos and talk with other members in our virtual camera club? Check out our new Flickr Public Group. It's a blast!


twitter.jpg Follow me on Twitter

-


Podcast Sponsors

SiteGrinder lets you take ownership of your websites. Effortlessly output pages right from Photoshop.

Red River Paper -- Try the $7.99 Sample Kit.

Add Magic to Your Slideshows -- FotoMagico presentations are so amazing that your audience will be asking how you did it.


Technorati Tags: , , , , ,

DIY Copy Stand for iPhone 3GS

The camera in the iPhone 3GS has improved close-up capabilities, tap focus, and more resolution than previous models. You can use the 3GS to photograph small objects, business cards, even duplicate 4" x 6" prints. With this DIY copy stand that's easy to make, you can produce high quality images with just a couple taps on its screen.

If you've ever tried close-up work with the iPhone, you know you have two challenges. The first is holding the camera steady enough to avoid camera shake. The second is getting the plane of the camera parallel to the plane of the subject to avoid distortion. This little device helps with both, plus diffuses the light for a more flattering rendering.

I have step-by-step photos showing the key elements of this project on The Digital Story Flickr page. In short, it works like this. You remove the tray from the iPhone packaging, drill a hole in it for the lens to see through, cut an opening in the bottom of a translucent box to set the tray in, and you're done. It's really that simple. I recommend that you start with a box that's at least 6" tall. That will give you enough distance to copy 4" x 6" prints. You can use "risers" such a little boxes to photograph smaller items that need more magnification. Here's a short instructional video that provides a nice overview.

Please feel free to add your comments, improvements, or variations on this project. The iPhone 3GS is a handy little camera, and I want to squeeze every ounce of capability out of it.

More on the iPhone 3GS

iPhone 3GS Movie Making Basics - Video for All

"iPhone 3G S from Photographer's POV" - Digital Photography Podcast 180


twitter.jpg Follow me on Twitter

-


Rim lighting is an effecting approach for both portraits as well as inanimate objects. This May 09 Photo Assignment Gallery shows off some terrific examples of this technique.

The July 2009 assignment is "Soft Background." Start working on your contribution now. Details can be found on the Member Participation page. You can submit photo assignment pictures up to 600 pixels in the widest direction.

jim_stocking_may09.jpg

Please follow the instructions carefully for labeling the subject line of the email for your submission. It's easy to lose these in the pile of mail if not labeled correctly. For example, the subject line for next month's assignment should be: "Photo Assignment: June 2009." Also, if you can, please don't strip out the metadata. And feel free to add any IPTC data you wish (These fields in particular: Caption, Credit, Copyright, Byline), I use that for the caption info.

Photo by Jim Stocking.

Good luck with your July assignment, and congratulations to all of the fine contributors for May. It's a beautiful collection of images.


twitter.jpg Follow me on Twitter

-


Now Available! The Digital Photography Companion. The official guide for The Digital Story Virtual Camera Club.

  • 25 handy and informative tables for quick reference.
  • Metadata listings for every photo in the book
  • Dedicated chapter on making printing easy.
  • Photo management software guide.
  • Many, many inside tips gleaned from years of experience.
  • Comprehensive (214 pages), yet fits easily in camera bag.

Technorati Tags: , ,

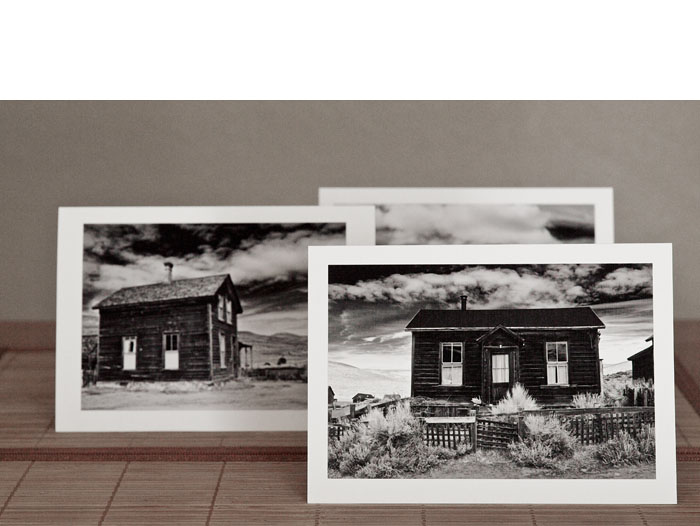
The Canon Digital Rebel T1i (500D) is proving to be an excellent field camera. In my first test, I roamed the streets of San Francisco with a Canon 70-200 mm f/4 L zoom. For my next adventure, I visited Bodie State Park off of Hwy. 395 in Northern California. Since CA may be closing most of its State Parks due to the budget crisis, I wanted to visit Bodie again for what I hope isn't a last look.

Setting Up the Canon T1i

This time, I mounted one of my favorite zooms on the T1i, the 24-105mm f/4 L IS. I used a rotating polarizer for most of the outdoor shots, that were captured early to mid morning. ISO was generally set to 200, which works great on the T1i and gives me a little more exposure latitude. Even though battery life is quite good on the T1i, I did use the BG-E5 Battery Grip ($114) for this trip. It allows me to load two LP-E5 batteries or 6 AA cells. I recommend going the LP-E5 route because it feels lighter in that configuration.

Handling

As I stated in the first test, this DSLR is great in the field. It feels good in the hands, is light on the shoulder, records excellent images, and I have my entire inventory of Canon lenses at my disposal. You can see a catalog of 12 images from this shoot by visiting the Canon T1i Visits Bodie State Park photo set on Flickr. All of the images were captured with the T1i and the 24-105mm zoom.

Video Recording

I've been recording video primarily in the 720p mode (1280 x 720) on the T1i. It's a nice fit for publishing HD on YouTube, plus I get the full 30 fps capture. One major difference with the T1i compared to movie making with the 5D Mark II, is that I don't have an external mic jack on the T1i. I get a lot of ambient sound in addition to the subject I'm recording. But the video itself is terrific. I highly recommend using an IS lens for video recording, or you'll be disappointed with the results.

Final Thoughts

I consider the Canon T1i capable of serious field work, especially when you want to travel light. I carried a small bag that had 3 lenses (18-55 mm IS, 24-105mm IS, and the 70-200 f/4), the T1i, battery grip, polarizer, and extra memory. The bag was light and I was able to capture everything I wanted, the way I wanted, using this rig.

There are two major pitfalls with the Canon T1i in the field that you should be aware of. First, this is not a weather proof camera and will not stand up to harsh elements the way the Canon pro models will. So you have to protect the body when things get stormy. Also, as I mentioned before, there isn't an external mic jack for video capture. So your audio options are pretty limited.

Speaking of video, be sure to have a large capacity Class 6 SDHC memory card. Personally, I like the Sandisk SDSDX3-008G-A31 8GB Extreme III SDHC card for $56. It's tough, fast, and dependable for field work. So, a couple cards like this, an extra battery, and a few light lenses, and you can handle just about any challenge in the field with this camera.


twitter.jpg Follow me on Twitter

-


Technorati Tags: , , , ,