Recently in Photography

  Page 294 of 385 in Photography  
sony_m43rds_competition.jpg

Looking back, Canon may someday regret its decision not to attend PMA 2010.


New concept cameras announced by Sony that will compete in the small DSLR market.


Why would I say that? Because suddenly there was more breathing space for those camera manufacturers trying to make a move in the market. And quite honestly, I'm seeing more traction than I had anticipated from the likes of Sony, Panasonic, Samsung, and Olympus. For example:

  • In addition to its thriving booth atmosphere, Sony announced today its competition to the micro four thirds mirrorless SLRs. Additionally, their flagship DSLR, the Alpha 900, was touted by a series of talks by top professionals such as Andy Katz, and the presentations were impressive. On top of that, Sony released plans for new Zeiss 500mm F4 and 24mm f2 lenses -- solid equipment backed by big marketing dollars. And thanks to a no-show Canon and scaled back Nikon presence, Sony became the star of the show.
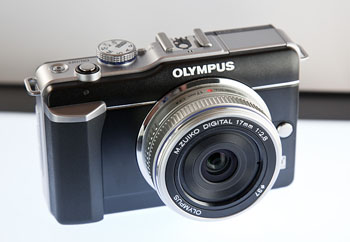
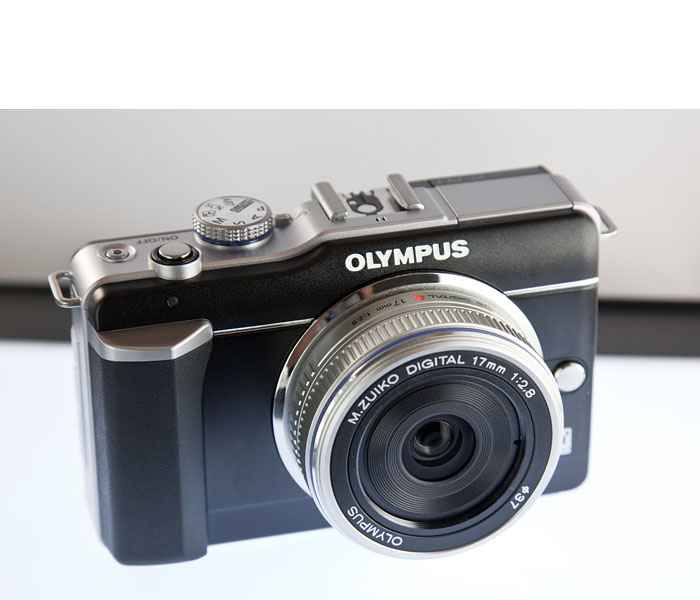
  • Panasonic and Olympus aren't just sitting on their lens caps either. Panasonic continues to attract great interest in its Lumix DMC-GF1 and other micro four thirds bodies, plus keeps pushing forward on developing its lens lineup for these bodies. Olympus was showing off its latest entry, the E-PL1, which offers a great feature set, handsome looks, and runs $200 less than its previous micro four thirds offerings.
  • Samsung was also making a big push on the PMA show floor. There was interest in their new high-end compact, the TL500, that features a fast f-1.8 24-72mm zoom (f-1.8 at the wide end), a flip out screen, and Raw capability. Many view this as a competitor to the Canon S90 (although I much prefer the S90's look and feel).
    • I think it's going to be interesting to see how all of this plays out over the coming months. Surely Canon and Nikon will continue to hold their impressive market share. At the same time, however, I wouldn't take my foot off the gas if I were any of these competitors. Sony saw an opportunity with this tradeshow, and they are definitely seizing the moment.

      gorillapod_magnetic.jpg

      Plenty of Goodies Too

      Of course the floor wasn't just all serious hardware. Accessory companies such as Joby showed off their latest wares. I had fun with the Gorillapod Magnetic that features three neodymium magnets that really latch on to metal surfaces. Now you have a whole new way to steady your compact camera.


      The Joby Gorillapod Magnetic features serious gripping power on metal surfaces.


      Lowepro, Think Tank, and Tamrac each saw a lot of activity in their respective bag booths. Obviously I was focused on Lowepro (since I am their photography evangelist), and saw good reaction to the new SlingShot series that improves on the already popular design. The Pro Rollers were also getting a lot of attention today.

      In terms of what wasn't there, a very noticeable omission today was the lack of software of the show floor. In large part I think this was because Adobe chose not to attend the show. But in general, it felt like the trend this year was more about taking pictures than working with them on your computer.

      I'm sure other things will jump out at me over the coming days. But these were the standouts on my first walk through the expo. I think PMA is still relevant, and many who attended the event today would probably agree.


      twitter.jpg Follow me on Twitter

      -


The Long Way Home

Hwy_395_MG_5807.jpg

With back to back trade shows to attend (NANPA and PMA), I had two choices -- either fly to Reno, then catch another flight to Anaheim, or map out a road trip. Driving does take more time. I'm writing this post in Bishop, CA, about halfway between Nevada and S. California. I'll arrive at PMA tomorrow afternoon. On the other hand, I shot 200 images today at wonderful locations such as Convict Lake, Mono Lake, and scenics south of Mammoth Lakes. So sometimes the long way home is the more beautiful route. It sure was today.

Foothills above Bishop, CA on Highway 395. Captured with a Canon 5D Mark II with a 24-105mm L zoom lens. More photos from this road trip are viewable on The Digital Story Flickr page.


twitter.jpg Follow me on Twitter

-


As a Canon S90 shooter, I was thrilled to see this top notch compact listed in Aperture 3's Raw support list. I did a few preliminary tests, and I liked what I saw in Aperture. But then I started to wonder: How does Aperture's Raw processing compare to Canon's Digital Photo Professional? After all, there's lots going on behind the scenes here, including lens correction.


Top image processed in Aperture 3, bottom picture in Canon's Digital Photo Professional. Click on image to enlarge.


You may recall that I ran a similar test comparing DPP processing to ACR 5.6. In this current test, I tried to take advantage of the unique tools in each application to create the best image possible. I didn't add any sharpening after sampling down, as I normally would, because I wanted to keep the playing field level.

This shot was captured handheld at 28mm, f/5.6, ISO 100. I recorded the photo in Sparks, NV.

Aperture 3 Processing

The top image is processed in Aperture 3. I used the standard Aperture 3 Raw profile for the S90. I then used the following adjustments: Definition, Vibrancy, Levels, Edge Sharpen, and Vignette. You'll notice some distortion in the shot, best illustrated by the orange poll on the left side. Overall, I really liked how Aperture processed this image. It would be nice to have a tool to adjust the distortion in Aperture, but easier asked than programmed, right?

DPP Processing

The second image was processed in Canon's Digital Photo Professional. There aren't as many luminance and color controls as in Aperture, but I did have the Lens Aberration Correction control to counter some of the distortion in the image. Interestingly enough, DPP did not correct the distortion as part of the standard Raw processing. I had to enable the Aberration Correction control to straighten out the pole. And it was a bit odd having the Distortion slider hidden behind the Tune button for Aberration Correction. It does work nicely, however.

Bottom Line

Overall, I really like having all of the various image tools that are available in Aperture 3. But for certain S90 photos that require distortion control, I'll probably open them in DPP first, correct them, then save out as a Tiff for finishing off in Aperture 3 or Photoshop CS4. For everything else, however, I'm going to stick with Aperture 3.

More Aperture Tips and Techniques

To learn more about Aperture 3, check out my Aperture 3 Essential Training on Lynda.com. Also, take a look at our Aperture 3 Focus Section. Tons of free content about how to get the most out of Aperture.

More Articles About the Canon S90

Five Lesser Known (but very cool) Features on the Canon S90

Canon S90 Raw Processing Comparison: DPP vs ACR 5.6 RC

DigiScoping Pro Basketball with the Canon S90

Did Canon Really Improve Image Noise with the PowerShot S90?

"Compacts for Serious Shooters" - Digital Photography Podcast 201

Is the Canon S90 the New G11?


twitter.jpg Follow me on Twitter

-


Photoshop Is My Aperture 3 Video Editor

cs4_video_adj.jpg

Yes you can trim video in Aperture 3, but that's about it. What I needed was a tool for color and luminance adjustments. First I tried roundtripping to iMovie. Quite honestly, that was a disaster. Let's just say that I don't think Aperture and iMovie should see each other any more. I tried to apply filters on export in QuickTime 7. Just too clunky. I even explored some of the free video editors on the Web. Now I know why they are free.

Then it dawned on me. I have Photoshop CS4... Extended. Up until now, having the Extended version didn't mean much to me. I'm not a scientist and I haven't delved into 3D yet. But I can import video, add adjustment layers to it, then render it out using the standard QuickTime export dialog box. This is exactly what I needed.

You can pick any frame in your video to view while you make your adjustments. I worked in layers, just as I would normally. But you don't have to. Then simply go to File > Export > Render Video, and save out the adjusted version. Your entire movie will have the luminance and color correction applied.

I still haven't perfected my workflow for managing videos in Aperture 3. Now that I have Photoshop CS4 for adjusting the movies, I might work like this:

  • Download video from camera to external hard drive that I use for all of my referenced files.
  • If they don't need any luminance or color adjustments, import them into Aperture as referenced files.
  • If they do need adjustment, correct in Photoshop CS4, render out, then import the corrected movies into Aperture 3 as referenced files.
  • Apply metadata, organize, etc. in Aperture 3.

At that point, I would probably copy the uncorrected master movies on to my Drobo and remove them from my referenced hard drive. I'm sure I'll tweak this workflow some more. But for now, I have deadlines to meet.

You might be wondering if you can roundtrip to Photoshop CS4 by choosing it for videos in your Aperture 3 preferences. Well, yes and no. Aperture does send the video to Photoshop and it opens correctly. But, you can't use the Save command to roundtrip back. So you have to Export > Render and new file anyway. So, in my opinion, this workflow isn't ready for primetime yet. And from what I've read, you can use Photoshop CS3 Extended for this, but you can't listen to the audio. But it's still preserved.

All of that being said, I am thrilled to have a way to adjust my videos while still using Aperture 3 as the manager. I'll report more as I discover it.

More Aperture Tips and Techniques

To learn more about Aperture 3, check out my Aperture 3 Essential Training on Lynda.com. Also, take a look at our Aperture 3 Focus Section. Tons of free content about how to get the most out of Aperture.


twitter.jpg Follow me on Twitter

-


NANPA_Lowepro.jpg

The exhibit hall opened on Tuesday night at NANPA, where Canon, Nikon, Lowepro, and many others displayed their wares. I was working in the Lowepro booth, talking with photographers, taking pictures, and answering questions. As you might suspect in a room of nature photographers, the most popular bag was the Lowepro Pro Trekker 600 AW. As one shooter said, "I need a bag that can hold my camera gear and my personal items when I'm working in the field.

Here's a short video of the Lowepro booth and a photographer giving the Pro Trekker the once over.

twitter.jpg Follow me on Twitter

-

After 2 years of waiting, we have Aperture 3. And it's beautiful! In this podcast I cover the highlights of this new release, then have 10 tips to help you get started.

Listen to the Podcast

You can also download the podcast here (30 minutes). Or better yet, subscribe to the podcast in iTunes.

More Aperture Tips and Techniques

To learn more about Aperture 3, check out my Aperture 3 Essential Training on Lynda.com. Also, take a look at our Aperture 3 Focus Section. Tons of free content about how to get the most out of Aperture.

Monthly Photo Assignment

Red is the Feb. 2010 Photo Assignment. You can read more about how to submit on our Member Participation page. Deadline for entry is Feb. 28, 2010.

TDS Workshops Update

The TDS Hot Air Balloon Photography Workshop in June 2010 has lost its hot air. The organizers cancelled the event for this year. Ack! So I'm working on a different event in the same time slot. Stay tuned for more information. If you'd like to get on the waiting list for upcoming workshops, please send me email with the subject line: "TDS Workshops." Those virtual camera club members who are on the waiting list get first opportunity to register for newly announced workshops. Attendance is limited to 6 for each TDS Workshop to ensure a personalized experience.

More Ways to Participate

Want to share photos and talk with other members in our virtual camera club? Check out our Flickr Public Group. It's a blast!


twitter.jpg Follow me on Twitter

-


Podcast Sponsors

Red River Paper -- Try the $7.99 Sample Kit.

Make Your Photos Sizzle with Color! -- SizzlPix is like High Definition TV for your photography.


Technorati Tags: , , , , ,

nanpa_logo.png

The car is packed, and I'll be heading up to the Nature Photography Summit in Reno, NV. This is the start of an exciting road trip that includes the NANPA event, then head down Highway 395 past some of my favorite sites in California (Mono Lake, June Lake, Mammoth Lakes, Bishop, Lone Pine), and arriving in Anaheim for the PMA Show.

At the shows, I'll be working in the Lowepro booth, meeting photographers, talking about gear, and recording short interviews. I'll post many of these conversations, so stay tuned. It's always great to hear what other shooters have to say. And if you're attending either of these events, be sure to come by the Lowepro booth to say hi.

Then, while on the road, I'll be taking pictures and posting anecdotes about the places I see and the people I meet. I have a lot of experience traveling Highway 395, and the one thing I know for sure is that I have no idea what I'll encounter. So , we'll all find out together.

Be sure to keep an eye on my Twitter feed, here at The Digital Story, and via the Lowepro Facebook Fan page.

Switching Aperture to 32-Bit Mode

aperture_32bit.jpg

If you have to switch to 32-bit mode in Aperture to run your plug-ins, which are all 32-bits, you can do so via the Get Info box (File > Get Info). With the application closed, check the "Open in 32-bit mode" box, then relaunch Aperture. All of your current Aperture plug-ins should be available to you then.

More Aperture Tips and Techniques

To learn more about Aperture 3, check out my Aperture 3 Essential Training on Lynda.com. Also, take a look at our Aperture 3 Focus Section. Tons of free content about how to get the most out of Aperture.


twitter.jpg Follow me on Twitter


Full Screen Browser in Aperture 3

a3_full_screen_mode.jpg

One of the pleasant surprises in Aperture 3 is the new Full Screen Browser. To access it from the normal browser view in Aperture, all you have to do is hit the F key. This lets you dedicate every inch of your monitor to your pictures. This feature is a blessing while I'm using my 17" MBP on the road.

If you want to edit one of the images, just double-click on the thumbnail in the Browser to bring it to full screen, then hit the H key to bring up the Adjustments Inspector. At this point, you can work as normal. Another nice touch is, if you hold down the Shift key while moving any of the sliders in the Adjustments Inspector, the Inspector interface disappears except for the slider you're using. Again, this lets you see more of your image with less of the interface.

When you're done editing your picture, just double click it to return to the full screen Browser. Hit the F key to return to the normal Aperture 3 interface. Very nice.

Oh, and one other thing. Those images in the illustration... they are Raw files from my Canon S90. Aperture 3 decodes them wonderfully. I've also talked with LX3 shooters, and they too can decode their Raw files in A3.

More Aperture Tips and Techniques

To learn more about Aperture 3, check out my Aperture 3 Essential Training on Lynda.com. Also, take a look at our Aperture 3 Focus Section. Tons of free content about how to get the most out of Aperture.


twitter.jpg Follow me on Twitter


Canon T1i Video Edited in Aperture 3

When Apple enabled video trimming in Aperture 3, my guess is they wanted to enhance the Slideshow module. And that they did. You can now combine still images, video, and separate audio tracks to create beautiful productions.

After playing with this module for a few hours, however, my message to Apple is that I would prefer even more video functionality (yeah, I know). But quite honestly, the task I often have at hand is to shoot video, cut it, then upload to YouTube -- as quickly as possible. Incorporating still images and soundtracks are fun, but not the normal project.

This short movie, "Mission St., SF" was captured with a Canon T1i, then imported directly into Aperture 3 for production and export. Click through to YouTube for the HD version.

So if you have your hopes up that there's a mini Final Cut Pro inside of Aperture, you might want to lower your expectations. The video tools are extremely basic. What you can do, however, is useful.

  • Add and manage DSLR video clips in the Aperture library. And thanks to the improved Import dialog box, you can choose which types of files you want to upload.
  • Select the video clips you want to work with, then go to New > Slideshow where you can organize their sequence, add a soundtrack, add title slides, and choose some basic parameters for your presentation.
  • Trim video clips by double clicking on them. This is very important because the one thing that all videos need is editing.
  • Export your production using one of the 5 presets or custom export settings. I used the HD 720 preset for this short movie.

I know it seems odd to use the Slideshow module for your video editing. But I think that's due to Apple's original concept for video management in Aperture. I wouldn't be surprised if up the road we see a dedicated module for handling movies. In the meantime, however, this is a huge addition to Aperture 3. And it will make my life more efficient and productive.

More Aperture Tips and Techniques

To learn more about Aperture 3, check out my Aperture 3 Essential Training on Lynda.com. Also, take a look at our Aperture 3 Focus Section. Tons of free content about how to get the most out of Aperture.


twitter.jpg Follow me on Twitter