Recently in Photography

  Page 146 of 385 in Photography  

olympus-om-d-em1-top.jpg

The Olympus OM-D E-M1 mirrorless camera includes Keystone Compensation that allows photographers to correct for converging lines in-camera.

There are two ways to apply this correction: 1) while shooting using the control dials on the top deck of the camera, or 2) using the RAW/Jpeg Edit function while viewing images. Here are the steps for both methods.

Keystone Compensation While Shooting

  1. Make sure you have Firmware 2.0. You can check this by going to the Menu and navigating to the wrench icon on the left side. The Firmware option will appear on the right. Once you navigate to it, it should read "Body:2.0" or later.
  2. Enable Keystone Comp. In the Menu, go to Camera Icon 1 on the left side and navigate to Keystone Comp. at the bottom of the screen. Turn it "on."
  3. Activate the LCD for live view by pressing the "monitor" button directly to the left of the viewfinder on the back of the camera.
  4. On the LCD screen, you should see the Keystone icon at the top and two scales with a green bar, one on the bottom and the other on the right. If you don't see these, press the INFO button repeatedly until they appear.
  5. Rotate one of the top control dials, and you'll see the image adjust. On my E-M1, the control dial around the shutter button adjusts the image horizontally, and the back control dial adjusts the image vertically.
  6. Once you begin an adjustment, a green arrow appears to show you which direction you're moving. Also, the scale for the adjustment you're not using will disappear. You can bring it back by "centering" the adjustment you're currently working on.
  7. Once the image looks good, take the picture.
  8. Move the green indicator bar back to center, then turn off Keystone Compensation.
  9. To save time, you can assign one of the Function buttons, such as Fn2, to quickly enable Keystone Compensation. If you do that, it will be grayed out in the Menu screen.

Penn Station, NY, No Keystone Compensation - Photos by Derrick Story. Penn Station No Compensation

Penn Station with Keystone Compensation Applied In-Camera with the E-M1 Penn Station With Compensation

Apply KeyStone Compensation in RAW/Jpeg Edit Mode

  1. Make sure you have Firmware 2.0. You can check this by going to the Menu and navigating to the wrench icon on the left side. The Firmware option will appear on the right. Once you navigate to it, it should read "Body:2.0" or later.
  2. Press the Play button and navigate to the image you want to correct on the camera's LCD screen.
  3. Press the OK button and choose either "RAW Data Edit" or JPEG Edit." Press OK.
  4. Navigate to "Custom2." Find the Keystone Compensation on the right side of the screen and enable it.
  5. Press the INFO button to make the adjustment to the image. As you move the Control Dials, a white box will indicate the adjustment you're making. Once the image looks the way you want, press the OK button.
  6. Press the OK button again, and choose "Yes." The correction will be applied.
  7. Press the Menu button to exit the screen and view your corrected photo.

The Keystone Compensation produces a Jpeg based on your size and compression settings. The final image looks amazingly good, and all done within the camera and ready to use.

More Features with Firmware 2.0

Tethering is also available with this firmware update. To learn more about that, see my article, Tethered Shooting for Product Photography.

Want to Comment on this Post?

You can share your thoughts at the TDS Facebook page, where I'll post this story for discussion.
Fast Memory Cards Need Fast Readers

lexar-sr1-card-reader.jpg

I had an interesting talk with the folks at Lexar today and learned about their new UHS-I and UHS-II SD memory cards.

Currently, I'm more interested in the UHS-I cards because none of my cameras are UHS-2 compatible anyway. But the Lexar UHS-II cards also have UHS-I controllers, so they match up well with my existing cameras and will perform great in the future.

I like the 32 GB Lexar Pro 1000X UHS 2 U3 SDHC ($46) and the 64 GB Lexar Pro 1000X UHS 2 U3 SDHC ($80).

Now for many of us, the most noticeable benefit of these SD cards comes when we're downloading images to our computers. A full 32 or 64 GB card can take a while to offload all those RAW files and videos. To maximize this speed (and the return on your investment), get a compatible card reader.

With these speedy memory cards, a USB cable or your computer's built-in card reader won't be as fast as a tuned unit.

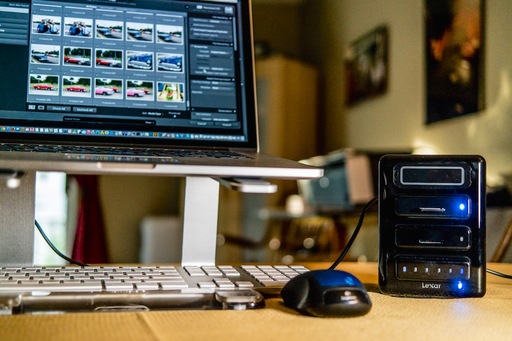
A good choice is the Lexar Professional USB 3.0 Dual-Slot Reader ($28) or the Lexar Professional Workflow SR1 Card Reader for SDHC/SDXC cards ($21). A matched card reader has a tuned controller that maximizes throughput from memory card to computer. A tandem like that can increase speed up to 8X compared to a USB 2 cable transfer.

One other thing. The drive in your computer is part of this recipe. If you have a fast SSD drive, then the flow of data can be quite speedy with this setup. A slower spinning hard drive does impact potential performance.

Want to Comment on this Post?

You can share your thoughts at the TDS Facebook page, where I'll post this story for discussion.
fotodiox-edge-light.jpg

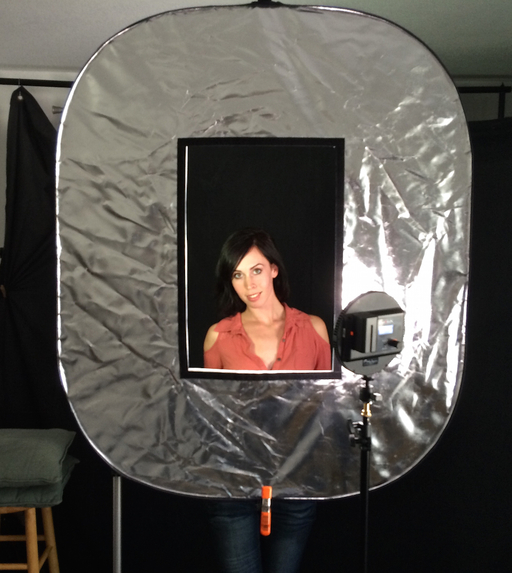
I ran a test today in the Fotodiox booth at PhotoPlus Expo. I asked Vanessa if I could take 3 pictures of her. The first with ambient expo hall lighting. Next, with a hotshoe flash mounted on the Olympus OM-D E-M1. And the third with me holding a Fotodiox Pro FlapJack LED Edge Light C-200R - 7-Inch Round light for illumination.

The Flapjacks have a glow that's excellent for portraiture, and I wanted to see how they compare to typical journalism lighting. Instead of forward-facing LEDs like in a conventional panel, the FlapJack's LEDs are mounted around the outer edge, aimed inward at layers of diffusion material. The FlapJack's bounced light produces a soft, even glow with no hotspots. All of this within a portable unit that's less than 1/2" at its thinnest point.

Thanks to its 5500k daylight color temperature rating, skin tones look great, even using auto white balance on the camera. The dimmer control provides adjustment from 10 percent to full power. The kit comes with everything you need including rechargeable battery, power supply cable, light stand mounting bracket with ball joint - all fitted neatly within a custom case. And since the battery is a standard Sony model, additional units are readily available.

So, let's take a look at that test shoot I mentioned. These shots have not been adjusted.

Existing light portrait with ambient illumination only. existing-light-vanessa.jpg

Fill flash. fill-flash-vanessa.jpg

Fotodiox Pro Flapjack 7-inch round handheld fotodiox-led-vanessa.jpg

In addition to not needing any light modifiers for the flattering glow, I'm also impressed with the excellent color balance. Portrait photographers on-the-go will appreciate the fast setup and ease of use.

The 7" Fotodiox Pro FlapJack LED Edge Light C-200R kit sells for $299.95 and the 10" model is $399.95. By using coupon code FJOL18 at checkout, you can save a whopping 18% (through the end of October.)


Nimble Photographer Logo

This Fotodiox LED Flapjack has a high Nimbleosity Rating. What does that mean? You can learn about Nimbleosity and more by visiting TheNimblePhotographer.com.

Want to Comment on this Post?

You can share your thoughts at the TDS Facebook page, where I'll post this story for discussion.

Ramin-Hamedani-sept-2014-pa.jpg

For the September 2014 Photo Assignment, TDS shooters opened a rear window to the world. See for yourself in our gallery, Shot from Behind. And which one will be the SizzlPix Pick of the Month?


Photo by Ramin Hamedani. Ramin writes, "On a nice summer day, I decided to sit by the lake on a dock. Using my iPhone, I took this image of myself staring into the peaceful surroundings. It was quiet except with the sound of water gently hitting the rocks beneath me. I did have my DSLR as well, but the wide angle of view on iPhone was tempting, and I did not want to change the lens on the DSLR anyway." See all of the great images from this month's assignment by visiting the Shot from Behind.


Participate in This Month's Assignment

The November 2014 assignment is "Layers." Details can be found on the Member Participation page. Deadline is November 30, 2014. No limit on image size submitted.

Please follow the instructions carefully for labeling the subject line of the email for your submission. It's easy to lose these in the pile of mail if not labeled correctly. For example, the subject line for this month's assignment should be: "Photo Assignment: Nov. 2014." Also, if you can, please don't strip out the metadata. And feel free to add any IPTC data you wish (These fields in particular: Caption, Credit, Copyright, Byline), I use that for the caption info.

Gallery posting is one month behind the deadline. So I'm posting September 2014 gallery at the end of October, the October gallery will be posted at the end of November, and on and on.

Good luck with your November assignment, and congratulations to all of the fine contributors for September.


Want to Comment on this Post?

You can share your thoughts at the TDS Facebook page, where I'll post this story for discussion.

This week on The Digital Story Photography Podcast: 5 Landscape Photography Tips, Speed Sorting Your Images, Photo Plus Expo Week - All of this and more on today's show with Derrick Story.

Story #1 - Budget Mitakon 42.5mm f/1.2 offered by ZY optics for M43, Sony E and Fuji X systems - Priced $359, and available initially in the Micro Four Thirds mount, the Mitakon 42.5mm f/1.2 appears to be aimed squarely at competing with Panasonic's Leica DG Nocticron 42.5mm f/1.2 for its Lumix G bodies, which delivers a similar angle of view to an 85mm focal length on full frame cameras. It's manual focus. (Source: DP Review).

In other news, Photo Plus Expo begins this week on Thursday in NYC.

And finally, Canon 6D and Sony RX1 Listed as Discontinued by Some Online Retailers. Preview of things to come? (Source: Petapixel).

Sunrise in Fog

Story #2 - 5 Landscape Tips from Our Fall Photography Workshop:

  • Be Daring with the Sun - Having it at your back is safe, but often boring.
  • Fight Lens Flare - When shooting backlit subjects, remember to shield your lens from the sun.
  • Find a Main Subject - A bucolic hillside is lovely, but find a starting point for the viewer's eye. Often a foreground element will do the trick.
  • Look for Layers of Light and Dark - This is composition style perfected by Ansel Adams, and it creates visual interest.
  • Don't Forget to Reset Your Settings to Default - Adjusting exposure compensation, ISO and white balance is great, but set it back to default after getting shot.

Story #3 - Speed Sorting: How to Rate a Large Batch of Photos Quickly. Nothing like coming home with 1,500 exposures. Here's how to prevent them from languishing on your hard drive.

Virtual Camera Club News

Photo Assignment for October 2014 is "Water".

New Paper from Red River

This new stock looks great: 66lb. Palo Duro Satin features a subtle surface texture and elegant warm tone, because it contains minimal optical brighteners in the base stock and none in the coating. The warmth of this product is great for portraits, naturescapes, and black & white prints with just a hint of sepia. If you want that fine art pro lab photo finisher look, check out this new stock.

A Note from SizzlPix

They've ramped up their capacity, so we can go for volume for the holidays.

Special for TDS listeners, a 20% discount on all SizzlPix ordered, now through end of November! For orders placed by October 31, there should still be time for free mini-samples prior to production.

Using the comment space on the newly streamlined SizzlPix order page, write "TDS 20 percent discount," and if a free mini-proof is wanted prior to production, "free proof first," and your mailing address.

And Finally...

If you haven't done so already, please post a review for The Digital Story Podcast in iTunes.

BTW: If you're ordering through B&H or Amazon, please click on the respective ad tile under the Products header in the box half way down the 2nd column on thedigitalstory.com. That helps support the site.

Download the Show

In addition to subscribing in iTunes, you can also download the podcast file here (31 minutes). You can support this podcast by purchasing the TDS iPhone App for only $2.99 from the Apple App Store.

More Ways to Participate

Want to share photos and talk with other members in our virtual camera club? Check out our Flickr Public Group. And from those images, I choose the TDS Member Photo of the Day.

Podcast Sponsors

Red River Paper -- Keep up with the world of inkjet printing, and win free paper, by liking Red River Paper on Facebook.

SizzlPix! - High resolution output for your photography. You've never seen your imagery look so good. SizzlPix.com. SizzlPix! now is qualified for PayPal "Bill Me Later," No payments, No interest for up to 6 months, which means, have your SizzlPix! now, and pay nothing until January!

Want to Comment on this Post?

You can share your thoughts at the TDS Facebook page, where I'll post this story for discussion.

I've been to Safari West many times, and always with a DSLR and 300mm lens. But for my most recent visit, I decided to shoot with an Olympus OM-D E-M5 ($799) and the super compact Olympus 75-300mm zoom lens ($549) that provided a reach up to 600mm compared to my Canon 5D Mark II.

Blue-Crowned-Pigeon Blue Crowned Pigeon - 150mm, f/5.6, 1/125th, ISO 1600, handheld. Photos by Derrick Story.

How did it go? I had a blast and loved the photos I came home with. I've never had this much reach before (600mm essentially), and it allowed me to compose tighter than ever before. Here's a portrait of a Southern White Rhinoceros at 300mm (600mm essentially) at f/7.1, 1/500th, ISO 1600, handheld.

Southern White Rhinoceros

I could even reach this Acorn Woodpecker high in a tree.

Acorn Woodpecker

And my rig was a fraction of the weight and size (and cost) of my counterparts in our Safari truck. If you mixed my images in with theirs, you's have a hard time distinguishing a quality difference, especially around 150mm with the Micro Four Thirds rig. Bottom line: yes, you can shoot wildlife with mirrorless.


Nimble Photographer Logo

The Olympus 75-300mm zoom lens has a high Nimbleosity Rating. What does that mean? You can learn about Nimbleosity and more by visiting TheNimblePhotographer.com.

Want to Comment on this Post?

You can share your thoughts at the TDS Facebook page, where I'll post this story for discussion.

Mac OS X Yosemite builds upon photo browsing improvements we saw in earlier versions, creating a terrific working environment for photographers. And the best part is, you never have to leave the Finder.

Here are a few basic buttons to click to supercharge your photo browsing experience in Yosemite.

Turn On Finder Preview

finder-preview-list.jpg Finder Preview on in Yosemite

With Finder Preview turned on, you can work in List View and still get a good look at your images. It's easy to activate. In the Finder, go to View > Show Preview. Most photographers will want to use the shortcut: Shift-Command-P.

Bonus Tip: You can add Tags directly from the Finder Preview window by clicking on the blue "Add Tags" link.

Even a Bigger View with Quick Look

quick-preview-yosemite.jpg Quick Look for even a better view.

We had Quick Look in Mac OS X Mavericks, but it seems more useable now in concert with Finder Preview. With a file highlighted, click on the "eye" icon in the Finder Toolbar to open a larger version of the photo. If you like keyboard shortcuts, Command-Y will enable Quick Look, or even faster, just tap the spacebar (thanks Scott Stuart).

Bonus Tip: You can "pinch to zoom" on a trackpad for a more detailed look at your photo.

Share from Quick Look

share-from-quick-look copy.jpg It's easy to share the image directly from Quick Look.

Once you're in Quick Look, you have a variety of sharing options. We had a more basic version of this in Mavericks, but Yosemite adds "Share Extensions," which enable you to customize this menu. You can build a sweet workflow, starting with the Finder.

More to Come

I have more Yosemite gems for photographers coming in future posts. Try these out, and see what you think.


Join me on my Instagram site as I explore the world of mobile photography. And now Instagram features 15-second movies too.

Want to Comment on this Post?

You can share your thoughts at the TDS Facebook page, where I'll post this story for discussion.

PhotoPlus Expo

PhotoPlus is right around the corner with the Expo opening on Oct. 30 at the Javits Convention Center in New York. If you're attending, I'd like to meet you. Here's my schedule.

I'm in the c't Digital Photography/Rocky Nook booth every day for 2 hours. Visit me there, then, and mention "The Nimble Photographer" or "The Digital Story Podcast," and I'll have a gift for you from The Nimble Photographer Store.

Speaking Itinerary for Derrick Story

Thursday, Oct. 30

  • 1:00 to 3:00 PM - "Mirrorless Cameras" - c't Digital Photography Magazine Booth 6.
  • Friday, Oct. 31

  • 12:00 to 12:20 PM - "The Nimble Photographer" - lynda.com Booth 267.
  • 12:30 to 12:50 PM - "Portrait Tips" - lynda.com Booth 267.
  • 1:00 to 3:00 PM - "What's in My Bag" - c't Digital Photography Magazine Booth 6.
  • Saturday, Nov. 1

  • 11:30 to 11:50 AM - "Social Media for Photographers" - lynda.com Booth 267.
  • 2:00 to 2:30 PM - "The Nimble Photographer" - Panasonic Booth 837.
  • 3:00 to 3:20 PM - "Lightweight Backup and Storage for Traveling Photographers" - lynda.com Booth 267.

I hope you have a chance to stop by and say hello.

Want to Comment on this Post?

You can share your thoughts at the TDS Facebook page, where I'll post this story for discussion.


Join me on my Instagram site as I explore the world of mobile photography. And now Instagram features 15-second movies too.

Long Telephoto for Landscape Work

I don't photograph much wildlife, but I always pack a long zoom lens for my outdoor work. Why? Because it affords me higher angles on subjects that often require my positioning a bit farther from them.

Mono Lake - North Shote Mono Lake, North Shore - photo by Derrick Story.

I photographed this image on the North Shore of Mono Lake with an Olympus ED-M 75 to 300mm II f4.8-6.7 zoom lens at an distance up the hill. I didn't like the angle from the water's edge, so I went back up the road for a higher perspective.

The other advantage of a telephoto for landscape work is that it compresses the scene. This is often flattering to the subject. Plus, it allows me to group together the elements that I think are important in the composition.

Image captured with an Olympus 75-300mm zoom lens mounted on an Olympus OM-D E-M10. ISO 250, f/8, -1/3 EV, hand held.

Want to Comment on this Post?

You can share your thoughts at the TDS Facebook page, where I'll post this story for discussion.
This week on The Digital Story Photography Podcast: Mac OS X Yosemite for Photographers, Shooting Fall Color in the Eastern Sierra, iPhone Digital Back for Older Hasselblads - All of this and more on today's show with Derrick Story.

Story #1 - Adobe Provides Detailed Instructions for Migrating from Aperture to Lightroom. Yes, your get star ratings and most metadata. No, you don't get image adjustments. (Source: F-Stoppers).

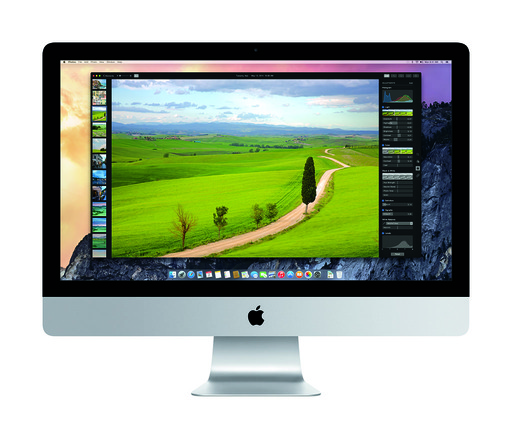
In other news, iMac with Retina 5K display. Here's how I would configure it: 3.5GHz Quad-core Intel Core i5, 8GBs RAM, 3TB Fusion Drive (Upgrade), AMD Radeon R9 M295X 4GB GDDR5 (Upgrade) Price: $2,899 (Source: Apple.com).

And finally, Flickr version 3.2 with upgrade for iPad viewing is terrific. (Source: TheDigitalStory.com).

iCloud Drive on Yosemite

Story #2 - Mac OS X Yosemite for Photographers - Here are a few items you should be aware of:

  • AirDrop between iOS device and your Mac - Make sure you're both on the same network, enable AirDrop on both devices, and files can be shared between them.
  • Drag and drop to iCloud Drive - I created a My Photos folder on iCloud Drive where I can backup photos by dragging and dropping in the Finder.
  • Aperture and iPhoto Updates - After updating both applications, they run wonderfully in Yosemite.
  • Photos.app - Coming in early 2015, we'll see the next generation photo management software from Apple for the Mac.

June Lake Loop

Story #3 - Fall Color in the Eastern Sierra - Spent a few glorious days in Mono Lake County last week. The color around Bridgeport, Lee Vining, and June Lake was impressive. Here's a report with a few Fall color photography tips. Plus, I include a field report on the Western Digital My Passport Wireless hard drive. To see some of the pictures, take a look at my article, A Drive Through Eastern Sierra Fall Color.

Story #4 - Hasselnuts iPhone Adapter for Older Hasselblads - This is a crazy device that I tested on my last road trip. Essentially, I can attach a handsome adapter that looks just like a film magazine for my Hasselblad 500C, but it allows me to use an iPhone as a digitizer. In my opinion, the resulting images are half Holga, half Polaroid transfer. I talk more about it in the fourth segment of today's show.

Virtual Camera Club News

Photo Assignment for October 2014 is "Water".

New Paper from Red River

This new stock looks great: 66lb. Palo Duro Satin features a subtle surface texture and elegant warm tone, because it contains minimal optical brighteners in the base stock and none in the coating. The warmth of this product is great for portraits, naturescapes, and black & white prints with just a hint of sepia. If you want that fine art pro lab photo finisher look, check out this new stock.

A Note from SizzlPix

They've ramped up their capacity, so we can go for volume for the holidays.

Special for TDS listeners, a 20% discount on all SizzlPix ordered, now through end of November! For orders placed by October 31, there should still be time for free mini-samples prior to production.

Using the comment space on the newly streamlined SizzlPix order page, write "TDS 20 percent discount," and if a free mini-proof is wanted prior to production, "free proof first," and your mailing address.

And Finally...

If you haven't done so already, please post a review for The Digital Story Podcast in iTunes.

BTW: If you're ordering through B&H or Amazon, please click on the respective ad tile under the Products header in the box half way down the 2nd column on thedigitalstory.com. That helps support the site.

Download the Show

In addition to subscribing in iTunes, you can also download the podcast file here (35 minutes). You can support this podcast by purchasing the TDS iPhone App for only $2.99 from the Apple App Store.

More Ways to Participate

Want to share photos and talk with other members in our virtual camera club? Check out our Flickr Public Group. And from those images, I choose the TDS Member Photo of the Day.

Podcast Sponsors

Red River Paper -- Keep up with the world of inkjet printing, and win free paper, by liking Red River Paper on Facebook.

SizzlPix! - High resolution output for your photography. You've never seen your imagery look so good. SizzlPix.com. SizzlPix! now is qualified for PayPal "Bill Me Later," No payments, No interest for up to 6 months, which means, have your SizzlPix! now, and pay nothing until April!

Want to Comment on this Post?

You can share your thoughts at the TDS Facebook page, where I'll post this story for discussion.