I'm thrilled to be leading the Sonoma Coast Photography Workshop for a second year. I have an amazing weekend planed.
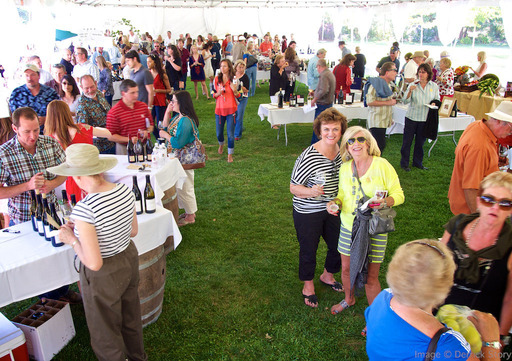
The Sonoma Coast Photography Workshop begins Saturday morning, August 24, 2012 and runs through Sunday evening August 25th. Our headquarters during the day will be the lovely Library Conference Room at the Bodega Bay Lodge, in Bodega Bay, CA. We also have a campsite reserved at Doran Regional State Park, a 10-minute walk from the Lodge. We will use the campsite as our field headquarters during the weekend. Paid workshop attendees are welcome to come out and visit the Field HQ on Friday afternoon.
During the weekend, we will work on environmental portraiture with a professional model, landscape shooting at Ft. Ross State Historical Park, and nature photography at Goat Rock... and plenty more.
When there's a dark area in your photograph that you want to lighten, the common inclination is to reach for the Dodge tool. I don't know about you, but I find the Dodge tool one of the most difficult to use for getting natural looking results. On my images, it always looks like someone spilled bleach on the photo.
A more elegant approach to lightening a dark area is to use the brushing tool in the Shadows & Highlights brick. It's nearly foolproof in use, an the results are fantastic.
The Shadows & Highlights brick in Aperture's Adjustments panel.
Here are the steps for using the Shadows & Highlights brush
Click on the gear icon in the Shadows & Highlights brick (as shown in the illustration).
Choose Brush Shadows & Highlights In
Don't click on the check box on the left side. That will happen automatically.
In the adjustment brick, move the Shadows slider to about 25 for a starting point.
In the floating palette (that will appear over your photo), move the Strength slider to 1.
Choose your brush size and softness (in the floating palette).
Start painting in the dark area you want to lighten.
Once you've painted an area, you can adjust the strength of its effect by moving the Shadows slider in the adjustment brick.
If you need to clean up an overpaint, click on the eraser icon in the floating palette.
The floating palette
You can always reset the adjustment and start over by clicking on the gear icon in the floating palette and selecting "Clear from entire photo." But I don't think you'll have to do that often, because this is such a beautiful method for lightening dark areas.
More Aperture Tips and Techniques
To learn more about Aperture 3, (especially brushing techniques) check out my Aperture 3 Essential Training on Lynda.com. Also, take a look at our Aperture 3 Learning Center. Tons of free content about how to get the most out of Aperture.
My next open Aperture Workshop is scheduled for Nov. 2012, in Santa Rosa, CA. You can get on the pre-registration list, plus learn about all the other photography workshops offered this season by visiting the TDS Workshops page.
The Digital Story on Facebook -- discussion, outstanding images from the TDS community, and inside information. Join our celebration of great photography!
Your iPhone captures terrific pictures. And now, so does the iPad. So when you want to give a print to someone, what do you do?
There are actually quite a few options available for printing directly from your iPhone or iPad. In the Macworld Magazine article, Mobile printing gets easier with or without AirPrint, I cover a number of options that don't include your Mac. Just send the file from your iOS device directly to a printer.
This works for photos and documents alike. While working on this article, I printed from a web browser, Pages word processing app, Keynote, and more.
Printing from your iOS device isn't something that you do every day. But when you need to, you usually have to do it quickly. So setting up your workflow now will save you anxiety later. Take a look at the article and see what you think.
The Digital Story on Facebook -- discussion, outstanding images from the TDS community, and inside information. Join our celebration of great photography!
Back-button focusing allows you to separate the auto-focusing function from the shutter release button. I talk more about how to do this, and why you might want to consider it for your shooting. I also discuss a unique opportunity where you can help me cover the Wine Country Big-Q Competition as part of the Event Photography Workshop that begins on July 13. I then gripe about the lack of availability of the Olympus OM-D E-M5 and touch on a great new technical backpack, the Lowepro Flipside Sport 10L. Enjoy the show!
Would you like to improve your B&W photography? I have a webinar coming up on May 23, "A Fresh Look at Familiar Subjects in B&W." It's free, but you have to reserve your seat in advance.
Typically, most DSLR shooters lock their focus by pressing the shutter half way, recomposing, then pressing further to record the image. It's a tried and true technique that I still use to this day.
But there are situations, such as portrait shoots and action photography, where you might want to move focus activation to a different button. This technique is often called "back-button focusing" because the most common repositioning is the button on the back of the camera.
We'll be practicing back-button focusing at the upcoming TDS Action Photography Workshop, and also at following events later on this season. It's worth having in your bag of tricks.
The Digital Story on Facebook -- discussion, outstanding images from the TDS community, and inside information. Join our celebration of great photography!
Popular photo sharing site Flickr has retooled its uploader interface. The new version features both improved functionality and is easier on the eyes.
The first think you'll notice is that the previous stark white thumbnail background has been replaced by charcoal gray. Not only does this make the photos look better, it's more attractive overall.
You can grab thumbnails and reposition them so they appear in the order you want in the photostream. There are also presets for the sorting order if you want newest first or oldest first.
Changing titles, adding captions, and working with tags is also easy for individual photos as well as the entire set.
Overall, this is a welcome feature change. I'd like to see this look and feel spread throughout the entire Flickr interface. To use the new uploader, look for the "Upload" link in the top toolbar of the Flickr interface. For the moment, it has a "new" flag next to it.
The Digital Story on Facebook -- discussion, outstanding images from the TDS community, and inside information. Join our celebration of great photography!
I keep a box of prints handy for reference. It consists of a few images printed on 3 or 4 different surfaces. When I'm thinking about which stock to use for a photo that I want to run through my Epson, I pull out my box of sample images. It helps me decide where to start by actually looking at the same photographs on different papers.
Being able to touch the prints is an important part of the process. It's easier to hold them at different angles and feel the texture of the paper.
I also use this sample kit when clients are asking about output. It's much easier for them to decide when they can examine the various options in person.
The Digital Story on Facebook -- discussion, outstanding images from the TDS community, and inside information. Join our celebration of great photography!
The iPhone display is so beautiful. Wouldn't it be great to use it as a control panel for your DSLR? Now, thanks to enlight photo, you can.
The ioShutter Release Cable ($69.99) with accompanying iOS apps (free "lite" version, or the "pro" that costs $9.99, shown in the illustration to the right ) enables you to shoot with your DSLR in a variety of ways:
Standard remote release. Press the button on the iPhone screen and the camera takes a picture.
Timer mode. With the free lite app you have countdown of 20 or 60 seconds. In the pro version, the timer is completely programmable.
Bulb mode. In the lite version, you can set exposure for 60, 90, or 120 seconds. In the pro version, it is completely programmable.
Time lapse. In the light version you have options of "every 5 seconds for 5 minutes," "every 5 seconds for 10 minutes," or "every 30 seconds for 10 minutes." In the pro version this is programmable.
Sound trigger. In the lite version you clap you hands to fire the camera. In the pro version you can set the decibel level.
Shake. In the light version you have "shake to take." In the pro version you have much more control.
How it Works
The system works like this. You buy either the E3 shutter release cable that fits Canon Digital Rebels, Canon 60D, Pentax K-5, and other cameras that use the mini-jack type socket. Or you can purchase the N3 shutter release cable that works with the Canon 5D series and pro Canons that use the larger socket connector for remote releases. Plug one end of the cable into your camera and the other end into the headphone jack of the iPhone. Fire up either of the iOS apps, turn on the camera, and start shooting.
I tested the E3 release with a Canon T1i and a Pentax K-5, using both the lite and pro iOS apps. All of the functions worked as advertised. There were no glitches at all with the Canon, and only one with the Pentax -- it would sometimes automatically go to burst mode when using the sound trigger. Aside from that nit, performance was solid.
If you get a phone call while using the ioShutter, you have to disconnect it from the headphone jack to communicate with the caller. I learned this one the hard way.
Time Lapse Test with Canon T1i
All of the functions of the ioShutter are useful, but the one that most will be interested in is the time lapse control. I tested this with the pro version of the app connected to the T1i. I programmed an exposure for every 4 seconds.
Lowepro Flipside Sport 10 Liter.
Keep in mind that if you want full programmability for your time lapse work, you have to pony up the additional $9.99 for the pro version.
Bottom Line
The ioShutter works as advertised. If you have a compatible camera, and an iPhone in your pocket, then all you have to carry is this light cable. By doing so, you have access to a variety of handy controls.
The $69.99 price tag is inline with cable releases that provide similar functionality. I do think, however, that the $9.99 price tag for the pro version of the iOS app is steep, especially after just shelling out $70 for the cable itself. You can use the free app, but if you want to use the time lapse function, you really need the pro version for maximum control. I think a fairer price tag for the pro version would be $2.99 or even $4.99.
That being said, I like the flexibility of packing just this light cable, yet having a variety of triggering functions available, that I can control via the lovely iPhone interface.
Nimbleosity Rating: 3.5 (out of 5). Rating move to 4 if pro app price was reduced.
The Digital Story on Facebook -- discussion, outstanding images from the TDS community, and inside information. Join our celebration of great photography!
Another point that I want to add focuses on the lights. I've been using the Lowel Ego lights for my table top work. They're affordable and work great.
To support the entire project, I use a 60" folding table.There's just enough room for my lights and portable light box kit. When I need to clear the area for other types of shooting, everything folds up and stores out of the way.
Table top photography can be both creative and productive. Something to consider.
The Digital Story on Facebook -- discussion, outstanding images from the TDS community, and inside information. Join our celebration of great photography!
Adobe just released ACR 6.7 that includes RAW support for 9 new cameras plus 30 new lens profiles. Heavy hitters are included such as the Canon 5D Mark III, Nikon D800, and Olympus OM-D. Plus Creative Suite 6 is now available.
Would you like to improve your B&W photography? I have a webinar coming up on May 23, "A Fresh Look at Familiar Subjects in B&W." It's free, but you have to reserve your seat in advance.