Recently in Photography

  Page 210 of 385 in Photography  

Easy Photo Attachments in iOS 6

Tap and Hold

Attaching photos to email just got a lot easier in iOS 6. Now you have the option to add images while you're in the Mail client. You no longer have to start with the picture in the Camera Roll.

So, if you're typing a note and decide to add a picture to it, no problem. The process is essentially the same on both the iPad and iPhone. Here's how it works.

On your iPad or iPhone, tap and hold anywhere in the body of the message. You'll get the familiar "Select/Select All" popup. On the iPhone, there will also be an arrow pointing to the right. Tap it to reveal, "Insert Photo or Video." On the iPad, there's enough real estate to display this from the start.

Tap and Hold iPad

Tap "Insert Photo or Video" and a new popup appears with all of the available photos on the device. Choose the one you want, then tap the Use button. The image will be attached.

On the iPhone, you'll see another screen after you tap the Send button asking you what size the image(s) should be. On the iPad, the attachment size is listed in the right corner of the CC field. If you tap on it, you can reveal the Image Size options for your photo.

This is a terrific improvement for photographers.


twitter.jpg Follow me on Twitter


Mobile photography became a little more interesting last week for iOS users. By this point, most folks know about the new panorama feature in iOS 6 for the iPhone 4S and iPhone 5. But there's more! I talk about my favorite photo goodies in this latest mobile operating system release from Apple. I also touch on the upcoming Aperture workshop and follow up on my Instagram impressions from the road. All of this and more on this week's TDS podcast.

Listen to the Podcast

You can also download the podcast here (34 minutes). Or better yet, subscribe to the podcast in iTunes. You can support this podcast by purchasing the TDS iPhone App for only $2.99 from the Apple App Store.

Monthly Photo Assignment

Panorama is the Oct. 2012 Photo Assignment. You can read more about how to submit on our Member Participation page. Deadline for entry is Oct. 31, 2012.

More Ways to Participate

Want to share photos and talk with other members in our virtual camera club? Check out our Flickr Public Group. And from those images, I choose the TDS Member Photo of the Day.

Podcast Sponsors

Red River Paper -- The $7.99 Sample Kit is back! And with free shipping.

Make Your Photos Sizzle with Color! -- SizzlPix is like High Definition TV for your photography.

Need a New Photo Bag? Check out the Lowepro Specialty Store on The Digital Story and use discount code LP20 to saven 20% at check out.


Technorati Tags:
, , , , ,


For the August 2012 Photo Assignment, TDS shooters hit the streets. See for yourself in our gallery, Street Scene. And which one will be the SizzlPix Pick of the Month?

sergio_burani_street_scene.jpg

Untouchable women sweeping the streets of Mandawa, Rajasthan. "It was early in the morning and I was walking the streets of Mandawa, in the Indian state of Rajasthan," writes Sergio Burani. In a cloud of dust, these two untouchable women appeared from nowhere, sweeping with a short-handled broom. The bright colors of their costumes provided a sharp contrast with the misery of their task." See all of the great images from this month's assignment by visiting the Street Scene gallery page.


Participate in This Month's Assignment

The October 2012 assignment is "Panorama." Details can be found on the Member Participation page. Deadline is Oct. 31, 2012.

Please follow the instructions carefully for labeling the subject line of the email for your submission. It's easy to lose these in the pile of mail if not labeled correctly. For example, the subject line for this month's assignment should be: "Photo Assignment: Oct 2012." Also, if you can, please don't strip out the metadata. And feel free to add any IPTC data you wish (These fields in particular: Caption, Credit, Copyright, Byline), I use that for the caption info.

Good luck with your Oct. assignment, and congratulations to all of the fine contributors for August.


twitter.jpg Follow me on Twitter

-


Now Available! The Digital Photography Companion. The official guide for The Digital Story Virtual Camera Club.

  • 25 handy and informative tables for quick reference.
  • Metadata listings for every photo in the book
  • Dedicated chapter on making printing easy.
  • Photo management software guide.
  • Many, many inside tips gleaned from years of experience.
  • Comprehensive (214 pages), yet fits easily in camera bag.

Technorati Tags: , ,

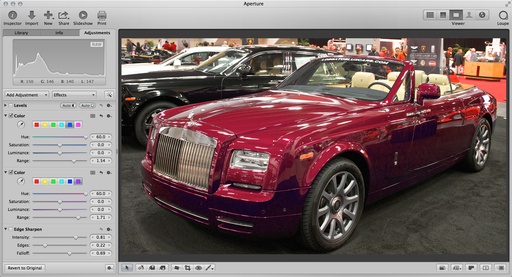
With the new Shared Photo Stream in Aperture 3.4.1 and iOS 6, you can set up mobile portfolios that can be viewed on your iPad, iPhone, Mac, or even Windows computer. You can limit accessibility to just your devices, or share individual streams (mobile portfolios) with friends. Here's how to set it up.

Setting Up Photo Stream To get started, select your photos and then click on the Share button in Aperture.

First, you have to designate one library as your Photo Stream environment. This library can be opened in either iPhoto 9.4 or Aperture 3.4.1. You can't maintain Photo Streams from multiple libraries with one iCloud sign-in. So I've established one library that is my "Photo Stream Mission Control" and maintain it with iPhoto or Aperture, depending on my needs at the moment. Remember, it's very easy to switch among libraries now with the Shared Library Container.

Set Up a Shared Photo Stream

Select a group of photos, then click on the Share button and choose Photo Stream. If this is your first, you'll be asked to give it a name. After that, you can add the selected images to an existing Photo Stream, or create a new one.

I like creating unique Photo Streams for portfolio sharing. That way I can show a curated collection of photos instead of sifting through everything I've got. This helps with viewer attention span too.

Photo Stream Dialog If you leave the "Share With" box blank, the Photo Stream will only be viewable on your devices.

Now you can set some parameters. If you want to share this with someone else, enter their iCloud email into the dialog box. They will be able to view your images on any iCloud-enabled device.

If the person doesn't have an iCloud account, you can still share with them, but then you have to check the box next to Public Website. The recipient will receive an email notification with a link they can view in any web browser. However this method puts your images on the Web, which is something you may not want. For tight control, it's best to stay within the iCloud ecosystem.

For Photo Streams only to be viewed on your ecosystem of devices, leave the "Shared With" box blank.

Photo Stream Portfolio Now I can show off my pictures on the iPad or iPhone, yet the portfolio is controlled via Aperture.

Once you've published the Shared Photo Stream, you can add or subtract images from it, share with additional people, or unshare if needed.

It's an easy way to create and maintain portfolios that you can show at anytime, anywhere, on your iPad or iPhone. And they look great!

Aperture Tips and Techniques

To learn more about Aperture 3, check out my Aperture 3.3 Essential Training (2012) on lynda.com. Also, take a look at our Aperture 3 Learning Center. Tons of free content about how to get the most out of Aperture.

My next open Aperture Workshop is scheduled for Nov. 16 & 17 2012, in Santa Rosa, CA. You can get on the pre-registration list, plus learn about all the other photography workshops offered this season by visiting the TDS Workshops page.


The Digital Story on Facebook -- discussion, outstanding images from the TDS community, and inside information. Join our celebration of great photography!


The new panorama feature in iOS 6 might seem like reinventing the wheel, but once you use it, you'll discover that it's quite remarkable.

Apple has combined hardware and software to help you produce images up to 240 degrees wide and around 25 MPs in size. And the best part? They look great.

Andechs Pano
I didn't go the entire 240 degrees for this pano of a former monastery in Bavaria, Germany. But I didn't have to. Captured by Derrick Story with an iPhone 4S.

To get started, enable the camera on your iPhone 4S, iPhone 5 or current iPod touch, tap the Options button, and tap Panorama. Continue to hold the phone vertically. That's the way you capture the images. It feels odd at first, but it's actually quite easy to use.

You'll see an arrow pointing to the right and a line. Tap the shutter button to begin recording, then move the camera from left to right keeping the arrow on the line as you record. I had best results when I moved the phone in a steady "not too fast, not too slow" motion.

Klosterstuberl Pano
I went the full 240 degrees for this image.

Once you've captured enough information, tap the shutter button again to stop recording. Or, you can keep moving until the camera stops, indicating that you've captured the full 240 degrees.

The iPhone will then process the picture and place it on your camera roll along with your other shots. They looked really good on the iPhone, but I reserved judgement until I could review the panoramas on the MBP 15" Retina Display. And they looked great there too!

My typical file size for a full 240 degree image was around 16 MBs. There's plenty of secret sauce in these shots, not only to create an image without seams, but the exposure and color looks wonderful also. This is about as easy as it gets for capturing panoramas.

It's funny, I have 3rd party panorama apps, and they work great. But now I'm shooting far more panos because the workflow is simpler, and the results are fantastic. Maybe Apple did reinvent the wheel, but it's free and has plenty of chrome.


The Digital Story on Facebook -- discussion, outstanding images from the TDS community, and inside information. Join our celebration of great photography!


The Lowepro Passport Sling II has been my daily companion for the last two weeks in Germany. Each day, before I leave the hotel, I pack it with selected camera gear, personal items, and even a light jacket. By the time evening arrives, my back and shoulders still feel as fresh as they did when I left.

Passport Sling Working out of the Passport Sling at Herzlich, Germany.

The key to success is not to carry everything I own all of the time. I use a Digital Video Fastpack 250 AW as my "A to B" bag. It contains a 15" MBP Retina Display, an iPad, my camera gear for the trip, and extra hard drives. It fits under the seat of the plane, so I never have to worry about checking it. The Fastpack is an excellent bag for getting me where I need to go.

The Passport Sling goes in my suitcase. Because it has a removable camera box, it's easy to collapse and stow. Once I get to my destination, I fill it with the contents I need for the day. The extra gear stays locked up in my room.

Flattened Passport Sling I can flatten the bag so it takes up very little depth in my suitcase.

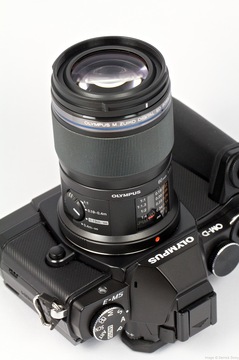
I can configure the Passport Sling to hold a medium sized DSLR or my Compact System Camera kit. For this trip, I was shooting primarily with the Olympus OM-D and the Panasonic 12-35mm f/2.8 zoom. I often carried a second lens and flash, plus polarizer and a Joby GorillaPod.

There were times, however, when I needed its help for more mundane tasks. For those trips, I would empty the Sling and hike to the store. Because of its large capacity, I could fit quite a few groceries inside.

Shopping with the Passport Sling It holds a lot of groceries too...

What really impressed me over the two weeks was how comfortable the bag is to wear. If I'm on a crowed train, climbing into a taxi, or walking for hours, the Passport Sling feels great and hugs my body. And if I need more space, I can unzip the expansion compartment that gives me about 30% more room.

When shooting, I leave the top zipper open so I can quickly get to my camera. I rarely missed a shot using this approach, and I was able to keep my camera out of sight during my adventures.

For urban travelers of any distance, this is a bag to consider. I know it has made my recent tour more enjoyable. The Lowepro Passport Sling II will be available for $65.


twitter.jpg Follow me on Twitter


My Podcasting Rig While in Germany

If you listened to my post-Oktoberfest morning podcast from the Leonardo Hotel in Munich, you know that I was sipping coffee and relaying events from the night before.

I thought you might get a kick out of seeing the set-up I've been using to record during these last two weeks.

Podcast Recording Munich Germany

I mount a Rode VideoMic Pro on a Joby GorillaPod and plug it in to my MacBook Pro Retina Display laptop via a Plantronics USB interface. The audio is captured by Audio Hijack Pro and edited (sometimes) in Fission, both by Rogue Amoeba.

I usually set up my Lowepro Fastpack to serve as a sound cushion. It's a simple rig, but it is very portable, and it has enabled me to keep posting to iTunes, even while on the road.


twitter.jpg Follow me on Twitter


I had a surprising number of conversations last week that were focused on my micro four thirds system. At the Photokina show, people wanted to know if my gear was serious enough for assignment work, and is this something they should be interested in. I realized that the general photography population in Europe and USA still hasn't fully grasped the value of CSC. I then spend some time talking about Photokina itself and a few of the things that caught my eye. And then I wrap up the show with my night at Oktoberfest in Munich - all of this recorded in Germany.

Listen to the Podcast

You can also download the podcast here (32 minutes). Or better yet, subscribe to the podcast in iTunes. You can support this podcast by purchasing the TDS iPhone App for only $2.99 from the Apple App Store.

Monthly Photo Assignment

Bokeh is the Sept. 2012 Photo Assignment. You can read more about how to submit on our Member Participation page. Deadline for entry is Sept. 30, 2012.

More Ways to Participate

Want to share photos and talk with other members in our virtual camera club? Check out our Flickr Public Group. And from those images, I choose the TDS Member Photo of the Day.

Podcast Sponsors

Red River Paper -- The $7.99 Sample Kit is back! And with free shipping.

Make Your Photos Sizzle with Color! -- SizzlPix is like High Definition TV for your photography.

Need a New Photo Bag? Check out the Lowepro Specialty Store on The Digital Story and use discount code LP20 to saven 20% at check out.


Technorati Tags:
, , , , ,


A Night Inside Oktoberfest Munich

I spent Monday night inside the Hofbrau tent at Oktoberfest in Munich. The capacity of this facility is over 3,000 people. During the 16 days of the festival, they will serve more than 500,000 1-liter beers... just in that tent.

Oktoberfest Crowd The scene from the balcony in the Hofbrau tent. Photos by Derrick Story.

Speaking of beer, It's amazing how much more you can drink there. It's stronger, specially brewed for Oktoberfest. But it's also fresh because it's not transported. Hofbrau makes it there, and there it is consumed.

More Beer Please
"More Beer Please!" The women who bring the beer are absolutely amazing.

The festival itself is huge. There are a total of 34 beer tents, 9 of which are very large. It takes 4 months to build the Oktoberfest village and 2 months to take it down. This happens every year.

In this shot that I took from the air, you can see how the festival dominates the Munich landscape.

Oktoberfest from the Air Oktoberfest from the air.

Inside the tents, music fills the air from live bands. Thousands of chickens and giant pretzels are served to help soak up the beer. And people truly have a good time. Yes, it's noisy, and there's lots of bumping. It's a beer drinking festival. And it's a blast.

I talk more about my Oktoberfest experience in this week's TDS Podcast.


twitter.jpg Follow me on Twitter


Across Germany, One Instagram at a Time

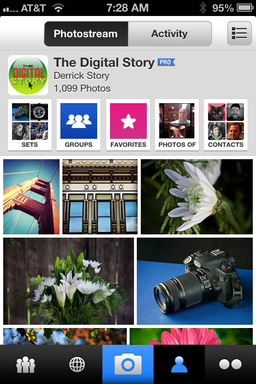
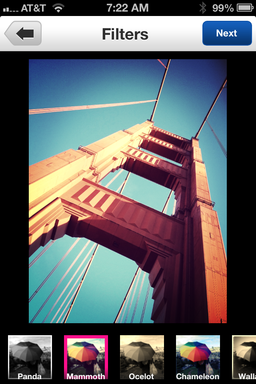
For me, Instagram is the ultimate travel log. You can capture images with your smart phone, apply effects, write captions, and share with others -- all in real time over a cellular network. During my visit to Germany, I've used Instagram to augment my Photokina reporting for Lowepro and to document my own observations. This is the first time I've tried this (in fact I've only been using Instagram for a few weeks), and I'm having a blast.

instagrams.jpg Recent Instagrams from my travels.

You can set up the application to share your posts on other social networks too. So I'm able to keep my Twitter and Facebook friends up to date, even if they don't follow me on Instagram.

Power Lines - Setting Sun "Power Lines, Setting Sun" captured through a train window while traveling from Cologne to Munich.

What's even more interesting to me, is that I'm using an iPhone 3GS for this reporting, not my iPhone 4S. As you may recall from a podcast earlier this month, I had AT&T unlock my iPhone 3GS, then I bought a SIM card in Germany for 25 Euros with 750 MBs of data plus plenty of talk time. This allows me to post lots of content regardless of my location.

Tonight, we head to Oktoberfest. I will certainly be reporting from there. If you use Instagram, you might want to follow me at derrickstory. Otherwise, I'll be sure to post on Twitter and on TheDigitalStory on Facebook. Prost!