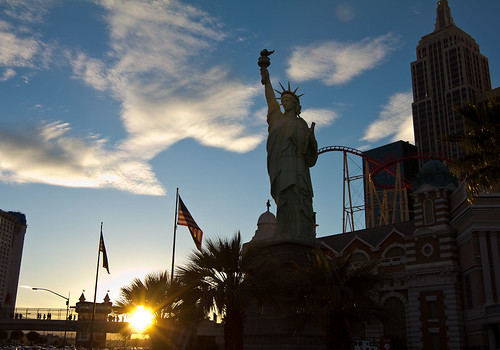
As soon as the Expo Hall closes at WPPI, I head outdoors for some late afternoon shooting. In this case, I liked facing the sunset and working with the interesting shapes of Las Vegas.
Recently in Photography
I'm recording this podcast as I'm stepping out of my hotel room in Las Vegas for day 2 of the WPPI show at the MGM Grand Hotel. I wanted to hold off on recording this episode until I've spent some time here, so you're getting my impressions of the event as close to "live" as possible.
Listen to the Podcast
You can also download the podcast here (21 minutes). Or better yet, subscribe to the podcast in iTunes. You can support this podcast by purchasing the TDS iPhone App for only $2.99 from the Apple App Store.
Monthly Photo Assignment
Loved One is the February 2011 Photo Assignment. You can read more about how to submit on our Member Participation page. Deadline for entry is Feb. 28, 2011.
TDS Summer 2011 Photography Workshop
We're making plans now for the Summer 2011 TDS Photography Workshop. If you want your name on the reserve list, just drop me a line.
More Ways to Participate
Want to share photos and talk with other members in our virtual camera club? Check out our Flickr Public Group. It's a blast!
Podcast Sponsors
Red River Paper -- Try the $7.99 Sample Kit.
Make Your Photos Sizzle with Color! -- SizzlPix is like High Definition TV for your photography.
Blurb believes passionately in the joy of books - reading them, making them, sharing them, and selling them. Learn more by visiting Blurb on The Digital Story.Technorati Tags:
digital photography, podcast, technique, Technology, The Digital Story, tips
You don't have to be a guy to use a Lowepro S&F Technical vest, as proven by fashion photographer Vered Koshlano. In this Lowepro blog post, she explains why in a very fun 1-minute video recorded on the show floor at WPPI.
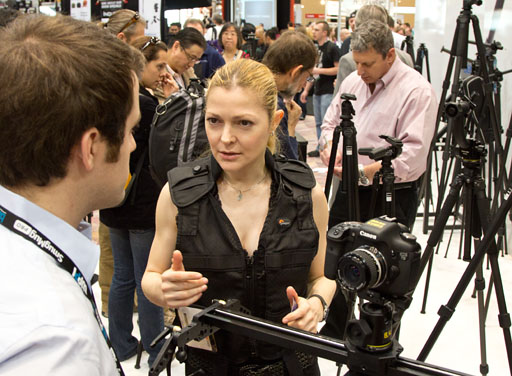
You can see Vered's work at www.byvk.com.
"This is an HDR shot with a Canon 60D using a Canon wide-angle 10-22mm at 10mm and the ISO set to 800," writes Keith Burrows. "I used Aperture 3 and HDR Pro plugin by NIK software."
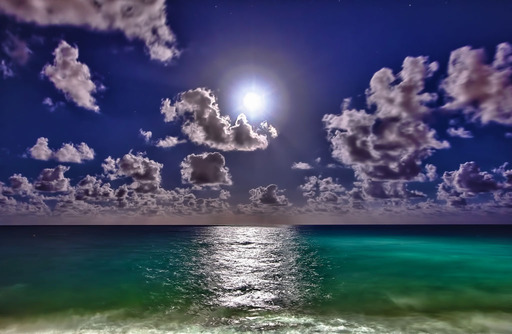 Moonrise, Palm Beach, Florida by Keith Burrows
"This section of beach was lit by giant spotlights from atop the seaside condos behind me. It almost made the water look like it had an underwater pool light illuminating it. I shot quite a few that night and will post them soon on my new photography site.
Keith is an associate Pastor at Acts 2 Worship Center A/G with a passion to capture the wonder & splendor of God's creation.
This is our 209th Grab Shot! Wow. If you want to review the collection that began back in 2006, go to our Grab Shots page.
If you have a candid you'd like to share, take a look at our Submissions page, then send us your Grab Shot. We'll try to get it published for you on The Digital Story.
And you can view more images from our virtual camera club in the Member Photo Gallery.
The Digital Story Podcast App is the best way to stream or download weekly TDS podcast episodes. No more syncing your iPhone, iPod Touch, iPad, or even your Android phone just to get a podcast. And the best part is, The Digital Story Podcast App is your way to help support this show. Download it today!

I'll be in rocking Las Vegas next week for the WPPI Convention at the MGM Grand Hotel. In addition to helping photographers in the Lowepro booth (#124), I plan on reporting on interesting things I see and people who I meet. I'm also going to record next week's TDS podcast from the MGM Grand.
Canon has the largest booth area, followed by Nikon and Sony. But one of the things I like about WPPI is that the expo attracts lots of smaller businesses doing creative things. I hope to share some of those goodies with you next week.
If you plan on attending the event, please stop by the Lowepro booth to say hello, or send me a Tweet at Derrick_Story.
Next stop... Las Vegas!
As we wait for large aperture prime lenses from Zeiss and Sigma for our micro four thirds cameras, we can still create those velvety soft backgrounds right now. I've been testing adapters for my Olympus PEN E-PL2, and it's a lot of fun.
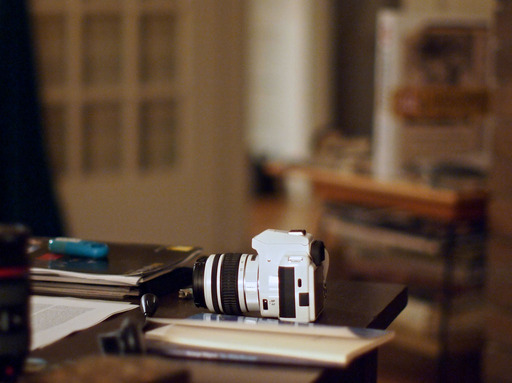 A Canon 50mm f/1.2 mounted on an Olympus E-PL2 to create this soft background effect. Click on image for larger version.
The process is quite simple. You get an adapter that allows you to mount a particular brand of lens on your camera. I've tested Zeiss and Canon adapters for the E-PL2. This allows me to use wide aperture primes on the petite Olympus to achieve effects I can't get with the kit lens.
Since the PEN cameras have image stabilization built-in to the body, any lens you put on the body becomes stabilized. You have to manually focus, and you don't get any aperture metadata. But what you do get is the ability to create shots at wide aperture.
If you want to create a big time look with your little camera, investigate adapters for any prime lenses you may have stashed in the closet.
Hiding pictures in iPhoto '11 is a helpful technique when you want to keep an image in your library, but you don't want others to see it. It's easy to set up, and just as simple to turn on and off. In this short video, I use the technique to hide a picture of me taken after a week of Oktoberfest in Munich.
More Training Available
There are now two ways to learn and have more fun with iPhoto '11: my iPhoto '11 Essential Training ONLINE at Lynda.com, and the new iPhoto '11 Essential Training DVD that you can purchase from the Lynda.com Store for $49.95 US.
You also may want to watch Creating Smart Albums in iPhoto '11. It's a very handy technique.
By using B&W in a photo, you can help focus the viewer's eye to a particular area of the composition. In this shot for example, I like how the basketball player is flying above the rim. It's amazing really. But in the full color version, the colorful crowd was distracting, making it hard to isolate the player with the ball. I like the expressions in the crowd, but I want the viewer to look at those after focusing on the main subject.
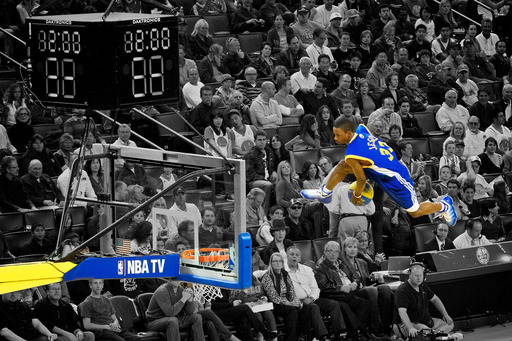 After bouncing off a trampoline during the halftime show at Oracle Arena, this athlete soars high into the air then dunks the ball on his way down. Click on image for larger version.
To help improve things, I converted the entire image to B&W in Aperture 3, then I used an adjustment brush to restore the color to just the player. To do this, go to the gear menu in the B&W brick, and choose, "Brush B&W away." It's very easy to do.
You can also create this effect in Photoshop, but the thing I like about Aperture 3 is that I don't have to build a mask. The application does that for me. All I have to do is paint and I get the effect I want.
More Aperture Tips and Techniques
My next Aperture Workshop is May 23, 2011 in Santa Rosa, CA. write me if you're interested in attending.
To learn more about Aperture 3, check out my Aperture 3 Essential Training on Lynda.com. Also, take a look at our Aperture 3 Learning Center. Tons of free content about how to get the most out of Aperture.
The ability to push the ISO up to 3200 for indoor sports makes everything easier. I can stop down the aperture a bit to give me more depth of field, and still maintain a fast shutter speed to freeze the action.
 Warriors point guard Stephen Curry splits the defense of Durant and Green to score during the Warriors victory over Oklahoma City at Oracle Arena on Feb. 13, 2011. Click on image for larger version.
For last night's Warriors victory over Oklahoma City at Oracle Arena, I used the Canon EOS 60Dwith the Canon EF 70-200mm f/4L zoom
to capture these shots. The 60D works great because of its 5.3 fps burst rate and the excellent image quality at ISO 3200. This enabled me to shoot at 1/500th second at f/4 or f/5.6.
 Kevin Durant dunks against the Warriors at Oracle Arena. Click on image for larger version.
Being able to use the f/4 telephoto instead of the bulkier f/2.8 70-200mm makes everything easier for this type of sports photography because it is lighter and smaller. Then, to get the most out of the images, I capture in Raw, even though the memory buffer fills up a bit faster on the 60D when I do.
The just announced Olympus SZ-10 is a compact featuring a 18x super telephoto 28-504mm lens, 3" 460K-dot LCD monitor, 720p HD video recording, 3D photo mode... and face detection for cats and dogs.
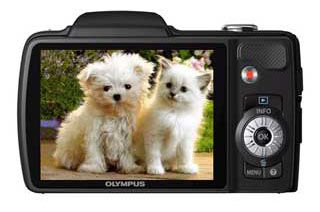
That's right, in there are two scene modes dedicated to cats and dogs, so when your favorite pet turns toward the camera, the SZ-10 locks-in focus and exposure for their adorable faces. "Say kibble!"
The Olympus SZ-10 should be available in April 2011 for $249.
