Recently in Photography

  Page 62 of 385 in Photography  

This is The Digital Story Podcast #662, Nov. 20, 2018. Today's theme is "TDS Holiday Gift Guide and Stocking Stuffers." I'm Derrick Story.

Opening Monologue

Window shopping is a long standing holiday tradition. And these days our computer screen is just as much part of the experience as the storefront display. On this week's show, I have assembled a delightful gift guide and a bonus list of stocking stuffers. So make yourself a cup of cocoa and join me for our annual holiday extravaganza.

TTDS Holiday Gift Guide

  • 3 Legged Thing Toolz Multi-Tool ($7.99) - The perfect stocking stuffer for every photographer - Sturdy, lightweight, cool tools, and it fits on the keychain.
  • SanDisk 128GB Ultra USB 3.0 Flash Drive ($28.74) - Think about it... 128GB of fast storage for less than $30. This could be a life saver.
  • Think Tank Photo Lens Case Duo 5 ($20.75) - Far and away my favorite lens case these days. Comes in green or black. Great for most mirrorless optics.
  • Tenba Tool Box 8 ($37.95) - With 7.0 x 8.0 x 2.75" interior dimensions, 10 compartments, and translucent cover, this is the perfect way to stow and organize gear. Comes in different sizes too.
  • Tenba BYOB 10 Camera Insert Gray ($35.08) - The gray BYOB 10 Camera Insert from Tenba is designed to carry and protect a camera and gear inside other non-camera bags including larger backpacks, suitcases or handbags. Its soft outer shell molds to the shape of a variety of carry bags. The gray BYOB 10 will hold a DSLR or mirrorless camera body with up to 4 lenses and accessories and can fit a 24-70mm f/2.8 lens attached to the camera body. Super handy!
  • Olympus Fisheye Body Cap 9mm f/8 Lens ($98.72) - One of the coolest lenses in the world - 18mm (35mm Equivalent), 2 Aspherical Elements, 140� Angle of View, and Extremely Slim Body Cap Profile.
  • SanDisk 500GB Extreme Portable USB 3.1 Type-C External SSD ($109.99) - Incredibly light and compact - 10 Gb/s USB 3.1 Type-C interface, which is also known as USB 3.1 Gen 2 and delivers read speeds of up to 550 MB/s. Additionally, this SSD is IP-55 rated and features resistance against water, dust, and shock. It can withstand a water flow of up to 30 kPA for 3 minutes, 1500 g of shock, and 5 gRMS of vibration @ 10-2000 Hz. I've been using one and I love it!
  • Zoom H1n Digital Handy Recorder ($119.99) - The H1n is geared for musicians, journalists, podcasters, and more, recording WAV and MP3 files to meet your professional needs. The H1n has a stereo X/Y microphone configuration that captures a realistic stereo image. The unit records audio to microSD or microSDHC flash memory cards, supporting capacities up to 32GB. The H1n records WAV audio at rates up to 24-bit / 96 kHz, and MP3 audio at rates up to 320 kbps. The pocket-sized device runs on two AAA batteries, providing up to 10 hours of continuous operation. If you ever need to capture audio, this is the device for you. I use one on the road for the TDS podcast.
  • Genaray Ultra-Thin Bicolor 288 SMD LED ($139) - All-Aluminum, Slim, Lightweight Design, 3200-5600K Adjustable Color Temperature, 10-100% Brightness Dimmer, 2.4 GHz Receiver for 98' Remote Control, Integrated Barndoors & Diffuser. These LED panels are so handy, from portraits to product shots. Easy to transport as well. Very nimble.
  • Panasonic Lumix G 25mm f/1.7 ASPH. Lens ($148 - $100 savings) - This is a compact, fast, sharp, and versatile optic for Micro Four Thirds shooters. Every photographer should have one of these in his/her bag. What a great value!

The Portfoliobox Inspirational Photographer

I got to thinking about some of the great PortfolioBox photographers out there, and how they could inspire us both artistically, but also in terms of our presentation online. So I started digging.

Each week for the month of November, I'm going to feature an inspirational photographer who uses Portfoliobox as his/her platform for presenting their work. This week I want to point you to Detomsign. His clean, engaging fashion photography is truly engaging.

He writes about Portfoliobox, "I like that this is not only a website creation tool, it's much more than that. It's like a community of creatives which are supported by professionals like Portfoliobox. I'm always recommending everyone that Portfoliobox is the best, easy to setup and ready to go at a minute. Will be using Portfoliobox for a long time and none of the others are as good as Portfoliobox You want the best? You can't go wrong with Portfoliobox I would say."

If you've signed up for a Portfoliobox Pro account, and have published at least one page, then send me the link to that site. Use the Contact Form on the Nimble Photographer and provide your name, the link, and the subject of the page or site you've published. I will add it to our PortfolioBox Pro Directory.

To create your own Portfoliobox site, click on the tile or use this link to get started. If you upgrade to a Pro site, you'll save 20 percent off the $83 annual price.

Holiday Stocking Stuffers for Photographers

  • Pedco UltraClamp Assembly Camera Mount Accessory for Cameras, Scopes, and Binoculars (1.5-Inch) ($23.47) - The Pedco UltraClamp Assembly adjustable camera mount accessory for cameras, spotting scopes, and binoculars allows for stability and flexibility in attaching an optic device to bike and motorcycle handlebars, car windows, roll bars, railings, tables and other objects and surfaces. The ball and socket head provides a wide range of angles for framing subjects, and can be quickly and easily adjusted.
  • tripod-table-web.jpg

  • Mini Tripod Table Stand with Pads and Soft Pistol Grip for DSLR 1/4" Cameras Weighing up to 2.5lbs ($8.99) - The ZaxSound is a heavy-duty tripod, can support cameras weighing up to 2.5lbs because it has 1 support leg that is built into the tripod main frame structure, which handles all the weight. and the other 2 legs that provide stabilization to the tripod.
  • Lume Cube - Bluetooth LED Light (Single - Black) ($79.99) - Proudly known as the World's Most Versatile Light�, Lume Cube represents the future of LED Lighting. Built with professional quality specs, the Lume Cube is pocket sized at 1.5 inches cubed, emits a powerful 1,500 Lumens of daylight balanced light and is waterproof to 100 feet and made with a custom lens. Diffuse, Gel or Modify the light output via the Lume Cube Light-House. Mount it to any of your devices via the built-in 1/4" 20 tripod mount on bottom. Control with manual buttons for quick adjustments or our Bluetooth App, this powerful little light can be used as a Flash (down to 1/125 of a second in Slave Mode) or constant video light.
  • LensPen New DSLR Pro Camera Cleaning Kit, NDSLRK-1 ($16.75) - Digital lens, filter and compact lens cleaning kit. Safe for use on all optical devices. Kit contains miniPRO II, FilterKlear and LensPen. Patented carbon compound. Over 500 cleanings.
  • Giottos AA1903 Rocket Air Blaster Large-Red ($11.99) - Large black Rocket Air Blaster easily removes dust and debris from cameras, lenses and filters with a powerful blast of air. Made of rubber. Includes a one-way valve to prevent Blaster from breathing in dust and spreading it back to your equipment.

Do You Have a Film Camera that Needs a Good Home?

Over the last year, I've received donations from TDS members who have film cameras that need a good home. What I do is inspect the items, repair and clean as I can, then list them in TheFilmCameraShop where I can find a good home for them. If you're interested in donating, please use the Contact Form on TheNimblePhotographer site. And thanks for you consideration!

Updates and Such

The 2019 TDS Workshop Season is Now Open

- We had a great response to last week's unveiling of the 2019 TDS Photography Workshop Season. Every event already has multiple deposits. If you want to join us in 2019, and I hope you do, please visit the Workshops page and find the event that's perfect for you.

Inner Circle Members: Continuing this month - Photo Critique. Check out the post on Patreon. Send your images to me with the subject line, "Photo Critique." More details on our Patreon page.

B&H and Amazon tiles on www.thedigitalstory. If you click on them first, you're helping to support this podcast. And speaking of supporting this show, and big thanks to our Patreon Inner Circle members:

And finally, be sure to visit our friends at Red River Paper for all of your inkjet supply needs.

See you next week!

More Ways to Participate

Want to share photos and talk with other members in our virtual camera club? Check out our Flickr Public Group. And from those images, I choose the TDS Member Photo of the Day.

Podcast Sponsors

Red River Paper - Keep up with the world of inkjet printing, and win free paper, by liking Red River Paper on Facebook.

Portfoliobox - Your PortfolioBox site is the best way to show off your best images.

The Nimbleosity Report

Do you want to keep up with the best content from The Digital Story and The Nimble Photographer? Sign up for The Nimbleosity Report, and receive highlights twice-a-month in a single page newsletter. Be a part of our community!

Want to Comment on this Post?

You can share your thoughts at the TDS Facebook page, where I'll post this story for discussion.
I have a location assignment on Monday where I have to shoot wine bottles at the winery, both with scenery backdrops and on seamless paper. Fortunately, I've designed a semi-portable product shot studio using an iMac box, a table, seamless paper, and lots of clips.

If this has piqued your curiosity, read on. Let's start with a finished product using this setup.

Whiskey Bottle Black Backdrop Whiskey bottle photographed using the "iMac Box" semi-portable studio. One LED light in a softbox. RAW file file processed in Capture One Pro 11.

I always bring my own table because I've learned not to depend on clients for suitable working surfaces. This puts me in complete control of my shooting environment. At this point, I'm sure you're wondering about the iMac box. It is a critical element for this rig.

DSCF0700.jpg

Why? Because it is the right height for my backdrop stand, it is very stable, and the way the box opens allows for an adjustable connector for the seamless paper. That way I can get just the right slope so I can create a gentle curve for a studio effect.

For the white backdrop images, I use a small softbox for the front lighting and a second light on the background to keep it nice and bright. The second light can also provide a bit of rim lighting on the product if necessary. These are both LED units that run off batteries.

DSCF0696.jpg

I cut the seamless paper so it fits semi-perfectly with this set up. Wooden yardsticks help me expand the width slightly beyond the iMac box, and they provide nice helpful anchors on both ends of the seamless.

The camera, (in this case a Pentax KP DSLR with the wonderful HD DA 20-40mm f/2.8-4 ED Limited now on sale for $596, $200 off and a steal) is positioned on a tripod with the flip LCD angled upward for easy viewing. I also bring my own stool that's just the right height for this working environment.

From here, it's just basic photography. Adjust the lighting, set the exposure, check the color, then take the picture. Once the first product is successfully recorded, the process is fast for additional shots.

Whiskey Bottle White Backdrop Test subject with portable studio on white seamless. Two lights, one on the background

When this part of the shoot is complete, everything breaks down quickly and can be carried for transport in the back of the Audi A3. Yes, I have to drop the back seats to accommodate the table.

DSCF0709.jpg

Some folks may wonder why I don't use a popup cube product studio for this assignment. I do have one, and I love it. That's what I use for the product shots for the TheFilmCameraShop that I run. The problem is that the popups are not quite big enough for group shots of wine bottles and other larger subjects. If I knew all the items were going to be small, then I would indeed go that route.

So there it is... a versatile portable studio that's relatively nimble and very efficient. Wish me luck on the shoot.

==========

Want to learn more about Capture One Pro? Take a look at my course titled, Capture One Pro 11 Essential Training on LinkedIn Learning. You can also tune in on lynda.com if you prefer your training there. Either way, I have four hours of entertaining education that will help you master this excellent photo management and editing application.

You can share your thoughts at the TDS Facebook page, where I'll post this story for discussion.

3-legged-tool.jpg

What a fun way to close out a busy 2018! This year's Holiday Gift Guide features quality items at a great value for the discriminating photographer. Take a look and snag a few of these for your holiday stockings.

  • 3 Legged Thing Toolz Multi-Tool ($7.99) - The perfect stocking stuffer for every photographer - Sturdy, lightweight, cool tools, and it fits on the keychain.
  • SanDisk 128GB Ultra USB 3.0 Flash Drive ($28.74) - Think about it... 128GB of fast storage for less than $30. This could be a life saver.
  • lens-duo-5.png

  • Think Tank Photo Lens Case Duo 5 ($20.75) - Far and away my favorite lens case these days. Comes in green or black. Great for most mirrorless optics.
  • Tenba Tool Box 8 ($37.95) - With 7.0 x 8.0 x 2.75" interior dimensions, 10 compartments, and translucent cover, this is the perfect way to stow and organize gear. Comes in different sizes too.
  • Tenba BYOB 10 Camera Insert Gray ($35.08) - The gray BYOB 10 Camera Insert from Tenba is designed to carry and protect a camera and gear inside other non-camera bags including larger backpacks, suitcases or handbags. Its soft outer shell molds to the shape of a variety of carry bags. The gray BYOB 10 will hold a DSLR or mirrorless camera body with up to 4 lenses and accessories and can fit a 24-70mm f/2.8 lens attached to the camera body. Super handy!
  • camera-insert.jpg

  • Olympus Fisheye Body Cap 9mm f/8 Lens ($98.72) - One of the coolest lenses in the world - 18mm (35mm Equivalent), 2 Aspherical Elements, 140� Angle of View, and Extremely Slim Body Cap Profile.
  • SanDisk 500GB Extreme Portable USB 3.1 Type-C External SSD ($109.99) - Incredibly light and compact - 10 Gb/s USB 3.1 Type-C interface, which is also known as USB 3.1 Gen 2 and delivers read speeds of up to 550 MB/s. Additionally, this SSD is IP-55 rated and features resistance against water, dust, and shock. It can withstand a water flow of up to 30 kPA for 3 minutes, 1500 g of shock, and 5 gRMS of vibration @ 10-2000 Hz. I've been using one and I love it!
  • zoom-recorder.jpg

  • Zoom H1n Digital Handy Recorder ($119.99) - The H1n is geared for musicians, journalists, podcasters, and more, recording WAV and MP3 files to meet your professional needs. The H1n has a stereo X/Y microphone configuration that captures a realistic stereo image. The unit records audio to microSD or microSDHC flash memory cards, supporting capacities up to 32GB. The H1n records WAV audio at rates up to 24-bit / 96 kHz, and MP3 audio at rates up to 320 kbps. The pocket-sized device runs on two AAA batteries, providing up to 10 hours of continuous operation. If you ever need to capture audio, this is the device for you. I use one on the road for the TDS podcast.
  • led-panel.jpg

  • Genaray Ultra-Thin Bicolor 288 SMD LED ($139) - All-Aluminum, Slim, Lightweight Design, 3200-5600K Adjustable Color Temperature, 10-100% Brightness Dimmer, 2.4 GHz Receiver for 98' Remote Control, Integrated Barndoors & Diffuser. These LED panels are so handy, from portraits to product shots. Easy to transport as well. Very nimble.
  • Panasonic Lumix G 25mm f/1.7 ASPH. Lens ($148 - $100 savings) - This is a compact, fast, sharp, and versatile optic for Micro Four Thirds shooters. Every photographer should have one of these in his/her bag. What a great value!

And as we wind down 2018, a special thanks to all of the members of The Digital Story community. I so appreciate your support of this site and the weekly podcast. And I'm looking forward to a creative, productive, 2019.

You can share your thoughts at the TDS Facebook page, where I'll post this story for discussion.

This is The Digital Story Podcast #661, Nov. 13, 2018. Today's theme is "The 2019 TDS Workshop Season." I'm Derrick Story.

Opening Monologue

Every year we strive to make our photography events even more compelling than the season before. For 2019, we have what I consider our best offering to date. Four unique events in fantastic destinations at truly affordable prices. And in today's TDS Photography Podcast, I will share each one of them with you. So sit back, tune in, and contemplate the possibilities for your next photography adventure.

The 2019 TDS Workshop Season

Here is the event slate for 2019! You can reserve your spot by visiting the 2019 TDS Workshops page and placing your $100 deposit for the event of your choice.

twilight-workshop.jpg

  • Joshua Tree National Park - March 13-15, 2019 - This will be our first workshop visit to Joshua Tree. This fascinating environment is perfect for landscape work by day and night photography once the sun sets. We'll also visit the Salton Sea to capture migratory birds and to explore this unusual body of water. During our lab sessions, there will be instruction on maximizing your results with Aurora HDR, Lightroom CC, and Luminar. Add a little aerial photography, and we're set for photographically satisfying adventure. Three days, $725
  • San Francisco Street Photography - April 26-28, 2019 - We'll work entirely on location in San Francisco. We'll book a hotel in picturesque Union Square that will serve as our headquarters during the event. No rental car will be necessary. We'll explore the City's hidden treasures and capture them through our lenses. And we're adding new shooting locations again this year, including twilight assignments. This is San Francisco like you've never seen it before. And as a bonus, Olympus Visionary Mike Boening will be joining the teaching staff and leading sessions on street shooting and night photography. Two instructors, three days, small group, and all for just $725. (That's right, it's 3 full days in one of the most photogenic cities in the U.S.)
  • The Sonoma Coast Exploration - July 17-19, 2019 - Northern California's rugged coastline is the perfect setting to fine-tune our landscape and long-exposure water images. Plus, we'll visit a former Russian fort, movie locations, and interesting fishing villages. This workshop is the perfect escape from summer heat and humidity while adding hundreds of beautiful images to your photo library. During our lab sessions, there will be instruction on maximizing your results with Aurora HDR, Lightroom CC, and Luminar. If a workshop could be relaxing and stimulating all at the same time, this is it. 3 days - $725.
  • Humboldt Redwoods Photography Workshop - Sept. 18-20, 2019 - There is magic in the forest. If you've never experienced the magnificent redwoods of Humboldt County, you are in for a treat. Every detail of this vibrant ecosystem presents a photographic opportunity. The fern-covered floor with Dogwoods and azaleas, the towering Redwoods, fallen logs across bubbling streams... so much to work with. Additionally, we'll explore the fascinating Eel River and its wildlife. During our lab sessions, there will be instruction on maximizing your results with Aurora HDR, Lightroom CC, and Luminar. This workshop will delight your eyes and satisfy your soul. 3 days - $725

You can reserve your spot by visiting the 2019 TDS Workshops page and placing your $100 deposit for the event of your choice.

The Portfoliobox Inspirational Photographer

I got to thinking about some of the great PortfolioBox photographers out there, and how they could inspire us both artistically, but also in terms of our presentation online. So I started digging.

Each week for the month of November, I'm going to feature an inspirational photographer who uses Portfoliobox as his/her platform for presenting their work. This week I want to point you to Eva Fidziukiewicz. Not only is her fashion work outstanding, but her unique Portfoliobox design is equally appealing.

If you've signed up for a Portfoliobox Pro account, and have published at least one page, then send me the link to that site. Use the Contact Form on the Nimble Photographer and provide your name, the link, and the subject of the page or site you've published. I will add it to our PortfolioBox Pro Directory.

To create your own Portfoliobox site, click on the tile or use this link to get started. If you upgrade to a Pro site, you'll save 20 percent off the $83 annual price.

Using Aperture and Automator to Add IPTC to Your Pictures

Former Aperture users... don't delete the app quite yet. I have a helpful, practical purpose for keeping it on your hard drive: to add IPTC metadata (semi-automatically) to your pictures.

I'm using the Automator/Aperture tandem to include my copyright and author info with images that may fall outside my normal workflow, and don't have camera functions to include them. I've been adding data to iPhone images and those from the Fujifilm XF10. Here's how it works.

Coming Next Week - The Official 2018 TDS Holiday Gift Guide

That's right. It's that time of year. And I have handpicked 10 fun, creative, useful gift suggestions for that favorite photographer in your life (who also might be you!). You definitely won't want to miss this show.

Updates and Such

Inner Circle Members: Continuing this month - Photo Critique. Check out the post on Patreon. Send your images to me with the subject line, "Photo Critique." More details on our Patreon page.

B&H and Amazon tiles on www.thedigitalstory. If you click on them first, you're helping to support this podcast. And speaking of supporting this show, and big thanks to our Patreon Inner Circle members:

And finally, be sure to visit our friends at Red River Paper for all of your inkjet supply needs.

See you next week!

More Ways to Participate

Want to share photos and talk with other members in our virtual camera club? Check out our Flickr Public Group. And from those images, I choose the TDS Member Photo of the Day.

Podcast Sponsors

Red River Paper - Keep up with the world of inkjet printing, and win free paper, by liking Red River Paper on Facebook.

Portfoliobox - Your PortfolioBox site is the best way to show off your best images.

The Nimbleosity Report

Do you want to keep up with the best content from The Digital Story and The Nimble Photographer? Sign up for The Nimbleosity Report, and receive highlights twice-a-month in a single page newsletter. Be a part of our community!

Want to Comment on this Post?

You can share your thoughts at the TDS Facebook page, where I'll post this story for discussion.

My photography world usually lives between 24mm and 105mm. Portraits, events, and urban fit nicely in this frame. But, there are those times when nothing else but an ultra-wide will work. It's an investment that I initially resisted, but praise the heavens ever time I use it.

Wide Angle Interior Interior captured with a 10-20mm Sigma on a Pentax KP. Photo by Derrick Story.

sigma-10-12mm.jpg

Such was the case last week during an assignment. I had few details about the shoot, and wasn't sure exactly how to prepare. My Sigma 10-20mm f/3.5 EX DC HSM sits in the bottom of the bag beneath the Pentax KP DSLR because I don't shoot with it as often as my other optics. But on this day, I really needed it.

When the client pointed to a interior staircase and asked, "Can you capture all of that for me?", I smiled, and replied, "Indeed I can." I mounted the Sigma 10-20mm on the Pentax, and just left it there for the rest of the day.

I like to shoot this way. Two camera bodies with the two optics that I'm using most at the time. The Olympus OM-D E-M1 II had the Panasonic 12-35mm f/2.8 zoom that covered 24-70mms with the crop factor. And the Pentax/Sigma combo covered the 15-35mm range.

From that point on, the shoot went as smooth as ice.

The Sigma 10-20mm f/3.5 EX DC HSM is available in mounts for Nikon, Canon, Sony-Alpha, Pentax, and Sigma. It originally sold for $649, but is now available for $399 thanks to an instant $250 rebate. I hemmed and hawed a bit before making this purchase last year. Now, I can think of at least a dozen photo shoots where it saved the day.

You can share your thoughts at the TDS Facebook page, where I'll post this story for discussion.

Former Aperture users... don't delete the app quite yet. I have a helpful, practical purpose for keeping it on your hard drive: to add IPTC metadata (semi-automatically) to your pictures.

I'm using the Automator/Aperture tandem to include my copyright and author info with images that may fall outside my normal workflow, and don't have camera functions to include them. I've been adding data to iPhone images and those from the Fujifilm XF10. Here's how it works.

step-1-quick-action.jpg Start with an Automator Quick Action.

First you have to create an Automator Quick Action. I outlined the steps on how to do this in the article, Create Your Own Quick Action Shortcuts for Photo Tasks. This time, however, you're going to build a Quick Action using a series of short AppleScripts written for Aperture. Here's the recipe.

add-iptc-workflow-web.jpg

The actions are in this order: Import Photos, Set IPTC Tags, Export Versions. When I add the actual fields to the Automator Action, I keep it simple. Study the screenshots carefully to customize your own workflow. Here are the actual IPTC tags that I include.

set-iptc-tags-web.jpg

Once you have everything completed, Save the Quick Action. Automator will place it in the proper Services folder so it's available when working at the Finder level in macOS Mojave. Now it's time to play.

Make sure Aperture is open and running in the background. I would also create a new folder on your Desktop to receive the copyrighted images.

Copy a small batch of images to a folder on your Desktop. Open them in Mojave's Finder using Gallery View. You can peruse the current EXIF data for the shots. Now let's add the IPTC info. Select them all (CMD-A), then choose your new Quick Action from the gear menu. Automator will go to work.

add-info.png

In the background, Automator will run all the pictures through Aperture, add the data you want, then place them in the folder you selected on the Desktop. It will take a few seconds per image to process. One it's finished, all of your copyrighted images should be in their new folder. You can check one by opening it in Preview and reading the Info panel.

info-panel.png

I imported these IPTC pictures into Photos for macOS Mojave, worked with them, then exported them out of the app. All of my metadata stuck with the pictures.

There are lots of individual uses for this workflow. It just depends on the data you add to the Automator Action. Give it a try and see what you come up with.

The Apple Photos Book for Photographers, 2nd Edition

Updated for macOS High Sierra, the The Apple Photos Book for Photographers, 2nd Ed. provides you with the latest tips, techniques, and workflows for Apple's photo management and editing application. Get your copy today!

You can share your thoughts at the TDS Facebook page, where I'll post this story for discussion.

Luminar 2018 users have a new filter in their toolbox. It's called AI Sky Enhancer, and it's impressive.

sky-enhancer-oak-1024.jpg Before/After with Luminar 2018 AI Sky Enhancer applied.

Unlike when you use a graduated filter to enhance a sky, AI Sky Enhancer doesn't affect the foreground subjects and only applies its magic to the sky itself. That's a huge timesaving by eliminating retouching. Skylum describes it like this:

"With the help of our deep neural network, Luminar analyzes the image and detects the sky. This neural network had been trained using hundreds of thousands of images with different amounts and different types of sky, whether it's a tiny patch of blue peeking through a skylight, a cloudy sky flaunting sunset colors, or a dark, ominous sky signaling a storm."

"Once image analysis is complete, Luminar performs what we call semantic segmentation, separating the image into different layers, based on the semantic and contextual meaning of the objects it detects."

"This analysis allows the most precise and intelligent sky enhancement with minimal noise, halos, and negative impact on other areas of the image. The AI detects objects in the foreground, defines edges, and analyzes the textures and tones of the sky itself."

This simplifies landscape editing, freeing the photographer from tedious brushing of foreground subjects that need to be excluded from the enhancement of the sky. Take a look at this finished image. AI Sky Enhancer was used without any brushing to exclude the vegetation from the edit.

Luminar AI Sky Enhancer Final edit of landscape using AI Sky Enhancer. Photo by Derrick Story.

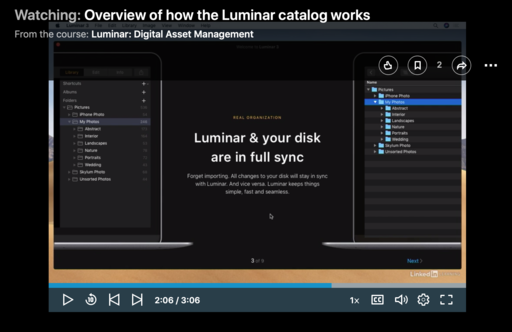
Luminar 2018 ($59) can be used as a standalone application, as a plugin for Lightroom, and as an editing extension for Photos for macOS. The next big step for this application with be Luminar Library coming in December.

Rock Luminar with my Essential Training

You learn all the ins and outs of Luminar 2018 via my Essential Training on lynda.com and on LinkedIn Learning. It's fun, and I promise, you will learn a lot.

You can share your thoughts at the TDS Facebook page, where I'll post this story for discussion.

This is The Digital Story Podcast #660, Nov. 6, 2018. Today's theme is "How to Manage Holiday Sales Temptation." I'm Derrick Story.

Opening Monologue

We're entering that time of year when retailers dangle tempting deals before our eyes in the hopes that we'll make a big ticket purchase. More often than not, these items are a bit past their prime, but still quite serviceable. So, what's the best strategy for evaluating what is a great deal and a perfect fit, as opposed to a mere impulse buy? I'll share my sure-fire approach on today's TDS Photography Podcast.

How to Manage Holiday Sales Temptation

I've already fought off my first impulse buy of the season. And it required some discipline to do so.

sony-a7-2.jpg

B&H Photo is offering the Sony Alpha a7 II Mirrorless Digital Camera with 28-70mm Lens Deluxe Kit for $998. The kit included the full frame Sony, a Sony 28-70mm zoom, spare battery, charger, and 64GB memory card for less than a grand. If you buy the camera alone with no lens or accessories, it's $1,400. You can see why my pulse started racing.

But I have a system for evaluating such mind-bending deals. Five steps to sane purchasing. So let's see where we end up after walking through the process.

  • Learn more about the camera - I pulled up a few reviews about the Alpha a7 II. First of all, it's not one of Sony's best low-light performers. It was release in 2015 and has had a couple firmware updates. But if I were to go full frame, I would want to shoot at high ISOs. And 24MP isn't more than I already have.
  • Is the 28-70mm a lens that I would buy normally? - Again, after some research, many users feel that it's soft at the corners. It's a tad bulky, but not exceptionally well made. And its maximum aperture is f/3.5-5.6. I would rather have a compact, sharp, fast, prime.
  • How would I use it, exactly? - It wouldn't be for commercial shoots because I don't have any glass besides the mediocre zoom. It's too big for travel photography. The shutter is too loud for street photography. So it doesn't fill a gap in my equipment arsenal.
  • Do I have a $1,000 to burn? - Well, now that you mentioned it, I don't. If I were purchasing an item that could generate more work or better art, yes, I could afford the grand as a business investment. But I don't have that kind of money to spend on a whim.
  • Would I regret my purchase after the thrill is gone? - Most likely yes. I just went through this process with the Fujifilm XF10. After a month of answering the above questions and shooting with the camera, I opted to buy it. Two weeks later, I'm more thrilled than ever to have it. I don't think that would be the case with the Sony.

Don't get caught off guard. Build your vetting process now, so when that super-tempting offer appears before your eyes, you have a system to determine if it's the right bargain for you.

The Portfoliobox Inspirational Photographer

I got to thinking about some of the great PortfolioBox photographers out there, and how they could inspire us both artistically, but also in terms of our presentation online. So I started digging.

Each week for the month of November, I'm going to feature an inspirational photographer who uses Portfoliobox as his/her platform for presenting their work. This week I want to point you to Rapha�l Heymann. His still lives are incredible, true works of art. And his use of Portfoliobox complements his work. You've got to check out his site.

If you've signed up for a Portfoliobox Pro account, and have published at least one page, then send me the link to that site. Use the Contact Form on the Nimble Photographer and provide your name, the link, and the subject of the page or site you've published. I will add it to our PortfolioBox Pro Directory.

To create your own Portfoliobox site, click on the tile or use this link to get started. If you upgrade to a Pro site, you'll save 20 percent off the $83 annual price.

Capture One Pro 11.3 and Fujifilm RAW Processing

I was among the many pleased photographers who exclaimed, "Finally!" when Phase One announced their improved Fujifilm RAW support with version 11.3.

This highlight, of course, is bringing the Fujifilm GFX 50S into the mix. But a dozen Fujifilm cameras and another half dozen lenses were included as well. Among them was my humble, but loved, Fujifilm XF10 compact with APS-C sensor. I was dying to seeing how its RAW files were decoded with Capture One Pro. I was not disappointed.

The XF10 Jpegs are beautiful. And I shoot in that mode most of the time. But I've programmed the back Function button to switch to RAW+Jpeg when I want to extract as much image information as possible. And now, thanks to Capture One Pro 11.3, I can do so with confidence.

Coming Next Week - The 2019 TDS Workshop Season

Is 2019 the year that you will join me and your peers for a photo adventure? I hope so. Next week I will lay out the entire 2019 season for you, and open the reserve list so you can secure your spot. Be a part of the action!

Updates and Such

Inner Circle Members: Continuing this month - Photo Critique. Check out the post on Patreon. Send your images to me with the subject line, "Photo Critique." More details on our Patreon page.

B&H and Amazon tiles on www.thedigitalstory. If you click on them first, you're helping to support this podcast. And speaking of supporting this show, and big thanks to our Patreon Inner Circle members:

And finally, be sure to visit our friends at Red River Paper for all of your inkjet supply needs.

See you next week!

More Ways to Participate

Want to share photos and talk with other members in our virtual camera club? Check out our Flickr Public Group. And from those images, I choose the TDS Member Photo of the Day.

Podcast Sponsors

Red River Paper - Keep up with the world of inkjet printing, and win free paper, by liking Red River Paper on Facebook.

Portfoliobox - Your PortfolioBox site is the best way to show off your best images.

The Nimbleosity Report

Do you want to keep up with the best content from The Digital Story and The Nimble Photographer? Sign up for The Nimbleosity Report, and receive highlights twice-a-month in a single page newsletter. Be a part of our community!

Want to Comment on this Post?

You can share your thoughts at the TDS Facebook page, where I'll post this story for discussion.

I haven't updated my iPhone X to iOS 12.1 yet because it includes the controversial battery performance feature for 2017 handsets. At some point I will update, but not until I've thought about this a bit more.

tim-cook-phone-event.jpg

My understanding from Tim Cook and Apple was that the advanced hardware in the iPhone X would not require iOS battery performance management. Based on what we see in iOS 12.1, that isn't the case.

samsung-charger.jpg

All of this may be moot for me anyway. A year ago, I decided to learn more about taking care of my iPhone battery, using the new handset as a fresh start for a different approach. In the article, A New Way to Charge My Smartphone, I outlined the basic changes I was making. Essentially, I no longer leave the phone plugged-in at night, opting instead to top it off during the day when it's around 50 percent.

In part, this became easier thanks to the Samsung Qi Certified Wireless Charger Pad I keep on my desk at the studio. I just plop the iPhone X on it, and refreshing the battery is easier than ever.

IMG_3432.jpg

So now, a year later, how did my grand experiment work? It appears quite well. I checked my Battery Health (Settings > Battery > Battery Health) to see that my Maximum Capacity is at 97 percent. It also reads that the battery can support normal peak performance. Great news!

My "new way" to recharge my phone has become second nature. How big of an impact on my battery health does this approach have? There's no way for me to know without running a side-by-side test. But after a year of rigorous use, I'm happy with 97 percent.

It will be interesting to see what battery health is in November of 2019.

As for the update to iOS 12.1. I'm going to sit tight for just a little while to see if Apple responds to the criticism about adding performance management for its 2017 handsets. Through future updates, they may add further enhancements to the tool that might make it a bit more appealing. My understanding is that I can turn it off if I wish. But something a bit more refined other than a binary "on or off" approach would be even better.

One final note on the iPhone X - Over the last year, it has performed very well. Battery life is excellent, and I seldom find myself below 25 percent. The camera is wonderful, as is its overall responsiveness. I really like it.

If I can continue to maintain good battery health with this handset, I can see me using it for quite a long time. And in this era of disposable devices, that would make me very happy.

You can share your thoughts at the TDS Facebook page, where I'll post this story for discussion.

I was among the many pleased photographers who exclaimed, "Finally!" when Phase One announced their improved Fujifilm RAW support with version 11.3.

Last of the Garden Tomatoes "Last of the Garden Tomatoes" - Photographed with a Fujifilm XF10 with the RAW file processed in Capture One Pro 11.3. Photo by Derrick Story.

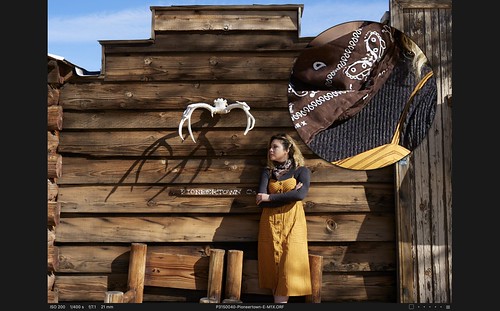
This highlight, of course, is bringing the Fujifilm GFX 50S into the mix. But a dozen Fujifilm cameras and another half dozen lenses were included as well. Among them was my humble, but loved, Fujifilm XF10 compact with APS-C sensor. I was dying to seeing how its RAW files were decoded with Capture One Pro. I was not disappointed. (Take a look at the Garden Tomatoes shot above.)

Capture-1-loupe.png The combination of the Fujifilm camera and Capture One Pro retains all that beautiful detail. Processed RAW file on the left, original RAW on the right.

The XF10 Jpegs are beautiful. And I shoot in that mode most of the time. But I've programmed the back Function button to switch to RAW+Jpeg when I want to extract as much image information as possible. And now, thanks to Capture One Pro 11.3, I can do so with confidence.

Edit Like a Pro with Capture One

Improve your skills with my new course titled, Capture One Pro 11 Essential Training on LinkedIn Learning. You can also tune in on lynda.com if you prefer your training there. Either way, I have four hours of entertaining education that will help you master this excellent photo management and editing application.

You can share your thoughts at the TDS Facebook page, where I'll post this story for discussion.