Recently in Photography

  Page 94 of 385 in Photography  

My phobia of color wheels began back in the original Final Cut days. I would look at them, then devise any other method to make the correction. And it wasn't until Capture One Pro that I overcame my prejudice and learned that they are truly helpful... and easy.

color-adjust-with-cb.jpg Fine tuning a portrait shoot with Color Balance in Capture One Pro. Photo by Derrick Story.

Currently, I'm in the middle of recording a Capture One 10 title for lynda.com. (My existing Capture One Pro 9 Essential Training is very popular, and we wanted to integrate the new features.

When I finished the movie on Color Balance, I had to laugh at myself. It's so fun. What was my problem before? So I thought that if you shared my previous phobia, this should help. Here are the basic controls for each of the color wheels.

Color-Balance-CP1-web.jpg The midtone adjustment in the Color Balance panel of Capture One Pro.

  • Drag the point in the middle of the circle to change the color. This could cover the entire image with the Master color balance, or the basic tonal areas with Shadow, Midtone, and Highlight wheels.
  • The tiny handle on the edge of the color wheel is to fine-tune the hue.
  • Once you set the color you want, use the left side slider to adjust saturation.
  • The right side slider is for brightness.

Start by choosing the Color you want to shift to in the shadows, midtones, or highlights, then fine tune it with the Hue handle. Next, work the Saturation slider until the effect is exactly to your taste, then finish off with Brightness. It's easy! And the effects are amazing.

To see the Before and After, hold down the Option/Alt key and click on the Reset arrow in the Color Balance panel. That will show you the image without your adjustments. Let go of the mouse, and your adjustments will appear again.

Start with a simple image to practice. Once you get the hang of it, you'll be visiting the Color Balance adjustment on a regular basis... and dramatically improving your images along the way.

More Capture One Pro Tips and Techniques

Improve your skills by watching Capture One Pro Essential Training now available on lynda.com. More than 5 hours of tips, tricks, and techniques. Plus many free movies using advanced techniques.

I've also created a dedicated Capture One Pro Training page on The Digital Story. You can follow all of the tips and techniques that I publish in one convenient spot.

Thinking About Making the Transition from Aperture or Lightroom? - Download my free eBook titled, Rocky Nook's Guide to Moving to Capture One Pro. I show you the steps to create a test library, then build the foundation for a smooth transition to Capture One Pro.

Want to Comment on this Post?

You can share your thoughts at the TDS Facebook page, where I'll post this story for discussion.
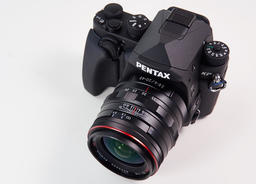
This is The Digital Story Podcast #575, March 14, 2017. Today's theme is "Existing Light is Alright." I'm Derrick Story.

Opening Monologue

Having departed to Southern California on a minute's notice last week, I grabbed my daily shoulder bag and headed out the door. It contained the gear I carry on a daily basis to the office, nothing more, nothing less. The only flash I had was the popup on the Pentax KP. And as it turned out, I never used it. So capturing life by existing light is the top story for today's show.

Existing Light is Alright

sharron-charlie-bw-web.jpeg

What are the components and techniques required for effective existing light photography? Here's a look at my list.

  • Prime lenses (or Pro zooms) - Even with great high ISO performance, we still need wide apertures.
  • Effective Auto ISO - For me, existing light photography isn't just setting the ISO to 1600 and shooting everything. I depend a lot on smart Auto ISO that increases sensor sensitivity only as needed, and has a limit at the top end that I can live with.
  • Smart Metering - One of the things that I noticed when testing the Pentax KP was that its evaluative metering was very smart. If there was a window in the frame, it didn't underexpose the rest of the scene as a result. Learning how you camera meters, and adjusting accordingly, is very important.
  • RAW+Jpeg - If I do the first three things right, my Jpegs should be pretty good. But I do want that RAW safety net for situations where I need to recover detail in the shadows or highlights.
  • The Blessed Tripod - Long exposures, HDR, and extended depth of field work better with camera support. Instead of jacking the ISO up to 128,000, You can keep it below a thousand and get tack sharp results with a tripod.

Hitting the Road with the MeFOTO Roadtrip Air

This week's three-legged adventure with the MeFOTO Roadtrip Air focuses on a giant family group shot, that was unplanned.

As I mentioned at the top of the podcast, I didn't carry a lot of gear on my journey down south. I had my everyday bag and the MeFOTO Roadtrip Air. At my sister's I learned that we were pulling together a family gathering. There were people there that I hadn't seen in years. And after about an hour, I knew we needed a group shot for the history books. And that's when my MeFOTO became invaluable.

Just to give you a bit of background about this super nimble tripod, it's distinguishing features include:

  • Super Fast Setup with the new HyperLock Leg System. Setup is as easy as 1,2,3: 1 - Hold tripod leg and twist counterclockwise until it stops (4 clicks), 2 - Pull the leg to the desired length, 3 -Twist leg clockwise until it stops. (How easy is that?)
  • Perfect for Selfies - removable telescoping center column converts to a Selfie Stick with included smartphone holder and Bluetooth remote!
  • Ultra lightweight - 30 percent lighter than classic MeFOTO models
  • Available in Backpacker, RoadTrip, GlobeTrotter models and 7 colors.

If you want to learn more about the MeFOTO line of tripods, look for the colorful tile on all the pages of the thedigitalstory.com. And if you decide that you want one for yourself, use coupon code THEDIGITALSTORY to save 10 percent and receive free shipping.

First Impressions of the Pentax KP DSLR

I brought three cameras on the road trip down south: Olympus OM-D E-M5 Mark II, Pentax ZX-5n SLR, and Pentax KP DSLR. I used all three for various situations, but I'm going to focus on the KP for this segment.

Here are the features and qualities that really stand out for me:

  • Compact for a 24MP DSLR. With the 21mm Pentax prime lens mounted, the KP fits in my workbag along side my mirrorless cameras.
  • Sensor-based image stabilization.
  • Cool lenses.
  • Super intelligent features, including choice of DNG or PEF for RAW files.
  • Customizable grips (standard) and buttons.
  • Up and down articulated LCD.
  • Friendly menu system.
  • Distinctive look that you will either love or hate.
  • Beautiful color rendition.
  • Solid WiFi.
  • Excellent high ISO performance.

As far as nits, I do have a couple. I do think the battery should be a bit bigger and/or last longer. Pentax still uses an old fashioned battery charger that requires a cord.

Overall, I really dig this camera and its cool limited edition lenses.

Updates and Such

Big thanks to all of our Patreon members! I was able to pay for the podcast server and the backup system from last month's pledges. Your contributions are making a positive impact.

We still have one seat open for our Road Trip and Rail adventure workshops. (The SF workshop has sold out.) If you'd like an invitation to either event, visit the TDS Workshops Page and use the Send Me Info form.

B&H and Amazon tiles on www.thedigitalstory. If you click on them first, you're helping to support this podcast. And speaking of supporting this show, and big thanks to our Patreon Inner Circle members.

And finally, be sure to visit our friends at Red River Paper for all of your inkjet supply needs.

See you next week!

More Ways to Participate

Want to share photos and talk with other members in our virtual camera club? Check out our Flickr Public Group. And from those images, I choose the TDS Member Photo of the Day.

Podcast Sponsors

MeFOTO Air Tripods - MeFOTO Air Tripods are a nimble photographer's dream.

Red River Paper - Keep up with the world of inkjet printing, and win free paper, by liking Red River Paper on Facebook.

The Nimbleosity Report

Do you want to keep up with the best content from The Digital Story and The Nimble Photographer? Sign up for The Nimbleosity Report, and receive highlights twice-a-month in a single page newsletter. Be a part of our community!

Want to Comment on this Post?

You can share your thoughts at the TDS Facebook page, where I'll post this story for discussion.
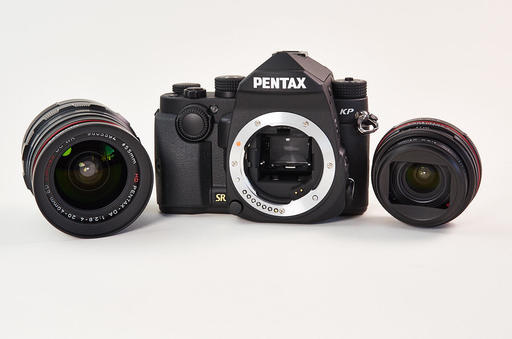
Image quality is determined by the tandem of camera and optics. The primary lenses I'm using with the Pentax KP DSLR are the Pentax DA 21mm f/3.2 AL Limited Lens ($496), the Pentax DA 20-40mm f/2.8-4 ED Limited DC WR Lens ($646), and the Pentax DA 70mm f/2.4 Limited Lens ($469). I also have a good collection of full frame lenses that I can use on this body.

IMGP0618-kp-brittney 471-portrait.jpg "Brittany" - ISO 800, 20-40mm lens at 27mm, f/3.5, original format Jpeg, no editing. Photo by Derrick Story.

When I set up the camera for testing, I configured Auto ISO for 100-6400 and let the KP use what it wanted. For image format, I'm capturing DNG+Jpeg. The KP provides options for .PEF and .DNG. I'm going with .DNG until there are RAW profiles for the native Pentax format (it's nice to have the option, isn't it?). I set the Program Line to MTF. What that means is, that in Program Mode, the camera opts first for the best aperture for that particular lens. White balance was typically Auto.

IMGP0090-bike-ride-pub.jpg "Irish Pub" - ISO 200, 20-40mm lens at 27mm, f/4.5, original format DNG, tonal adjustments. Photo by Derrick Story.

These DNGs were decoded in Capture One Pro 10. I also looked at them in Photos for macOS. They looked good in both applications. The Jpegs were often tonally different than the RAW files. Like other camera manufacturers, Pentax has its own secret sauce for Jpeg files. In the case of the KP, they were brighter with a dash of color correction, quite pleasing overall. In many instances, I would post an unedited Jpeg and call it a day.

IMGP0701-rons-celebration-chat.jpg "Conversation" - ISO 6400, 20-40mm lens at 40mm, f/5.6, original format DNG, no editing. (Bright window on the left did not throw off exposure in patterned metering.) Photo by Derrick Story.

Another aspect that impressed me was how the camera was able to meter in mixed lighting. The KP does a great job of not being fooled by a strong light source from the back or the side. Bright windows were rendered that way without compromising the tones of the primary subject. As a result, I left the camera in patterned metering most of the time, and I rarely had to use exposure compensation. This allowed me to focus more on composition.

IMGP0651-kp-upland-walk-walk.jpg "Morning Walk" - ISO 100, 20-40mm lens at 40mm, f/5.6, original format DNG, light tonal editing. Photo by Derrick Story.

Lens sharpness was good across the board. I did fine tune the 20-40mm zoom using AF Fine Adjustment (Custom Menu Setting 23) to ensure the best focusing accuracy. But I have to say that the combination of Pentax HD optics with the KP DSLR is a beautiful tandem. Overall image quality is outstanding.

IMGP0141-kp-sunday-walk-farm.jpg "Sonoma County Farm" - ISO 100, 20-40mm lens at 40mm, f/5.6, original format DNG, graduated screen to add more detail to sky. Photo by Derrick Story.

Then, there is the color. We've come to expect excellent color from Pentax cameras, and the combination of the KP DSLR and HD optics extends that tradition. Sorting the images in Capture One Pro was a delight, to say the least. The greens have a tremendous amount of vigor, the reds were well-controlled, and the blues were pleasing and natural.

IMGP0050-Pentax-KP-Dibs-dibs.jpg "Dibs" - ISO 200, 21mm lens, f/3.2 at 1/6th of a second handheld, original format DNG, no editing. Photo by Derrick Story.

And finally, don't underestimate the contribution of the 5-axis Shake Reduction system toward image sharpness. When shooting the above portrait of Dibs the Cat, I didn't realize that my shutter speed had slowed to 1/6th of a second. I had forgotten that I had locked the ISO at 200 instead of using the Auto ISO setting that provided a range of 100-6400. But the Shake Reduction system saved me, and the image is remarkably sharp.

Final Thoughts on Image Quality

I have no idea how the Pentax KP will rate in the forthcoming lab tests from various photography publications. But the thing that impressed me was that I didn't have to worry about image quality.

What I did was mount good optics on the body, configured Auto ISO and Program Line to let the camera do the heavy lifting, and I just focused on composing interesting pictures. And the results were terrific.

The Pentax KP DSLR is shipping now for $1,099.

More Articles About the Pentax KP

Pentax KP Review - Part One - Top Deck - An overview of the Mode dial, Function dial, and other controls on the top panel of the camera.

Pentax KP Review - Part Two - The Back Panel - An overview of back panel controls and the menu system for the Pentax KP.

You can share your thoughts at the TDS Facebook page, where I'll post this story for discussion.
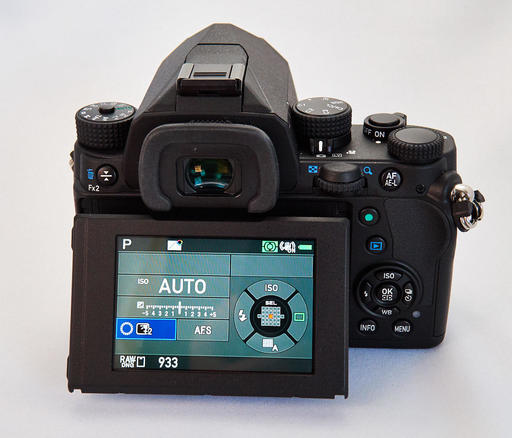
White balance is one of those adjustment tools that we sometimes forget that we need. Then when we use it, we go, "Oh wow, that does look better."

I think in large part this is because digital cameras tend to record portraits a bit on the cool side. In other words, skin tones can be slightly bluish. We typically don't think about this much, that is, until we adjust those tones with the White Balance tool and compare the difference.

white-balance-in-photos.png

In the following 5-minute video, I walk you through the White Balance tool in Photos for macOS. It's not included in the default adjustments panel, so it's often overlooked. I begin by showing how to enable the adjustment by going to Add > White Balance in the Adjustments panel. Once you enable it, I recommend that you keep it in your default set of adjustments by going back to Add, then choosing Save as Default from the popup menu.

Now that White Balance is available, here are some tips on how to use it.

Indeed, a White Balance adjustment can be a subtle improvement for an image. But it's often those subtleties that distinguish a good photographer from just an average one.

Book or Videos: Photos for macOS

Explore the world of modern photography with my The Apple Photos Book for Photographers that features insightful text and beautiful illustrations.

And if you'd like to cozy up to a video at the same time, watch my latest lynda title, Photos for macOS Essential Training

You can share your thoughts at the TDS Facebook page, where I'll post this story for discussion.
Don't Forget About Noise Removal

For many of us, noise removal is one of those forgotten adjustments in our everyday workflow. In part, that's because camera manufacturers have improved the high ISO pictures that appear on our screen. But that doesn't mean we still don't need it at times.

dxo-noise.png Noise Reduction in the DxO OpticsPro for Photos editing extension.

But what I've noticed is, that if "I just play around with noise reduction" on an image, especially one with continuous tones at a higher ISO, I usually like the results. Looking at the screen, I'll say to myself, "Hmm, that looks better." So I try to remember to at least take a look at noise reduction every now and then with these types of shots.

There's a NR slider in most of our image editing apps. Lightroom, Capture One Pro, and Photos for macOS all have this functionality. But I've noticed that their algorithms vary widely.

luminar-noise.png The noise reduction tool in Luminar.

Even though Lightroom and Capture One have good built-in tools, I find myself working with plugins more often for my NR work. For example, I really like the noise reduction tool in Luminar. Typically, I use it as an editing extension for Photos for macOS or as a plugin for Lightroom because it's so convenient and doesn't disrupt the workflow. For one-click convenience that are also effective, I like the DxO OpticsPro for Photos editing extension.

There's a good article on Amateur Photographer titled, What's the best noise reduction software out there?. They survey a number of apps that work on both Mac and Windows machines, and rate them.

Chances are that you have one or more of these on your computer right now. You might want to pay it a visit every now and then. I think you'll be happy with the results.

Photos for macOS as Your Digital Darkroom

You can learn more about using Luminar as an editing extension in my lynda.com training, Photos for macOS: Advanced Editing Extensions.

And if you'd prefer to cozy up with a book, check out The Apple Photos Book for Photographers that features chapters on basic editing, advanced post processing, and editing extensions.

You can share your thoughts at the TDS Facebook page, where I'll post this story for discussion.
This is The Digital Story Podcast #574, March 7, 2017. Today's theme is "Capturing RAW HDR with Your Smartphone." I'm Derrick Story.

Opening Monologue

Adobe just announced a Lightroom Mobile update that includes an HDR feature that makes use of the Raw capture capability of the latest mobile devices. The app instructs your cameraphone to scan the scene to determine the exposure range, then it captures 3 DNG files that it uses to build the HDR image. We wanted to learn more about this, so we invited Adobe's Josh Haftel to the show to explain how this all works. And that's our lead story for today.

Capturing RAW HDR with Your Smartphone

After capture the files are automatically aligned, merged, de-ghosted, and tone-mapped. The end result is a 16-bit DNG that combines the benefits of the Raw file format and HDR, and can be processed in the same way as the HDR technology in Adobe Camera Raw and Lightroom.

lr-mobile-hdr.jpg

Compared to existing smartphone HDR modes, this method offers better dynamic range, according to Adobe. Members of Adobe's Creative Cloud service get the additional benefit of automatically syncing files and edits with their desktop.

The algorithms of new HDR mode do require powerful hardware and are therefore limited to a relatively small number of devices, though. On iOS it works with all devices that are capable of capturing DNG files, such as iPhone 6s, 6s Plus, 7, 7 Plus, iPhone SE, or the iPad Pro 9.7. On Android at this point only the Samsung Galaxy S7, Galaxy S7 Edge and the Google Pixel models are supported. However, Adobe says it is working on getting the software to run on a wider range of devices.

This description is from the DP Review article, Lightroom Mobile update brings Raw HDR capture mode.

Hitting the Road with the MeFOTO Roadtrip Air

As you're listening to this podcast, I've already left Santa Rosa for a road trip to Southern California. Packed among my gear is a brand new MeFOTO Roadtrip Air that will be my three-legged companion for the next several days.

Just to give you a bit of background about this super nimble tripod, it's distinguishing features include:

  • Super Fast Setup with the new HyperLock Leg System. Setup is as easy as 1,2,3: 1 - Hold tripod leg and twist counterclockwise until it stops (4 clicks), 2 - Pull the leg to the desired length, 3 -Twist leg clockwise until it stops. (How easy is that?)
  • Perfect for Selfies - removable telescoping center column converts to a Selfie Stick with included smartphone holder and Bluetooth remote!
  • Ultra lightweight - 30 percent lighter than classic MeFOTO models
  • Available in Backpacker, RoadTrip, GlobeTrotter models and 7 colors.

I'll share my initial shooting experiences with it next week. If you want to learn more about the MeFOTO line of tripods, look for the colorful tile on all the pages of the thedigitalstory.com. And if you decide that you want one for yourself, use coupon code THEDIGITALSTORY to save 10 percent and receive free shipping.

My First Experience with Olympus PRO Advantage Camera Service

On Feb. 27, I shipped my Olympus OM-D E-M5 Mark II via USPS Priority Mail to Hackensack NJ for my first service using their PRO Advantage plan.

The $99 annual plan includes two Clean and Check services that include the following checkpoints:

  • Exterior cleaning
  • Firmware upgrade
  • Auto Focus accuracy check
  • Image stabilizer check
  • Function check
  • Sensor and optical check

The procedure goes like this. First you call Olympus at 1-800-260-1625, Option 4 to log in the repair order, get a service number, and the address to ship the camera to.

Then you send off the camera with that information, plus your PRO Advantage service coupon in the box. Once they receive the camera, they acknowledge the possession via email.

The service took one day, then I received it back on Monday, March 6. The camera was packed nicely, and everything looked great. The only gotcha was that my settings had been wiped out via the firmware update. So I had to spend a few minutes getting everything programmed back to my personal preferences.

This service seems like a good option for the growing numbers of pro photographers using Olympus gear.

Updates and Such

Big thanks to all of our Patreon members! I was able to pay for the podcast server and the backup system from last month's pledges. Your contributions are making a positive impact.

We still have one seat open for our TDS SF and Road Trip workshops. If you'd like an invitation to either event, visit the TDS Workshops Page and use the Send Me Info form.

B&H and Amazon tiles on www.thedigitalstory. If you click on them first, you're helping to support this podcast. And speaking of supporting this show, and big thanks to our Patreon Inner Circle members.

And finally, be sure to visit our friends at Red River Paper for all of your inkjet supply needs.

See you next week!

More Ways to Participate

Want to share photos and talk with other members in our virtual camera club? Check out our Flickr Public Group. And from those images, I choose the TDS Member Photo of the Day.

Podcast Sponsors

MeFOTO Air Tripods - MeFOTO Air Tripods are a nimble photographer's dream.

Red River Paper - Keep up with the world of inkjet printing, and win free paper, by liking Red River Paper on Facebook.

The Nimbleosity Report

Do you want to keep up with the best content from The Digital Story and The Nimble Photographer? Sign up for The Nimbleosity Report, and receive highlights twice-a-month in a single page newsletter. Be a part of our community!

Want to Comment on this Post?

You can share your thoughts at the TDS Facebook page, where I'll post this story for discussion.
The Pentax KP DSLR back panel is well designed. It isn't intimidating - just a few buttons on the right side of the 3" articulated LCD - but it provides an impressive amount of control.

The 4-Way Controller

P3033878-gear-kp-back-LCD-general.jpg Illustration 1 - 4-Way Controller in AF Point Selection Mode.

When you turn on the camera, the LCD lights up with a bold, easy to read display. Shutter speed, aperture, ISO and the other usual suspects are shown. But you'll also notice a graphic illustration of the 4-Way Controller and OK button that's directly to the right of the LCD.

P3033851-gear-kp-back-LCD-4way.jpg Illustration 2 - 4-Way Controller in ISO-Drive-WB-Flash mode.

Why would you need that illustration? The physical version is right next to it. But there's more than meets the eye. The 4-Way has two modes. And the LCD shows you which one is active. In Illustration 2, you see that you can control the ISO, drive option, white balance, and flash with the four buttons of the controller. Press and hold down the OK button, and you can change modes to the AF selection point by using the four buttons to navigate (Illustration 1). As you do so, the AF point is also highlighted in the viewfinder. This gives you complete and flexible control over the autofocus.

To set this up, go to Menu > Tab 1 >AF with Viewfinder > AF Active Area and choose SEL. (You can alternatively let the camera choose the AF point for you by choosing Auto 27 or Auto 9. But I prefer to control the AF point myself.)

You can toggle back and forth between modes for the 4-Way controller by pressing and holding the OK button. They're all straightforward, however, I do want to mention my favorite White Balance setting: Multi Auto White Balance. It is to the right of AWB in the WB menu, and it measures mixed lighting and gives you an intelligent setting. I love it, and it works.

The Info and Menu Buttons

Press the Info button, and s grid of options appears on the screen (Illustration 3). Navigate to the one you want via the 4-Way controller and press the OK to reveal its details. The Pentax KP does not have a touch screen, so you use buttons to navigate.

P3033870-gear-kp-back-info-button.jpg Illustration 3 - Information screen when you press the Info button.

Press the Menu button, and you have a variety of settings to choose from. They are organized via a tabbed interface displayed on the top of the screen (Illustration 4).

P3033872-gear-kp-back-menu-screen.jpg Illustration 4 - Menu Screen

Here are some of my favorite menu settings:

  • Camera Tab 1: Custom Image - a wonderful variety of profiles here that are customizable. My default is Natural with just a slight Sharpness boost.
  • Camera Tab 1: Program Line - I absolutely love this option. I like shooting in Program mode as my default. And this control let's me customize the program. How smart is that? Currently, I'm using MFT, which leans towards the sharpest aperture setting on each lens based on its MFT data.
  • Camera Tab 3: Clarity - I've never seen this before as a capture setting, but I like it.
  • Camera Tab 5: Button Customization - Being an Olympus mirrorless shooter for all of these years, I need to have control over the programming of my buttons.
  • Camera Tab 5: Memory - What settings do you want the camera to remember (and not remember) when you turn it off? Here's where you select those. BTW: Clarity isn't selected by default, so you may want to turn that on here if you're using it.
  • Camera Tab 5: Save User Mode - I have U1-U5 programmed on the Mode dial. This is where I set that up.
  • Wrench Tab 4: Copyright Information - You have to do this!
  • Custom Tab 2: AWB in Tungsten Light - This is a fantastic way to automatically correct for those hideous orangish tones.
  • Custom Tab 4: AF Fine Adjustment - I used this to specifically calibrate my 20-40mm Pentax zoom, and I improved its performance.

Other Buttons and Dials

In the upper left corner is Fx2, which is programmed for the electronic level by default. You toggle it on and off here. The level is visible in both the viewfinder and on the LCD.

The rear e-Dail is to the right of the viewfinder. In Program mode, it is used to shift the aperture setting. But it changes functionality based on the other settings.

The AF/AE-L button is programmable via the Button Customization menu (Camera Tab 5), and can be used in a variety of ways, including exposure lock.

The green button is a reset button. Depending on what you're doing, such as Composition Adjustment (Camera Tab 4), it can be used to zero out your settings in that particular function. It's very handy.

And finally, the standard playback button with its familiar sideways triangle icon works exactly as you would expect.

Final Thoughts

I have really enjoyed getting to know the back panel of this camera. The graphics on the LCD are easy to read and attractive, the menu is nicely organized, and many of the settings are quite clever.

The Pentax KP DSLR is shipping now for $1,099.

More Articles About the Pentax KP

Pentax KP Review - Part One - Top Deck - An overview of the Mode dial, Function dial, and other controls on the top panel of the camera.

Pentax KP Review - Part Three - Image Quality - I programmed the KP to do the heavy lifting so I could focus on composition. Here's how the photos look.

You can share your thoughts at the TDS Facebook page, where I'll post this story for discussion.
mirrorless-mover-25i-1.jpg

We're thrilled that Think Tank Photo is sponsoring the TDS San Francisco Street Photography Workshop in April 2017. They're providing a Mirrorless Mover 25i to each participant. What a perfect bag for nimble street photography!

This is the same bag that I used on assignment in Iceland, Washington D.C., and Las Vegas recently. The Mirrorless Mover 25i is "just the right size" for photographers on the go. It provides quick access to my Olympus mirrorless kit, iPad mini, audio recorder, and the accessories I need to get the job done.

mirrorless-mover-oprn.jpg Think Tank Mirrorless Mover 25i on assignment in Washington D.C. to cover the Wildspeak Conference.

The TDS San Francisco Street Photography Workshop begins on the evening of April 6 and runs through April 9. Our headquarters is the nostalgic Cartwright Hotel, right off Union Square in the heart of street photography heaven.

Over the span of three days, we explore the beauty and the grittiness of San Francisco, conduct class sessions in our private meeting room at the Cartwright, and enjoy the company of enthusiast photographers who rarely get to spend quality time together.

workshop-crew.jpg

We still have one seat open for this event. You can reserve your spot by signing up here. You'll learn new things, get great pictures, and score a brand new Think Tank bag too.

You can share your thoughts at the TDS Facebook page, where I'll post this story for discussion.
Pentax-KP-D-Story-web.jpg

The Pentax KP DSLR is an innovative, rugged, high resolution camera designed for active photographers who like innovation and portability.

This is the first installment of a multipart review that will help new owners get off to a great start with the camera, and hopefully answer questions for prospective buyers. Today's focus is learning to operate the top deck.

Top Deck

The first thing that you'll notice is that there is no LCD on the top deck. Instead, Pentax uses a Mode Dial (left side), Function Dial (right side next to the pentaprism), Setting Dial (right side, below the shutter button), Fx3 button, and the Capture Mode Selector (beneath the Function Dial) for controlling the camera. Changes can be reviewed on the 3" articulated LCD on the back of the body.

P2280243-Pentax-KP-top-deck-w-lens.jpg

To be honest, I have not missed the top LCD at all. And I like the clean, traditional look without it.

The Mode Dial on the left side should be intuitive for DSLR shooters. The are the traditional PSAM exposure options, plus full Auto and Bulb. Pentax adds Sv (Sensitive Priority that based on your ISO preference) and TAv (Shutter and Aperture Priority). You have to push the Mode Dial Lock Button in the center of the dial to change modes.

The Mode Dial also include 5 User Settings where you can create different combinations of settings and change to them quickly. This is handy for going from product photography, to landscape, to Black & White. You can name each of these, making it easy to keep track of them.

I recommend setting the Mode Dial to P as a starting point and default mode.

The Function Dial on the right side of the top deck is handy, but it takes some explaining since it's not a typical DSLR control. It has three pre-programmed settings: AE - AE Metering, rotate the Settings Dial to change metering patterns; HDR - HDR Capture, rotate the Settings Dial to selected the type of HDR capture you wish to use; and CH/CL - Continuous Shooting, rotate the Settings Dial to select the burst mode that you want to use. Pentax includes a Medium burst mode in addition to Low and High.

You can program the C1, C2, and C3 positions to you personal preferences. I've done so like this: C1 - Outdoor View Setting, rotate the Settings Dial to brighten or dim the LCD; C2 - EV Compensation, rotate the Settings Dial to change exposure compensation; and C3 - Bracket Value, rotate the Settings Dial to change Auto Exposure Bracketing. Pentax provides up to 5 stops for this function.

You can set the Function Dial to the white dot if you aren't interesting in using any of the functions. I recommend programming C1 for Outdoor View and using that as your default setting.

P2280255-Pentax-KP-right-side.jpg

The Fx3 button is pre-programmed for Exposure Compensation. And I recommend that you leave it that way. To change EC, hold down the Fx3 button and rotate the rear e-dail. Ergonomically speaking, I prefer to use C2 on the Function Dial and Settings Dial combination. It's easier for my large hands. But I leave Fx3 programmed for exposure compensation in case I need to use it when I have the Function Dial set to another adjustment.

You can program the Fx3 button by going to Menu > Tab 5 > Button Customization. There are seven different options available, including depth of field preview and change AF area.

The Capture Mode Selector Switch allows you to change from optical viewfinder, to live view (LV) to movie capture. Live View is quite handy with the Pentax KP because the articulated LCD swings up and down for different viewing angles.

If you like to use Live View, as I do often, I recommend that you set the AF Active Area parameter to User Selectable. This limits focusing to one active point that you can move around with the back jog dial. It's far more efficient that wrestling with the camera's choices during live shooting. You can make this change in the Menu > Tab 1 > AF with Live View > AF Active Area > SEL.

To enable this option while shooting in Live View, hold down the back OK button for a few seconds until the arrows appear, then use the four-button jog dial to move the focusing point. It works great, and is quite efficient.

The Pentax KP DSLR starting shipping this week for $1,099. In the next installment of this review, I will explain the ins and outs of the back panel controls. Until then, happy shooting!

More Articles About the Pentax KP

Pentax KP Review - Part Two - Back Panel - Looks at the buttons on the back of the camera and the menu system for the Pentax KP.

Pentax KP Review - Part Three - Image Quality - I programmed the KP to do the heavy lifting so I could focus on composition. Here's how the photos look.

You can share your thoughts at the TDS Facebook page, where I'll post this story for discussion.
This is The Digital Story Podcast #573, Feb. 28, 2017. Today's theme is "How Many Cameras Do You Really Need?" I'm Derrick Story.

Opening Monologue

Over the years, I've had many people ask me, "So, how many cameras do you own?" I'm never sure if the motivation is pure curiosity, or if they're seeking rationalization for their own gear acquisition habit. But believe it or not, there is science to my inventory management. And that's the lead story for today.

How Many Cameras Do You Really Need?

twin-olympus-web.jpg

Photography is both my job and my hobby. So the spectrum of equipment is broad. At the most basic level, every time I walk out the door, I have at least one camera with me. It may be as nimble as an iPhone, or as complicated as a DSLR kit with multiple lenses and accessories.

So how do I meet these varied needs without filling my entire studio with camera gear? Efficiency and discipline. Here are my basic guidelines.

  • The Noah's Ark Approach - For each species I like to have two bodies. First, I always want a backup incase something goes wrong with my primary shooter. Plus, there are times I need to send in once camera for repair or cleaning. Having two equates to peace of mind.
  • Different Designs for Different Jobs - The basic formats that I use are smartphone, compact, mirrorless, DSLR, and 35mm film. Each of these are used during a typical week. Each has its strengths that I rely on.
  • Lens Sharing is Important - One of the primary reasons that I shoot Micro Four Thirds for my mirrorless is because of the extensive lens catalog that can be shared across both Panasonic and Olympus cameras. I've switched to Pentax for my DSLR work because I really like their 35mm film bodies, and I want lenses that work with both film and digital sensors. Having an efficient approach to lens management means that I can get by with less glass.
  • Keeping it Compact - My everyday bag is about the dimensions of a 13" laptop. Yet, I typically have three cameras inside: mirrorless, DSLR, and 35mnm. How does that work? I brands that I favor are very compact: Olympus and Pentax. That makes a big difference in a small space.
  • Selling What You Don't Need - Equipment management for me is a dynamic process. I upgrade as gear improves in the different categories that I use. But in order this to work, I must be disciplined enough to sell gear that is no longer mission critical. A perfect example of this was when I listed all of my Canon gear on Amazon during my transition to Pentax.
  • So how many cameras do I have? Well, I'm not saying. But you can do the math and probably come pretty close with a guess.

    In the News

    It's Never Over Until It's Over

    I was watching the Academy Awards last night and was reminded of a very important lesson. Well, a couple of them, in fact. The first being, just because it's never happened before, doesn't mean that it won't happen to you. And second, and an event photographer, it's never over until it's over... completely over. Imagine how you would feel if you were packing your gear as the executive producer for LaLa Land was making his acceptance speech? Wow.

    Dates Set for the Northern CA Coast Tour Workshop

    Good news for those wishing to join us for a tour up the Northern CA Coast. We've set the dates for this event: May 18-20th, 2017. Originally, we were planning this as a summer workshop. But after working with experts who actually live in the areas that we'll be working, we moved the event to late May. This provides us with Spring weather and far cheaper room accommodations.

    Those of you on the Reserve List will receive your personal invites later this week. You will have 10 days to secure your spot before we open up the event to the general public. If you're not on the reserve list, and would like to be, please visit the TDS Workshops Page and use the Send Me Info form.

    Updates and Such

    Big thanks to all of our Patreon members! I was able to pay for the podcast server and the backup system from last month's pledges. Your contributions are making a positive impact.

    B&H and Amazon tiles on www.thedigitalstory. If you click on them first, you're helping to support this podcast. And speaking of supporting this show, and big thanks to our Patreon Inner Circle members.

    And finally, be sure to visit our friends at Red River Paper for all of your inkjet supply needs.

    See you next week!

    More Ways to Participate

    Want to share photos and talk with other members in our virtual camera club? Check out our Flickr Public Group. And from those images, I choose the TDS Member Photo of the Day.

    Podcast Sponsors

    MindShift Gear - MindShift Gear is a group of committed professional photographers and product designers who support conservation and protection of our natural resources and planet.

    Red River Paper - Keep up with the world of inkjet printing, and win free paper, by liking Red River Paper on Facebook.

    The Nimbleosity Report

    Do you want to keep up with the best content from The Digital Story and The Nimble Photographer? Sign up for The Nimbleosity Report, and receive highlights twice-a-month in a single page newsletter. Be a part of our community!

    Want to Comment on this Post?

    You can share your thoughts at the TDS Facebook page, where I'll post this story for discussion.