Wanna get away? Improving your photography is one of the best excuses to travel. Over the coming months, I'll be participating in events in San Francisco, Santa Fe, and the Far East. In this podcast, I discuss these opportunities in case you're considering a trip that combines photography with travel. Here are the highlights:
Workshop
I've Taken Great Pictures, Now What?
This workshop will help you decide the best way for you to organize and edit your pictures. Derrick will focus on four approaches: Adobe Lightroom, Apple Aperture, Adobe CS4, and "Roll Your Own."
Class runs from 10am to 3pm on
Nov. 22, 2008 - 4246 Frank Doyle Library, Santa Rosa Junior College, Santa Rosa, CA - $63 Tuition
To Register, visit: Santa Rosa Community Ed or call 707-527-4372
Webinar
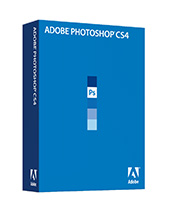
Five Things Photographers Need to Know about Photoshop CS4
In this free webcast, O'Reilly Media author Derrick Story shows
photographers important features in Photoshop CS4 that can improve
their entire post production experience. Derrick spent months working
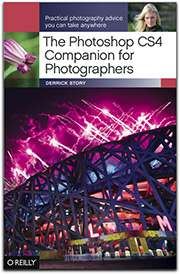
with the beta version of CS4 while writing his new book, The Photoshop CS4 Companion for Photographers. Then hosting a conversation in the O'Reilly Digital Media forums for 3 days afterward.
Tuesday, Dec. 16, 2008, 10:30am to 11:30am, Free, Registration URL will be announced on The Digital Story.
Panel Discussion
Ask the Experts" - A Photography Panel Discussion
Where do your digital photography interests lie? Capture? Post Production? Trying to decide what camera to buy? O'Reilly Media has assembled a panel of photography experts who will give you the inside scoop on photography equipment, and the latest releases of Photoshop and Adobe Lightroom.
Jan 4, 2009, 7pm-9pm, Book Passage in Corte Madera, CA.
Workshop
Aperture Power Tools Workshop
This two-day Power Tools workshop will introduce you to all of Aperture's major functions, making post production as enjoyable as capturing the images in the first place. Jan. 5-6, 2009, Macworld Expo, SF, CA.
Find out more at the Macworld Expo site.
Photography Tour
MacMania 9 - Far East Cruise
The cruise begins in China, then visits South Korea and Japan. Photography courses include capture and post production. Additional tours are available as options for reasonable prices. Main cruise is July 11-17, 2009.
For more information, visit the MacMania 9 web site.
Photography Workshop
Beginning Workflow with Photoshop CS4 and Lightroom
We begin by exploring the intricacies of Raw, Bridge, and Lightroom. After that we practice building our own workflows with these tools. By the end of the week, participants have acquired a step-by-step process for uploading, rating, key-wording, processing, outputting, and archiving their photographs. With Derrick’s guidance, we learn how to take the “work” out of “workflow,”
transforming these tasks into a rewarding, enjoyable part of the creative process. July 19 - 25, 2009, Santa Fe, New Mexico.
For more information, visit the Santa Fe Workshops web site.
Monthly Photo Assignment
Whirlwind is this month's photo assignment. This can be taken so many ways: things happening quickly, life breezing by, an very energenic child. You can read more about how to submit on our Submissions page. Deadline for entry is Nov. 30, 2008.
Listen to the Podcast
Now that I've piqued your curiosity, it's time to listen to today's audio show titled, "Event Mania." You can download the podcast here (26 minutes). You can also subscribe to the podcast in iTunes
The Digital Story podcasts are available for direct download from Apple iPhones. I've created a special mobile download page here. Just load the page in Safari, browse the podcast line-up, and click on the one you want to listen to.
Want to share photos and talk with other members in our virtual camera club? Check out our new Flickr Public Group. It's a blast!
 Follow me on Twitter
-

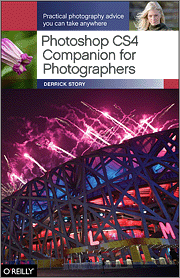
Learn what photographers need to know to organize and edit their images with Photoshop CS4. Take a look at The Photoshop CS4 Companion for Photographers. It fits in your laptop bag and is very easy on your wallet.
Technorati Tags:
digital photography, podcast, technique, Technology, The Digital Story, tips
Sponsor Notes...
Add Magic to Your Slideshows -- FotoMagico presentations are so amazing that your audience will be asking how you did it.
Red River Paper -- Try the $7.99 Sample Kit.
