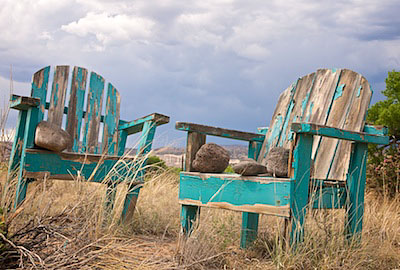
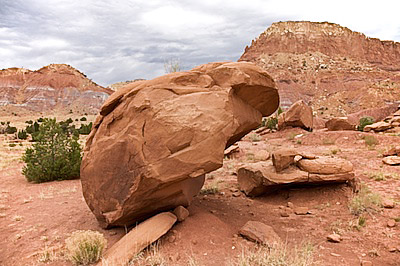
Recently in Show Notes

  Page 94 of 97 in Show Notes  

"Camera Bag Chat" - Podcast 32

Lowepro Slingshot 200

We love our photo bags almost as much as the cameras tucked safely inside. This week I chat with Suzanne Caballero, who is a camera bag expert. She works for Lowepro; they've been designing great bags for over 30 years.

During our conversation, Suzanne shared a few stories about famous photographers she's met through her work as Marketing Communications Manager. First she talked about Greg Gorman, who is a well known portrait shooter with a wonderful studio in Northern California. Suzanne also talked about Seth Resnick, a legend too, who is doing much to promote digital photography across the world. She even chats about her first photo expedition to Death Valley with John Isaac. Great stuff!

I asked Suzanne for some staff recommendations for Lowepro bags. Here are a few she thought you'd be interested in:

And finally, here's the link to first story and the second story she told about Lowepro bags saving more than just camera gear.

Listen to the Podcast

Now that I've piqued your curiosity, it's time to listen to today's audio show titled, "Camera Bag Chat." You can download the podcast here (34 minutes).

Technorati Tags: , ,

Camera Settings

Today's photo mailbag includes questions about exposure compensation, over-saturation of solid reds by some cameras, macro photography, photo archiving, iTunes podcast subscriptions, plus a bonus slideshow tip. I promised to post the links to the Macworld article on photo archiving. So here's the info:

First, take a look at New Life for Old Photos, then you might want to read Selecting a Scanner. You might also be interested in Tools for Turning Back Time. And finally, don't forget my podcast titled, Scanning Tips.

Plus, here's some more info about my slideshow tip, Use Existing Signs for Titles. This tip is to help you prepare your entry for the FotoMagico Slideshow Showcase. Submit your Entry Form today (to get on the books), then start working on your presentation. Deadline to submit Entry Forms is May 30, and your presentation itself is due by June 15.

Listen to the Podcast

Now that I've piqued your curiosity, it's time to listen to today's audio show titled, "Mailbag - Digital Photography Q&A." You can download the podcast here (28 minutes).

Technorati Tags: ,

FotoMagico

Powerful multimedia presentations of your pictures will enhance their impact on viewers. And few tools in the photographer's bag of tricks are more compelling than slideshows. This episode begins a month long journey into the craft of building great slideshows. As part of this endeavor, I'm announcing the FotoMagico Slideshow Showcase, which is an opportunity for you to master the art of slideshow presentation and share samples of your work with the world.

Here's how it all unfolds. In this podcast I'm discussing how to pick an appropriate subject and am offering some ideas for getting your tools together. Then, as we work through the month of May, I'll be providing tips for building your show, adding audio, making titles, and fine-tuning your presentation. The goal is that after a few weeks, you'll have your slideshow project in production and will be able to submit an entry form to the FotoMagico Slideshow Showcase. Then in June, we'll select 10 entries to feature on The Digital Story and send out a press release with the names, bios, web site links, and pointers to all of the showcased presentations. This is an excellent opportunity to shine a light on your photography.

You should read the Official Rules for entry (at the bottom of that page), but the basic parameters are this:

  • Anyone over 18 can enter.
  • Slideshow entries must be between 1-4 minutes in length.
  • The dimensions of the slideshow can be no more than 400 pixels in any direction. 320x240 is the recommended size.
  • Music and/or voiceover is permitted, but not required.
  • You must own, or have permission, to use all of the content in your slideshow
  • You need to complete an Official Entry Form by May 30 for each slideshow submitted, but you can submit as many shows as you wish.
  • If you wish to use FotoMagico to create your show, you can get a $10 discount off the software by entering "Digital Story" in the discount code box. Visit the order page and select FotoMagico. You'll be able to enter a coupon code at the first checkout page. The code is set to "Digital Story". Once the code is input, and the Checkout button is clicked, the $10 discount will be reflected on the final order total page.

You may also use other software to author your slideshow, such as iPhoto 6 (Mac), QuickTime 7 Pro (Mac/Windows), and Photo Story 3 (Windows XP), just to name a few. As the month goes on, I'll publish tips and tricks for adding polish to your creation.

The FotoMagico Slideshow Showcase also serves as our Photo Assignment for the month of May. You can send in your entry form before your slideshow is completed (to let us know that you're working on your presentation). In fact it's recommended. Entry forms are due by May 30. The actual slideshows are due on June 15. You can complete and submit your entry form here.

Listen to the Podcast

Now that I've piqued your curiosity, it's time to listen to today's audio show titled, "Sensational Slideshows." You can download the podcast here (32 minutes).

Technorati Tags: ,

Window Seat

How do you find you photographic vision? I interview Julieanne Kost, the author of Window Seat: The Art of Digital Photography and Creative Thinking, about how her compelling project came to life, and how it's changed her as a photographer.

"I've so enjoyed taking pictures on one subject matter," said Julieanne. "The project just kept growing and growing. Over a course of 5 years I took more than 3,000 pictures." Julianne has included 150 of the best images in her book Window Seat.

The conversation covers the process of choosing your best images, how to evolve as a photographer, and lots of insights from a truly irresistible artist.

Listen to the Podcast

Now that I've piqued your curiosity, it's time to listen to today's audio show titled, "Julieanne Kost on Photo Vision." You can download the podcast here (23 minutes).

Share Your Photo Project

If you have an ongoing photo project, or are considering one, tell us about it in the Comments field. Be sure to include a link if you have samples published.

Technorati Tags: ,

Golden Gate Bridge

Our photo compositions are just as prone to bad habits as any other regular activity. Every now and then it pays to step back and rethink our approach to taking pictures. This begins the process of creating compelling compositions.

One habit to avoid is always holding the camera the same way, at the same level. By raising your lowering the camera, your angle of view changes and so do your compositions. Another trick is to walk around your subject and not just take the first shot that presents itself. And don't forget to zoom in and out while experimenting with your compositions.

Listen to the Podcast

Now that I've piqued your curiosity, it's time to listen to today's audio show titled, "Compelling Compositions." You can download the podcast here (28 minutes).

Technorati Tags: , ,

Canon 30D

There are two types of digital camera disasters: those we bring upon ourselves and those of which we have no control. In this podcast I talk about both.

One of the pitfalls that I warn to stay away from is canned air, and I recommend to use blower bulbs instead. My favorite is the Giottos Rocket Air Blaster. But even with the Rocket, be sure to use it with care since you're inside your digital SLR where all the sensitive components reside.

I also find Ziploc bags very useful for protecting my cameras from humidity and condensation. Always have one with you that's large enough to contain your camera and lens.

Finally, keep an eye out for firmware updates for your camera. Sometimes they add new features to your model, but often they fix problems and are well worth the effort of installing.

Listen to the Podcast

Now that I've piqued your curiosity, it's time to listen to today's audio show titled, "Camera Mayhem - Self-Inflicted and Otherwise." You can download the podcast here (30 minutes).

Technorati Tags: , ,

"The Perfect Print" - Podcast 26

Epson R2400

Making a good print is more science than art. The creative process happens before printing -- capturing and editing the image. When it's time to put it on paper, all we want is to take what we see on the monitor and output it. Why is that often so difficult?

It doesn't have to be. Just remember these three steps: calibrate your screen, image edit your photo, and configure your printer.

If you don't have a colorimeter to calibrate your monitor, such as the Pantone Spyder, go to the Displays preference pane, click the Color tab, then click on the Calibrate button. Mac OS X will walk you through a pretty good calibration process. My tips are, use 2.2 for the Gamma setting and D65 for the White Point. Some folks have asked me about the new huey screen calibrator that costs less than $80 and includes nifty software for the Mac. It's fun to use, but I get better results from the Spyder, or even using the Displays preference pane calibrator.

Now that your screen is displaying photos properly, open the image you want to print and make your basic exposure and white balance adjustments. Don't go crazy here, just tweak enough so the image looks natural and balanced.

The final tip is to let your Mac control the color management, not the printer. Choose Colorsync in your printer dialog box (from the Color Management dropdown menu) and choose the correct type of paper from the Print Settings dropdown. If you have custom ICC Printer Profiles for your printer, load them and use 'em. This is one of the reasons that I like Epson printers so much. You can download ICC profiles from the Epson site.

Colorsync

Now print. You'll be surprised how much better your output looks by just following these three basic steps. And in case you're curious, my current favorite "serious" printer is the Epson R2400. This is a great fine art unit that produces archival content that lasts for over 100 years. On the simple side of things, I really like the portable Dye Sub units made by Canon. I've been using a CP-300 for some time now for 4"x6" snapshots, and it works great.

Listen to the Podcast

Now that I've piqued your curiosity, it's time to listen to today's audio show titled, "The Perfect Print." You can download the podcast here (26 minutes).

Technorati Tags: , ,

Rider

Where do you draw the line when taking pictures of strangers on location? Do you always need permission first? Is a model release necessary for every shot that includes a person? What's the difference between assertive and obnoxious?

During my last trip to Mexico, I had a good conversation with photographer-friend Ben Long that addressed these very topics. We were taking pictures in villages on the outskirts of Puerto Vallarta and found ourselves discussing what's appropriate and what isn't.

For example, the photo of the young man riding a horse was a situation where he knew I was taking photos of him. At one point he even smoothed his hair. I never asked formal permission, but did make eye contact before I took the shots. Since he is recognizable in this composition, I would not use this photo for commercial purposes. I didn't get a model release. But I am comfortable using this picture for teaching and reporting.

The second picture, below, is of a woman washing clothes in a stream. I was on the other side of the water with a steep grade between us. I was not able to interact with her during the shoot. Even though she is not recognizable by my definition, I would not use this shot for commercial purposes either. Technically, I believe I could. But I would be more comfortable with a model release. So, I'll use this image for teaching and leave it at that.

Washing Clothes

I have no absolute rules on this subject. I've included these images as part of the discussion. Keep them in mind as you listen to Ben and I talk about our adventures in Mexico.

Listen to the Podcast

Now that I've piqued your curiosity, it's time to listen to today's audio show titled, "Street Shooting Etiquette." You can download the podcast here (22 minutes).

Technorati Tags: , ,

"Killer Panoramas" - Podcast 24

Burney Falls, CA

Digital panoramas are a great way to broaden the width of your lens, add resolution to your final print, and better convey the feeling of the location. By following just a few simple techniques, you can begin creating your own panoramas today.

The concept is to shoot a series of images with your digital camera, then stitch them together on the computer. At first, this might sound like a daunting task. But today's stitching software is so good that the procedure is almost automatic. I've been using Adobe's Photomerge software that's part of Photoshop Elements 4, which first came out for Windows, but now there's a Mac version too. (BTW: Photomerge is also part of Elements 3 on both platforms.) I also like the Photostitch software that comes bundled with Canon cameras.

To use Photomerge, simply put the series of images you want to stitch together in a folder. Then open Photoshop Elements and choose: File > New > Photomerge.

Photomerge as Part of Elements

Direct Photomerge to your series of images, then follow the prompts. Before you know it, you'll have your own stunning panorama. You can apply this technique to indoor photos too, such as this image I captured inside Grand Central Station in New York with a 2-megapixel Canon Digital Elph compact camera.

Grand Central Station, NYC

Listen to the Podcast

Now that I've piqued your curiosity, it's time to listen to today's audio show titled, "Killer Panoramas." You can download the podcast here (28 minutes).

Technorati Tags: , ,

Photo Web Site

A well-designed website to show off your photography is an effective store front for photographers. In this podcast, I discuss the importance of having a web presence, for amateurs as well as professionals. The process of assembling your images for online publication has similar benefits to putting together a print portfolio. It forces you to cull your best work and think about your strengths and weaknesses as a craftsman and an artist.

I then cover a few tips for building a site quickly. Today's web tools make this process much easier than a few years ago. I recently redesigned my Story Photography web site in just 3 hours using Apple's new iWeb application. I wrote about this experience in the post titled, Putting iWeb to the Test. You might want to read this post, no only for my description of the process, but also because there are lots of comments, pro and con, about iWeb as a Web building application.

Giles Turnbull also posted a good overview of three Mac web builder tools in his article, Mac OS X Web Builder Face-Off. Windows users have some solid options too. The leading contender is time-tested Dreamweaver 8, but it's a pricey $399 -- probably more than you want to spend. But fear not, you can get NVU, an open source web authoring tool for free. It's available for download for Windows, Linux, and Mac platforms.

Listen to the Podcast

Now that I've piqued your curiosity, it's time to listen to today's audio show titled, "Build Your Own Photo Web Site." You can download the podcast here (33 minutes).

Technorati Tags: ,