Recently in Show Notes

  Page 99 of 99 in Show Notes  

Digital cameras have become adept at making movies as well as capturing still images. I've had great fun with the Casio EX-P505 that shoots amazing video using the M2S4 (MPEG-4) Codec. I get 30fps at 640x480 resolution and stereo audio. Many other cameras offer comparable specs too.

For some time now, we've been able to watch the movies we make with these cameras on our computers and even burn them to DVD for TV viewing. But as of Oct. 12, 2005, we can start thinking about carrying our videos around and sharing them with others on the new Apple iPod video that displays movies at 320x240 resolution in full stereo.

It's quite easy to prepare your movies for the iPod. Just download the latest version of QuickTime Pro (the player only version is free, but to edit and prepare content for the iPod you need the Pro version that costs $30) and open your home movie. Then go to File > Export... and select "Movie to iPod" from the drop down menu as shown below.

Export to iPod
Open your movie in QuickTime Pro, then choose the "Movie to iPod" export option.

You should know that the ripping process is processor-intensive and will take your computer a while, so you might want to go grab some dinner while it prepares the movie. Once it has finished making your production iPod-frienndly, you can open iTunes 6 and drag the movie to the "Videos" folder in the left hand "Source" column. If you don't have iTunes 6 yet, you can download it for free. Now, when you connect your iPod video, it will automatically grab the movie you just loaded into the Video folder, and you can play it right alongside the latest episode of "Lost."

If you want more details, Apple has published a helpful tutorial titled, Creating Video for iPod.

Tips for Capturing Video with a Digital Camera

Here are a few tips to help you capture iPod-friendly video. There's also a helpful article on O'Reilly's Digital Media site by Ian David Aronson that provides additional hints.

  • Shoot in good lighting. Video needs lots of light. If it's too dark inside, then go out, at least for your first project or two.
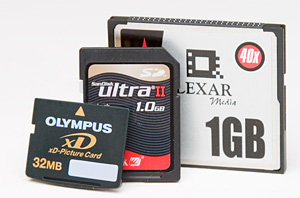
  • Use a big memory card. Video takes up much more memory than still pictures. I recommend 1GB.
  • Record at the highest quality and resolution possible. For example, if you camera supports 640x480 at 30fps, go for it.
  • Get close. Compose your frame tightly. These movies will be viewed at 320x240, which isn't exactly movie theater size. So stay away from distance shots and get close to your subjects.
  • Try to avoid too much background noise (audio). On-camera microphones tend to pick up *everything,* so try to control background noise best you can. And beware of wind! It sounds terrible.
  • Figure out what you're going to shoot before you press the record button. You don't have to have a full blown storyboard, but sketch out your scenes beforehand.
  • Keep your movies to 5 minutes or less. You have a better chance of holding your audience's attention.

Listen to the Podcast

Now that you have your gear together, it's time to listen to today's audio show title, "Making Movies with Digital Cameras." You can download the podcast here (23 minutes). And for a real treat, I've posted a sample movie titled, The Potting Bench. It's iPod ready now.

"To Shoot a Bottle" - Podcast #2

You don't need expensive lighting to get professional results in the studio, especially for product photography. With a little planning, you can use natural light from a window to capture compelling shots. This is a great technique for posting eBay for-sale items and article illustrations. Here's a quick tour of how to set up your existing light studio.

First, you need to find an area with a light source. A north window is ideal because the light is diffused and not too harsh. Then, set up your backdrop. White photographer's seamless backdrop paper works best, but you can use a roll of butcher's paper too. You want to create a "sweep." That means that you attach the paper to the wall (or any vertical surface), then have it curve as it bends toward your horizontal shooting platform. The gentle curve of the sweep eliminates any distracting edges in the background. The white background enables you to place your shot seamlessly on a white web page. Once your backdrop is set up, put your subject on the shooting platform.

Existing Light Bottle
Glass bottle shot with window light and butcher's paper for backdrop. ISO 100, 1/4 sec. @ f-8, +2 exposure compensation.

-------------------

Mount the camera on a tripod. Set the ISO at 100 to keep image noise to a minimum. Adjust your white balance to "cloudy" to compensate for the bluish light coming through the north window. Set exposure compensation to +2. You need to do this because your camera's light meter will be fooled by the bright white backdrop forcing it to underexpose the subject. By setting your exposure compensation to +2, you will have cleaner whites in the background and a properly exposed subject. If the shot turns out too bright, back off exposure compensation to +1 or +1.5.

Finally, set the self-timer and make sure the camera is focusing on the subject. The self-timer will prevent jarring the camera when you initiate the exposure. Check your shot in the LCD viewfinder; it should look pretty good. The only adjustment you should have to make is possibly adding some side-lighting with reflectors (foamcore or white cardboard works great), or exposure compensation for an image that's too bright or dark.

If you'd like to learn more, check out my Digital Photography Pocket Guide, 3rd Edition. For a crash course on product photography with studio lighting, see my article titled, Professional Product Shots Made Easy. And feel free to post your questions and comments here. See you next time!

If you haven't listened to it already, you can download the podcast here (23 minute show).

Compact cameras generally use "Auto Flash" as their default mode. And for most flash photography, auto gets the job done. But if you want to improve your photos, to the point where they rival professional images, spend a few minutes exploring the other flash modes on your camera.

Start by locating the "lightening bolt" icon on you camera -- that's the universal symbol for electronic flash. If you're lucky, it's a button control on the back of your camera, which means easy access. Some cameras bury the flash controls in the menu system. If that's the case for your digicam, you'll have to dig a little deeper to find it.

My favorite option is "flash on." This control makes the flash fire regardless of the ambient lighting conditions. I use it often for outdoor portraits. Why, because when working in nature, the light isn't always coming from a flattering angle, such as with this image:

No Flash Portrait

By enabling the "flash on" option, you can add a pleasing front light to the portrait, put a little sparkle in the eyes, and reduce skin imperfections. Look at the difference in this portrait.

Flash On Portrait

A variation of this technique is the "slow synchro" flash mode. Sometimes this option is located in the menu items as "Nighttime Flash," "Nighttime Portrait," or "Night Snapshot." I use this mode at evening parties or whenever I want to capture some background environment along with the main subject.

Slow synchro flash will immediately elevate your party shots above everyone else's who will have a dark background and a harshly lit subject. The main thing to keep in mind is to hold the camera very still during exposure, even for a second or two after the flash has fired. That will keep your background from becoming too blurry. Here's an example.


Nighttime Flash Mode

These simple techniques will dramatically improve your pictures. If you'd like to learn more, check out my Digital Photography Pocket Guide, 3rd Edition. And feel free to post your questions and comments here. See you next time!

If you haven't listened to it already, you can download the podcast here (26 minute show).