Recently in Photography

  Page 243 of 384 in Photography  

For the Aug. '11 Photo Assignment, TDS shooters experimented with various surfaces exploring the theme Reflection. The imagery in this gallery is beautiful. And which one will be the SizzlPix Pick of the Month? (These will look great Sizzled!)

Ruth Cooper for Reflection

Recent SizzlPix winners include: Richard Lucic for June 2011, True Grit, and Matthew Rampton for July 2011, Smoke. Congratulations to both.

Participate in This Month's Assignment

The Oct. 2011 assignment is "Side Lighting." Start working on your contribution now. Details can be found on the Member Participation page. Deadline is Oct. 31, 2011.

Please follow the instructions carefully for labeling the subject line of the email for your submission. It's easy to lose these in the pile of mail if not labeled correctly. For example, the subject line for this month's assignment should be: "Photo Assignment: Oct. 2011." Also, if you can, please don't strip out the metadata. And feel free to add any IPTC data you wish (These fields in particular: Caption, Credit, Copyright, Byline), I use that for the caption info.


Photo by Ruth Cooper. (Click on it to see enlarged version.) You can read more about how Ruth captured this shot, plus see all of the other great images on the Aug. 2011 Gallery page.


Good luck with your Oct. assignment, and congratulations to all of the fine contributors for August.


twitter.jpg Follow me on Twitter

-


Now Available! The Digital Photography Companion. The official guide for The Digital Story Virtual Camera Club.

  • 25 handy and informative tables for quick reference.
  • Metadata listings for every photo in the book
  • Dedicated chapter on making printing easy.
  • Photo management software guide.
  • Many, many inside tips gleaned from years of experience.
  • Comprehensive (214 pages), yet fits easily in camera bag.

Technorati Tags: , ,

Remarkably smooth. That's my first impression of Flickr's Photo Session. It's a new feature that allows you to share a set of images in real time with up to 10 guests located... well, just about anywhere.

Flickr Photo Session on an iPad Photo Session being viewed on an iPad.

I fired up a Photo Session on my MacBook Air, then joined from an iPad and an iPhone 3GS. As I navigated from image to image on the MB Air, the photos moved in perfect sync on both mobile devices. In just minutes, you could lead a presentation to a small audience with no hassle.

If the guests sign in with a Yahoo ID, they can chat with you or among themselves via the pop-up window in the lower right corner. It's like having your own mini webinar. You can navigate the images, or allow others to drive. On the iOS devices, all you have to do is swipe the screen.

During my session, I was interrupted with a text message. I jumped out of Safari on the iPhone and took care of business via text. When I returned to Safari, Photo Session needed about 5 seconds to reconnect, then I was back in business. Very nice.

I know some photographers have been wondering how Flickr would respond to Google+. Well, this answer is sweet. Try it.

For more information about Photo Session, take a look at this FAQ.

Flickr Training

I have a lynda.com title, Flickr Essential Training that provides all the ins and outs you need to master Flickr. Stop by and learn how to get the most from this terrific photo sharing environment.

Previously on The Digital Story

Exploring Interesting Places Via Flickr

Become Your Own Museum Curator with "Galleries" on Flickr

Using Google to Search Within Flickr

Flickr Keyboard Shortcuts

Flickr Updates Share Tools for Facebook, Twitter

Introduction to Flickr Essential Training


The Digital Story on Facebook -- discussion, outstanding images from the TDS community, and inside information. Join our celebration of great photography!

I'm speaking at the Mac Computer Expo in Petaluma, CA on Saturday, Oct. 1, 2011. My talk, A Photographer's Workflow for the iPad is part of my Nimble Photographer series where I show the powerful things you can do with just a compact camera and an iPad. Admission to the Expo, and my talk, are free.

Mac Computer Expo

For the session that begins at 2 pm, I'll connect the iPad to the digital projector and use it to illustrate how to organize, image edit, and output images captured on the go with your digital camera. I'll cover my favorite iApps, and share a few tricks I've learned along the way. After the session, I'll stick around for follow-up questions and to chat with folks about anything Mac.

The entire session line-up for the day is quite impressive. If you're able to join us, get there early enough to see the keynote at 9:00 am and stay for the entire program. Plus, there's an expo hall with plenty of Mac vendors showing off their latest products.

And if you're part of our photography community, please introduce yourself to me. I love meeting members of our virtual camera club.


The Digital Story on Facebook -- discussion, outstanding images from the TDS community, and inside information. Join our celebration of great photography!


Eye-Fi Update

When I noticed the latest iApp update from Eye-Fi, I tested it right away on my iPhone. Why such a hurry? Well, my super nimble photographer set-up consists of a Canon S90, Eye-Fi Pro SD card, and my iPhone. Everything fits in my pants pockets, yet, I have sophisticated controls on the S90 to make beautiful images and send the ones I want immediately to any of my social networking sites.

If you haven't tried the Eye-Fi iOS app for the iPhone or iPad, it's quite refined these days. The app itself is free. But of course you need an Eye-Fi card.

Simple Workflow

Eye-Fi Download

On the Canon S90, I shoot Raw+Jpeg. I've configured the Eye-Fi card to send any Jpeg I mark as "protected" to the iPhone. I have it ignore the Raw files all together. When I see a shot on the S90 that I want to publish, I simply launch the Eye-Fi app on the iPhone, then hit the protect button on the S90. Within a few seconds the Jpeg is transferred from camera to mobile phone.

Later, when back at the studio, I upload the Raw files in to Aperture as part of my normal photo management. So I'm getting the best of both worlds. I have the ability to capture high quality images in the field and publish them immediately, while still maintaining a Raw workflow for maximum quality when I need it.

For projects where I need finer control, I use a more robust version of this workflow - iPad with ShutterSnitch talking to an Olympus PEN with an Eye-Fi card. But for extreme nimbleosity, you can't beat the compact camera to iPhone workflow.

More Nimble Photographer Articles

Review: Filterstorm Pro for the iPad

Revisiting a Wireless Workflow from Camera to iPad

Adobe Launches Carousel for Mobile Photography on iPhone, iPad, and Mac

Minimal Folio for iPad: Truly Useful Portfolio and Presentation App

Return of the Nimble Photographer

Nik Software Brings Its Magic to the iPad with Snapseed

PhotoToaster for the iPad

Putting Eye-Fi "Direct Mode" to the Test

iPad Camera Connection Kit

M.I.C. CF Card Reader for the iPad: Does it Work?

Eye-Fi Card, iPad, and ShutterSnitch for Wireless Transfer

iPad as a Photo Softbox

How to Create and Deliver Content for the iPad

Acme Made iPad Cases for Style and Protection

Will the iPad Squish my Photos?

The $2 iPad Stand

Bluetooth Keyboard and iPad - A Powerful Combination

Turn Your iPad into a Live Camera

Lowepro Classified 160 AW is Perfect Bag for iPad Toting Photographers

"iPad for Photographers" - Digital Photography Podcast 219


The Digital Story on Facebook -- discussion, outstanding images from the TDS community, and inside information. Join our celebration of great photography!


A good camera bag is the photographer's home away from home. These days, it often contains your shooting gear, a laptop or tablet, and a few personal items. If you're in an urban setting, it's good to be discrete and blend in with the crowd. Yet, styling is important, as is weather protection. And none of this is any good unless it's comfortable over the long haul.

DSLR Video Fastpack 250 AW with Quick Access Open

For those reasons, my new favorite camera bag for day-to-day use is the new Lowepro DSLR Video Fastpack. In this week's show, I talk about camera bag attributes that I like, and why this new backpack fits the bill so well.

Listen to the Podcast

You can also download the podcast here (28 minutes). Or better yet, subscribe to the podcast in iTunes. You can support this podcast by purchasing the TDS iPhone App for only $2.99 from the Apple App Store.

Monthly Photo Assignment

Hands and Feet is the Sept. 2011 Photo Assignment. You can read more about how to submit on our Member Participation page. Deadline for entry is Sept. 30, 2011.

TDS Nov. Aperture Workshop

I've organized an Aperture Workshop on Nov. 12th and 13th. Signups are in progress now. If you want a registration form, or just more information, drop me a line. BTW: We include a professional model shoot as part of this workshop. Just saying...

More Ways to Participate

Want to share photos and talk with other members in our virtual camera club? Check out our Flickr Public Group. And from those images, I choose the TDS Member Photo of the Day.

Podcast Sponsors

Red River Paper -- The $7.99 Sample Kit is back! And with free shipping.

Make Your Photos Sizzle with Color! -- SizzlPix is like High Definition TV for your photography.

Need a New Photo Bag? Check out the Lowepro Specialty Store on The Digital Story and use discount code LP20 to saven 20% at check out.


Technorati Tags:
, , , , ,


microGAFFER Tape for Photogs on the Go

microgaffer.jpg

Filed under "why didn't someone think of this before," the folks over at Visual Departures have created microGAFFER, gaffer tape in convenient 1" wide rolls that weigh just 2.2 ounces each. (Standard rolls of gaffer tape weigh over 2 pounds.) You can now have your infinitely handy, fix just about anything, tape in your pocket or camera bag when on location.

I like the convenient 4-roll pack that contains two black, one white and gray for $19.95 at Adorama. Mine is on its way...


The Digital Story on Facebook -- discussion, outstanding images from the TDS community, and inside information. Join our celebration of great photography!


When you look at the new DSLR Video Fastpack, you see a next generation backpack that's evolved from the original (and popular) Fastpack. With the current model, Lowepro has updated both the design and function. The official announcement is just days away. But I've been using a test model for nearly 3 months, and I'm going to show you some of the features that have impressed me.

DSLR Video Fastpack 250 AW

Mobility Redefined

  • Clever Fastpack Access that combines easy entry for your gear when you need it, yet allows you to keep it protected and organized during transport.
  • Lightweight, Stylish Design that doesn't attract attention in urban settings. Even the Lowepro logo is stitched with black thread to downplay recognition.
  • All Weather Cover that is stored in the bottom of the pack, but can be quickly deployed to cover the entire bag in just seconds. Helps protect gear from the elements.
  • Side Mount Tripod Holder that accommodates tripods, monopods, or DSLR video rigs.
  • Built-in Laptop/Tablet Sleeve that provides quick access to your computer, yet protects it when not in use.
  • Well-Designed Storage Compartments to keep both camera gear and personal items neatly stowed.
  • Audio Organizer Pouch to tame those cords from microphones and the rest of your sound gear.
  • Hide Away Hip Belt Storage for you when don't need the hip belt and want it out of your way.

DSLR Video Fastpack 250 AW with Quick Access Open DSLR Video Fastpack 250 AW with Quick Access Open

What Makes it a Fastpack?

All three models (150, 250 & 350) provide side access to your camera. Here's how to best take advantage of this feature. First, loosely buckle the hip belt so you have a few extra inches of room around your waist. Then slide the top strap off your right shoulder, and swing the bag around to your front from the left side. Open the side zipper compartment and retrieve the camera. The hip belt will keep the pack attached to your body, even if the other shoulder strap slides off. Once camera is in hand, swing the pack around to the back again so it's out of your way while shooting. This entire procedure takes only seconds. The outer security strap will keep the rest of your gear in place during this process.

DSLR Video Fastpack 150 AW
DSLR Video Fastpack 150 AW with Tripod

Side Mount Tripod Holder

For portable tripods, such as the Joby Gorillapod Focus, you can use the side mesh pocket with top side strap to secure it during transport. For larger tripods and video rigs, pull out the tripod cup that's stashed behind the mesh pocket. When you're not using it, it hides neatly away behind the mesh pocket.

Camera Compartment for DSLR Video Fastpack 150 AW Camera Compartment for DSLR Video Fastpack 150 AW

Choosing the Right Size Bag for your Gear

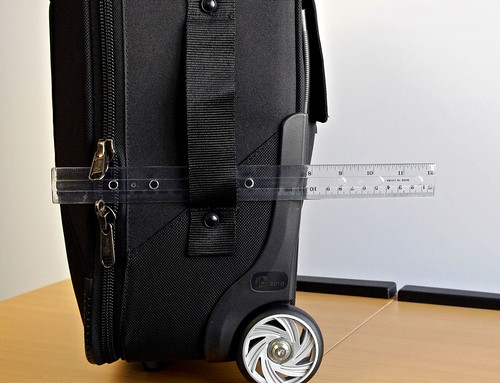
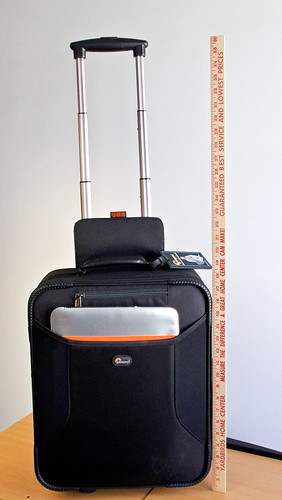
Nimble photographers should be well-served with the DSLR Video Fastpack 150 AW. It secures up to a 13" laptop or table. I've been using it with both a MacBook Air and an iPad with room to spare. The camera compartment will hold up to a Canon 5D Mark II (no grip) with 24-105 f/4 zoom (as shown above). I've been toting the Canon 60D with 15-85mm zoom (closer to the gear Lowepro recommends for this bag), plus a Canon 320 EX flash (left side) and an Olympus PEN with 17mm f/2.8 lens (right side). If needed, I can store additional lenses or another compact camera in the top personal compartment.

Camera Compartment for DSLR Video Fastpack 250 AW Camera Compartment for DSLR Video Fastpack 250 AW

For event coverage and bigger jobs, the DSLR Video Fastpack 250 AW holds more gear. For computer, it accommodates up to a 17" laptop. In the camera compartment I reconfigured the dividers so I could store a Canon 5D with a 70-200mm f/2.8 zoom attached to the body. It looks like there's enough head room for a grip also, but I wasn't able to test that. I also had room for the 16-35mm f/2.8 and 24-105mm f/4 zooms.

As I mentioned earlier, I did rearrange the dividers for this set up. Lowepro provides you with a stock configuration when they ship the bag, but you're not limited to that. For my set up, I removed the right divider, took the left divider, turned it around and placed it on the right side to hold the 16-35 and 24-105. This is a perfect set up for event photography, allowing me quick access to the 5D Mark II with the 70-200mm f/2.8 attached. For different gigs, I might move the dividers around again.

If you have tons of gear, you can fill up the DSLR Video Fastpack 350 AW. I didn't have one for testing, so we'll have to wait for the official announcement to see the specs for it.

Fastpack 250 and 150 Side by Side Fastpack 250 and 150 Side by Side

Pricing and Availabilty

We should see an official announcement from Lowepro as early as Oct. 3 with pricing information and availabilty. From what I understand, the pricing will be very competitive. If you're attending PhotoPlus Expo on Oct. 27-29 in New York City, you can see the bags in person at the Lowepro booth.

In addition to his other photography pursuits, Derrick Story serves as the Photography Evangelist for Lowepro.


The Digital Story on Facebook -- discussion, outstanding images from the TDS community, and inside information. Join our celebration of great photography!


redrock_livelens_canon.jpg

This isn't just any adapter. The Redrock Micro LiveLens MFT is the first active lens mount to allow Canon EF lenses to be used with any micro four-thirds camera body. It provides the power and electronics to control Canon EF lenses when attached to these cameras, such as the Olympus PEN or Panasonic G series. With the LiveLens MFT's control touchpad, the EF lens' aperture can be opened and closed in increments as small as 1/3 stop. The LiveLens MFT works with virtually every EF lens available today.

The active lens mount is available in the Redrock Micro store for $442.50. If you have lots of Canon glass and shoot micro 4/3, this could be interesting.


The Digital Story on Facebook -- discussion, outstanding images from the TDS community, and inside information. Join our celebration of great photography!


For Whom Is the Nikon 1 Built?

nikon1_front.jpg

I've been thinking about the Nikon 1 and trying to figure out why there isn't an APS-C sensor in that handsome body. Instead, as you probably know by now, Nikon designed a 1" sensor that's smaller than micro 4/3, but bigger than a compact. Some speculate that they did this to protect their DSLR business. Really?

I guess Sony didn't get that memo when they designed the NEX series, which features a 1.5X APS-C sized 14.2 MP CMOS sensor. Nor did Olympus when they put the same sized sensor in their PEN series as they have in their DSLRs. Both companies, along with Panasonic and Samsung, might be feeling like they've dodged a bullet.

So, for whom is the Nikon 1 built? I doubt that they will lure away any NEX shooters. Olympus might be vulnerable up the road if they don't update their technology. Those who already love Nikon are most likely to embrace this system. Canon is going to announce something big in November, so its brand loyalists will probably sit tight for the moment.

Here's the thing from my point of view... if I'm coming to the game this late, then I would want to pull out all of the stops and leverage as much fantastic Nikon technology as possible to go after Sony. In my mind, the Nikon 1 doesn't do that. It feels like a camera designed by committee. And I really don't know who it's for.

One of the biggest frustrations I see when people begin to take control of organizing photos on their computers, is what to do with all of those files from years past. I hear stories of photographers immediately adding thousands of images to their brand new workflow, only to have it smothered in the avalanche. As you may have guessed, I have ideas on how to make the transition from disheveled to meticulous. And I share them in this movie.

Keeping track of your work is a focus of my latest title on lynda.com, Organizing and Archiving Digital Photos. I show you techniques for Lightroom, Aperture, iPhoto, and even roll-your-own. By spending a little time with these movies, you should be able to tighten up your photo management workflow.

More on Organizing and Archiving Digital Photos

Roundtripping from Lightroom to Photoshop

Organizing and Archiving Overview Movie

Choosing the Right Hard Drive for Your Photo Backup

"Organizing and Archiving Your Photos" - Digital Photography Podcast 290

Quick Keywording Tips in Lightroom 3

Backing Up Aperture 3 Via My Local Network


The Digital Story on Facebook -- discussion, outstanding images from the TDS community, and inside information. Join our celebration of great photography!