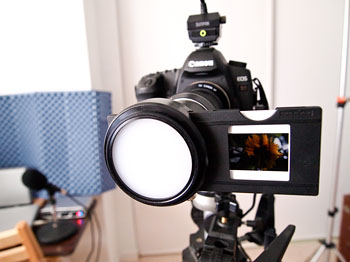
The Olympus 17mm f/2.8 micro four thirds lens is the first prime optic available for the new Olympus PEN E-P1 digital camera. When you first mount this "pancake" lens on the E-P1, it looks like a match made in heaven. Unlike the 14-42mm zoom that has a modern look, the 17mm is a blast from the past and finishes off the elegant retro feeling established by the E-P1 body.
Performance is good too. The lens focuses quickly in autofocus mode and has an accessible manual focus ring. Exposure was consistent with shots made by the 14-42mm lens in controlled lighting. Images were crisp with good contrast. Edge to edge sharpness is good, even at f/2.8, and I didn't detect any vignetting at any aperture.
Purchasing Considerations
If you buy the lens separately, it's listing for $299 on Amazon, plus another $99 for the VF-1 Optical Viewfinder. Personally, I strongly recommend buying the VF-1 viewfinder with the 17mm lens. It slides snugly into the E-P1 hot shoe and allows you to compose with the LCD turned off. It's effective in all lighting conditions, including bright sunlight -- perfect for photographers who don't like composing shots on an LCD screen. But you're looking at a $400 investment for this tandem that has the 35mm equivalent of a 34mm lens (you simply double the focal length of micro four thirds lens to get the 35mm equivalent.)
Another route to go is get the 17mm in the kit instead of the 14-42mm lens. The kit is listed for $899 on Amazon, which is $100 more than the 14-42mm kit and includes the VF-1 optical finder. You can buy the 14-42mm lens for $299 later if you want to start with the 17mm.
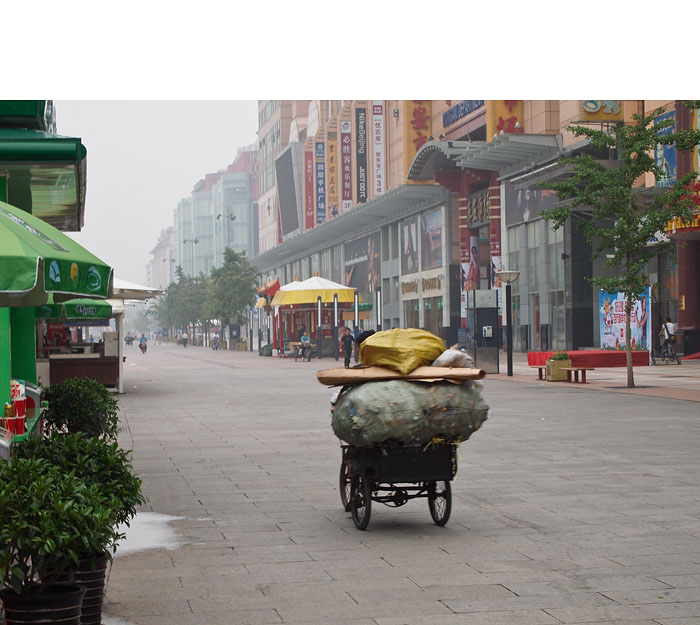
Uncropped image shot with Olympus E-P1 and 17mm lens set to f/4. You can see a catalog of images captured with the 17mm on the TDS Flickr page. Those images are direct from the camera with no editing. Photo by Derrick Story.
But as some point you will want the 14-42mm zoom too. As nice as the 17mm is, you can't tap the full potential of the E-P1 with just this lens. There will be situations where you want more breadth or reach. An alternative to the 14-42mm zoom, if you already have glass by Olympus, is the Olympus MMF-1 Four Thirds to Micro Four Thirds Adapter for $180. I tested it briefly with a handful of four thirds lenses, and it performed quite well. It's well-crafted too.
A Few Things to Note
If you want to shoot at f/2.8 with this lens, you're best off to switch to aperture priority mode and set it there yourself. In program mode, the E-P1 didn't open up more than f/3.5, even with a shutter speed as slow as 1/6 of a second. I checked my menu settings, and could not find a reason for this, so I suspect it will be corrected with a future firmware update -- unless I missed something, which is entirely possible with a new camera.
Also, a lens case is not provided for the lens or the viewfinder. This is a little surprising considering the price tag. So you'll have to dig around in your accessories box to find a couple pouches to protect these items when banging around in your camera bag.
And even though the the optical viewfinder fits snugly in the hot shoe, I would still prefer a thumbwheel to tighten it down. I could see the viewfinder getting accidently bumped and flying off the top of the camera. At $100 a pop, this is something to avoid.
The Bottom Line
The Olympus 17mm f.2.8 pancake optic is a handsome addition to the already classic good looks of the E-P1. Performance is solid, but you really need the VF-1 optical viewfinder to reap the full benefit of this lens. The tandem (lens and viewfinder) is a bit on the pricy side when purchased separately, so if you're really interested in them, consider the 17mm kit initially. You can later add the 14-42mm as a separate purchase. [Thanks to Rob-L for helping me with my math on the kits.]
More Articles on the Olympus E-P1
If you're interested in the Olympus E-P1, check out my ISO Comparison post. I run at series of photos from the camera staring at ISO 100 all the way up to ISO 6400. I also have a podcast covering the features of the E-P1. I also have a First Look at the Olympus E-P1 article at Macworld Magazine. Another helpful tip is the Olympus E-P1 "Please Check the Status of Your Lens" Message. I have a nice collection of street shots with the E-P1 in the article, Early Morning on the Beijing Streets.
 Follow me on Twitter
-