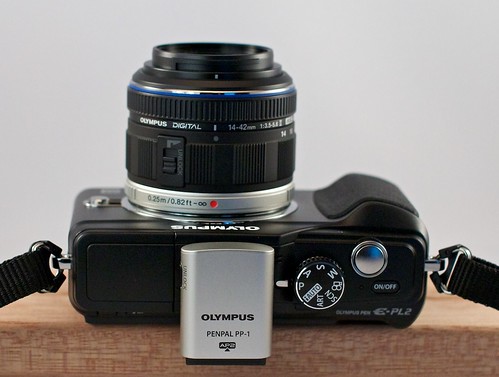
The just announced PENpal Bluetooth accessory for the Olympus PEN E-PL2 allows photographers to send images via Bluetooth to a variety of devices. This includes some smart phones, Windows computers, and Macs.
At first, I wondered how practical the PENpal would really be. After all, it's not that hard to take the memory card our of the PEN and insert it into my MacBook Air. But after some testing, I've found that the PENpal is saving me time. So I thought I would show you how.
My Normal Workflow
I have to do lots of quick turnaround work, especially with blog posts and other online projects. Usually it goes like this. I shoot the shots, take out the card, put it in the computer, browse the images in Adobe Bridge, find the one I like, sample it down to blog posting size, upload it, then return the card to the camera. Later, when I have time, I upload the entire shoot into my photo management system.

Olympus PENpal Workflow
Once I pair the E-PL2 with the MacBook Air, the two devices can talk to each other via Bluetooth. This changes my "quick turnaround" workflow considerably. Now, it's just these few steps:
- Browse the photo on the 3" LCD of the E-PL2 to find the image I want to use. Right away I've saved a few steps because I immediately know the picture I want to use. If I need to, I can zoom-in on the camera to determine the quality of the shot.
- Send the image to my Mac. It's quite easy to do. While viewing the shot on the E-PL2 in playback mode, I press the OK button to bring up the contextual menu. I choose "Send a Picture" and the photo goes directly to my Mac.
- Upload the shot to my blog. Since the Olympus will automatically resample the photo for me before it sends it, I don't even have to open an image editor. I can choose from three sizes: Small 640x480, Large 1920x1440, or Medium 1280x960.
I'm done. And with Art Filters and other in-camera editing tools, I can actually create some pretty good looking stuff on the fly.
Does it Work with iOS Devices?
I was not able to get the PENpal to work with an iPad or iPhone. Bluetooth in those devices isn't as accessible as it is with Mac OS X. Too bad. That would a really sweet workflow to go from the PENpal to an iPad.
 Follow me on Twitter


