As high-end compact cameras became, well, more compact, their optical viewfinders fell by the wayside. For me, this wasn't such a terrible thing since they were usually awful anyway, often only showing a fraction of the photo you were actually recording. That being said, wouldn't it be nice to have something other than the LCD screen for composing with these little photographic gems?
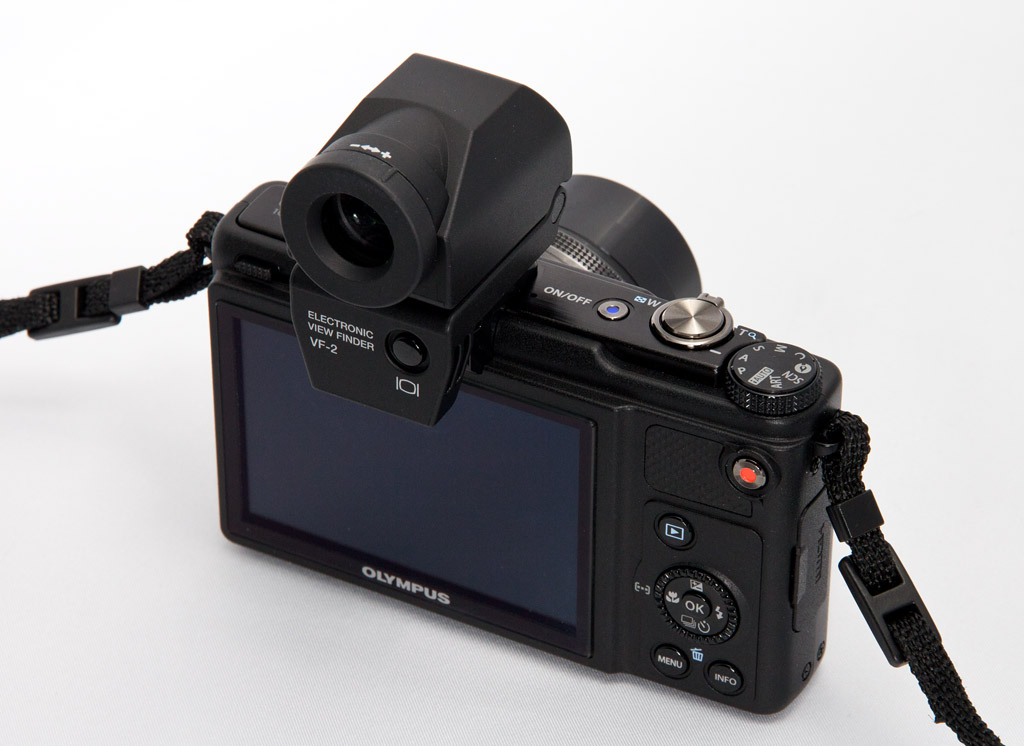 Olympus XZ-1 with VF-2 Electronic Viewfinder. Click on image for larger version. Photo by Derrick Story.
The engineers at Olympus seem to think so too. For their latest well-heeled compact, the XZ-1 with f/1.8 zoom, they included an accessory shoe that accommodates the VF-2 Electronic Viewfinder (that also works on most of the PEN cameras.)
The VF-2 slides into the accessory port and provides an accurate view of both image and camera controls. You can switch back and forth between the viewfinder and the LCD by pressing the control button on the back of the viewfinder. The VF-2 is hinged, so you can angle up to 90 degrees providing more flexibility in how you hold the camera when you take pictures. There's also a diopter ring so you can adjust its clarity to your eyesight.As you can image, this accessory is a blessing when working in bright sunlight, which can make composition on an LCD difficult at best. But I use the VF-2 for all types of shooting. I find it easier to concentrate on my composition with the device, similar to the experience of composing through a DSLR.
What's amazing, however, is how small and light the entire package is. For photographers on the go, or just anyone who loves to travel light, the Olympus XZ-1 plus VF-2 Electronic Viewfinder does make compact photography more pleasurable than ever. The only downside? The price for this combo will also lighten your wallet.
The Olympus XZ-1 is running around $499 plus another $249 for the VF-2 Electronic Viewfinder. So don't try it unless you have the budget to spend. Because if you do, you'll certainly be hooked.
More Articles about the Olympus XZ-1
Olympus XZ-1 ISO Test 100-3200
"Olympus XZ-1 ISO Smackdown" - Digital Photography Podcast 267