Recently in Photography

  Page 78 of 386 in Photography  

The DJI Spark, 6 Months Later

Six months ago I was a drone newbie. I had never flown one, didn't know the rules, and the whole project seemed daunting. But I was curious. The photo opportunities were intriguing.

dji-spark-1024.jpg

Then DJI released the Spark. And I knew that my time for aerial photography had come. I got my hands on one immediately.

At first, I didn't know exactly what I was going to do with it. I had to learn how to fly it. DJI makes that relatively easy. The navigation system is terrific. I use my iPhone as the controller. (It's really nice with the iPhone X.)

But there were rules and regulations to learn. That part was a bit more thorny. I consider myself a responsible pilot. But it does take restraint at times. There are so many places that I want to fly that I just cannot.

And I had to figure out, how did I want to use this new tool? How will it mesh with the other pictures I take? This exploration has become the most exciting part.

spark-DJI_0001-Pano.jpg

I've become enamored with the panorama feature of the Spark. It's amazing. Because of the precise navigation electronics, the drone is a perfect capture device for building big pictures from above. I can choose horizontal framings, vertical, or spherical. All of them are interesting and at times useful, but my favorite is the horizontal panorama.

Once I position the aircraft and set the capture sequence in motion, it's fun to watch its robot-like maneuvers as it positions itself to record each frame. I can preview the stitched image with the DJI software, but the best results come later when I use Lightroom's Photo Merge technology.

What I've discovered is that the Spark fills a gap in my visual storytelling. I'm pretty good at covering my subject from different angles. But the one from above was always missing. And having it now completes many of my essays.

I'm still a terrible pilot. I keep telling myself I need to practice flying more. But I'm adept enough to get the shots that I need. And 6 months later, I have to say that the Spark is an important part of my photo kit. It's here to stay.

More About the DJI Spark

DJI Spark: The Nimble Drone.

Elevated Panoramas with the DJI Spark

The DJI Spark, 6 Months Later

New DJI Spark Firmware.

Exporting a Single Frame from Video

You can share your thoughts at the TDS Facebook page, where I'll post this story for discussion.

One of the joys of mirrorless photography is the camera's ability to accept a variety of classic SLR optics. In my case, when I want to scratch a creative itch, I like to mount one of my Pentax K or Zeiss Contax lenses on to my Olympus PEN-F (not to mention the occasional film camera itself).

Some photographers don't realize that there are a wide variety of adapters ranging from budget priced to top shelf, and that it's very easy to find exactly the right one for you. Here's how to do it.

lens-adapter.jpg

Start by visiting this B&H Adapter page. At first you'll see numerous options for practically every camera and lens. But you can narrow the results quickly.

Go to the left column and scroll through the options under Camera Fitting. In my case, I go to "4/3rd Micro." Check the box next to the camera type you want to adapt to. Then go to Lens Fitting. I selected "Pentax K" because that is the optical mount that I want to adapt to my Olympus mirrorless camera. Now scan the results in the browser window, and select the best option for you.

8585_08_pentax-135mm-leah.jpg Pentax-M 135mm f/3.5 portrait lens.

You probably already have a few favorite SLR lenses collecting dust in the closet. Prime optics are my favorite for adapting. In my own collection, I often choose a Pentax K 50mm f/1.4, Zeiss Contax 85mm f/2.8, or Pentax K 135mm f/3.5 (compact with built-in lens hood... sweet!) because I like to use these for portrait work. They meld their unique analog character to the preciseness of digital capture.

Also, there are many great vintage optics available on the market for affordable prices. Take a look at cool used lens page as an example.

Generally speaking, working with adapted lenses means shooting wide open and manually focusing. But now we're also seeing adapters that bring more functionality to SLR optics (but at a price of course). It all depends on what you're after.

Personally, I enjoy the process of controlling the focus and letting the lens apply its magic at maximum aperture. I find it creatively energizing. I hope you explore this world as well. It's a beautiful place!

You can share your thoughts at the TDS Facebook page, where I'll post this story for discussion.

This is The Digital Story Podcast #618, Jan. 16, 2018. Today's theme is "5 Photo Tips You May Not Have Thought Of." I'm Derrick Story.

Opening Monologue

Evolving as a photographer is a journey of many small steps. We start with the basics, then spend the rest of our lives perfecting our technique. And along the way, we may discover a small bit of information that results in a big improvement. Today, I have five tips that may help you take the next step.

5 Photo Tips You May Not Have Thought Of

I have this running joke with myself that any given photograph has dozen components. Things like composition, aperture setting, ISO, color, motion, highlights, shadows, expression, and so on. The joke is, that I can do 11 of those things wonderfully, but if I screw up the 12th, then the image will likely fall short of my expectations.

That's why tips pieces are so popular. Because they often address the one thing we overlooked. And when applied with the other 11 variables, could turn out to be the missing ingredient to success.

I'm not saying that any of today's tips may serve as a silver bullet for you. But you never know. So let's take a look and see what we think.

  • Use Your Histogram in the Field - We have this amazing tool on the back of the camera that can help us capture the best range of tones for any given image, but it's often not used: the histogram.
  • Embrace Natural Light Photography All Times of Day - All sorts of things get stuck in our heads, and a popular misconception is that our travel work should only be shot during the golden hours of the day. All light is good light. Match the lighting to the story that you're trying to tell. And when needed, use your bag of tricks, such as a polarizer and RAW files to help tame extreme tones.
  • Backgrounds Are As Important as Subjects - It's so easy to become mesmerized by our primary subject that we overlook non-complementary backgrounds. Practice the 1-2 punch technique: first the subject then the background... every time.
  • victoria-1024.jpg

  • Ask Your Portrait Subjects if They Have a Good Side - This is so simple that it's hard to believe how often it's overlooked. Even non-models often know their best side. By starting there, you not only gain their respect, but get the shoot off to a good start.
  • Weight on One Foot or the Other, Never Flatfooted - This is the most basic posing technique, and one that is so important. By shifting the weight to one foot or the other, the entire energy of the shot improves.
  • Beer Koozie Lens Pouch

    I've been offered plenty of free, promotional beer koozies over the past few months, and I have accepted every one of them. Why? Because they make great on the go lens cases. You have to get the kind that fold for them to be truly nimble. I keep a couple of them in my suitcase, along with ultralight shoulder bag for on-the-fly urban exploration.

    Starbucks Lens Hood

    Next time you purchase your morning Americano, be sure to hang on to the cup sleeve that we use to keep our hands for burning. Why? They make a great on-the-fly lens hood, for practically any optic in your arsenal.

    The San Francisco Street Photography Workshop

    San Francisco Street Photography - April 26-28, 2018 - We'll work entirely on location in San Francisco. Our hotel in picturesque Union Square will serve as our headquarters during the event. No rental car will be necessary. We'll explore the City's hidden treasures and capture them through our lenses. As always, we're adding new shooting locations again this year, including twilight assignments. This is San Francisco like you've never seen it before. And as a bonus, Olympus Visionary Mike Boening will be joining the teaching staff and leading sessions on street shooting and night photography. Two instructors, three days, and all for just $695. (That's right, it's 3 full days in one of the most photogenic cities in the U.S.)

    The 2018 Nimble Classroom Series

    The 2018 Nimble Classroom Series begins in February. Here are the first three sessions:

    • Layers in Capture One Pro 11 - Feb. 10
    • BUILD YOUR DIGITAL DARKROOM WITH PHOTOS - MARCH 10
    • Digital Asset Mgmt with Luminar - April 21

    You can sign up right now for each of these and reserve your spot. Only 6 participants per class.

    Updates and Such

    Three new training videos are now posted for our Patreon Inner Circle Members:

    • Tips for Importing Images into Photos for macOS
    • Using Gradient Masks in Luminar
    • Working with Light Adjustments in Capture One Pro

    You can become a member of our Inner Circle by clicking on this link or by clicking on the Patreon tile that's on every page of The Digital Story.

    B&H and Amazon tiles on www.thedigitalstory. If you click on them first, you're helping to support this podcast. And speaking of supporting this show, and big thanks to our Patreon Inner Circle members:

    And finally, be sure to visit our friends at Red River Paper for all of your inkjet supply needs.

    See you next week!

    More Ways to Participate

    Want to share photos and talk with other members in our virtual camera club? Check out our Flickr Public Group. And from those images, I choose the TDS Member Photo of the Day.

    Podcast Sponsors

    Videoblocks - Go to videoblocks.com/digitalstory to get all the stock video, audio, and images that you can imagine for just $149. Save on millions of studio-quality clips, tracks, and graphics.

    Red River Paper - Keep up with the world of inkjet printing, and win free paper, by liking Red River Paper on Facebook.

    The Nimbleosity Report

    Do you want to keep up with the best content from The Digital Story and The Nimble Photographer? Sign up for The Nimbleosity Report, and receive highlights twice-a-month in a single page newsletter. Be a part of our community!

    Want to Comment on this Post?

    You can share your thoughts at the TDS Facebook page, where I'll post this story for discussion.
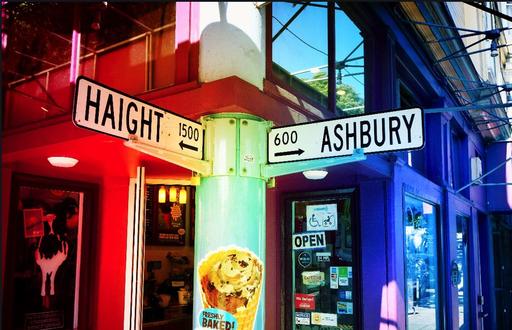
Blue skies that aren't blue enough, office lighting that makes the walls a funny color, a shirt that's just a shade off - these are all perfect scenarios that can be addressed by the new Selective Color tool in Photos for macOS High Sierra. And I have a free video to show you exactly how it works.

Use Selective Color for specific areas from Photos for macOS High Sierra Essential Training by Derrick Story

Start by choosing a color well in Selective Color that is closest to the color that you want to adjust. Then use the eyedropper to fine tune your selection. Now you can adjust Hue, Saturation, Luminance, and Range. And you can perform these acts of magic on multiple colors in your photograph. And the best part is that this is a non-destructive edit. So experiment! You can do no harm.

selective-color.png This walkway was once yellow. Now it's green. That's Selective Color.

And once you know that you have this tool at your disposal, you can keep it in mind when you shoot. "I love this scene, just wish the car was a little brighter." Shoot the scene, then make the car brighter by using Selective Color - super handy, and fun.

New Photos for macOS High Sierra Training!

Is it time for you to learn the ins and outs of the latest version of Photos? Take a look at Photos for macOS High Sierra Essential Training on LinkedIn Learning, or on lynda.com. Maximize your iPhone photography and complement the work you do with your mirrorless cameras as well. You'll love your cameras even more...

You can share your thoughts at the TDS Facebook page, where I'll post this story for discussion.

Two useful Type-C accessories that I discovered at CES 2018 for photographers on the go are the Kingston Nucleum ($79) and the LaCie's DJI Copilot ($349).

The Kingston Nucleum

P1082882.jpg The Kingston Nucleum connected to a new MacBook. Photo by Derrick Story.

The Kingston Nucleum allows you to connect your favorite USB devices, plus HDMI, SD cards, and microSD cards, all in one slim, portable, stylish hub. Five ports, two card readers, and no external power required.

Aside from the handsome design, I really like the quality of the cord and its two connecting ends, which are reinforced. This is a high performance accessory that should serve you well over the long haul. And it looks great beside your new laptop computer.

LaCie's DJI Copilot

Another USB-C device that may be of interest to photographers is LaCie's DJI Copilot.

P1082887.jpg LaCie's DJI Copilot. Photo by Derrick Story.

This portable USB-C device has some impressive features:

  • 2TB Storage Capacity
  • USB 3.1 Type-C Interface (interchangeable with other interfaces)
  • Integrated SD Card Reader
  • Directly Copy Files - No Computer Needed
  • Review Footage on Your Mobile Device
  • Backup Battery Pack for USB Devices
  • Integrated Status Screen
  • Manage and Organize Files
  • Drop- / Splash- / Dust-Resistant
  • Windows, Mac, iOS & Android Compatible

The big selling point here is that you don't need to bring your computer in the field to backup your camera's memory cards. The Copilot will take care of that by itself, and it will provide you with completion status on its integrated screen. So you know when it's safe to reformat the card.

You can also view your files in the field if you have a table device with you. The Copilot connects to iPads and other portables as well as the computer when you return home. And with its ample 2 TB of internal storage, you should be covered, even on extended shoots.

Additionally, I saw many other USB-C devices at CES, such as the Sandisk Extreme Portable SSD and the Western Digital 1 TB stick flash drive.

So, by combining the Nucleum for your existing peripherals and adding a new accessory or two, your new state-of-the-art computer becomes just a bit more friendly.

You can share your thoughts at the TDS Facebook page, where I'll post this story for discussion.

CES had so much to offer today: home automation, beautiful HDTVs, robots, cars, drones, and tempting audio devices. But the booth that brought the biggest smile to my face was Polaroid.

Polaroid Booth CES 2018

First, they had the best free bags at the tradeshow. They are big, sturdy vessels with happy faces promoting the excellent Polaroid Pop camera. If you're on the floor today, you have to swing big and grab one.

Polaroid Booth CES 2018

Second, the booth design is excellent. It's bright, colorful, and for lack of a better term, joyful. I found myself circulating through it three times just to take in the cameras, displays, giant film boxes, and supporting visuals.

Polaroid Booth CES 2018

But the bottom line is always about the product. And both the Polaroid Pop ($199) and the Polaroid OneStep 2 ($99) are the types of cameras that I've been waiting for them to release.

polaroid-pop-1024.jpg

The Pop combines a 20MP digital camera with a ZINK Zero Ink printer to create a stylish, versatile photography tool. The OneStep2 uses i-Type or 600 Instant Film and produces classic Polaroid prints. I have one print of each that we shot today, and they are quite different.

P1093001.jpg

The output from the Pop is cleaner and more like a modern day print, except that it is semi-instant and emerges from the top of the camera. The OneStep2 output has more muted colors and isn't as sharp as the ZINK image. Instead it has that artistic vibe that looks great with creative portraits.

Choosing the right format depends on your work. If you're more inclined to have the images represent the world as we see it, I would go with the Pop. But if you like those muted colors and soft tones, then the OneStep2 might be a better choice.

Polaroid Booth CES 2018

Either way, Polaroid is back, and their booth represents the vibrancy and energy that I feel in their latest crop of products. If you love instant photography, be sure to visit them at booth 16615 in the Central Hall.

You can share your thoughts at the TDS Facebook page, where I'll post this story for discussion.

This is The Digital Story Podcast #617, Jan. 9, 2018. Today's theme is "Beer and Roaming in Las Vegas." I'm Derrick Story.

Opening Monologue

The Consumer Electronics Show is one of the few remaining technology events where press still receives the red carpet treatment. We enjoy a well-stocked media center, excellent PR events with substantial refreshments, and lots of access to the stars of the show. And this week I'm going to take you behind the scenes as we junket together at CES.

Beer and Roaming in Las Vegas

Waiting-Samsung-Press-Event.jpg "Waiting for the Samsung Press Event" - A sea of journalists waiting in line at the Mandalay Bay Convention Center for the Monday Samsung press conference. Photo by Derrick Story.

I take you behind the scenes for the press day that precedes the opening of CES in Las Vegas.

Panasonic announces Lumix DC-GH5S, an even more video-focused GH5

DP Review reports: The GH5S uses a slightly larger, but lower resolution 12.5MP sensor whose 'multi-aspect' design offers a series of ~10.2MP crops with the same angle of view. It gains the ability to shoot the wider-angle DCI 4K format at up to 60p, whereas the GH5 tops out at 24p. Both cameras can shoot UHD 4K at up to 60p.

The sensor features a "dual gain" design that Panasonic calls "Dual Native ISO." This uses two separate sensor read-out circuits - one that maximizes dynamic range at lower sensitivities, and one that prioritizes noise reduction at a dynamic range cost. Unusually, Panasonic lets you limit its camera to one of these modes.

The Panasonic Lumix DC-GH5S will be available February 2nd for $2499 body-only.

The 2018 Nimble Classroom Series

The 2018 Nimble Classroom Series begins in February. Here are the first three sessions:

  • Layers in Capture One Pro 11 - Feb. 10
  • BUILD YOUR DIGITAL DARKROOM WITH PHOTOS - MARCH 10
  • Digital Asset Mgmt with Luminar - April 21

You can sign up right now for each of these and reserve your spot. Only 6 participants per class.

Updates and Such

Three new training videos are now posted for our Patreon Inner Circle Members:

  • Tips for Importing Images into Photos for macOS
  • Using Gradient Masks in Luminar
  • Working with Light Adjustments in Capture One Pro

You can become a member of our Inner Circle by clicking on this link or by clicking on the Patreon tile that's on every page of The Digital Story.

B&H and Amazon tiles on www.thedigitalstory. If you click on them first, you're helping to support this podcast. And speaking of supporting this show, and big thanks to our Patreon Inner Circle members:

And finally, be sure to visit our friends at Red River Paper for all of your inkjet supply needs.

See you next week!

More Ways to Participate

Want to share photos and talk with other members in our virtual camera club? Check out our Flickr Public Group. And from those images, I choose the TDS Member Photo of the Day.

Podcast Sponsors

Videoblocks - Go to videoblocks.com/digitalstory to get all the stock video, audio, and images that you can imagine for just $149. Save on millions of studio-quality clips, tracks, and graphics.

Red River Paper - Keep up with the world of inkjet printing, and win free paper, by liking Red River Paper on Facebook.

The Nimbleosity Report

Do you want to keep up with the best content from The Digital Story and The Nimble Photographer? Sign up for The Nimbleosity Report, and receive highlights twice-a-month in a single page newsletter. Be a part of our community!

Want to Comment on this Post?

You can share your thoughts at the TDS Facebook page, where I'll post this story for discussion.

Over the past month I've been testing the Olympus Digital ED 17mm f/1.2 PRO, Digital ED 25mm f/1.2 PRO, and the Digital ED 45mm f/1.2 PRO lenses. Knowing that ultimately I could only afford one, I had to decide which of the trio I was going to invest in.

P1052727.jpg The Trio of Olympus PRO Lenses. Photos by Derrick Story.

The final decision did not come down to performance or quality. All three optics delivered beautiful images. And when I zoomed-in on the RAW files in Capture One Pro, I could not believe how well they held together. Truly impressive.

What it came down to was this: Which optic was more practical for my photography? And after a month of very enjoyable work, the clear winner for me was the Olympus Digital ED 45mm f/1.2 PRO lens.

Leah with 45mm f/1.2 PRO Leah in the Studio - Olympus 45mm at f/1.2, E-M1 Mark II, ISO 200, processing in Capture One Pro 11. Photo by Derrick Story.

In the end, the 45mm f/1.2 is the pro portrait lens that I've always wanted for my micro four thirds system. It's the right focal length, it doesn't take up too much room in the camera bag, and the images are absolutely beautiful.

Yes, I would love to keep all three optics in the PRO line up. But right now, I can only afford one, and that one will the 45.

You can share your thoughts at the TDS Facebook page, where I'll post this story for discussion.
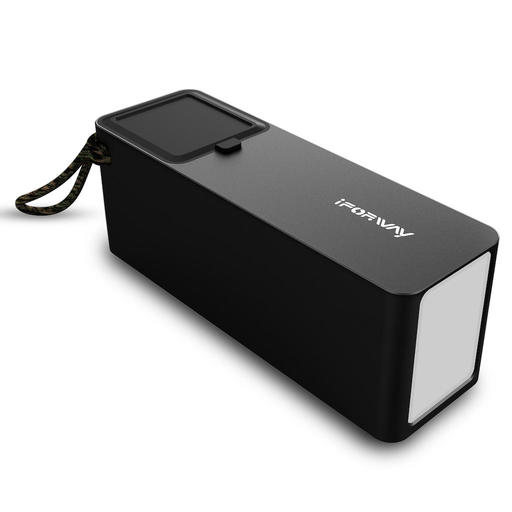
Photolemur 2.2 Spectre is a next-generation picture enhancement application for both Mac and Windows. It uses image recognition technology that understands different components of a photo, then applies up to 12 different algorithms in an attempt to improve it. And in many instances, it does this quite well. Photolemur is available as a standalone app, as a plugin for Lightroom, and my favorite method, as an editing extension for Photos for macOS.

before-and-after.jpg Photolemur editing extension running with Photos for macOS High Sierra.

Regardless of how your access the software, it couldn't be easier to use. Simply open a RAW file or Jpeg in Photolemur, then let it work its magic. After 15 seconds or so, you're presented with an edited image. During that time, the software analyzed your shot and applied some or all of the following corrections.

  • Color recovery - Automatically restores the natural beauty of the blues, yellows, and reds.
  • Sky enhancement - Recognizes clouds of all kinds - cirrus, cumulus, stratus and nimbus - and makes them look as lifelike as possible.
  • Exposure compensation - Senses the inaccurate exposure settings and enhances them by lightening or darkening.
  • Natural light correction - Knows what time of the day is and how to adjust the tones, exposure, and contrast of mornings, evenings, dusk, and dawn.
  • Foliage enhancement - Neutralizes the lost of colors of nature shots emphasizing the trees, leaves, plants and makes them as true-life beautiful as possible.
  • Noise reduction - Identifies and reduces digital noise.
  • Smart dehaze - Detects and fixes distracting elements such as haze, fog, mist, dust, and smog.
  • Tint perfection - Finds a pleasing balance between colors depending on image itself and its composition.
  • Raw processing.
  • JPG fix - Detects imperfections in JPEG files and brings them back to a clear, clean, and crisp state.

original-landscape.jpg Original, unedited landscape in Photos for macOS.

===============================

finished-landscape.jpg Finished version after Photolemur processing and a few small tweaks in Photos for macOS. Notice the improvement in the sky and how the building and foliage have been brightened. Photos by Derrick Story.

The only user-controlled adjustment in Photolemur is the Boost slider. This is available after the image has been processed, and it allows you to fade the effect if you wish. The Boost slider is helpful, but I really like using Photolemur as a plugin for Lightroom or as an editing extension for Photos because I can make my own final adjustments once the image has been AI enhanced.

This is the best of both worlds. Photolemur serves as a foundation auto-enhance tool that I can then customize to my own tastes.

using-boost.jpg The Boost slider allows you to back-off the enhancement to a percentage that looks right to you.

As you would expect, the technology works better with some shots than others. I was particularly impressed with how Photolemur reads a sky and improves it automatically. It's also quite good with foliage. It can handle multiple images at once, so you can run a batch of vacation shots through Photolemur and turn them around quickly.

Photolemur does an admirable job with portraits as well, although sometimes your subjects might not want to be as sharp and crisp as the application might render. Here's where the Boost slider is very important.

Overall, I'm impressed with the results of this app. In my workflow, it can serve as a first-step edit in Photos, allowing me to fine-tune the image after the initial pass. That being said, I would trust the standalone version to a quick-process batch of vacation photos to prep them for a on-the-fly slideshow.

I tested the downloadable version of Photolemur that's offering a family license and bonuses for $45 (limited time, Mac or Windows version). A single license version is also available in the Mac App Store for $14.99, which seems like a great price for this software.

New Photos for macOS High Sierra Training!

Is it time for you to learn the ins and outs of the latest version of Photos? Take a look at Photos for macOS High Sierra Essential Training on LinkedIn Learning, or on lynda.com. Maximize your iPhone photography and complement the work you do with your mirrorless cameras as well. You'll love your cameras even more...

You can share your thoughts at the TDS Facebook page, where I'll post this story for discussion.
This is The Digital Story Podcast #616, Jan. 2, 2018. Today's theme is "Pick One from Each." I'm Derrick Story.

Opening Monologue

We spend a lot of time discussing the art and science of photography. As we should. This is our chosen craft. But to be a truly effective artist, we need to address issues beyond aperture settings and sensor size. I've identified 5 key areas that can help us become more efficient and effective in 2018. And as a result, better content creators as well.

Pick One from Each

rainbow-1024.jpg

These five key areas are definitely slanted toward photographers. But with a few tweaks, could be applied to any creative endeavor. Each needs to be accomplished before the end of 2018. Let's take a look at them.

Create a New Revenue Stream - Yeah, I know, you already have a full time job or are retired. Great. If we've learned nothing else from 2017 is that these situations can turn on a dime. It take but only a minute to lose a revenue stream, but usually weeks, months, or even years to create a new. Start one now. Here are some ideas.

Experiences Over Things - I'll discuss new gear in a moment. But this is more about focus. Using resources to facilitate experiences instead of just accumulating possessions creates an energy that fuels us in nearly every area of our life. I'm suggesting workshops, social groups (in person), personal projects, a camera buddy, and day trips.

Fix or Improve One Valuable Relationship - Unfortunately, the people in our lives often become collateral damage when bad things happen to us. Many of these relationships can be repaired or improved. Pick one, and take steps to make it better. You will feel lighter.

Decide What Equipment You Need to Move Forward - Don't wait until you're tempted by the latest new thing. Take a look at your craft and identify the soft spots. Then plan for and purchase the gear that will help you strengthen those areas.

Improve Your Physical Well Being - Fatigue makes cowards of us all. Whereever you are with your physical well being right now, you can improve it. Look at diet, exercise, and daily habits in general. I recommend physical activity first thing in the morning, then one other time over the course of the day. Each session can only be 15-20 minutes. You will be delighted with the results.

Update Your Camera Metadata

Take a minute tonight to update the copyright imprint on each of your cameras to 2018, double check the timestamp, and create new 2018 metadata templates for Lightroom and Capture One Pro.

The 2018 Nimble Classroom Series

The 2018 Nimble Classroom Series begins in February. Here are the first three sessions:

  • Layers in Capture One Pro 11 - Feb. 10
  • BUILD YOUR DIGITAL DARKROOM WITH PHOTOS - MARCH 10
  • Digital Asset Mgmt with Luminar - April 21

You can sign up right now for each of these and reserve your spot. Only 6 participants per class.

Updates and Such

Three new training videos are now posted for our Patreon Inner Circle Members:

  • Tips for Importing Images into Photos for macOS
  • Using Gradient Masks in Luminar
  • Working with Light Adjustments in Capture One Pro

You can become a member of our Inner Circle by clicking on this link or by clicking on the Patreon tile that's on every page of The Digital Story.

B&H and Amazon tiles on www.thedigitalstory. If you click on them first, you're helping to support this podcast. And speaking of supporting this show, and big thanks to our Patreon Inner Circle members:

And finally, be sure to visit our friends at Red River Paper for all of your inkjet supply needs.

See you next week!

More Ways to Participate

Want to share photos and talk with other members in our virtual camera club? Check out our Flickr Public Group. And from those images, I choose the TDS Member Photo of the Day.

Podcast Sponsors

Videoblocks - Go to videoblocks.com/digitalstory to get all the stock video, audio, and images that you can imagine for just $149. Save on millions of studio-quality clips, tracks, and graphics.

Red River Paper - Keep up with the world of inkjet printing, and win free paper, by liking Red River Paper on Facebook.

The Nimbleosity Report

Do you want to keep up with the best content from The Digital Story and The Nimble Photographer? Sign up for The Nimbleosity Report, and receive highlights twice-a-month in a single page newsletter. Be a part of our community!

Want to Comment on this Post?

You can share your thoughts at the TDS Facebook page, where I'll post this story for discussion.