This is The Digital Story Podcast #558, November 15, 2016. Today's theme is "The Attack of the 1" Sensor." I'm Derrick Story.
Opening Monologue
By the time you listen to this, I will be working in Washington D.C. at the WildSpeak Conference. I'll be recording interviews and capturing still images. My big camera is the Olympus OM-D E-M5 Mark II. What a beast ;-) The other three capture devices are considerably smaller, yet quite powerful. And one of them is the subject of today's show. Plus, a listen-in to my teaching podcasting to National Geographic photographers.
The Attack of the 1" Sensor
We all know that technology is constantly on the march. Laptops are thinner and cameras are smaller. But the changes are happening in opposite directions. Not only are the devices more compact, they are more powerful too.
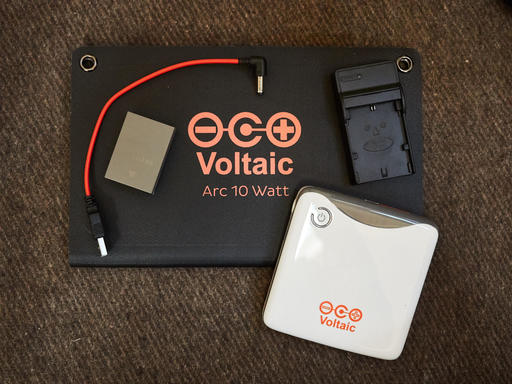
A sweet spot in this evolving technology is the 1" sensor. It has enough surface area and photo sites to work in all lighting conditions, yet doesn't generate a tremendous amount of heat, so it can be housed in extremely small form factors. Here are three examples that I think are worth noting.
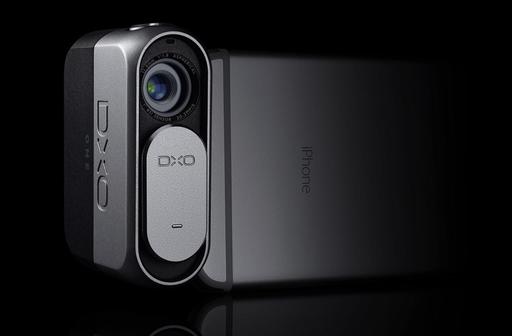
The DxO ONE ($499) - I'm starting here because in terms of efficiency, this camera is impressive. It features a 20.2MP 1" BSI-CMOS Sensor with a 32mm f/1.8 optic - all in a package that measures 3"x 2" x 1" and weighs less tha 4 ounces.
Other highlights include:
- Built-In Wi-Fi for Remote Use
- Full HD 1080p Video Recording at 30 fps
- ISO 51200, Shutter Speed to 1/20000 sec
- Pivoting Design, Built-In Li-Ion Battery
- JPG + DNG and DxO SuperRAW
- Contrast-Detect AF with Face Detection
And the best part is, the results can see stunning.
The Sony Cyber-shot DSC-RX100 IV ($899) - If you're willing to go about an inch bigger and spend nearly twice as much, the RX100 IV is an amazing camera.
- 20.1 MP 1" Exmor RS BSI CMOS Sensor
- BIONZ X Image Processor
- Internal UHD 4K Video & S-Log2 Gamma
- Zeiss Vario-Sonnar T* f/1.8-2.8 Lens
24-70mm (35mm Equivalent)
- 2359k-Dot OLED Tru-Finder Pop-Up EVF
- 3.0" 1229k-Dot Multi-Angle Xtra Fine LCD
- Slow Motion Video at 960 fps
- Built-In Wi-Fi Connectivity with NFC
- ISO 12800 and 16 fps Continuous Shooting
The Panasonic Lumix DMC-ZS100 ($697)
- 20.1MP 1" High Sensitivity MOS Sensor
with Venus Engine Image Processor
- Leica DC Vario-Elmarit 10x Zoom Lens
25-250mm (f/2.8 - f/5.9)
- 1,166k-Dot Live View Finder
- 3.0" 1.04m-Dot Touchscreen LCD Monitor
- 4K 3840 x 2160 Video at 30p/24p (AVCHD Ver. 2.0, MP4)
- 5-Axis Hybrid O.I.S.
- ISO 25600 and Up to 50 fps Shooting
- 4K Photo Modes and Post Focus
Podcast Class for Photographers at National Geographic
As part of WildSpeak, I teamed up with National Geographic photographer and podcaster, Robin Moore, to lead an intimate workshop at the Nat Geo center in Washington D.C.
I thought you might be interested in hearing some of my talk. So I recorded it for you. (Yes, just for you, seriously.) Here's a 9-minute excerpt as the second segment of today's show.
Review The Apple Photos Book for Photographers
The print version of the Apple Photos Book is now available. And I have 10 review copies for photographers who will read the book and publish a review about it. If you're interested, please write me at derrick@thedigitalstory.com
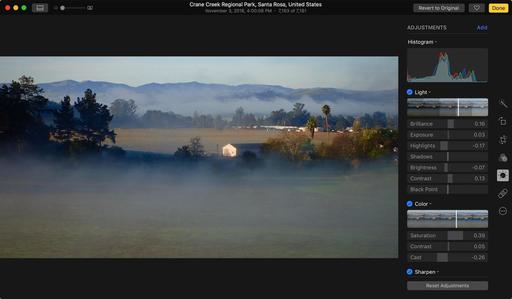
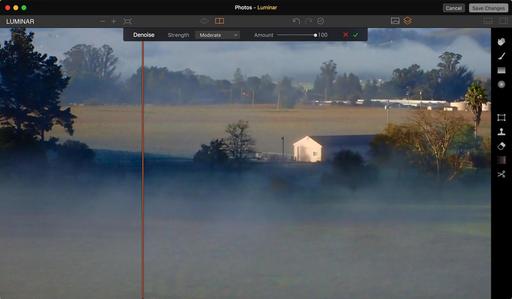
Luminar for the Mac
I've been testing a pre-release version of Luminar, both as a standalone app, a plug-in for Lightroom, and as an Editing Extension for Photos for macOS. And after improving countless images, I can tell you that I really like this software. I've already integrated it into my photography workflow.
And now you can secure a copy for yourself. If you pre-order before Nov. 17th, you'll receive Luminar at a discounted price, plus two bonuses, all for only $49 total (existing Macphun customers) or for $59 (new customers).
Updates and Such
Big thanks to all of our Patreon members! I was able to pay for the podcast server and the backup system from last month's pledges. Your contributions are making a positive impact.
The 2017 Workshop Season is posted. I talked about the events in last week's podcast, and folks are signing up for the reserve list. If you want to join me in 2017, take a look at the line up, and add you name to the list.
B&H and Amazon tiles on www.thedigitalstory. If you click on them first, you're helping to support this podcast. And speaking of supporting this show, and big thanks to our Patreon Inner Circle members.
And finally, be sure to visit our friends at Red River Paper for all of your inkjet supply needs.
See you next week!
More Ways to Participate
Want to share photos and talk with other members in our virtual camera club? Check out our Flickr Public Group. And from those images, I choose the TDS Member Photo of the Day.
Podcast Sponsors
Red River Paper - Keep up with the world of inkjet printing, and win free paper, by liking Red River Paper on Facebook.
MacPaw Creators of CleanMyMac 3 and other great software for Apple computers. Visit www.macpaw.com today.
Hedge for Mac - The fast solution for moving photos and videos from memory cards to drives, or drives to drives for that matter. Learn more at Hedge for Mac.
The Nimbleosity Report
Do you want to keep up with the best content from The Digital Story and The Nimble Photographer? Sign up for The Nimbleosity Report, and receive highlights twice-a-month in a single page newsletter. Be a part of our community!
Want to Comment on this Post?
You can share your thoughts at the TDS Facebook page, where I'll post this story for discussion.
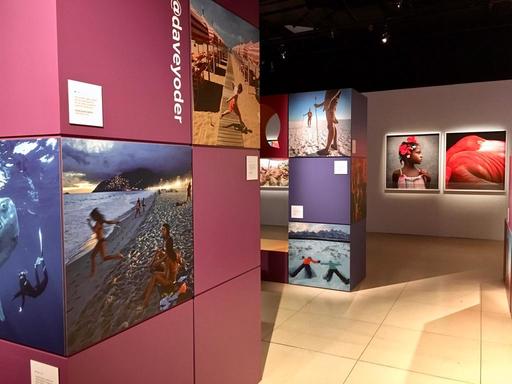
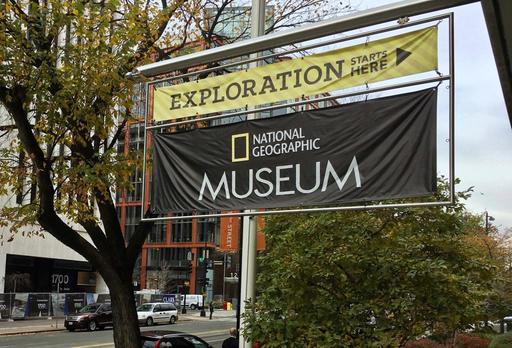
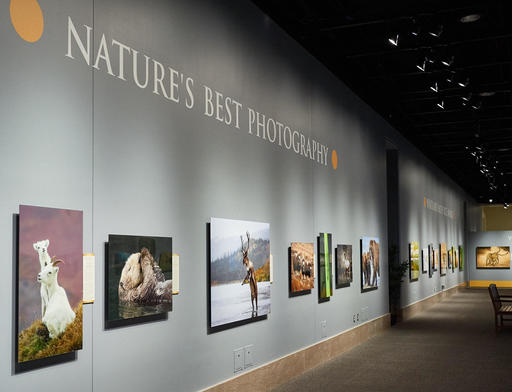 You have until September 2017 to see this exhibit at the Smithsonian.
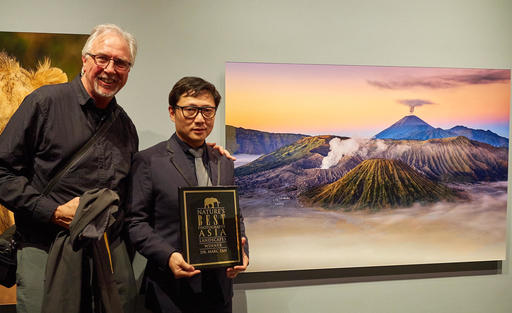 "Mt. Bromo" by Dr. Marc Tan is the winner for Asia Landscapes. It was one of my favorite images on display.