This is The Digital Story Podcast #590, June 27, 2017. Today's theme is "Out of Chicago." I'm Derrick Story.
Opening Monologue
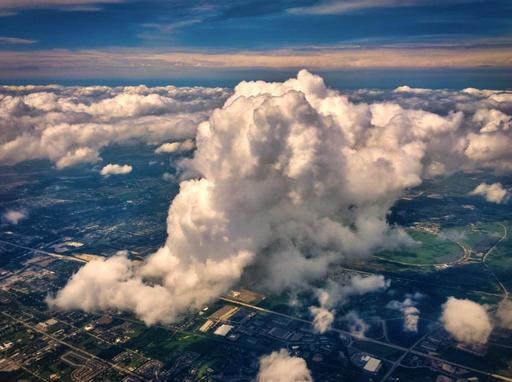
It was the day after Summer Solstice when we touched down at O'Hare Airport. You could feel the heat seeping through the cracks in the covered walkway that connected the plane to airport. There was no mistake. It was summer and I was in Chicago. And what transpired over the next few days is the top story for today's show.
Out of Chicago
Later that night I was awakened from my sleep by the sound of rain blowing hard against my window. And there was thunder as well. I had a pre-conference workshop the next morning that included a photo walk.
"What is our Plan B?" I asked myself. "I don't know," I answered.
I picked up my phone and checked the weather. The rain was predicted to stop by 8 am. And what was predicted to follow was three days of glorious spring-like weather.
"If that's true," I thought, "then we're in for a great conference." I rolled over and fell asleep again.
It was true, and we had a fantastic event. Here are some of the highlights with a few embarrassing moments mixed in.
My Favorite and Slightly Embarrassing Moments in Chicago
- A Favorite: Catching up with Valerie Jardine (Hit the Streets podcast) about her transition away from Street Focus on TWiP.
- Embarrassing: When I accidentally called one of my favorite people on staff Michelle when her name is really Malinda.
- A Favorite: Watching participants in my Analog workshop try to figure out what camera the wanted to choose while they were all hidden from sight in old Crown Royal cloth bags.
- Embarrassing: Privately swearing to conference organizer Chris Smith when he was joking with me about my needing a meal break after a very long day. He later said he didn't even remember the incident. (Nice guy!)
- A Favorite: Finding the best street taco joint on State Street for my first lunch in Chicago.
- Embarrassing: Not realizing that I had met Scott Wyden Kivowitz years earlier at Photo Plus Expo.
- A Favorite: Seeing a room full of people waiting for my printing talk to begin.
- A Favorite: All of the TDS listeners who introduced themselves to me at the conference, in restaurants, and on the streets of Chicago.
Mirrorless Panel Discussion
On Sunday I moderated a panel discussion with a terrific slate of mirrorless photographers including Giulio Sciorio, Mike Boening, and Jamie MacDonald. I thought that you might want to hear part of the discussion, so here's an excerpt for your listening pleasure where I'm talking about sensor size, then turn it over to Guido for his thoughts. After that, Jamie and Mike chime in.
Using ImageFramer 4 with Lightroom
ImageFramer's Lightroom plugin is a Post-Processing Action plugin that will add itself to your Export flow. After the plugin is installed, it will be listed in the bottom-left panel of the Export dialog and a "Process with ImageFramer" section appears in the right panel, if the plugin is enabled.
To use the plugin, type the name of the template in ImageFramer that you want to use (case sensitive). During Export, after all the Lightroom adjustments are applied, ImageFramer will be launched, the image will be processed with the template and saved back into Lightroom's flow.
So, if you want to create your own greeting cards and original art from images stored in Lightroom, ImageFramer can be a terrific tool for you.
ImageFramer is used by artists, professional and amateur photographers, scrapbookers, framers, and simply people who simply want their family photos to look better.
ImageFramer helps you to:
- Themed frames: Frames for holidays, seasonal frames, kid frames, romance (for weddings) and many more creative designs. Great for greeting card designs, scrapbooking, enriching family photos etc.
- Overlays: Text or image overlays can be used for adding copyright notices, signatures, descriptions, and even automatic data, like file name, date (file or EXIF), location, caption and headline from IPTC metadata. New in version 4: Snapping overlays to center or edges and simplified interaction with text color and fonts.
- Design Templates. ImageFramer comes with some preset templates. It's easy to add your own templates. These can be used in-app or through Lightroom or in built-in Batch Processor. New in version 4: Saving templates to files and importing them into a another ImageFramer installation.
- Mats. ImageFramer has a special color mat frame types that can look beveled with control over bevel width, and the colors of both the mat and the bevel. Size of mat can be different in each direction (often useful to have a wider mat on the bottom). Multiple mat (and frame) layers allow limitless combinations.
- Integration with Workflows: Adobe Lightroom Export plugin, Photos.app, Sharing extension. Useful for portfolios, web site exports, printing (even simple designs like overlays or a simple white border).
We want everyone to enjoy the benefits of the new ImageFramer. ImageFramer 4.0 is a free upgrade for ImageFramer 3 customers. Note that it requires macOS 10.11 (El Capitan) or later. TDS listeners can receive a 20 percent discount by visiting: our ImageFramer landing page.
Updates and Such
Big thanks to all of our Patreon members!
While you're listening to this, I'm most likely on a train heading south to New Orleans. The anticipated weather looks a lot more challenging than the first leg of the trip here in Chicago. I'll share the inside scoop in next week's podcast.
Registration invitations have gone out to Reserve List members for the Autumn in Wine Country Photography Workshop. If you are on the Reserve List, but didn't get your invite, please contact me. You can learn more about the workshops by visiting the TDS Workshops Page.
B&H and Amazon tiles on www.thedigitalstory. If you click on them first, you're helping to support this podcast. And speaking of supporting this show, and big thanks to our Patreon Inner Circle members.
And finally, be sure to visit our friends at Red River Paper for all of your inkjet supply needs.
Texas-based Red River Paper recently announced a new fine art paper, Palo Duro Etching. The new paper is a 100 percent cotton rag paper and is free of optical brightener additives. The paper is designed to offer warm white tones, deep blacks and a subtle texture to accurately recreate traditional darkroom fine art prints.
See you next week!
More Ways to Participate
Want to share photos and talk with other members in our virtual camera club? Check out our Flickr Public Group. And from those images, I choose the TDS Member Photo of the Day.
Podcast Sponsors
ImageFramer 4 - ImageFramer is used by artists, professional and amateur photographers, scrapbookers, framers, and people who simply want their family photos to look better.
Red River Paper - Keep up with the world of inkjet printing, and win free paper, by liking Red River Paper on Facebook.
The Nimbleosity Report
Do you want to keep up with the best content from The Digital Story and The Nimble Photographer? Sign up for The Nimbleosity Report, and receive highlights twice-a-month in a single page newsletter. Be a part of our community!
Want to Comment on this Post?
You can share your thoughts at the TDS Facebook page, where I'll post this story for discussion.
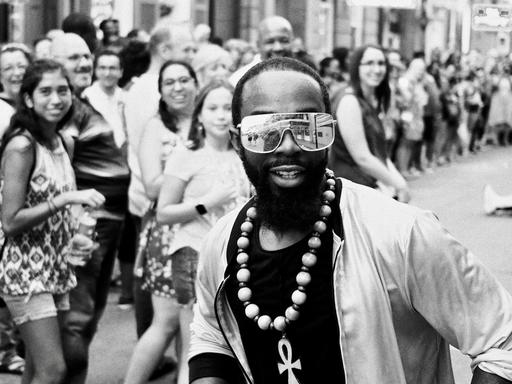 "Street Performer, NOLA" - Olympus PEN-F, monochrome mode, Panasonic 20mm f/1.7 - Photos by Derrick Story.
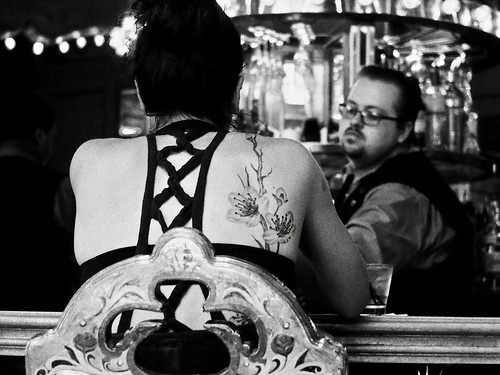
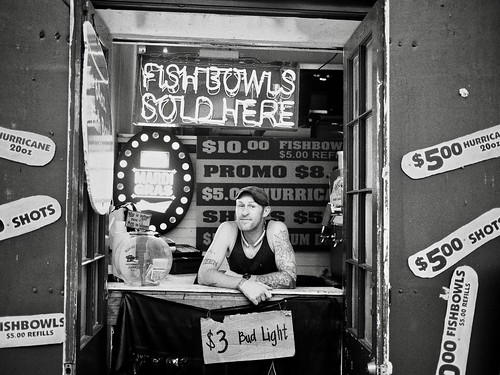 "Bartender, NOLA" - Olympus PEN-F, monochrome mode, Panasonic 20mm f/1.7 - Photos by Derrick Story.
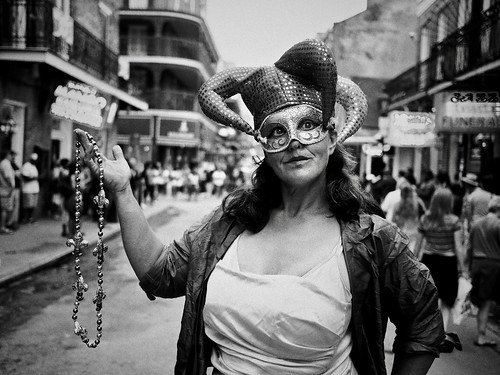 "Mask, NOLA" - Olympus PEN-F, monochrome mode, Panasonic 20mm f/1.7 - Photos by Derrick Story.
 "Musician, NOLA" - Olympus PEN-F, monochrome mode, Panasonic 20mm f/1.7 - Photos by Derrick Story.
 "Rotating Bar, NOLA" - Olympus PEN-F, monochrome mode, Panasonic 20mm f/1.7 - Photos by Derrick Story.