This is The Digital Story Podcast #754, Sept. 1, 2020. Today's theme is "5 Easy Ways to Edit Movies Recorded with Your Camera." I'm Derrick Story.
Opening Monologue
Practically every camera on the market today captures video in addition to still pictures. Yay! But capture is not the roadblock for most photographers turned movie makers; it's the editing that slows them down. I can help with that. Today, I'll show you five different apps that make it easy to trim up your clips and share them with the world. And the best part, you probably already have the software on your computer. I hope you enjoy the show.
5 Easy Ways to Edit Movies Recorded with Your Camera
The number one need in the world of amateur video is trimming. If you could easily clean up the beginning of the clip and the end, you've fought half the battle.
Adding a title or two is another very common request. And then exporting the footage in a format that will work on social is darn important as well.
For these tasks, you don't need to invest in high end video editing software. In fact, you probably have apps on your computer right now that can meet your basic needs. So let's take a look at them and see if any are right for you.
- QuickTime for Mac - QuickTime Player lets you trim movies, stitch clips together, and move them around once they're on the timeline. Once you've finished your editing, you can export the new file or share it to YouTube and social networks. It's really quite incredible.
- Photos for Windows and Photos for Mac - There's a nifty video editor inside Photos for Windows 10 that allows you to split and trim clips. So you can do quite a bit of editing once you get the hang of it. Photos for macOS enables trimming of video clips, and then you can stitch them together by creating a Slideshow. You can also create and add graphics there. Here's a good article on editing video using Photos for Windows 10.
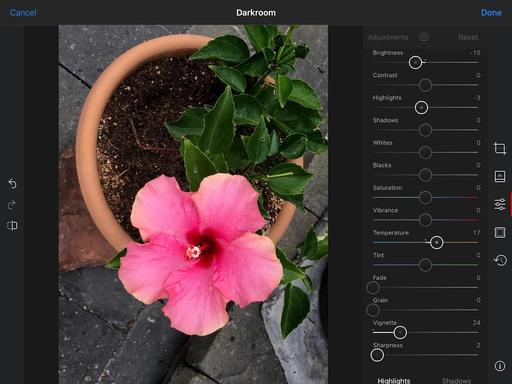
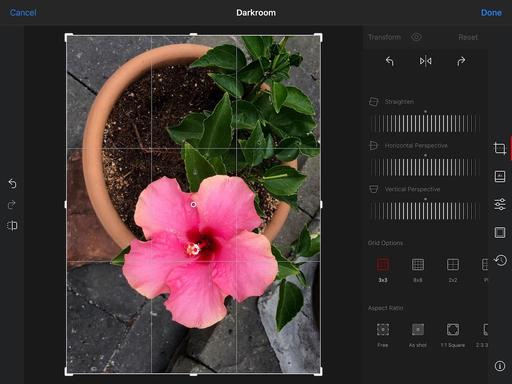
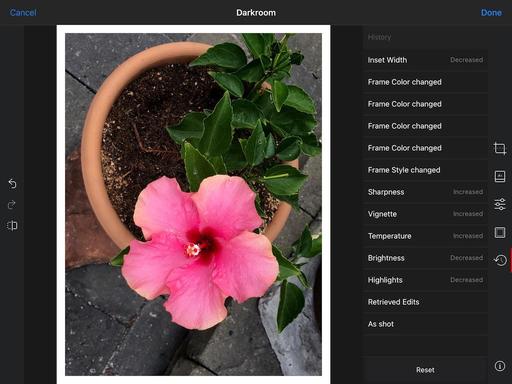
- Photos for iOS on iPad - Funny enough, the iPad is a more powerful machine for editing videos using Photos than the Mac itself. On the tablet you can not only trim, but add filters, adjust colors, tweak exposure, crop, and even add a vignette. Since the iPad and Mac are connected via iCloud, you could use them as a tandem. Edit the clips on the iPad, then stitch them together using Slideshow on the Mac.
- Lightroom Classic for Mac and Windows: The Classic version is quite good at video editing. You can trim, adjust tone and color, and even play with clips. Check out this excellent tutorial for using Lightroom with movies.
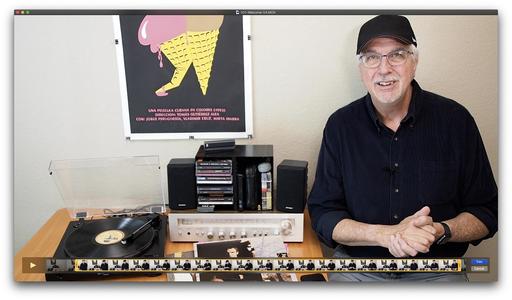
- iMovie for macOS and iOS: If you haven't looked at iMovie in a while, you should revisit it. Not only is it excellent for editing your videos, you can create trailers and other fun projects. Take a look at trailer I created for the How to Get Started with Vinyl Records online course.
As your comfort level increases, you can push into more sophisticated apps such as Final Cut. But for basic work, it's amazing you can do with software that you probably already own.
Sony to Debut a New Line of 'Compact' Full-Frame Cameras Starting this Month: Report
You can read the entire article on PetaPixel.
Sony might have some interesting gear in the works. According to the latest rumors, the company is planning to debut a new line-up of "super-compact" full-frame a7 and a9 cameras aimed at vlogging and travel. And the first one, dubbed the "Sony a7C", will arrive this month.
According to Sony Alpha Rumors, two reliable sources have "confirmed" speculation that Sony is planning to release a new entry-level full-frame camera this month... but they actually said a lot more than that. Apparently, the camera will be part of a new line of super-compact "C" cameras that will live alongside the regular a7 and a9 series.
The first to arrive will be the Sony a7C--an entry-level model, on par with the Sony a7 III--but other "C" cameras are rumored to follow, creating a whole line of compact cameras aimed at vloggers and travel shooters who prioritize portability and features like a flip screen.
The first camera, the so-called Sony a7C, is rumored to arrive sometime in "mid-September" as a sort of hybrid between a Sony a7 III and the a6600. According to SAR, the camera will combine the body of an a6600 with the sensor and performance of the a7 III, the fully-articulating screen of the a7S III, and a pop-up EVF like we've seen on several of the RX100 cameras.
Other specs include a single SD card slot, USB Type-C, both a mic and a headphone jack, and built-in WiFi and Bluetooth. All of this for a little more than $2,000 MSRP at launch. Finally, the "C" line of cameras will allegedly be released alongside a new line of compact lenses to match.
New Release: "How to Get Started with Vinyl Records"
Take a hands-on journey with Derrick Story as he shows you how to set up a HiFi stereo system, add vinyl records to your music library, care for them, and finally, how to digitize the albums for personal listening.
Everything that you need to know to get started with records, or to rekindle your love for vinyl LPs. Plus, you'll get 30-percent discount codes for digitizing software from Rogue Amoeba. The money you will save is more than you'll spend for the price of this online course. What a great value!
In this online course, Derrick will show you:
- All of the gear that you need to set up a HiFi system.
- How to wire up and configure your kit.
- Where to find records and what to look for.
- How to take care of your vinyl so that it lasts a lifetime.
- How to digitize your albums and add them to your digital music catalog.
- Tips and tricks to enhance your enjoyment.
You can learn more and purchase the course here.
Updates and Such
Inner Circle Members: A big thanks to those who support our podcast and our efforts!
How to Watch Photos for macOS Catalina and iPadOS - Learn everything you need to know about Photos for the Mac and iPad by checking out my latest course on LinkedIn Learning and on lynda.com. This course is perfect for Mac and iPad based photographers who shoot with iPhone, Mirrorless, and DSLR cameras. It covers both photography and movies. And if I say so myself, it's a lot of fun.
B&H and Amazon tiles on www.thedigitalstory. If you click on them first, you're helping to support this podcast. (The Digital Story is supported by its audience. When you purchase through links on our site, we may earn an affiliate commission.) And speaking of supporting this show, and big thanks to our Patreon Inner Circle members:
Affiliate Links - The links to some products in this podcast contain an affiliate code that credits The Digital Story for any purchases made from B&H Photo and Amazon via that click-through. Depending on the purchase, we may receive some financial compensation.
And finally, be sure to visit our friends at Red River Paper for all of your inkjet supply needs.
See you next week!
Product Links and Comments
There are product links in this article that contain affiliate tags. In some cases, depending on the product, The Digital Story may receive compensation if you purchase a product via one of those links. There is no additional cost to you.
You can share your thoughts at the TDS Facebook page, where I'll post this story for discussion.