Recently in Photography

  Page 116 of 386 in Photography  

After months or research, testing, and practice, my 5+ hour video training Capture One Pro Essential Training is now available. Here's a taste of what's in store for you.

These movies are designed to show you the easiest ways to make the transition to Capture One. The techniques are straight-forward and uncomplicated. The focus is to get you up and running as quickly as possible, so you can be productive in your new photo management environment. This is a best practices approach.

CaptureOnePro-Promo 1024.jpg

These tutorials will be particularly helpful to former Aperture users looking for a new home, and for unhappy Lightroom photographers who want better RAW decoding and improved performance. I myself made the transition from Aperture to Capture One, and I show you how you can too.

After working with these movies, you might be surprised at just how easy it was to learn this application. Take a look. I think you'll be happy you did.

More Capture One Pro Tips and Techniques

Improve your skills by watching Capture One Pro Essential Training now available on lynda.com. More than 5 hours of tips, tricks, and techniques. Plus many free movies using advanced techniques.

Thinking About Making the Transition from Aperture or Lightroom? - Download my free eBook titled, Rocky Nook's Guide to Moving to Capture One Pro. I show you the steps to create a test library, then build the foundation for a smooth transition to Capture One Pro.

Want to Comment on this Post?

You can share your thoughts at the TDS Facebook page, where I'll post this story for discussion.
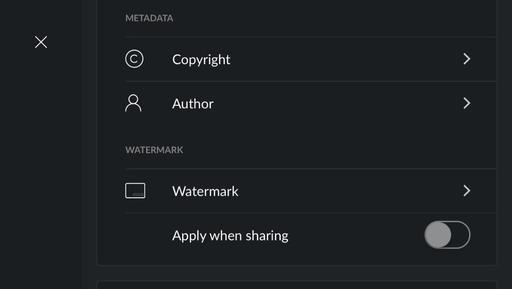
If you've purchased the award winning Affinity Photo ($49, Mac App Store), you also received a handful of editing extensions for Photos for OS X, including my favorite, Haze Removal.

I decided to try Haze Removal with an iPhone shot, because, well, I have a lot of those in my Photos library. Here's how it looked. (Check out the difference in the sky.)

Affinity-haze-removal-web.jpg Three adjustment sliders here: Distance, Strength, and Exposure Correction. Also notice that there's a Before/After slider so you can easily check your work.

When you download or upgrade to the latest version, the extensions are automatically loaded on to the Mac. You can turn them on and off in System Preferences > Extensions > Photos. This panel is also available by clicking on More at the bottom of the Extensions popup menu in Photos.

Speaking of editing in Photos, a great shortcut is to click on a picture, then press the Return key to go straight to ending mode. Once you're there, the Extensions button is at the bottom of the list on the right side.

Affinity Photo includes some other helpful editing extensions in the bundle, but Haze Removal is my favorite of the bunch.

Master Photos for OS X

(It's More Powerful than You Think)

For hands-on tutorials, be sure to take a look at Photos for OS X Essential Training on lynda.com. I cover everything you need to know to get the most from this surprisingly powerful image management application.

More Help and Insights on Photos for OS X

Don't forget about the Photos for OS X Special Feature Section on The Digital Story. It's a roundup of tutorials, videos, and articles focused on helping you master Apple's latest photo management software. You can also find it under Photography in the top nav bar.

Want to Comment on this Post?

You can share your thoughts at the TDS Facebook page, where I'll post this story for discussion.

This is The Digital Story Podcast #521, March 1, 2016. Today's theme is "Good Photos Under Bad Conditions." I'm Derrick Story.

Opening Monologue

In the movie, "Bridge of Spies," James Donovan asks accused Russian spy Rudolf Abel, "Aren't you worried?" Able calmly replies, "Would that help?" That was clearly one of the best lines in movies last year, delivered by Mark Rylance who earned an Oscar for Best Supporting Actor. In the end, both Donovan and Abel survived their challenges.

Every line of work has its obstacles. You don't have to be a Russian spy to face adversity. This week's show focuses on challenges that photographers encounter, and some suggestions for overcoming them and returning home with great images.

Good Photos Under Bad Conditions

rainy-bridge-crossing.jpg

Here are 6 basic challenges that we all might face at one time or another.

  • Inclement Weather. Which by the way, sometimes makes for great photographs. The one item I want in snow or rain is a lens hood to keep the droplets off the front of my optics. A good camera bag is helpful too. But I don't waste a lot of time with plastic bags and stuff. A compact umbrella is helpful to create a temporary workspace. Other than that, a protection filter, lens hood, good camera bag, and I'm ready to roll.
  • Law Enforcement and Security Officers. You're going to get a lot of different opinions on this, but mine is still to not be confrontational. I'd rather talk my way out of the situation than be carried away. I draw the line at anyone touching me or my gear. In those situations I move along. And if appropriate, file a complaint afterward.
  • Family Vacation. You have to be creative to get good travel images while vacationing with family. First, call shotgun. If you're not driving, you're in position to take pictures. Second, get up before everyone else, go shoot, then rejoin them for breakfast. Try to avoid dinner at twilight. Be willing to negotiate shooting time in exchange for activities they want to do.
  • Malfunctioning Equipment. Even though I travel light, I still like to have one layer of redundancy. A spare body in a soft pouch covers so many bases. I think the GM5 or the OM-D E-M10 make great safety nets. Put a body cap lens on them, or use the venerable 17mm f/2.8.
  • Threat of Violence or Theft. This is my least favorite of the bunch. Especially when we have incidents such as TIME photojournalist Christopher Morris being apparently choke-slammed to the ground today during a Donald Trump rally in Redford, Virginia, by a US Secret Service agent. But there are many other situations too, and you have to maintain your street sense while working. It's good to fall into the zone as a photographer, but maybe not so in hostile environments. Also, we have the luxury of not taking our best camera into uncertain conditions. Sometimes a backup camera is the way to go. And one last note on this: watch for cars and buses.
  • Fatigue and Apathy. This is the constant personal battle. One leads to the other IMHO. If you feel like you're not seeing any good images, take a break. Have a coffee. Browse the web on your phone. Take a nap. Find little ways to recharge the batteries and get your shooting mojo back.

0659265617.jpg

In the News

Olympus Fox Brown limited edition OM-D E-M10 II launched worldwide - covered by DP Review

A brown and chrome version of the OM-D E-M10 II compact system camera, first announced in January, has been launched worldwide by Olympus. The new version is a limited edition, of which only 3500 will be made and distributed, and Olympus hopes the unique coloration and grained texture of the finish will attract collectors.
The camera is the same as the standard OM-D E-M10 II, but comes with a brown leather-effect cover, a premium leather strap and a silver-colored lens cap. It will only be available in a kit with the company's 14-42mm F3.5-5.6 EZ Pancake standard zoom lens.

The Olympus OM-D E-M10 II Fox Brown costs $899 with lens and is available to order now.

Springtime Cleaning Note from MacPaw

Clean up space on your Mac for new photo shoots with CleanMyMac 3 by MacPaw. It's an easy way to brush away extra files and retrieve precious disk space. CleanMyMac 3 also accelerates your Mac and instantly frees up RAM. Top features include:

  • Cleaning hard drive
  • Speeding up system
  • Removing caches from Photos app
  • Uninstalling apps and add-ons

Get 30 percent off by visiting our landing page at macaw.com/tds.

Member Quotes of the Week

Intelligent comments culled from The Digital Story Facebook page.

In regard to last week's Facebook Post: "The Reluctant Portrait Photographer" we had some terrific comments, and I want to share one with you now.

Matthew wrote: "The Reluctant Photographer was a great segment. Besides the "don't be creepy" advice, I appreciated the be professional tip. Such a simple thing that makes a world of difference."
Tillie wrote: "Hey Derrick, thanks for your comments and insights about portrait photography in The Reluctant Photographer. . I just had to laugh - "don't be creepy". Seriously, it's so important to make a genuine connection with clients and keep the conversation going. Be authentic."
Joe added: "Really useful advice in The Reluctant Portrait Photographer. I am prone to geek out on cool lighting effects so it's good to be reminded that rapport with the people is what really counts with portraits."

Post your thoughts on our Facebook page. Believe me, I read them. Also, we have a question going on Facebook right now: "If you had to pick one film camera from the past, that you craved, but couldn't afford, what would it be?"

Cool Accessory: Tamrac Goblin Body Pouch

Tamrac Goblin Body Pouch 1.4 - Part of an entire family of handy, affordable stash bags for your gear. Great idea! You can check them out here.

  • Easy Cinch-to-Shut Drawstring
  • Fused Quilted Interior
  • Ripstop Nylon Exterior
  • 3 colors: Kiwi, Ocean, and Pumpkin

Prices start at $13. The one I like, the Goblin 1.4 has interior dimensions of 4.2 x 5.0 x 3.5" and sells for $18.95. There's also a slimmer, longer model, the 1.0 with dimensions of 4.0 x 6.2 x 2.2" and sells for $16.95

Updates and Such

Pt. Reyes Photography Workshop - We have one room open at the Pt. Reyes Photography Workshop, Aug. 19-21 2016. If you want to hang out with us at Straus Ranch House and explore some of the most beautiful coastline in the world, visit the TDS Workshops page and put yourself on the reserve list.

Out of Chicago Update - The debut of The Nimble Photographer Workshop sold out on Friday, June 24. Because there is a wait list, we've added a second workshop on Thursday June 23. I hope you can join me in Chicago this coming June. There's still time for Early Bird pricing.

And finally, be sure to visit our friends at Red River Paper for all of your inkjet supply needs.

See you next week!

More Ways to Participate

Want to share photos and talk with other members in our virtual camera club? Check out our Flickr Public Group. And from those images, I choose the TDS Member Photo of the Day.

Podcast Sponsors

Red River Paper - Keep up with the world of inkjet printing, and win free paper, by liking Red River Paper on Facebook.

ImageFramer Take your photos to the next level with ImageFramer. Visit www.apparentsoft.com today.

MacPaw Creators of CleanMyMac 3 and other great software for Apple computers. Visit www.macpaw.com today.

The Nimbleosity Report

Do you want to keep up with the best content from The Digital Story and The Nimble Photographer? Sign up for The Nimbleosity Report, and receive highlights twice-a-month in a single page newsletter. Be a part of our community!

Want to Comment on this Post?

You can share your thoughts at the TDS Facebook page, where I'll post this story for discussion.

What Film Camera Would You Buy Today?

Film cameras are far more affordable today than in their heyday. You can purchase now what you only dreamed of in the past.

IMG_0807.jpg

In my case, I craved the Contax G1 with the Zeiss 28mm, 45mm, and 90mm primes when it was released. I was working for a newspaper then, so that camera was far out of reach. But today, you can buy a G1 for about $150, then shop around for lenses. I finally get to shoot with my dream camera of the past. And it was worth the wait. I'm having a blast with it.

So, my question to you is: what would you buy today? What is that camera from the past that you would have loved to own? If you want to chime in, go to our TDS Facebook page and comment on this story. Or you can send me a tweet @Derrick_Story.

Either way, let me know. I'm going to share the results on next week's TDS Photography Podcast.

Want to Comment on this Post?

You can share your thoughts at the TDS Facebook page, where I'll post this story for discussion.

Among its many processing skills, Capture One Pro is an excellent B&W converter. And thanks to its built-in presets, you can create a beautiful monochrome in just 3 steps.

Step One - Choose a Preset

Choose your image and go to B&W in the Tool Tabs. It's the icon that's box with a diagonal line through it. The list of presets are listed in the B&W pane.

step1-choose-BW-preset.png

Mouse over the list to see how the various options affect your image. Choose your favorite.

Step 2 - Fine Tune Exposure, Clarity, and Grain

Once you've applied the preset, fine tune the image using the other tools in the B&W panel. I like the B&W sliders and Clarity. Exposure and Levels are usually helpful too.

step2-finetune-grain.png

Don't forget to add some grain. It's a wonderful effect and adds a little crispness to the image too.

Export to Your Desktop

Now all you have to do is go to File > Export Images > Variants, then set the parameters and click Export 1 Variant. Your B&W photo will be ready to share.

BW-Austin-1600.jpg

More Capture One Pro Tips

I've published a short tutorial for organizing the User Collections area of your library. Take a look at One Way to Set Up Your Capture One Library. Following those simple techniques will help you add the structure that you crave for your image library.

Capture One Pro Essential Training on lynda.com

Later this month, my new video training titled, Capture One Pro Essential Training will be live on lynda.com. Keep your eyes peeled for my announcement. More than 100 movies that show you the easiest way to master your library, edit files, and output them in a variety of ways.

Thinking About Making the Transition from Aperture or Lightroom? - Download my free eBook titled, Rocky Nook's Guide to Moving to Capture One Pro. I show you the steps to create a test library, then build the foundation for a smooth transition to Capture One Pro.

Want to Comment on this Post?

You can share your thoughts at the TDS Facebook page, where I'll post this story for discussion.

Sigma just announced its first mirrorless body, the Sigma sd Quattro H Mirrorless Digital Camera.

Sigma sd Quattro H Mirrorless.jpg

The specs are rather impressive for the high resolution model (there will also be a standard resolution version).

  • 45MP APS-H Foveon X3 Quattro CMOS Sensor
  • Dual TRUE III Imaging Processing Engine
  • Sigma SA Lens Mount
  • 2.36m-Dot Electronic Viewfinder
  • 3.0" 1.62m-Dot Main LCD & Sub Monitor
  • Phase & Contrast-Detect Hybrid AF System
  • Super-Fine Detail Exposure Mode
  • ISO 6400 and 3.8 fps Continuous Shooting
  • Quick Set Button; Lock Switch
  • Focus Peaking; Lossless Compressed Raw

The thing that really jumps out at me is that you can use the entire Sigma SA line of lenses with the Quattro H (specs above) and the entry level Quattro. Given that the optics they've been producing lately are so good, this could be a stunning, compact package. No release date or price yet, but I'll be following the story.

The Nimbleosity Report

Do you want to keep up with the best content from The Digital Story and The Nimble Photographer? Sign up for The Nimbleosity Report, and receive highlights twice-a-month in a single page newsletter. Be a part of our community!

Want to Comment on this Post?

You can share your thoughts at the TDS Facebook page, where I'll post this story for discussion.

This is The Digital Story Podcast #520, Feb. 23, 2016. Today's theme is "The Reluctant Portrait Photographer." I'm Derrick Story.

Opening Monologue

As the world sees it, every photographer is a portrait photographer. You can tell people that you only shoot landscapes or pets, and they will nod their heads, then ask you to shoot their daughter's wedding. That's just the way it is. So in that spirit, I'm dedicating today's show to all of those reluctant portrait photographers out there. I will not only help you survive, but thrive the next time you're pressed into duty to photograph a friend, family member, or coworker.

The Reluctant Portrait Photographer

Portrait photography is about comfort, both for you and the subject. The path to that goal for you is having a clear idea on how you're going to photograph your subject, and for them to believe that you know what you're doing. Here's how to achieve that.

Crystal-300mm-P2160828.jpg

  • Keep it simple. I recommend outdoor shoots in the morning of late afternoon hours. This eliminates many of the headaches associated with indoor sessions.
  • Scout your location ahead of time. Have a clear idea of specific spots that have favorable light the time of day that you're there. Look for restrooms and other facilities that might come in handy. Know where to park, if there are any fees, and if you need a permit. It's like practicing law; you don't want any surprises.
  • Line up an assistant. It can be a friend of yours or the subject's. But you want an extra set of hands and eyes. The hands to hold reflectors, and the eyes to spot wardrobe malfunctions and stray hair. Plus it makes conversation easier.
  • Use fill light. I prefer reflectors, but have fill flash ready too. Practice your settings. Be comfortable with your lighting schemes.
  • Keep the conversation going. Don't clam up on the person. Nobody likes the silent treatment, especially photo subjects. It's lonely in front of the camera.
  • Show them a good picture as soon as possible. Once you have a shot that is flattering, show it to the subject on the back of the camera's LCD. They will immediately relax.
  • Don't be creepy. I think complements are great during a shoot, but know where the line is. Keep your praise confined to pretty eyes, shining hair, and attractive wardrobe. Do not head south of the neck for your comments.
  • Work quickly. If you're constantly fiddling with your camera and equipment, you'll convey a sense of incompetence. The shoot will go downhill from there.
  • Be professional. You know what that means. Do it.

In the News

Tamron releases stabilized 85mm F1.8 and 90mm F2.8 macro full-frame lenses - covered by DP Review

Third party lens-maker Tamron has released a pair of new full-frame, stabilized primes.
First is an 85mm F1.8 Di VC USD which has LD and XLD elements to reduce flare and ghosting, 9 circular aperture blades for 'attractive' bokeh, a fluorine coating to keep moisture and fingerprints off of the front element and 3.5 stops of shake reduction (tested to CIPA standards). It uses a ring-type ultrasonic motor that Tamron says will be precise and responsive. Pricing and availability have not been announced.
Lens number two is a 90mm F2.8 Di VC USD 1:1 Macro, which is an updated version of a lens of the same name from 2012. It too has LD and XLD lenses, a 9-blade aperture, fluorine coating, and USM motor. It can take life-size close-ups at a minimum distance of 13.9cm/5.5in and a 'quick-shift' feature lets the photographer take over focusing without having to press a button. The 90mm macro will begin shipping in March for $649.
Both lenses are weather-sealed and support Tamron's new TAP-in Console. They'll be available for Canon, Nikon and (eventually) Sony Alpha mounts.

Foam Can Coolers Make Excellent Lens Cases

If you like to travel lightly with just a shoulder bag, you can keep your spare lenses in closed-cell can coolers. They're light, about the right size, and offer excellent protection.

Member Quotes of the Week

Intelligent comments culled from The Digital Story Facebook page.

In regard to last week's Facebook Post: "Become the Master of Your Capture One Library" we had some terrific comments, and I want to share one with you now.

Michel wrote: "I feel really fortunate that I can follow along as you make the transition from Aperture to Capture One. I'm hoping this is the last transition I have to make. To that end do you know what percentage of business C1 represents for Phase One? I feel that if it's significant it's less likely to abandon it (as was the case for Apple/Aperture)."

Post your thoughts on our Facebook page. Believe me, I read them.

Report on the Olympus 300mm f/4.0 Telephoto

I spent a week with this lens and loved it. I go into detail about it during this segment of the show.

Updates and Such

Pt. Reyes Photography Workshop - We have two rooms open at the Pt. Reyes Photography Workshop, Aug. 19-21 2016. If you want to hang out with us at Straus Ranch House and explore some of the most beautiful coastline in the world, visit the TDS Workshops page and put yourself on the reserve list.

Out of Chicago Update - The debut of The Nimble Photographer Workshop sold out on Friday, June 24. Because there is a wait list, we've added a second workshop on Thursday June 23. I hope you can join me in Chicago this coming June. There's still time for Early Bird pricing.

And finally, be sure to visit our friends at Red River Paper for all of your inkjet supply needs.

See you next week!

More Ways to Participate

Want to share photos and talk with other members in our virtual camera club? Check out our Flickr Public Group. And from those images, I choose the TDS Member Photo of the Day.

Podcast Sponsors

Red River Paper - Keep up with the world of inkjet printing, and win free paper, by liking Red River Paper on Facebook.

ImageFramer Take your photos to the next level with ImageFramer. Visit www.apparentsoft.com today.

MacPaw Creators of CleanMyMac 3 and other great software for Apple computers. Visit www.macpaw.com today.

The Nimbleosity Report

Do you want to keep up with the best content from The Digital Story and The Nimble Photographer? Sign up for The Nimbleosity Report, and receive highlights twice-a-month in a single page newsletter. Be a part of our community!

Want to Comment on this Post?

You can share your thoughts at the TDS Facebook page, where I'll post this story for discussion.

After having spent a week reviewing all of the editing extensions for Photos for OS X, I have a clear favorite: Tonality by Macphun.

tonality-extension.jpg

I bought my version from the Mac App Store for $19.99, which includes the standalone version. But I only use it as an editing extension for Photos for OS X. Personality, I like the integrated workflow.

This app combines two things that appeal to me: an extensive selection of high quality presets, with plenty of controls to fine tune the final image. The preset categories include: Basic, Architecture, Portrait, Dramatic, Outdoor, Street, Vintage, Film Emulation, Toning, and HDR, each with many options within. And for the most part, you could stop right there. However, if you like to tinker, take a look at the tools in the right side adjustments panel.

tonality-adjustments-web.jpg

Once you've finished working with the shot in Tonality, click on Save Changes to return to Photos for OS X. You can press the M key to see the original shot, even though you've left Tonality, and even Revert to Original if you wish.

Chances are, however, that you'll want to share the edited picture using any of Photos extensive publishing tools. Bottom line here: I think Tonality helps me be more creative in my post production work.

Master Photos for OS X

(It's More Powerful than You Think)

For hands-on tutorials, be sure to take a look at Photos for OS X Essential Training on lynda.com. I cover everything you need to know to get the most from this surprisingly powerful image management application.

More Help and Insights on Photos for OS X

Don't forget about the Photos for OS X Special Feature Section on The Digital Story. It's a roundup of tutorials, videos, and articles focused on helping you master Apple's latest photo management software. You can also find it under Photography in the top nav bar.

Want to Comment on this Post?

You can share your thoughts at the TDS Facebook page, where I'll post this story for discussion.

External Editors is one of the most affordable, and exciting, editing extensions for Photos for OS X. It's available in the Mac App Store for 99 cents.

external-editors-photos.jpg

It allows you to connect practically any image editor to your Photos library. I tested it with two of my favorites: Photoshop CC and Alien Skin Exposure X. It worked perfectly on both counts.

The workflow is simple. Open your image in Edit mode in Photos for OS X. Choose External Editors from the list of editing extensions you have loaded. Editors will open your image and present you with all the available editing apps on your Mac. Choose the one you want, then it takes you there for adjustments. After you've finished working on it, just click Save.

You're back in the External Editors interface. Choose Save Changes and your edited image is returned to Photos for OS X. And here's the kicker, if you press the M key, you can see the original version of your shot. And if you want, you can Revert to Original.

As some readers have pointed out, this workflow doesn't work when you send RAW files to Photoshop. So this doesn't sound like a solution for RAW shooters, or for artists who add layers while in Photoshop. So if you fall into these categories, then you might want to save your 99 cents. (Thanks John for the heads up!)

But for Jpeg shooters, this workflow is far better than the old style of roundtripping, because even though you're using an outside app, the workflow remains non-destructive. And in that case, I can't think of a better way to spend a buck.

Master Photos for OS X

(It's More Powerful than You Think)

For hands-on tutorials, be sure to take a look at Photos for OS X Essential Training on lynda.com. I cover everything you need to know to get the most from this surprisingly powerful image management application.

More Help and Insights on Photos for OS X

Don't forget about the Photos for OS X Special Feature Section on The Digital Story. It's a roundup of tutorials, videos, and articles focused on helping you master Apple's latest photo management software. You can also find it under Photography in the top nav bar.

Want to Comment on this Post?

You can share your thoughts at the TDS Facebook page, where I'll post this story for discussion.

One of the best feelings a photographer can experience is to fire up the computer and quickly find an image from the past. Knowing that you are the master of your image library builds confidence and efficiency.

tina-library-organized.jpg

The first step in Capture One Pro is understanding the difference among the three major sections in the Library pane: Catalog Collections, User Collections, and Folders. Here's a brief explanation of each:

  • Catalog Collections - Controlled by the application using pre-defined filters such as All Images and Recent Imports. This is where your pictures enter the database when imported from a memory card.
  • User Collections - Controlled by you, providing the tools to build a library structure that's consistent with your sense of organization. You can create Groups (that act like folders in Aperture), Projects, and Albums.
  • Folders - Shows the location of your masters, whether they're in the C1 catalog container, or outside the application set up as a referenced catalog.

I've published a short tutorial for organizing the User Collections area of your library. Take a look at One Way to Set Up Your Capture One Library. Following those simple techniques will help you add the structure that you crave for your image library.

Capture One Pro Essential Training on lynda.com

Later this month, my new video training titled, Capture One Pro Essential Training will be live on lynda.com. Keep your eyes peeled for my announcement. More than 100 movies that show you the easiest way to master your library, edit files, and output them in a variety of ways.

Thinking About Making the Transition from Aperture or Lightroom? - Download my free eBook titled, Rocky Nook's Guide to Moving to Capture One Pro. I show you the steps to create a test library, then build the foundation for a smooth transition to Capture One Pro.

Want to Comment on this Post?

You can share your thoughts at the TDS Facebook page, where I'll post this story for discussion.